Form editors have the Manage tab. Here managers can create, edit, and publish forms.
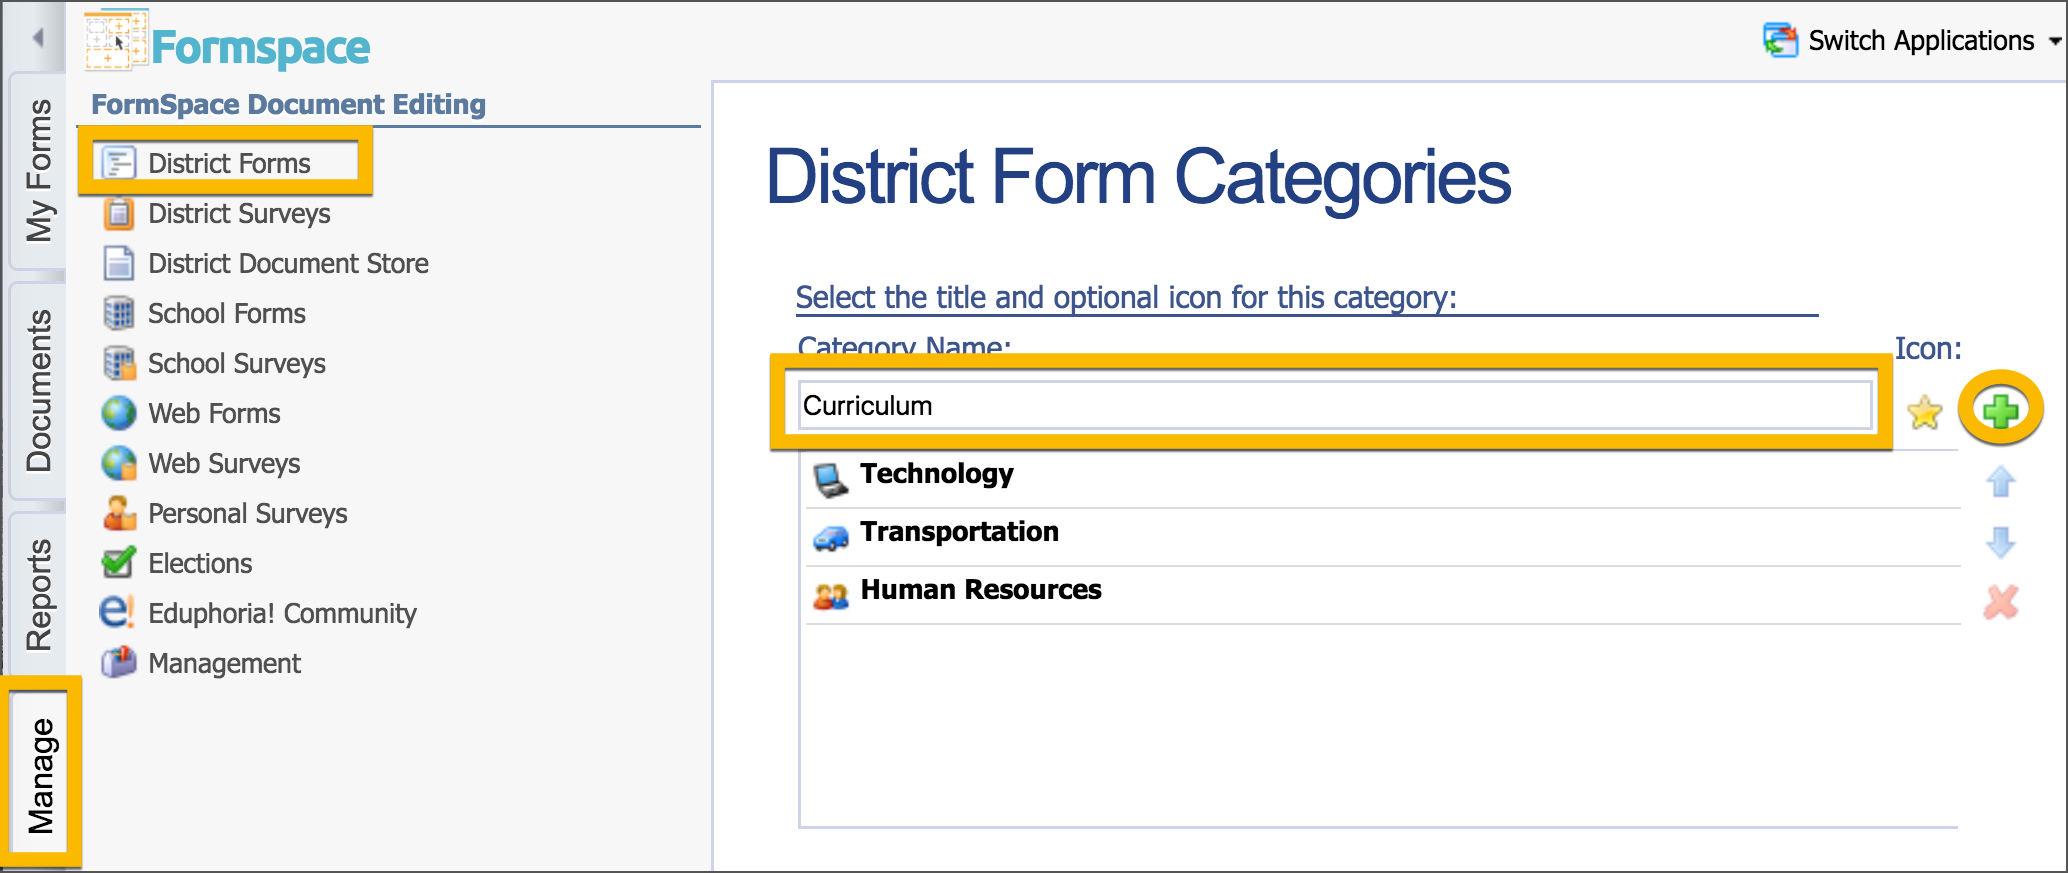
Creating District Form Categories
By default, Formspace offers one category under District Forms called General Forms, but you can create other categories matching district departments to sort forms more easily.
Click on the Manage tab.
Click on District Forms.
In the Category Name field, enter a name for the category.
Select an icon to represent the new category.
Click the green Add icon to create or update the category.
You can use the blue arrows to move categories up and down in the list, so they appear in the order you choose. Use the red X button to delete a category.
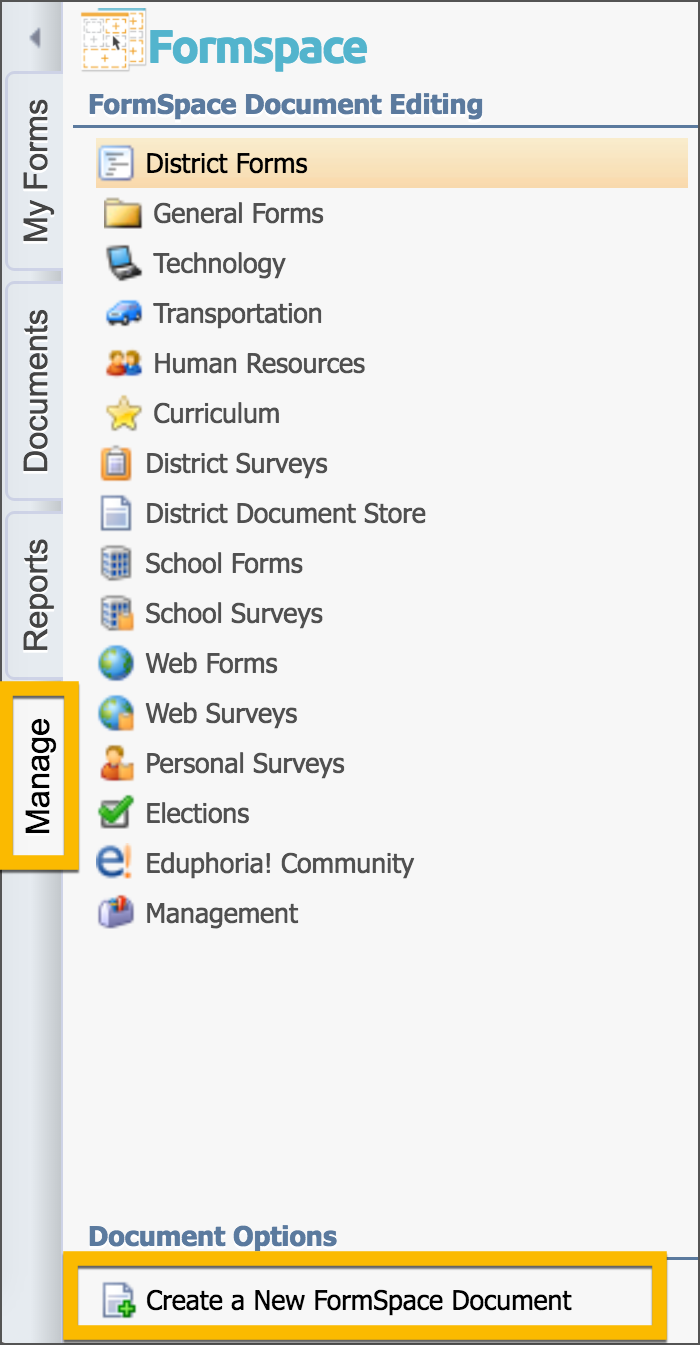
Creating a District Form
Go to the Manage tab.
Click Create a New Formspace Document in the lower left corner.
Choose District Form.
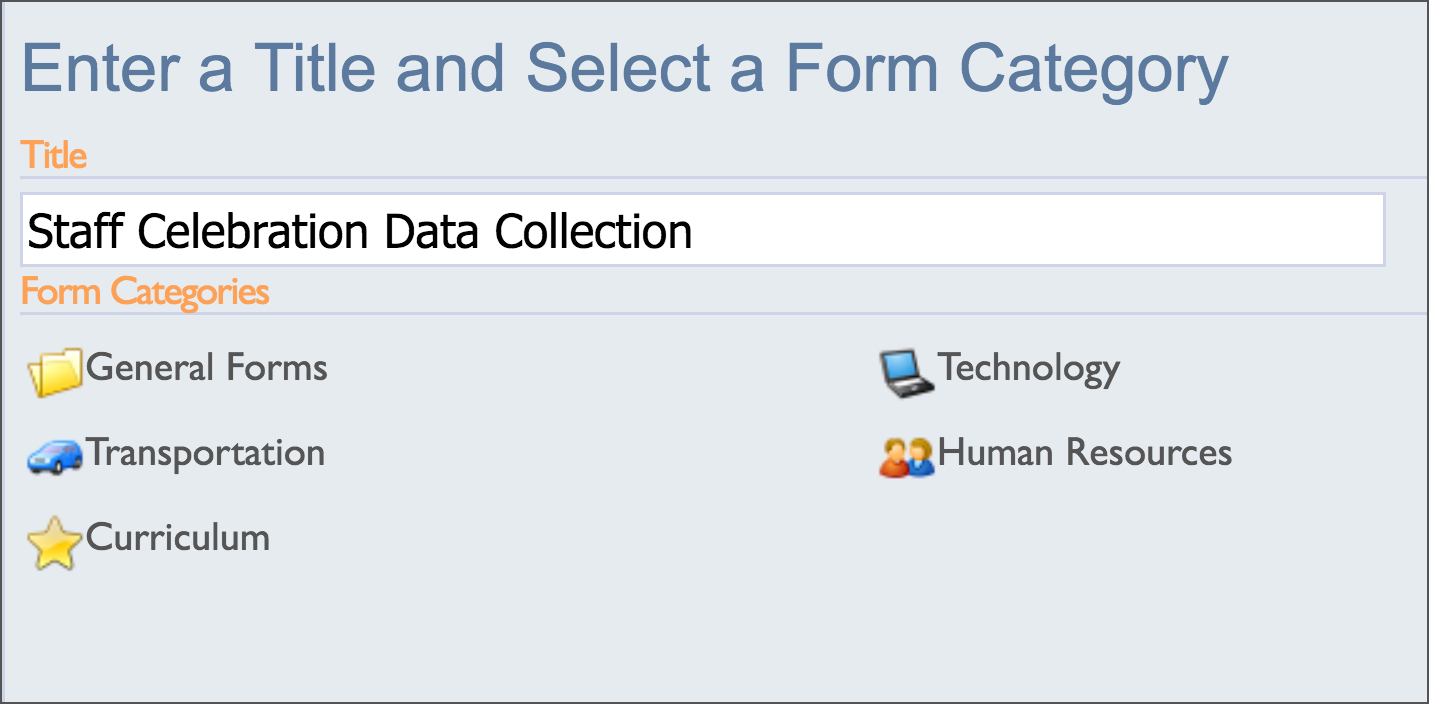
Enter the name of the form in the Title field provided.
Select the appropriate Form Category for the form.
Click Create & Begin Editing in the lower right corner.
Note: Set up District Form Categories before creating a form, or the General Forms category will be the only available option when you create the form.
Form Toolbar Icons
Preview 
Preview allows form managers to preview a form during the building and editing process.
Print 
After clicking the Preview button, a new window opens and the form can be printed by clicking the Print icon.
Publish 
Click Publish after altering any questions so changes become live.
Form States
|
|

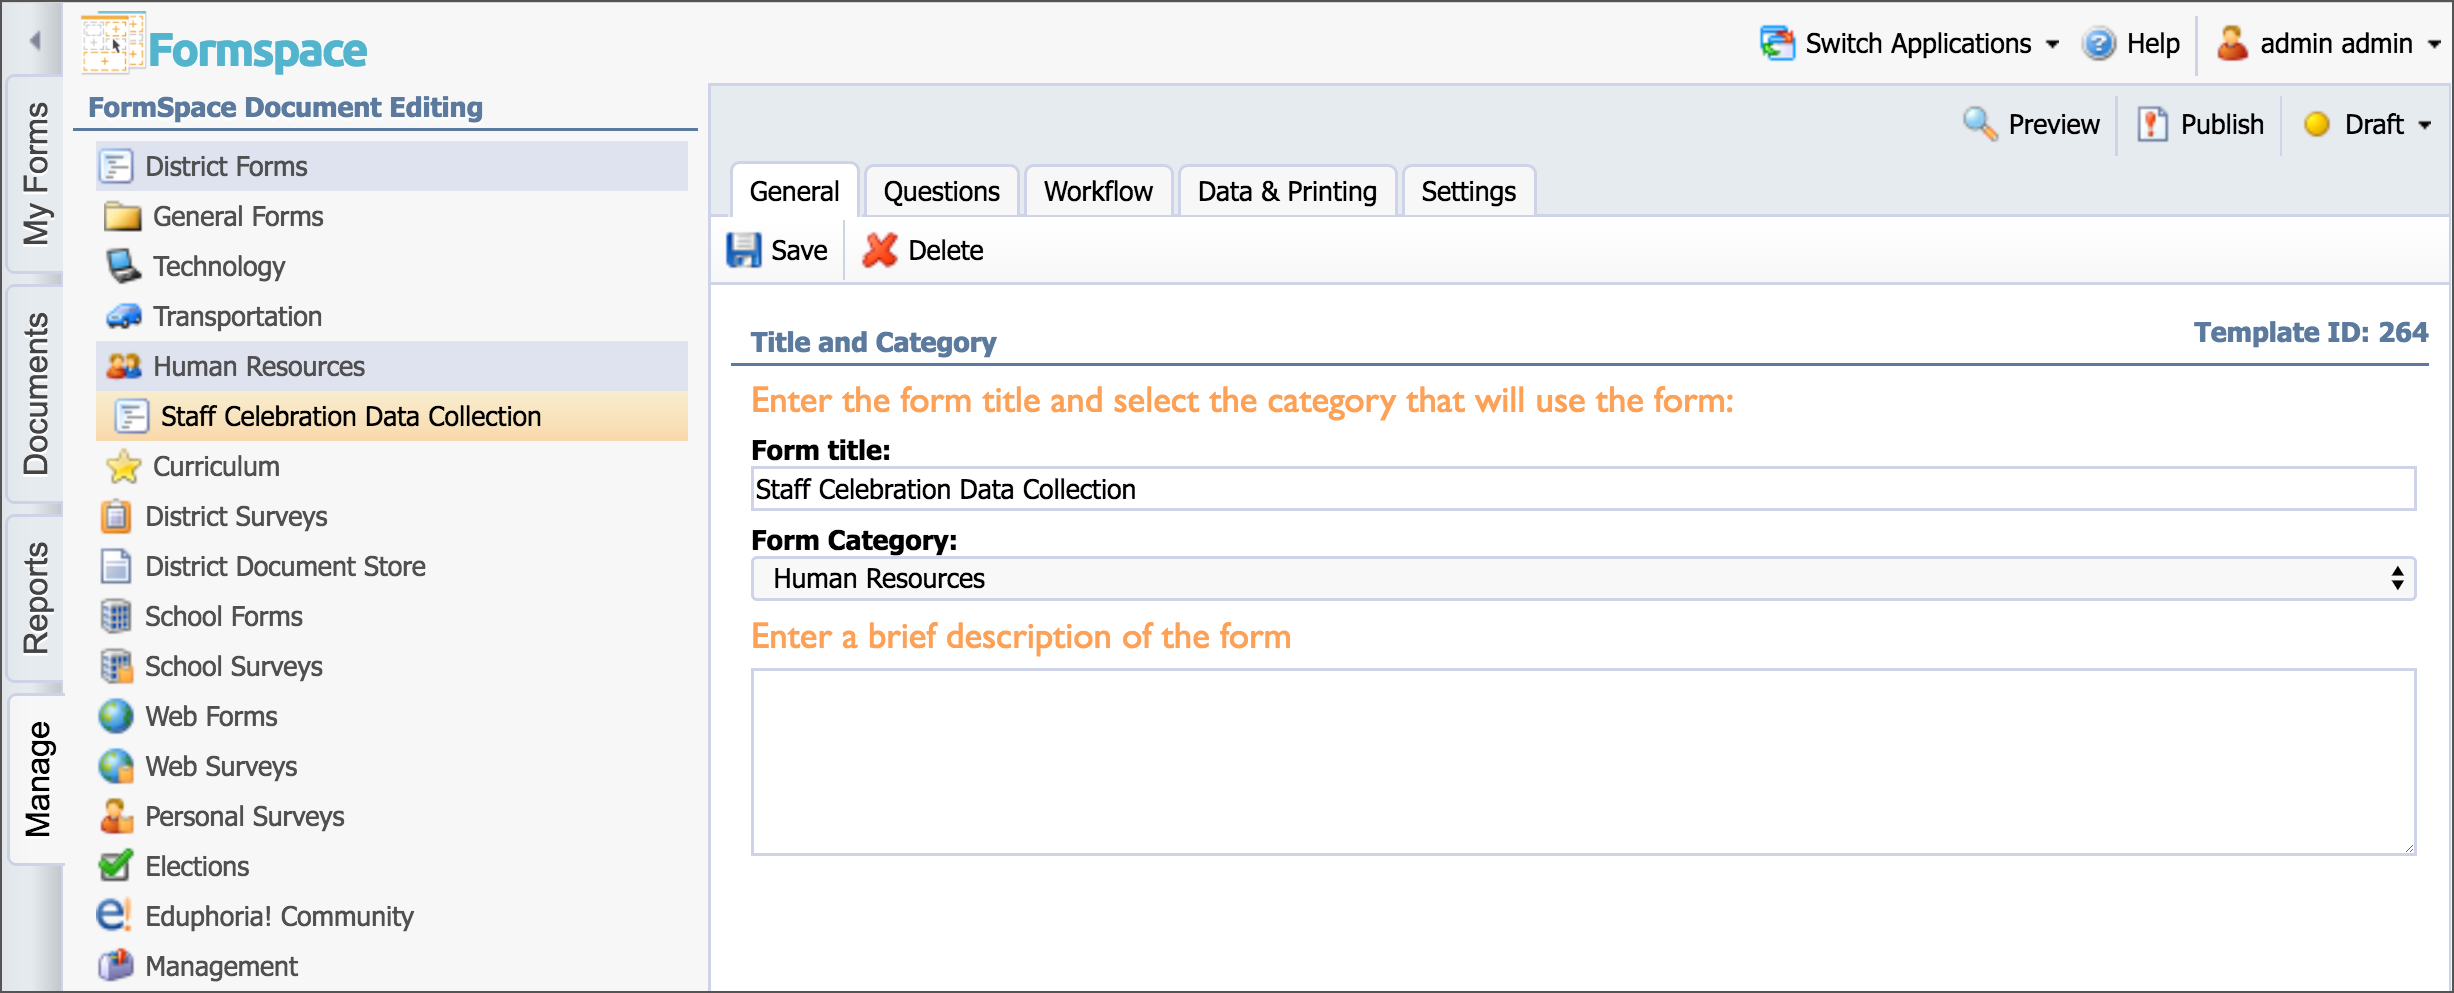
General Information Tab
The General tab contains the following text fields that can be created and edited by a form manager: Form Title, Form Category, and a Brief Description.
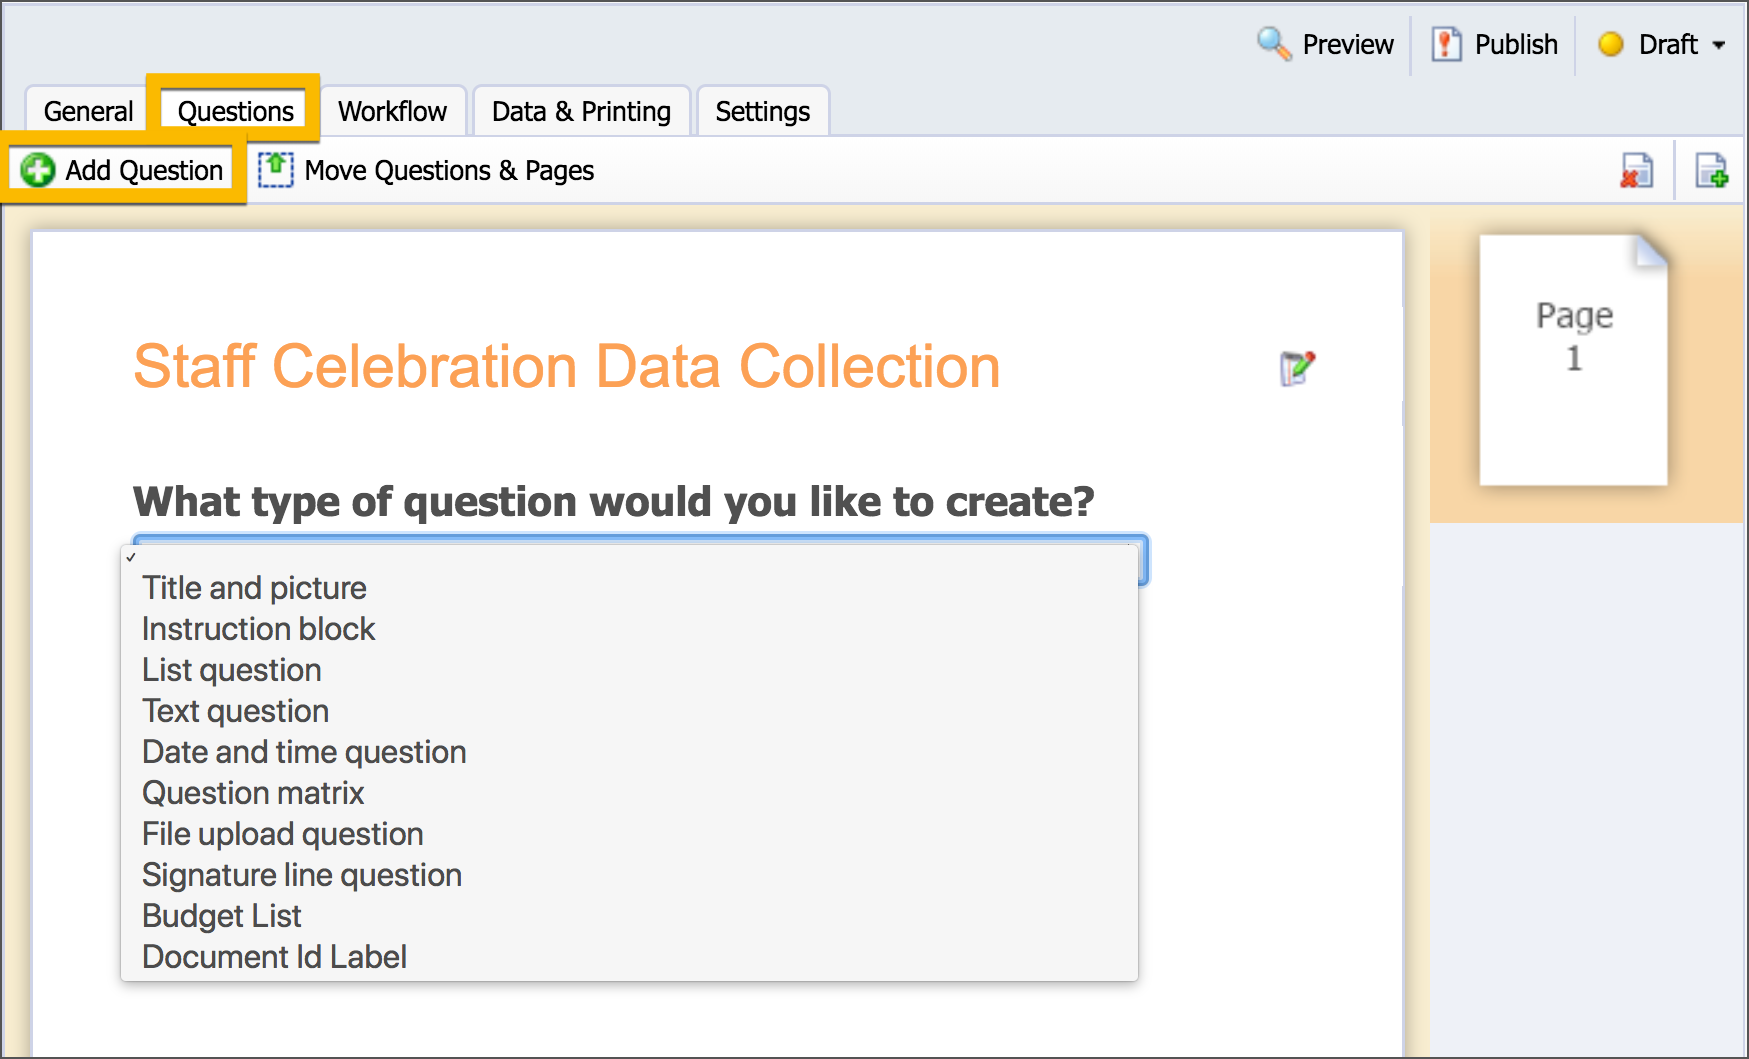
Questions Tab
Forms are created, edited and managed on the Questions tab. Here you can add, manage, and delete questions and pages.
Note: All questions must be deleted before a page can be deleted.
Creating a Question
Click Add Question.
From the drop-down list, select a type of question to create.
Depending on the question type added, the controls will differ.
Once the question information is entered, click Finished.
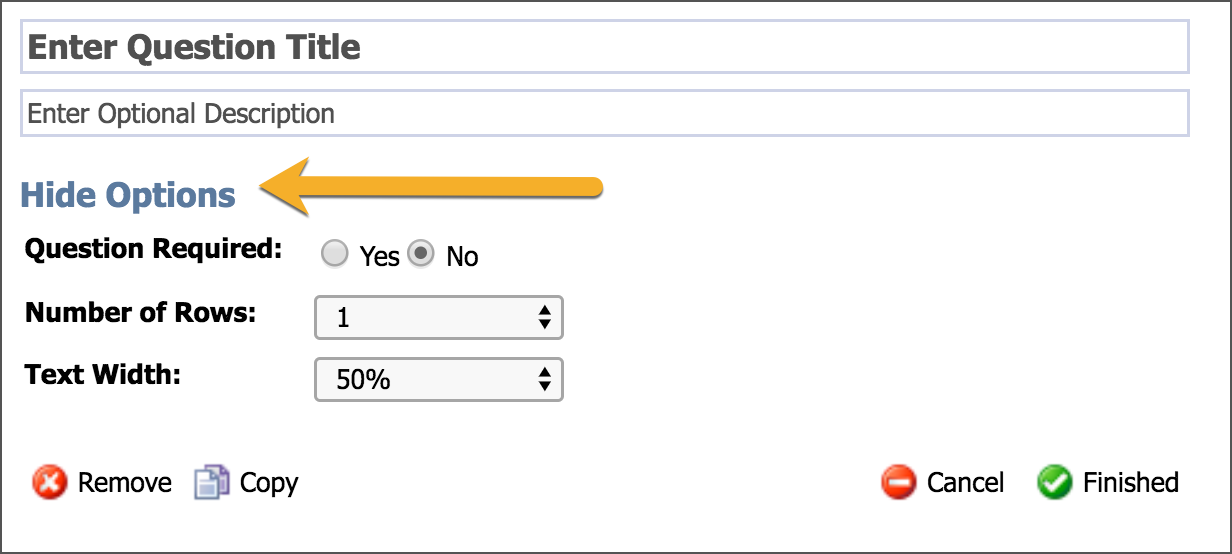
Question Options
Each question type has specific options to customize that type of question.
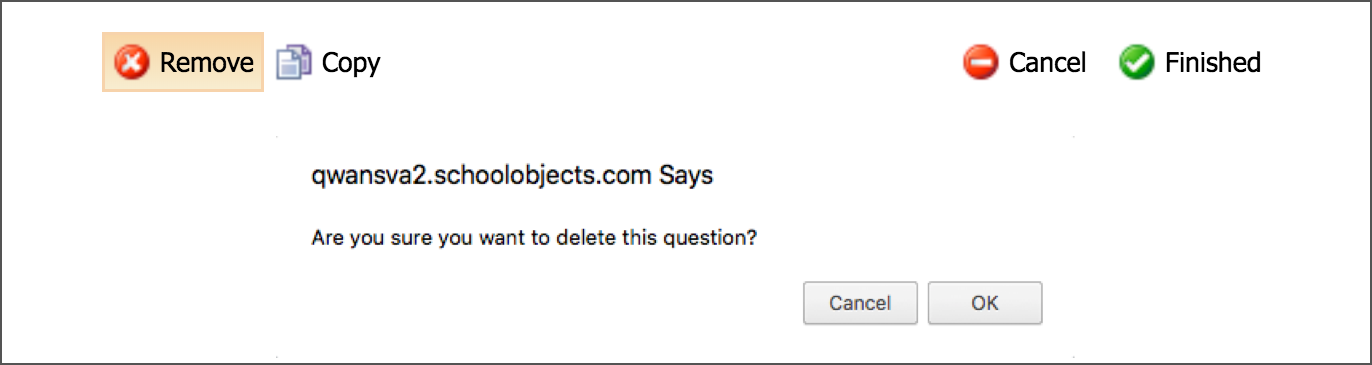
Removing a Question
Click the Edit button.

Click Remove.
A dialog box appears asking if you are sure you want to delete this question.
Click OK.
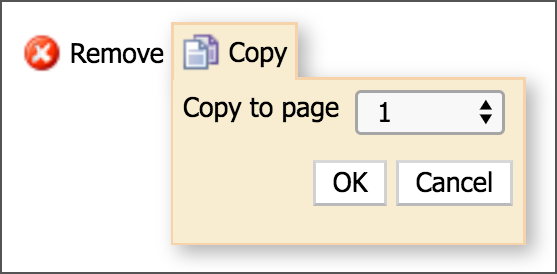
Copying a Question
Questions can be reordered and copied to other pages.
Click the Edit button.
Click Copy and select which page you would like the question to be copied to.
The copied question appears at the bottom of the page you selected for copying.
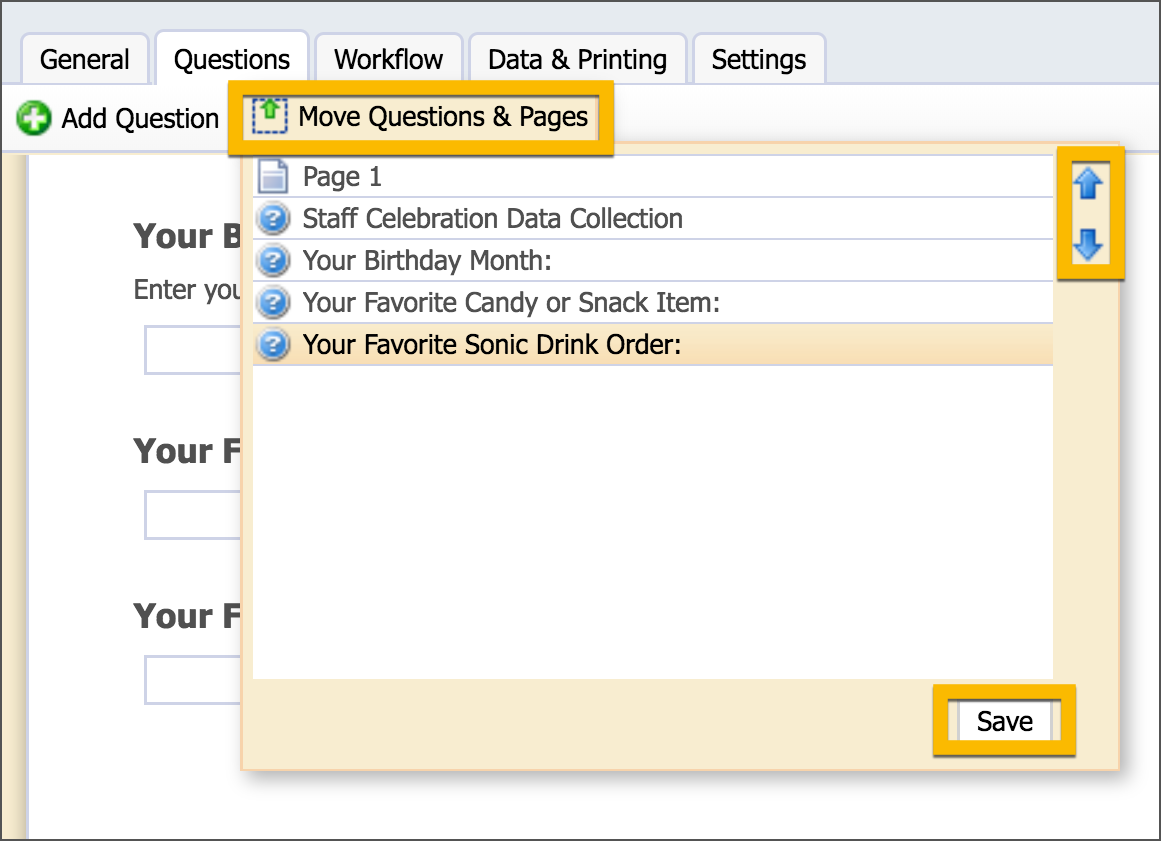
Moving a Question
Click Move Questions & Pages on the top toolbar.
Highlight the question to move.
Use the blue arrows on the right to move the selected question up or down.
Click Save when finished.
Adding and Deleting Pages
The paging feature allows you to have a single form that acts as multiple pages. While a single page has no actual limit to the number of questions, and therefore length, adding multiple pages can make a form flow more smoothly. Pages also act as good divisions of a form as each one can have a separate title at the top and each page can have a separate approver assigned to complete specific questions.
To add a page, click
.png) in the upper right corner of the screen and select the actual page on the right to edit the form.
in the upper right corner of the screen and select the actual page on the right to edit the form.To delete a page, click
.png) .
.