The Custom Fields settings in Workshop Settings allow administrators to create and track additional, organization-specific data related to professional learning (PL) sessions. These fields can capture additional information beyond the system's default options.
Here are a few examples of Custom Fields that your district might use:
Department or School – Track which departments or schools are attending workshops.
Special Requirements – Note dietary restrictions, accessibility needs, or material requests for contributors and attendees.
Session Categories – Add custom classifications for workshop types, such as compliance training or leadership development.
Funding Source – Specify whether the workshop is funded by grants, federal programs, or internal budgets.
Certificate Codes – Include custom identifiers for PL credit tracking or certification programs.
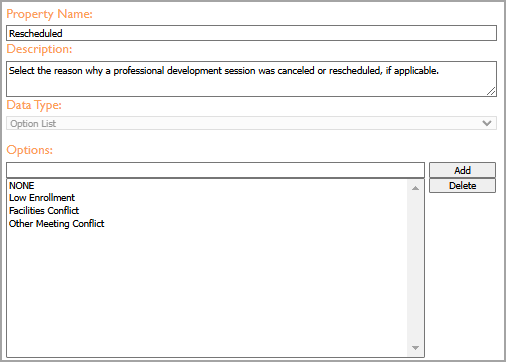
Rescheduled – Identify the reason why a professional learning session was canceled or rescheduled, if applicable.
These optional fields help districts and schools customize Strive to better align with their professional learning tracking and reporting needs.
Adding a Custom Field
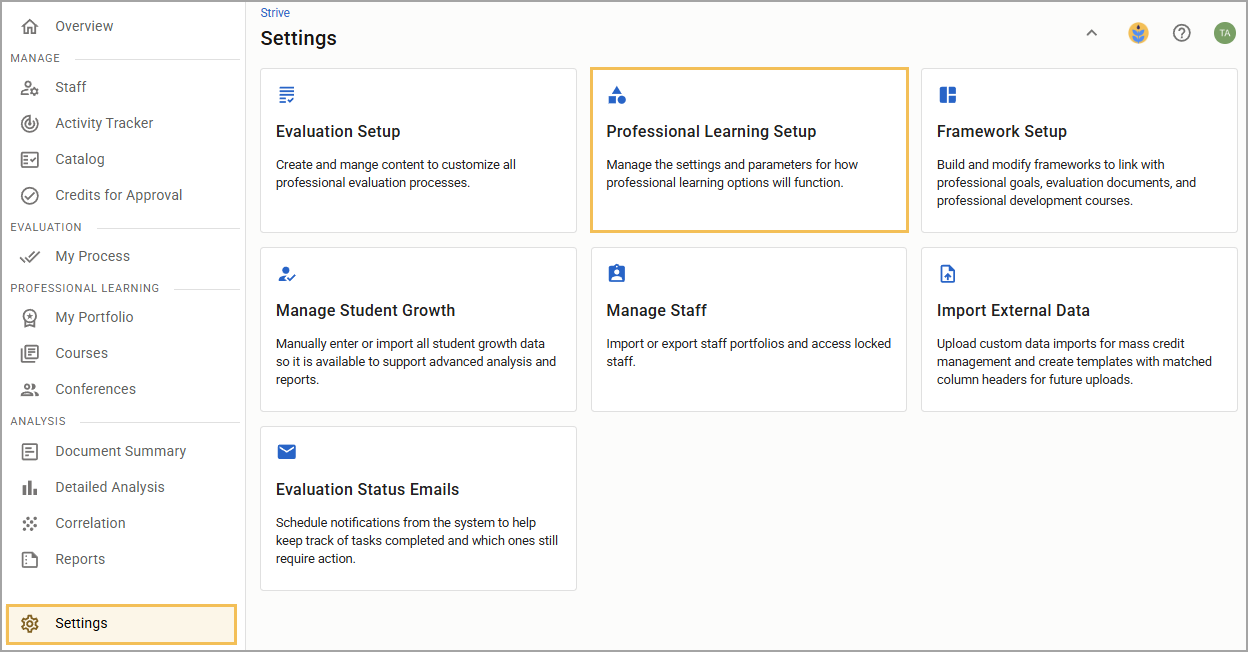
Step 1: Select the Settings option from the main menu and then select Professional Learning Setup.
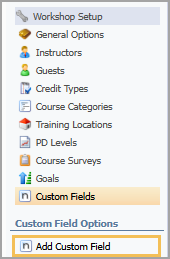
Step 2: Select Workshop Setup to expand the options and then select Custom Fields.
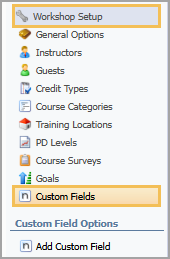
Step 3: From the Custom Field Options menu that appears, select Add Custom Field.
Step 4: In the Property Name field, enter a name for the custom field.
Step 5: In the Description field, enter a brief explanation of how to use the custom field and the value it provides. This might also include instructions for the user.
Step 6: From the Data Type drop-down menu, select the type of field that appears, such as a checkbox, date and time selector, text box, and so on. Selecting Option List allows you to add or delete the choices that the users see when completing the custom field.
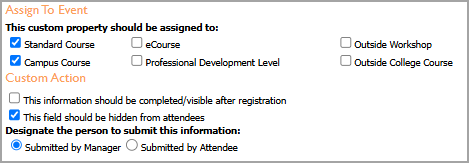
Step 7: In the Assign To Event section, select the checkbox for each type of event to which the custom field applies.
Step 8: In the Custom Action section, select the appropriate checkbox to determine whether attendees can see the information provided by this field. For example, a Rescheduled or Funding Source field might be kept hidden from attendees.
Step 9: Determine who completes the field by selecting either Submitted by Manager or Submitted by Attendee.
Step 10: Select Save. The custom field is complete and available to use when creating and editing workshops.