Chromebooks and the LockDown Browser extension support Speech-to-Text. Before initiating a test with LockDown Browser, you must allow the browser to have access to the microphone in the testing environment using one of two options: the Google Admin Console or individual device setup.
Caution: Students attempting to set up or allow access to their microphone in an active test with LockDown Browser active will be booted from the test and their test will be force submitted. Allow the microphone using one of the two following options before starting the assessment.
Google Admin Console for IT Administrators (Highly Recommended)
To enable Speech-to-Text at scale, update your Google Admin Console settings to allow microphone access using your full district URL across all managed devices.
Quick Guide
Sign in to Google Admin Console.
Go to Menu > Access Devices > Devices > Chrome > Settings.
Click Users & browsers.
To apply the setting to all users, leave the top organizational unit selected. Otherwise, select a child organizational unit.
Scroll to the Hardware section.
Locate Audio Input (microphone) and set it to Allow users to set microphone or explicitly allow via policies.
Under Audio input allowed URLs, add your full district URL.
Click Save.
You can also use the Google Admin Console to restore microphone access if a user selected the Never Allow option at any point.
Individual Device Setup
Students can use the browser settings to activate the microphone while logged in to select a test.
Quick Guide
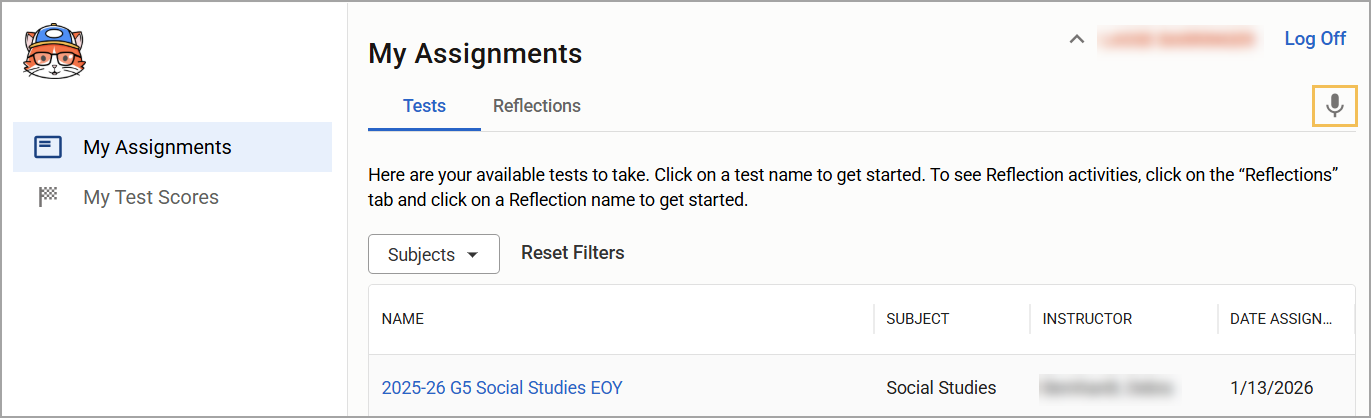
Log in and select My Assignments.
Click the Microphone icon () in the top-right of the screen to test microphone access.
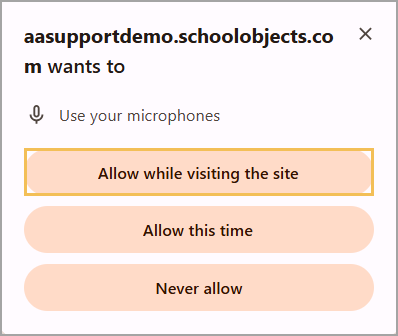
Once the pop-up window appears, select Allow while visiting the site to turn on the microphone during testing.
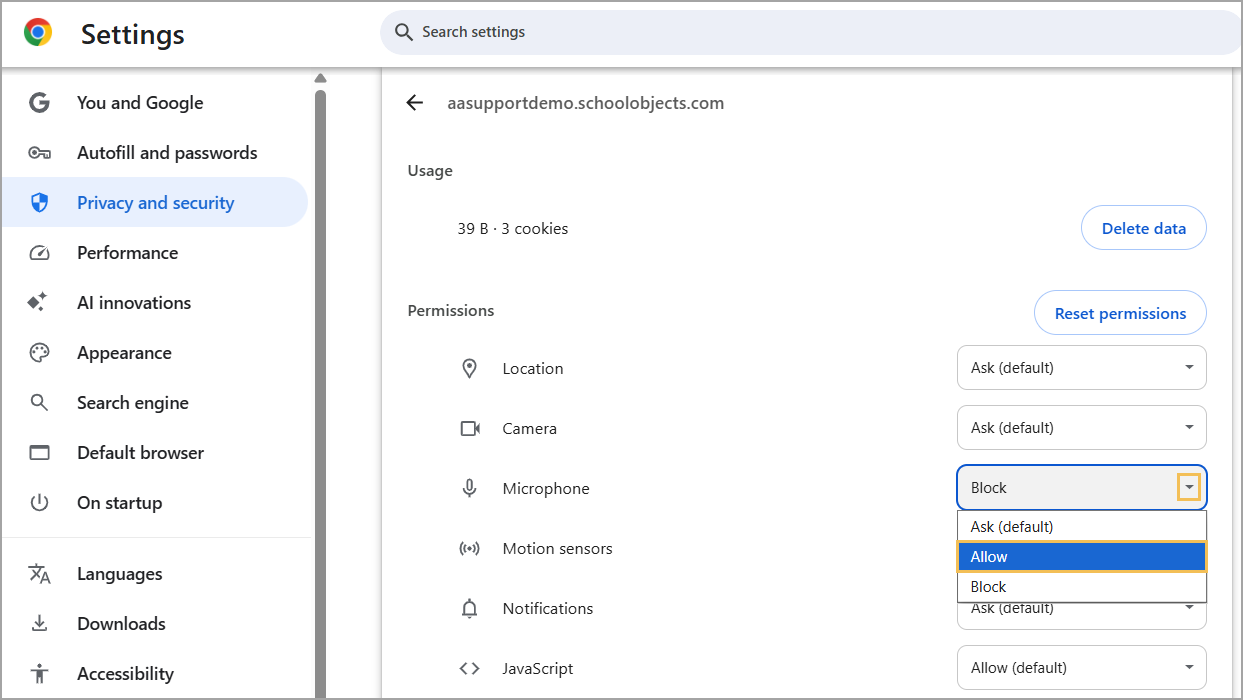
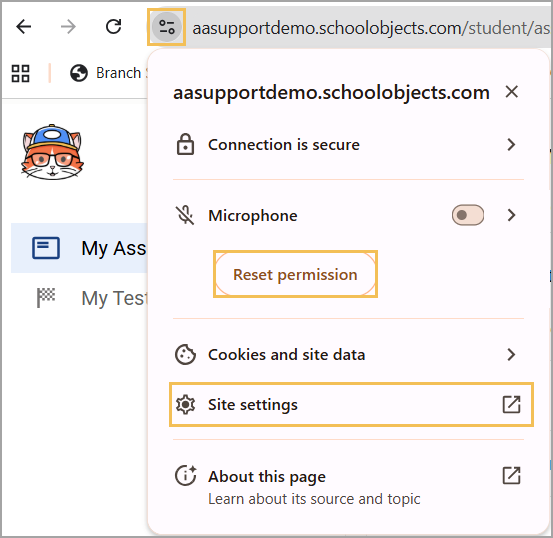
Should the student select Never Allow instead, restore microphone permissions by selecting the Settings icon to the left of the URL.
Under Microphone, toggle it on or select Reset permission, which allows you to reselect the Microphone icon and choose Allow while visiting the site. If the Microphone section does not appear, select Site settings.
Next to Microphone, use the drop-down menu to select Allow.
Illustrated Guide
Step 1: Log in and select My Assignments.
Step 2: Click the Microphone icon () in the top-right of the screen to test microphone access.
Step 3: Once the pop-up window appears, select Allow while visiting the site to turn on the microphone during testing.
The microphone is now permitted for the Speech-to-Text support.
Restore Microphone Access
Should the student select Never Allow, you can complete the following steps on the student’s Chromebook to restore microphone access.
Step 1: Log in and select My Assignments.
Step 2: Select the Settings icon to the left of the URL.
Step 3: Under Microphone, toggle it on or select Reset permission, which allows you to reselect the Microphone icon and choose Allow while visiting the site. If the Microphone section does not appear, select Site settings.
Step 4: Next to Microphone, use the drop-down menu to select Allow.