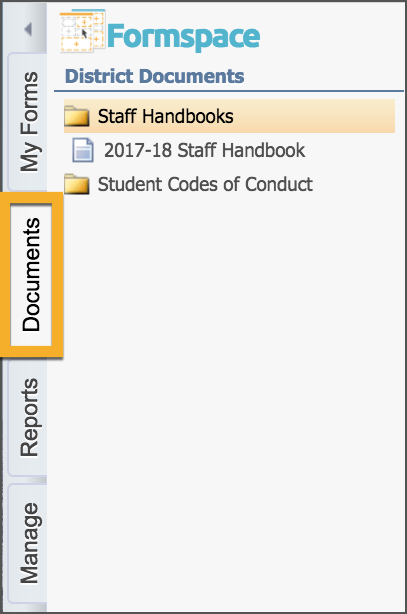
The District Document Store is a catalog to store electronic documents for district staff members. Once uploaded, documents are then viewed and available for download on the Documents tab. This is a great place to store Staff Handbooks, Policies, Student Codes of Conduct, etc. all in one easy to access place.
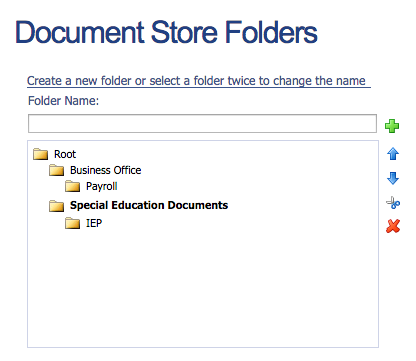
Document Store Folders need to be created to organize the documents uploaded.
Creating a New Folder
Type the title in the Folder Name box.
Click Root to establish the folder inside the root directory. To place a subfolder inside another folder, click on the containing folder to add the subfolder.
Click the green Add button to add the folder.
Double-click on a folder name to edit the name.

Example of folders with subfolders:
.png)
.png) Move folders up and down in the list.
Move folders up and down in the list.
.png) Cut to move a folder from inside one folder to another.
Cut to move a folder from inside one folder to another.
.png) Delete a folder.
Delete a folder.
Adding a Document to the File Store
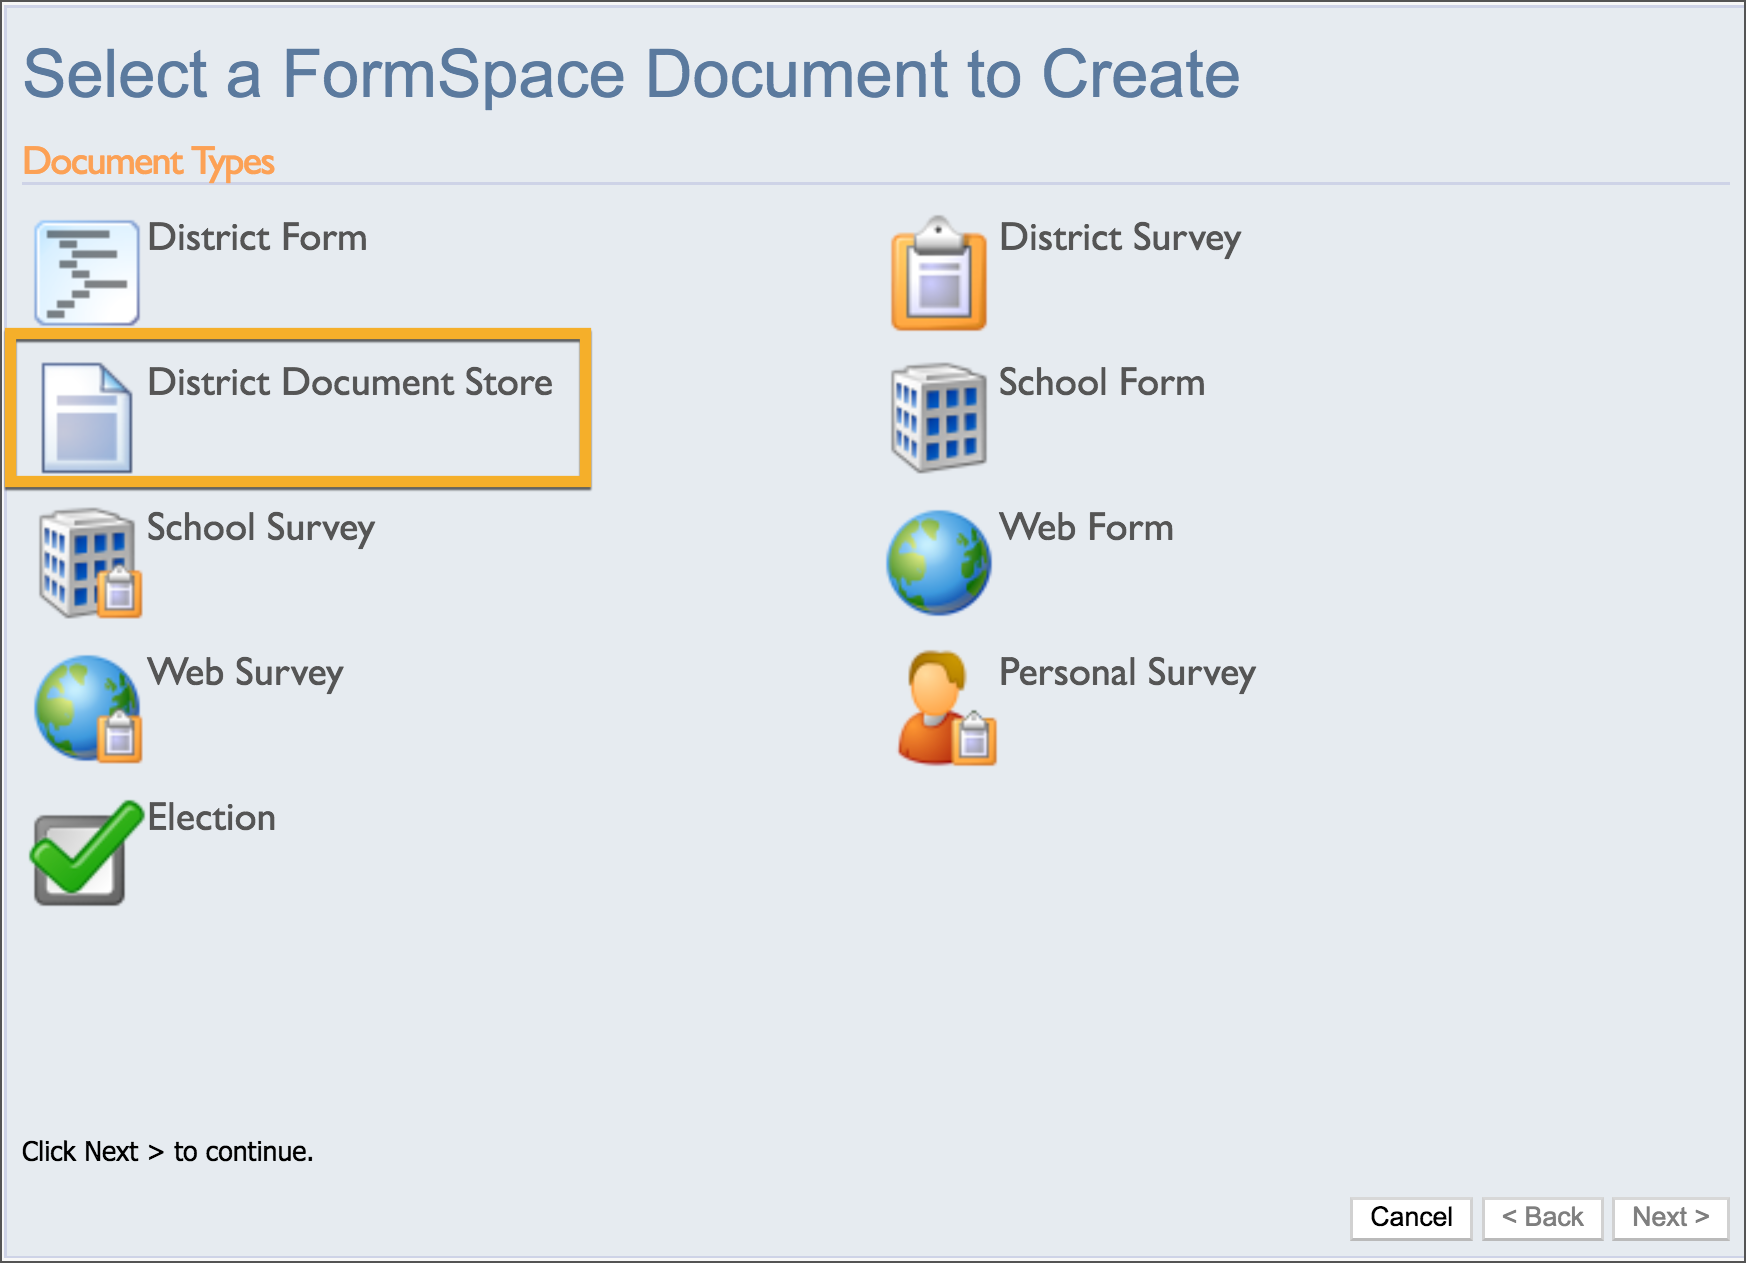
Click on Create a New Formspace Document.
Choose District Document Store as the document type.
Enter the title and select the folder where the document will reside.
Click Next.
Click Create & Begin Editing.
Select the document title from the document tree.

On the Document Description tab, the title can be edited and comments can be added to provide more clarification for user to determine more information about the document.
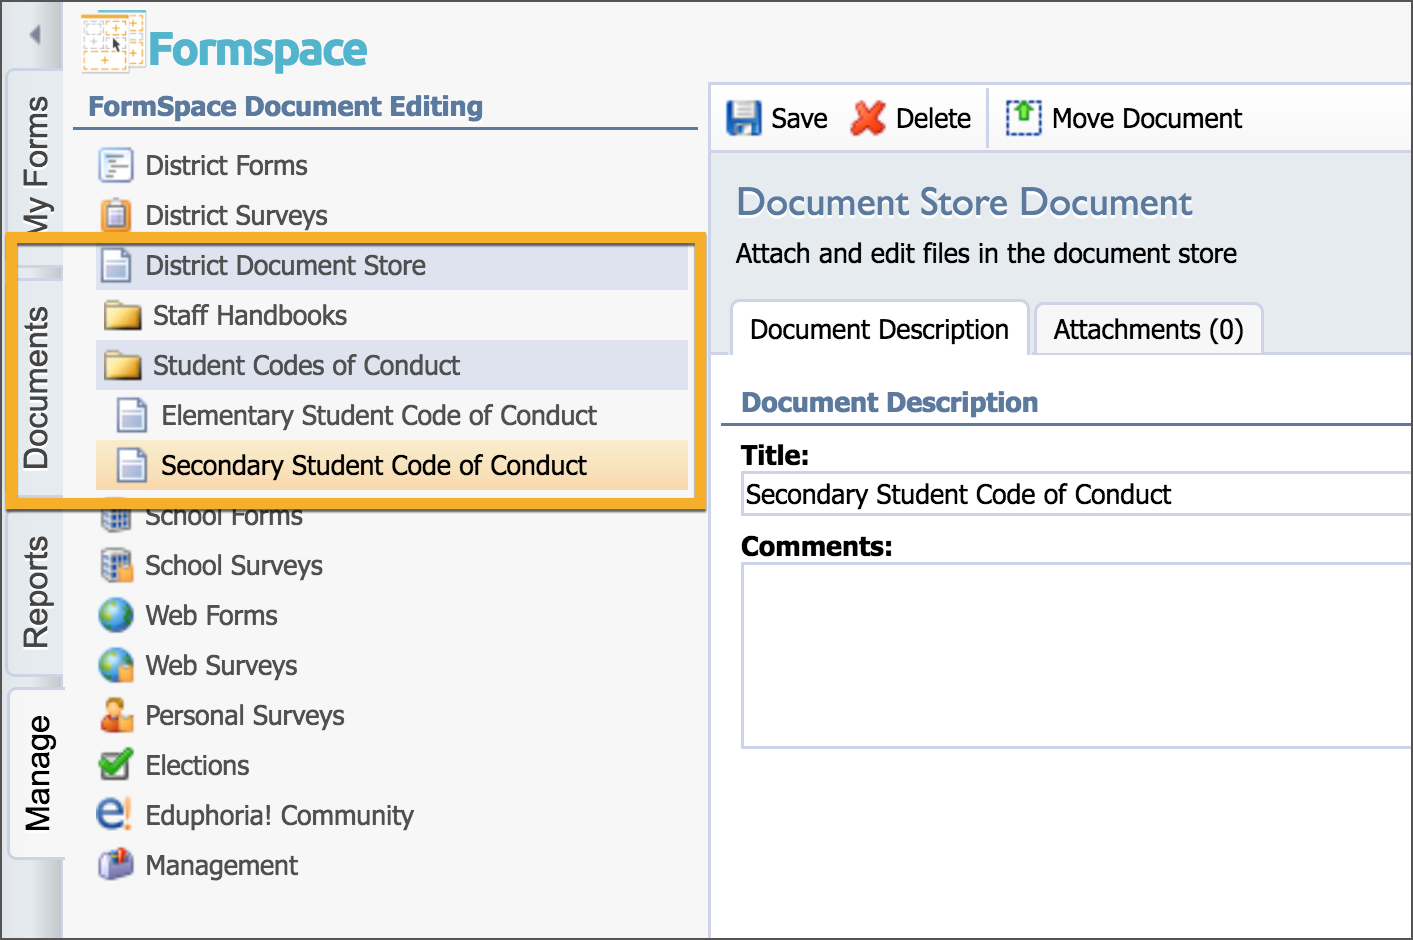
Click the Attachments tab and select the option to Add Attachment.
Browse for the file on your computer and click the Attach File button.
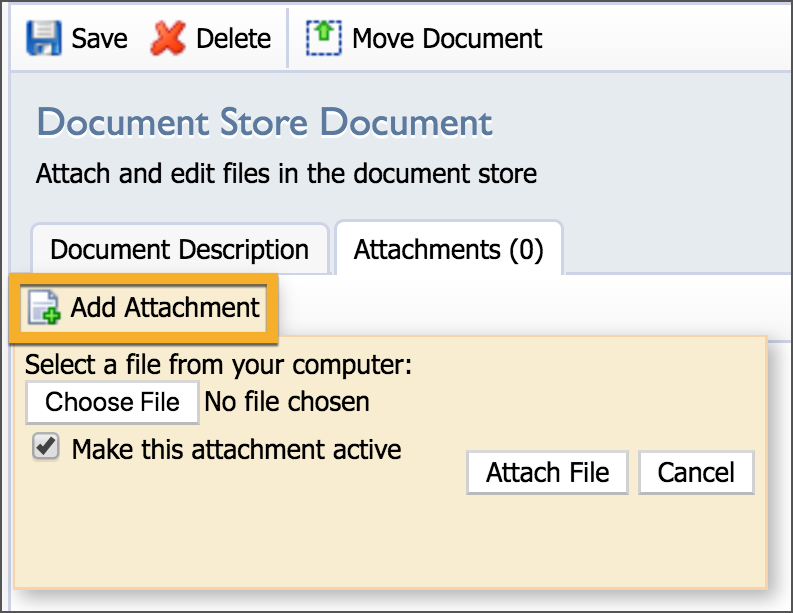
Note: The Make this attachment active option is selected by default.
You can attach multiple files to the one document in your store. Simply click the Add Attachment button to upload another file.
Replacing a Revised Document
Revisions to a document can be uploaded as well. Select the document and new options appear.

Add Revision – Allows an additional upload of a document without replacing the older one. When you upload the new document, it is linked with to original.
Preview – Allows viewing of the document.
Delete Document – Removes the document from the document store.
Make Revision Inactive – Keeps only one version active for staff to view and utilize.
Additional Options

Save – Saves all changes made to the Document Store.
Delete – Removes document(s) from the folder.
Move Document – Allows movement of document to another folder.