Once a user has configured the student inventory type framework, they can create student inventory assessments and assign them to a student inventory type. Without first entering in these building blocks, it is impossible to create assessments.
Creating a Student Inventory Assessment
Quick Guide
Log in to Aware and select Author.
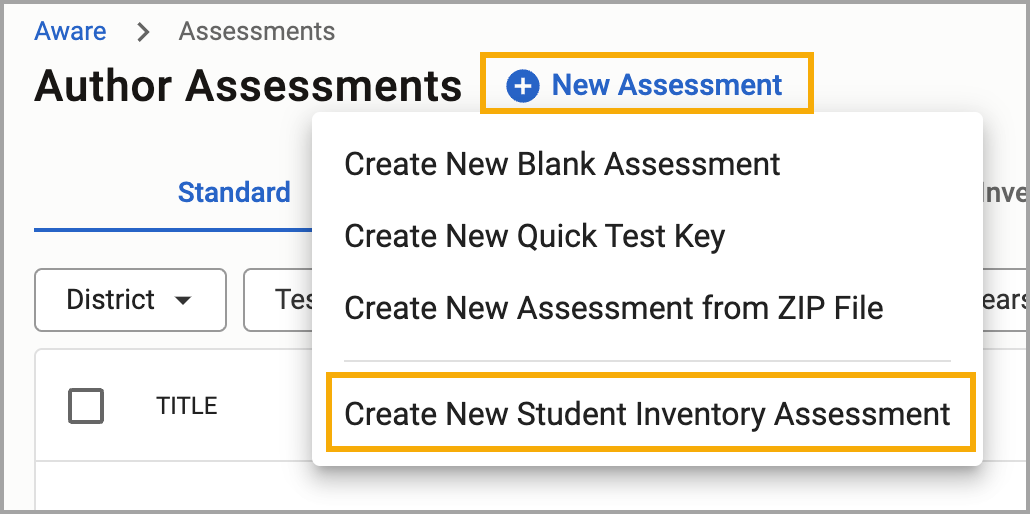
Select New Assessment then Create New Student Inventory Assessment.
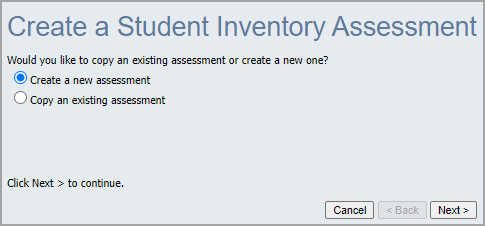
Choose either Create a new assessment or Copy an existing assessment, then select Next.
Choose which Student Inventory Type to assign to the new student inventory assessment, then click Next.
Enter a Title and choose a Language, Term, Start Date, and End Date for the student inventory assessment. Then, click Next.
Select one or more Campuses to apply to the student inventory assessment, then click Finish.
Illustrated Guide
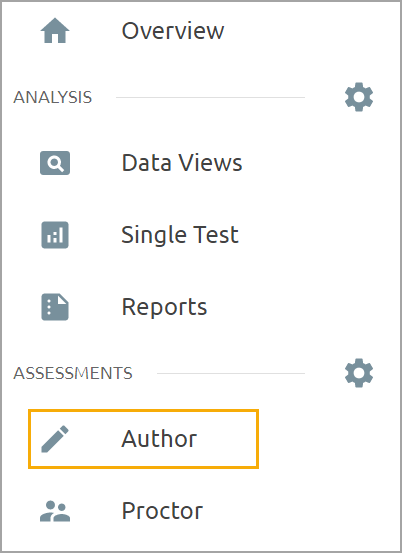
Step 1: Log in to Aware and select Author.
Step 2: Select New Assessment, then Create New Student Inventory Assessment.
Step 3: Follow the instructions in the creation wizard to build a student inventory assessment. Choose either Create a new assessment or Copy an existing assessment, then select Next.
Step 4: Choose which Student Inventory Type to assign to the new student inventory assessment, then click Next.
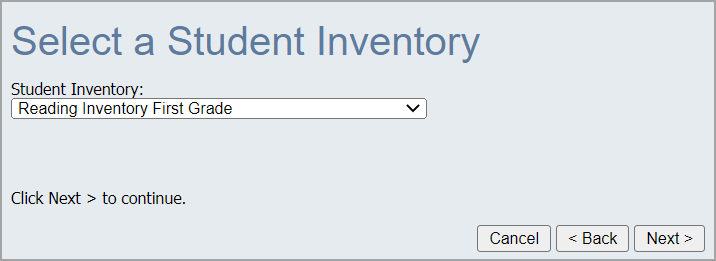
Recently completed student inventory types will be visible in the drop-down menu even if they do not appear in the Inventory table or have any student inventory assessments tied to them.
Step 5: Enter a Title and choose a Language, Term, Start Date, and End Date for the student inventory assessment. Then, click Next.
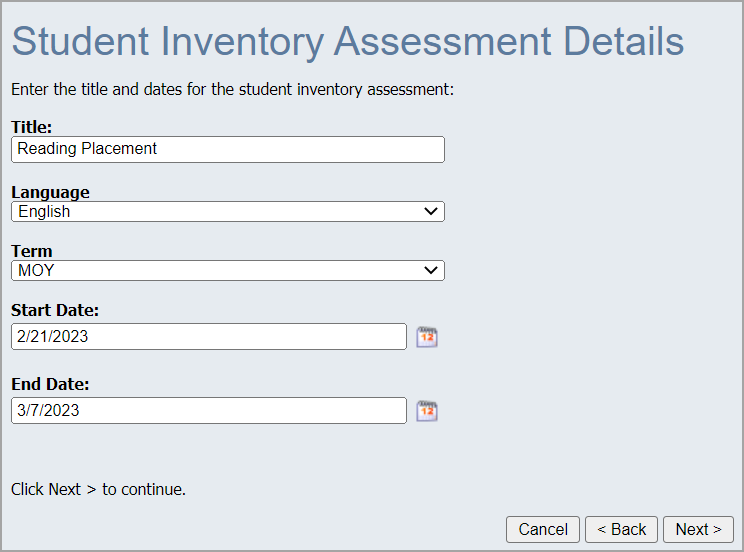
Users can only enter scores within the established date range.
Step 6: Select one or more Campuses to apply to the student inventory assessment.
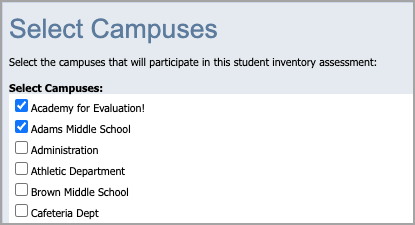
Click Finish to complete the creation of the inventory assessment.
Once complete, the inventory assessment editing screen will appear. Additionally, the assessment will appear in the Inventory table.
Student Inventory Assessment Settings
Once you have created a student inventory assessment, you can establish multiple settings in various tabs.
General Tab
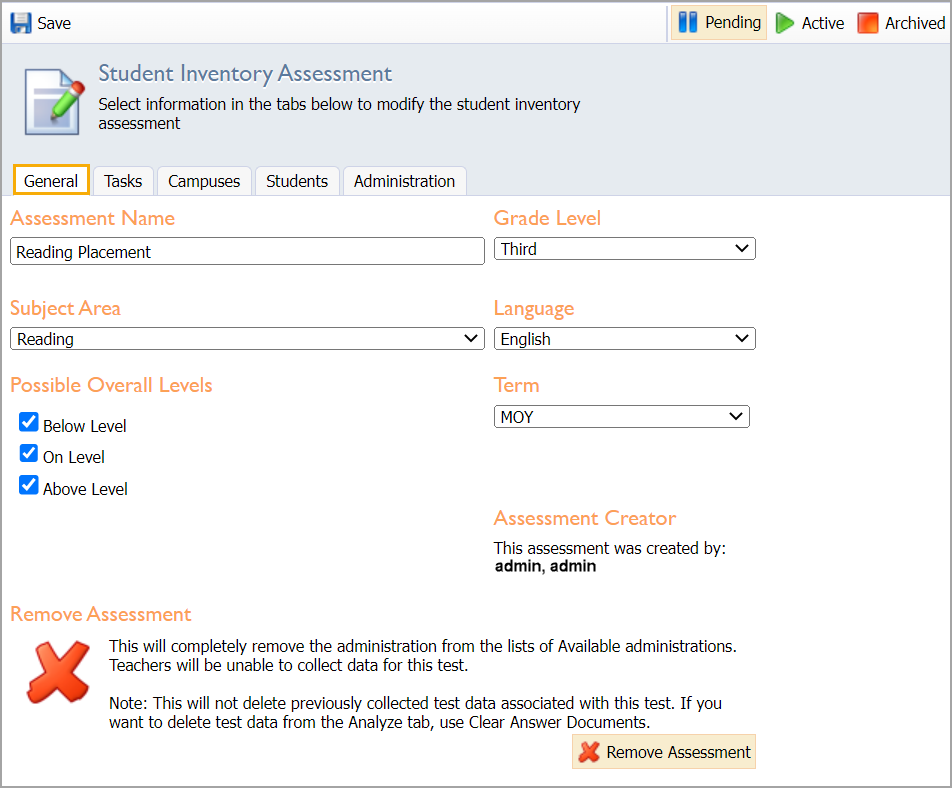
Select the General tab to determine the Possible Overall Levels a teacher will be able to choose from when entering inventory scores for a student. You can also edit the Assessment Name, Subject Area, Grade Level, Language, and Term, or remove the assessment.
Caution: Removing the inventory assessment will not delete previously collected test data associated with this assessment. If you want to delete test data, select Delete Answer Sheet under the Administration tab within test authoring.
When finished, click Save.
Tasks Tab
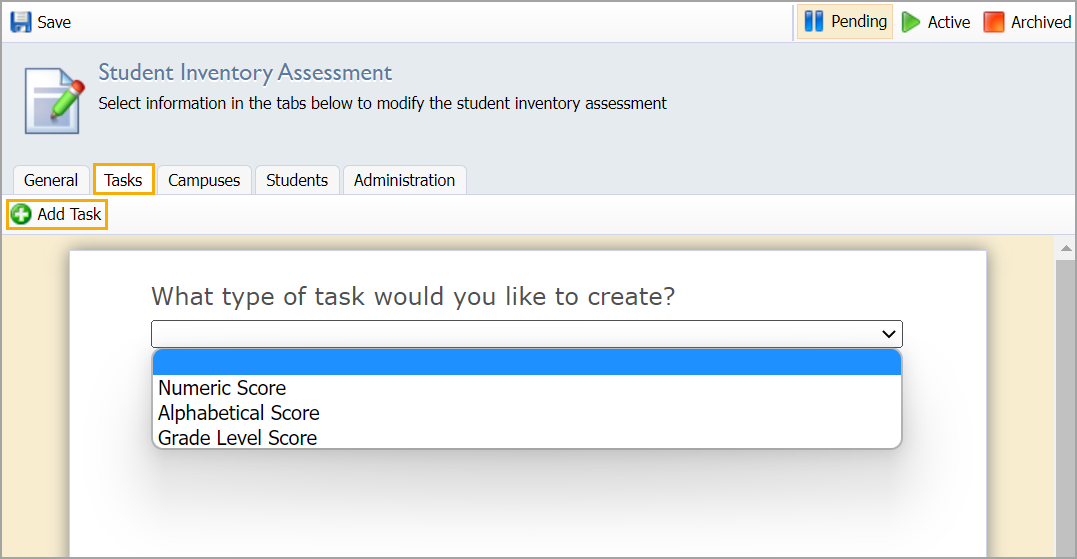
Select the Tasks tab to add inventory assessment tasks.
Tasks are essentially questions or sub-assessments that a student is asked to complete. How well a student completes a task is measured within a particular range. For a fluency task, the range may be words per minute, but a letter sound identification task may be the number of letters successfully identified.
To create a task, select Add Task then choose the type of task from the list:
Numeric Score - A numeric score will limit the ranges to numbers.
Alphabetical Score - An alphabetic score will limit the ranges to letters.
Grade Level Score - A grade level score will limit the ranges to grade levels.
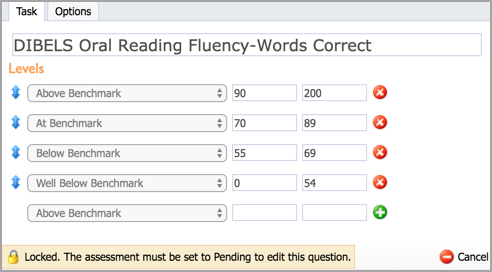
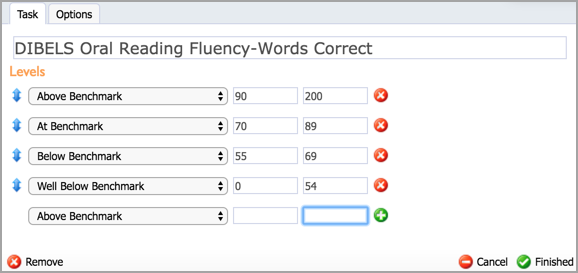
Once a task type is chosen, the task editor will appear. On the Task tab, enter a task name. Select a task level from the drop-down list and enter the range in the boxes. Hit the Enter key and click the Plus sign to add the range, and repeat the process as needed.
The user who set up the student inventory type determined the task levels seen in this step.
On the Options tab, select Required if the task is required and/or Allow decimal if the score will include a decimal.
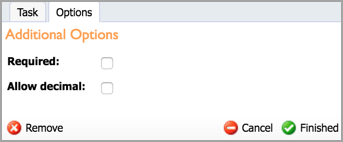
Click Finished to save changes and close the task editor window.
Notice that if a task is required, it will be noted in red beside each task. To edit a question, roll the mouse over the question and click the Pencil icon. To move a task, use the double arrow controls on the right.
Once an assessment is active, tasks cannot be removed or added. Make sure the assessment is complete before making it active.

Campuses Tab
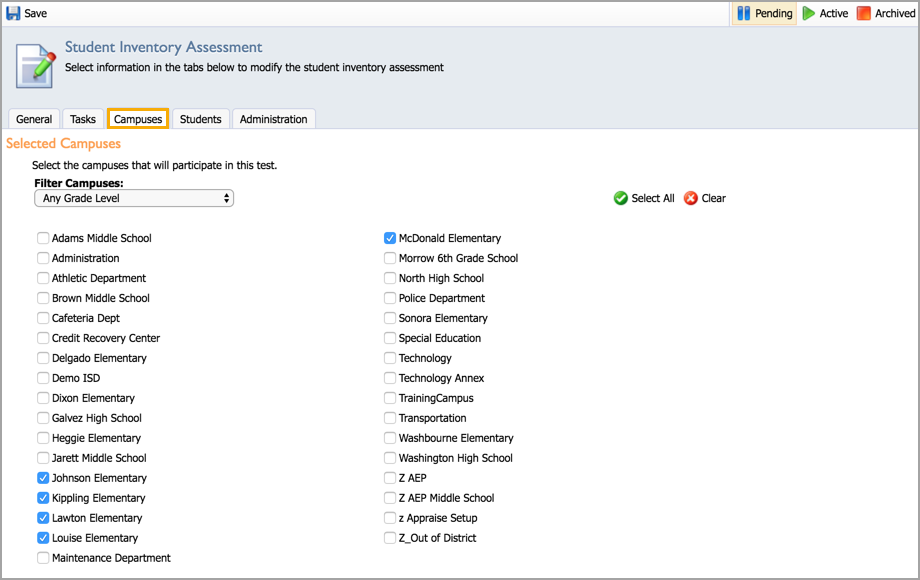
The Campuses tab will display the campuses that will be using this assessment. All campuses that are associated with the assessment need to be checked. Either select all campuses from the list, or filter by grade level to see a list of only those campuses that teach that grade level and click Select All.
Students Tab
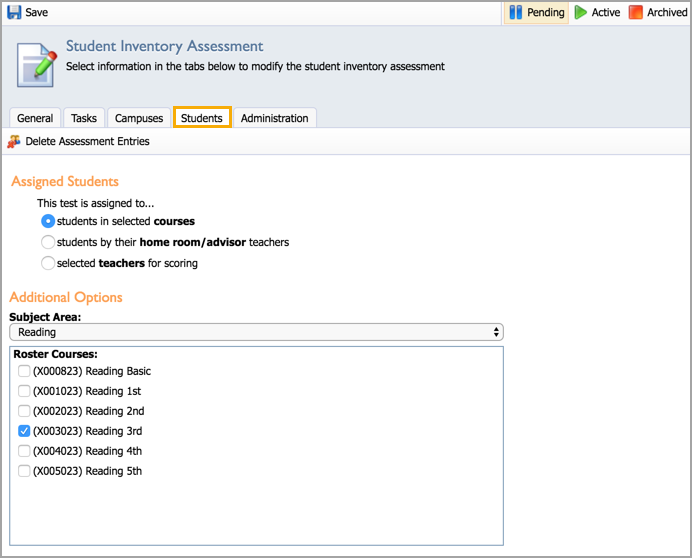
Use the Students tab to determine which students are associated with the assessment and to delete student assessment entries.
You can assign the assessment to students in the following ways:
Students in selected courses - Select the appropriate roster courses for the assessment.
Students by their homeroom/advisor teachers - Select the homeroom/advisor teachers on each campus for the assessment.
Selected teachers for scoring - Select the teachers on each campus for the assessment.
Student Filtering
Student filtering limits assessment entries by program status, form, grade level, or monitor group. If multiple filters are applied across the same filtering category, students can meet either criterion selected.
For example, if At Risk and Section 504 are selected, any students who are At Risk or Section 504 will be included. However, if Third grade is also selected, only Third grade At Risk or Third grade Section 504 students will be included.
Clear Assessment Entries
There are two ways that assessment entries can be cleared/deleted:
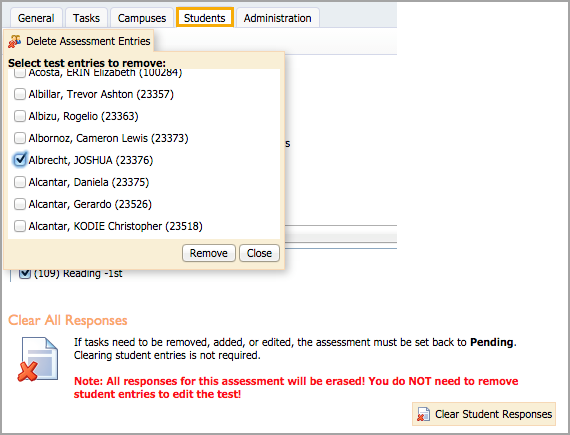
By Student - If assessment entries need to be removed for a student, click the Delete Assessment Entries button, select the student, and choose Remove.
Clear All Responses - If assessment entries need to be removed for all students, use this option.
Warning: Once you have removed an assessment entry from a student, the entries cannot be recovered. Use either of these options with caution.
Administration Tab
The Administration tab controls administration dates and online teacher submission. The test will be available to teachers between the date range listed. Assessment scores cannot be entered outside these dates.
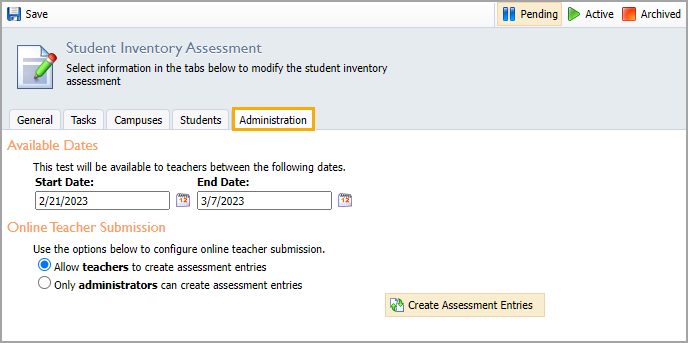
Teachers or testing administrators can create assessment entries. An administrator is any staff member with the Data Administrator or Reading Inventory role.
One advantage of the administrator creating assessment entries is the ability to view the students who have not been given an assessment. To see the students who have not been given an assessment, first select the inventory assessment under Configure Quick View. Then, edit the view and select Include Students Who Were Not Scored on the Columns tab. The students who have not been scored will appear in the list with an overall status of Unknown.
Once the assessment entries are created, teachers can enter scores for each student under Tests Available by selecting Administer.
Once the assessment is created and ready, make it Active by clicking the Active button in the upper right corner. Once the assessment is active and the date falls within the date range listed, teachers can enter student scores.
Once the assessment is marked Active, the tasks are locked and cannot be edited unless the assessment is set to Pending.
