Once you have configured Azure SAML authentication to work for your staff, you can follow these additional steps to add student single sign-on (SSO). First, you will add a Role claim, and then you will add a Student ID claim.
Be sure to verify that you have the correct requirements in place before getting started.
Adding a Role Claim
Step 1: Log into Azure Active Directory as a user with Admin privileges.
Step 2: Select an existing Azure user group or create a new Azure user group that contains students who will log into Eduphoria. The role that separates staff from students is assigned at the group level.
Step 3: Select Enterprise Applications and select the app you are currently using to authenticate with Eduphoria.
Step 4: Select Assign users and groups.
Step 5: Select the application registration link in the instructions.

Step 6: Select Create App Role.
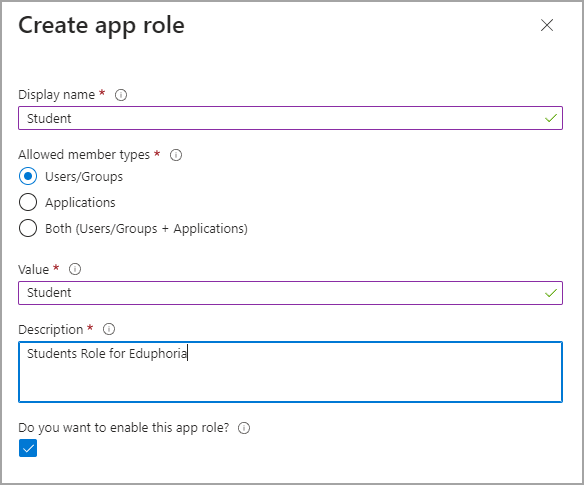
Step 7: Select the following settings in the pop-up window:
Student as the Display name
Users/Groups as the Allowed member types
Student as the Value
Students Role for Eduphoria as the Description
Step 8: Select the Do you want to enable this app role? checkbox.
Step 9: Click Apply.

Step 10: Navigate back to the Azure Active Directory home screen, and select Groups from the list.
Step 11: Select the group you want to use for students from either an existing group or a group you created in step 2.
Step 12: Select Assigned roles from the list.
Step 13: Select Add Assignments from the menu.
Step 14: Search for and select the student role you created in steps 6 and 7 and then click Add.
Adding a Student ID Claim
Step 1: Navigate back to the Azure Active Directory home screen and select Enterprise Applications from the list.
Step 2: Select the app you are currently using to authenticate with Eduphoria.
Step 3: Select Get Started under the Set up single sign-on heading.
Step 4: Select Edit in the Attributes & Claims section.
Step 5: Select Add new claim.
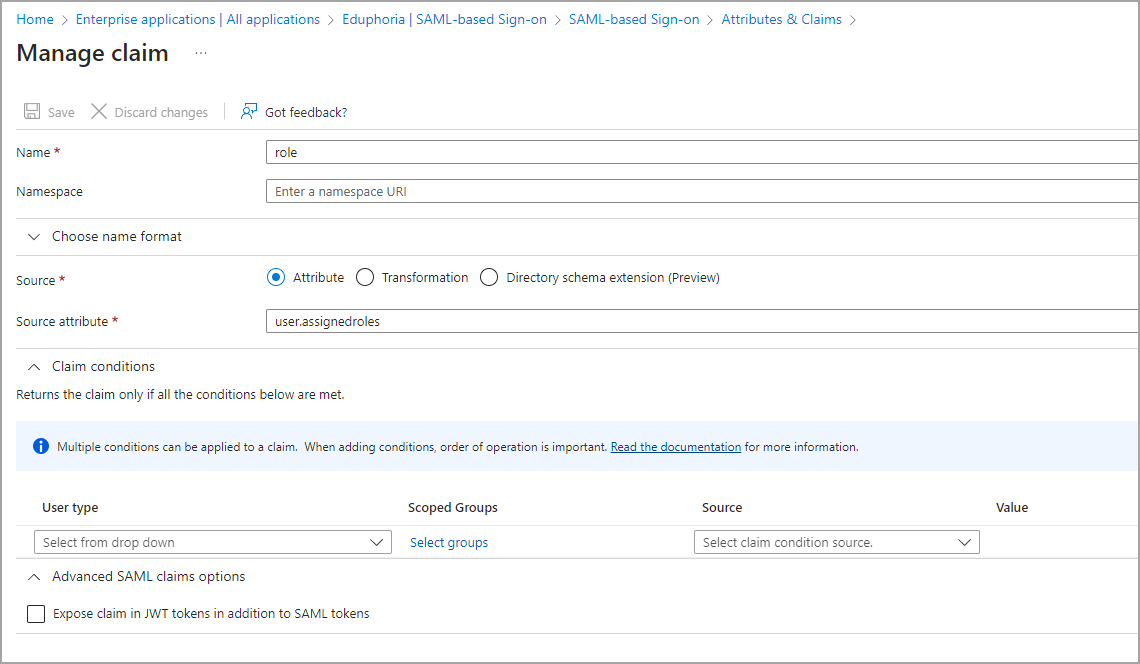
Step 6: Name the claim role, select Attribute as the Source, and select user.assignedroles for the Source attribute. Select Save.

Step 7: Select Add new claim again.
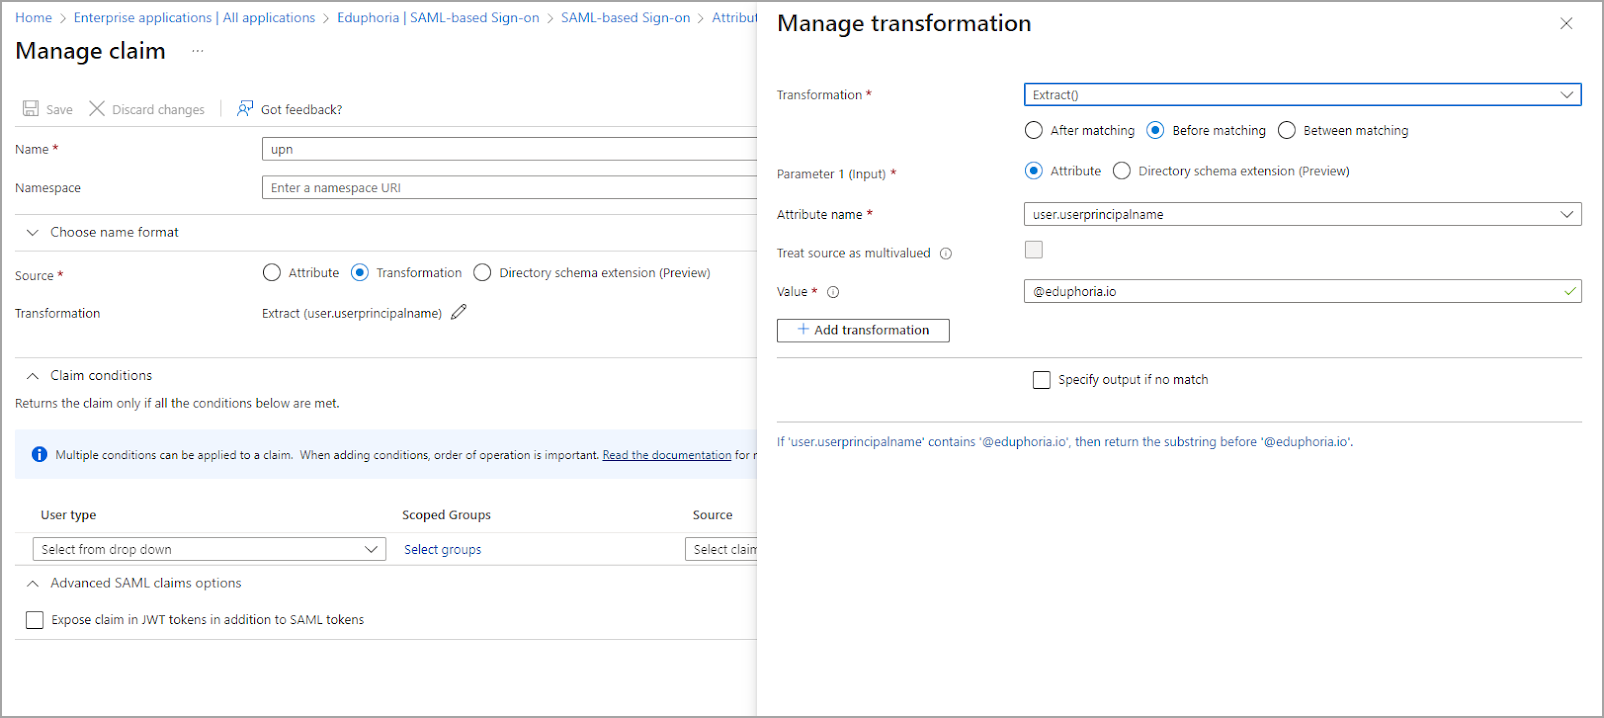
Step 8: Name the claim upn, all-lowercase as this attribute is case-sensitive. Then, select Transformation as the Source.
Step 9: On the Manage transformation wizard, select the following settings:
Extract() as the Transformation
Before matching
Attribute for Parameter 1 (Input),
user.userprincipalname for the Attribute name
Your email domain suffix for Value
In this example, we are using @eduphoria.io. This strips the email suffix off the username, so we can match it against the student ID. Click Add when finished.

Step 10: Navigate back to the Azure Active Directory home screen, select Enterprise Applications, then select the app you are using to authenticate with Eduphoria. In the Assign users and groups section, select the Assign users and groups link.
Step 11: Select Add user/group.
Step 12: Select the group you used during the steps for adding a role claim.
Step 13: Log in to Eduphoria and select Management, then Directory Services & Student Sign-On.
Step 14: Under the Alternate Student Sign-On tab, check the box for Students log in with alternate method.
Once you're finished, return to Configuring Azure SAML2 Authentication to resume or complete any lingering steps to enable SAML.