The Import Users feature will help you add additional information to users’ profiles, such as ID numbers, DOB, Certification Information, demographic information, etc.
This additional information is helpful for:
Importing User Account Information
Step 1: Log in to Eduphoria and go to Management from the home screen.
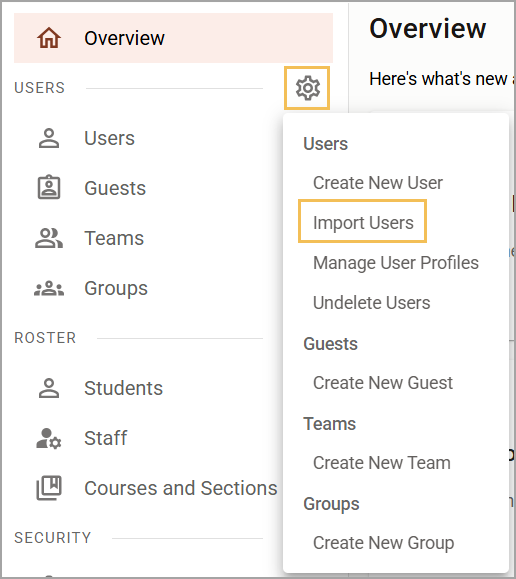
Step 2: Select Users Settings (), then select Import Users to launch a wizard that will guide you through the process.
Prepare Data for Import
Step 1: Select Download Template to access a CSV file in the recommended format. Add the data to the file.
OR
Generate a file from your Employee Information System that has the same column headings as the template.
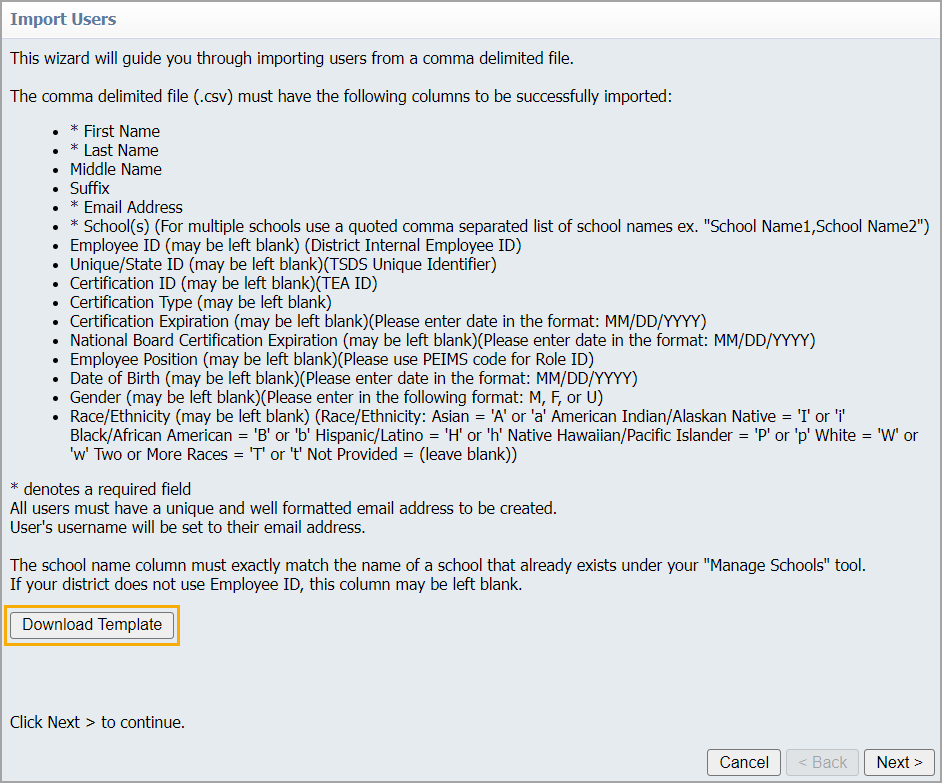
Caution: All of the column headings are required for the import. You do not have to have data in all of the columns, but you must have the headings.
Step 2: When all data is added to your spreadsheet, save the file as a CSV. Refer to this sample import file for an example.
Step 3: The following are required fields to update account information. Do NOT leave these columns blank.
First Name
Last Name
Email Address
School(s)
Caution: The school name column must exactly match the name of a school that already exists under your Manage Schools tool. For multiple schools, use a comma-separated list of school names. Example: School Name1, School Name2.
Step 4: The remaining data is optional, but the column headers are necessary for the spreadsheet. All column headers must be included even if the fields are left blank.
Column Header / Optional Field | Additional Information |
|---|---|
Middle Name | N/A |
Suffix | N/A |
Employee ID | District Internal Employee ID |
Unique/State ID | TSDS Unique Identifier |
Certification ID | TEA ID |
Certification Type | Separate by a comma if there’s more than one. |
Certification Expiration | Enter the date in the format MM/DD/YYYY. If it is a lifetime certification, enter the year 2099. |
National Board Certification Expiration | Enter the date in the format MM/DD/YYYY. Leave blank if this does not apply to a staff member. |
Employee Position | Use PEIMS code for Role ID. |
Date of Birth | Enter the date in the format MM/DD/YYYY. |
Gender | Enter in the following format: M, F, or U. |
Race/Ethnicity | Asian = 'A' or 'a’ American Indian/Alaskan Native = 'I' or 'i' Black/African American = 'B' or 'b' Hispanic/Latino = 'H' or 'h' Native Hawaiian/Pacific Islander = 'P' or 'p' White = 'W' or 'w' Two or More Races = 'T' or 't' Not Provided = Leave Blank |
Step 5: Once you have prepared the CSV import file, use the Next button to start the import process. Select Choose File to begin.

The wizard will immediately notify you if there is an error in the file by providing a basic error message to help you pinpoint the problem. If you receive an error message, choose the Back arrow and select the file again after correcting the mistake.
Step 6: Click the Next button to continue.
Step 7: When asked for a password, select a default password for any new users to input during the initial login. Users with new accounts will be prompted to change this password during the initial login. You can leave the password blank if all users in your file have Eduphoria accounts. 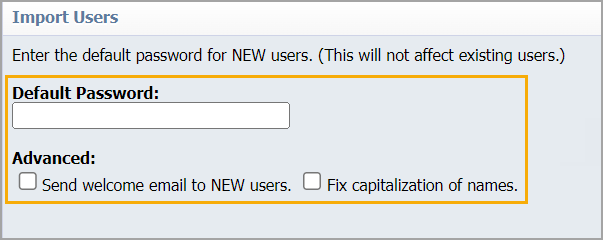
Note: Inputting a default password will not impact existing users.
If desired, fix capitalization and send a welcome email to new users.
Step 8: Select Next to complete the wizard and update all user accounts.
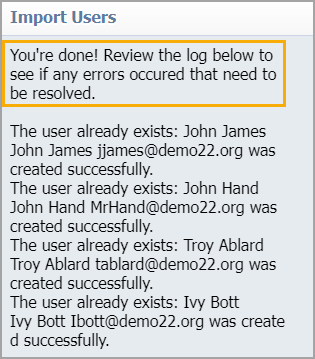
Step 9: The final screen is a confirmation that the list of users was imported. Click Finish to close the import wizard.
Basic Troubleshooting Tips
Ensure all required fields are filled out.
Match school names exactly as they are shown in School Management.
Follow the required formatting, especially for date fields.
Ensure you have all the column headers exactly as listed in the User Import.
Do not include an asterisk (*) in the required field columns.