Facilities&Events and Strive use Guest user accounts to allow users outside your district to have limited access to these applications. Guest accounts can be created in each application separately and are accessible within Management, Facilities&Events, and Strive.
Creating Guest Users in Management
System administrators with the Manage Guests right can create and manage guest user accounts.
Step 1: Log in to Eduphoria and select Management.
.png)
Step 2: From the main menu, select the User Settings gear icon.

Step 3: From the resulting drop-down menu, select Create New Guest to launch the wizard.
.png)
Step 4: Enter the guest’s First Name, Last Name, and Email Address. Then, enter a Guest Password to create their login credentials. (Optional) Select an Organization to enable invoicing in Facilities&Events.
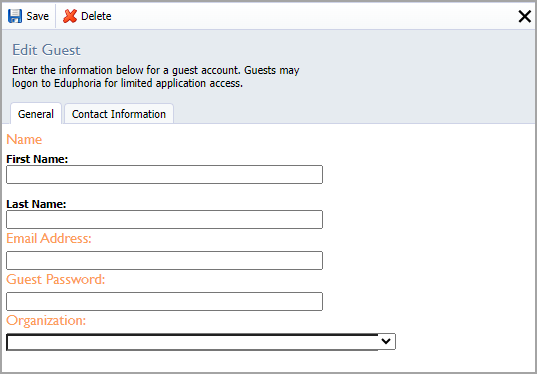
Step 5: Select Save.
Once added, you can select the guest user's account from the list on the Guest screen to make changes to their account.
Note: You cannot view a guest’s password after the account is created. If a guest forgot their password, they can reset it using the Forgot Password? link on the login screen.
Adding Guest Users in Strive
Strive managers can use guest accounts to provide access to an outside instructor to manage a course or to invite attendees from outside your district to register and receive certificates for provided training.
Follow these directions to add a guest to Strive under the Workshop Settings gear.
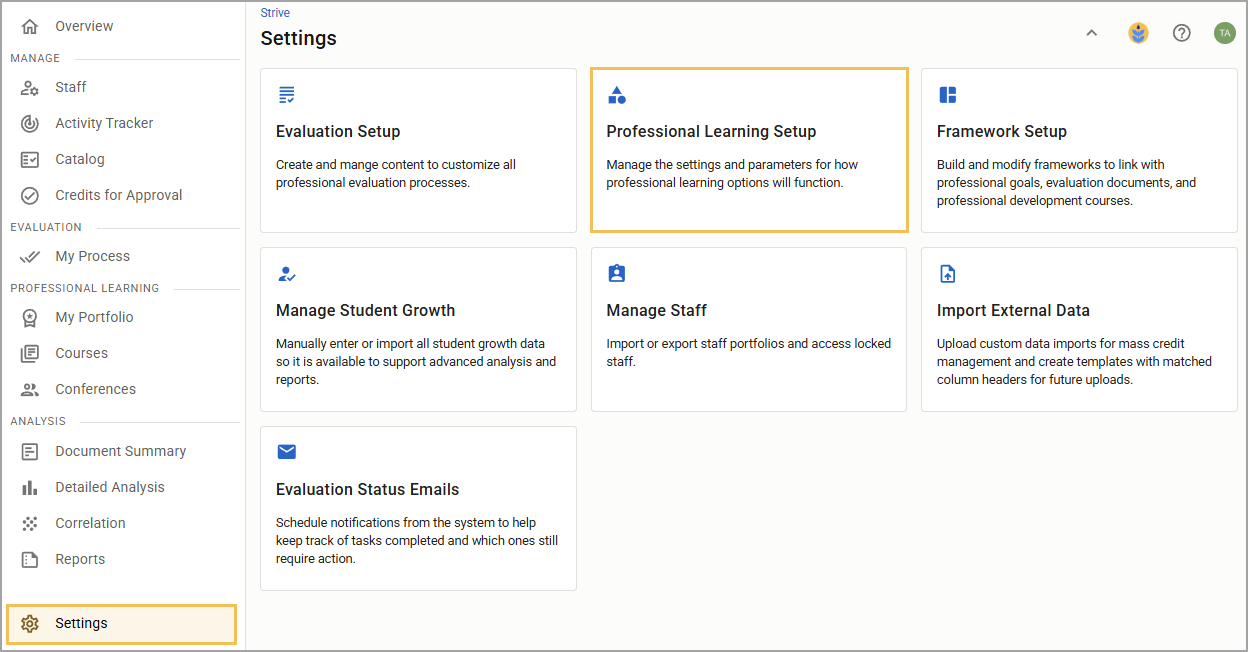
Step 1: In Strive, select the Settings option from the main menu and then select Professional Learning Setup.
Step 2: Select Workshop Setup to expand the options and then select Guests.
.png)
Step 3: Select Add Guest.
.png)
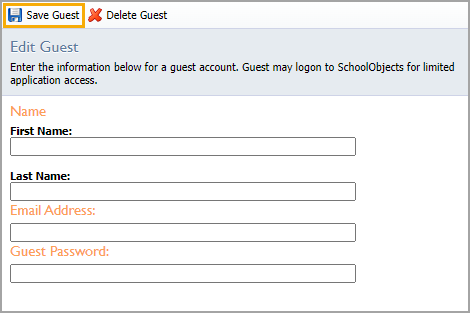
Step 4: Enter a first name, last name, and email address. Then, create a guest password for the user.
Step 5: Select Save Guest.
Assigning the Guest as an Instructor in Strive
Once you have added a guest user, you can assign them as an instructor to the district court instructor’s list.
Step 1: Select the Settings option from the main menu and then select Professional Learning Setup.
Step 2: Select Workshop Setup to expand the options and then select Instructors.
.png)
Step 3: Select Add Instructor.
.png)
Step 4: Select Guest Instructor, then select Next.
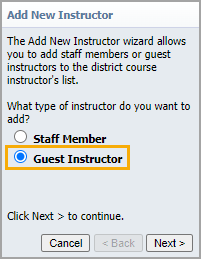
Step 5: Select the added guest, then select Next.

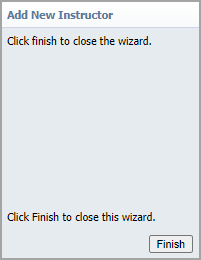
Step 6: Select Finish.
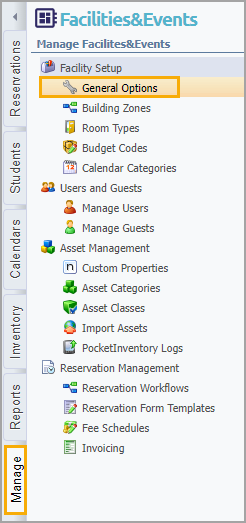
Adding Guest Users in Facilities & Events
Creating a guest user account in Facilities&Events is similar to the process detailed in the Management section.
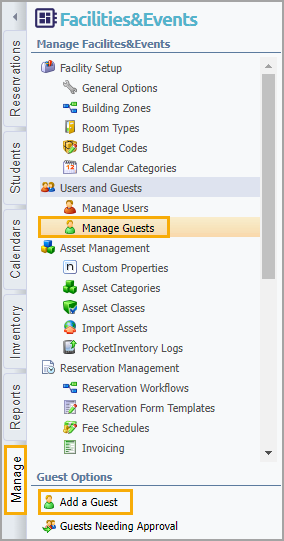
Step 1: In Facilities&Events, select the Manage tab
Step 2: Expand the Users & Guests section and select Manage Users.
Step 3: Select Add a Guest.
Step 4: Enter the guest’s First Name, Last Name, and Email Address. Then, enter a Guest Password to create their login credentials. Select an Organization to enable invoicing.
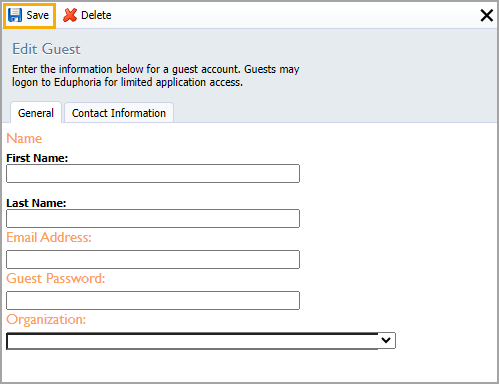
Step 5: Select Save.
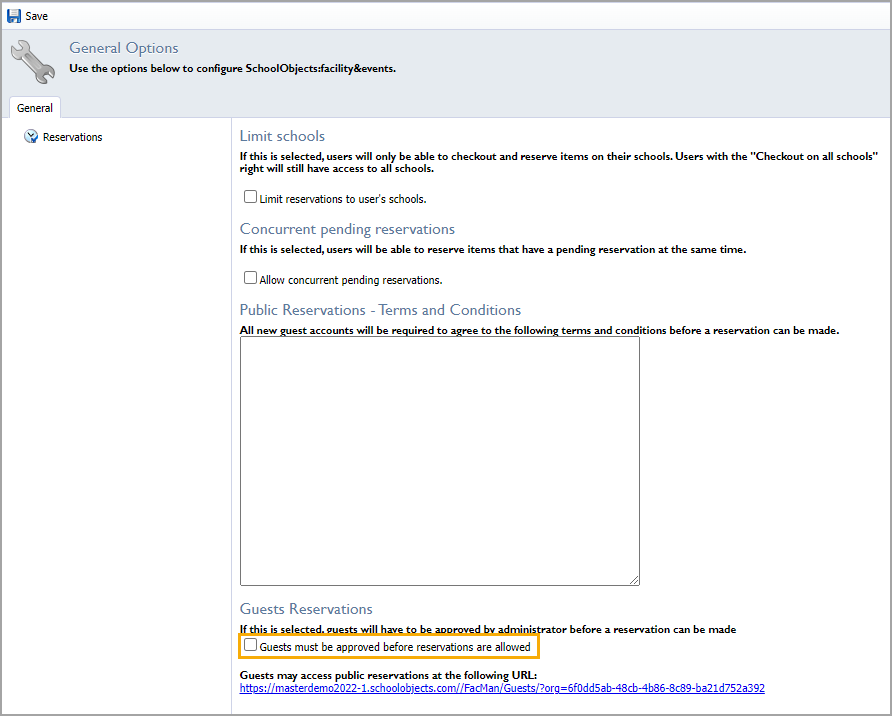
Approving Guests in Facilities & Events
System administrators must activate a setting in Facilities&Events to allow users from outside the district to access Guest Reservations. Learn more information about guest reservations and setting up reservations for guest access in Guest Reservation Workflows and Fee Schedules.
Step 1: In Facilities&Events, select the Manage tab, then select General Options.
Step 2: Check the box for Guests must be approved before reservations are allowed.
Step 3: Post the link on a site so that guests can log in and access specific locations available for reservation.
Step 4: Select Manage Guests, then select Guests Needing Approval.
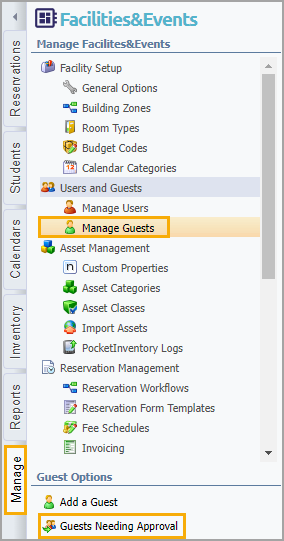
Step 5: Select Approve or Deny.
After approving or denying a guest, they no longer appear in the list waiting for approval.