The Import Users feature lets you add additional information to users’ profiles, including ID numbers, date of birth, certification information, demographics, and more.
This additional information is helpful for getting all of your user data into the Custom TIA Report for data submission.
Quick Guide
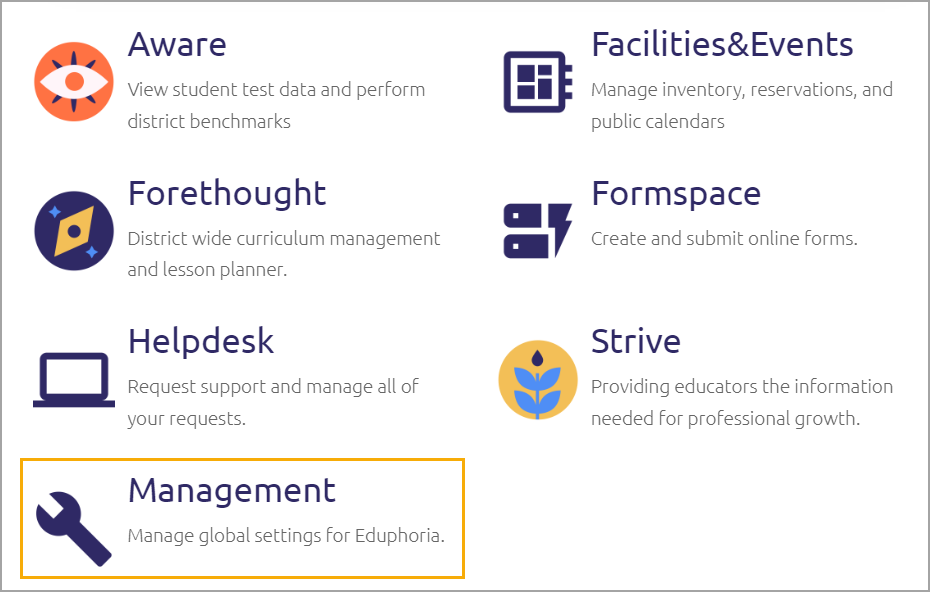
Log in to Eduphoria and select >Management from the application home screen.
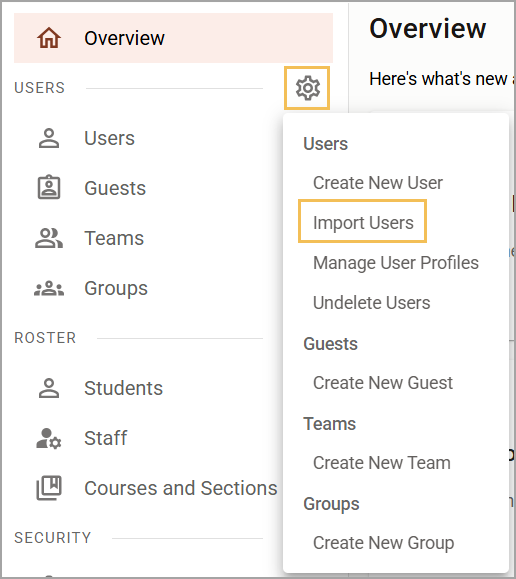
Under the Users Setting gear (), select Import Users.
Either select Download Template to download a CSV file in the recommended format, or generate a file from your Employee Information System with the same column headings as the template.
Add the recommended data in the table below to your CSV file to prepare for TIA data submission.
When you’ve added all the data to your spreadsheet, save the file as a CSV.
Return to Import Users and select the Choose File button to navigate to your file.
Select the Upload button to begin importing.
Illustrated Guide
Step 1: Log in to Eduphoria and select Management from the application home screen.
Step 2: Under the Users Setting gear (), select Import Users.
Step 3: To add data to a CSV file, you can either select Download Template to access a CSV file in the recommended format, or generate a file from your Employee Information System with the same column headings as the template.

Step 4: Add the data that you want to import into users’ profiles to your CSV file. The following fields are recommended to prepare for the TIA data submission.
Exact Header Value | Required? | More Information |
|---|---|---|
First Name | Required for new accounts only | |
Last Name | Required for new accounts only | |
Email Address | Always required if not using External ID | |
School(s) | Required for new accounts only | The school name column must exactly match the name of a school that already exists under your Manage Schools tool. For multiple schools, use a comma-separated list of school names. Example: School Name1, School Name2. |
Middle Name | Optional for TIA, but included the data file | |
Employee ID | Optional for TIA, but in the data file | District Internal Employee ID, which cannot be a Social Security number. |
Unique/State ID | Required for TIA | TSDS Unique Identifier (for Texas districts) |
Certification ID | Required for TIA | TEA ID (for Texas districts) |
Date of Birth | Required for TIA | Enter the date in the format MM/DD/YYYY. |
Step 5: When you’ve added all the data to your spreadsheet, save the file as a CSV. Refer to this sample import file for an example.
Step 6: Once you have prepared the CSV import file, return to Import Users and select the Choose File button to navigate to your file.
Note: There is no need to send a Welcome email if you are updating accounts rather than creating new ones.
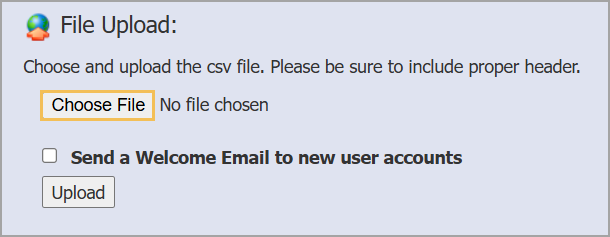
Step 7: Select the Upload button to begin importing.
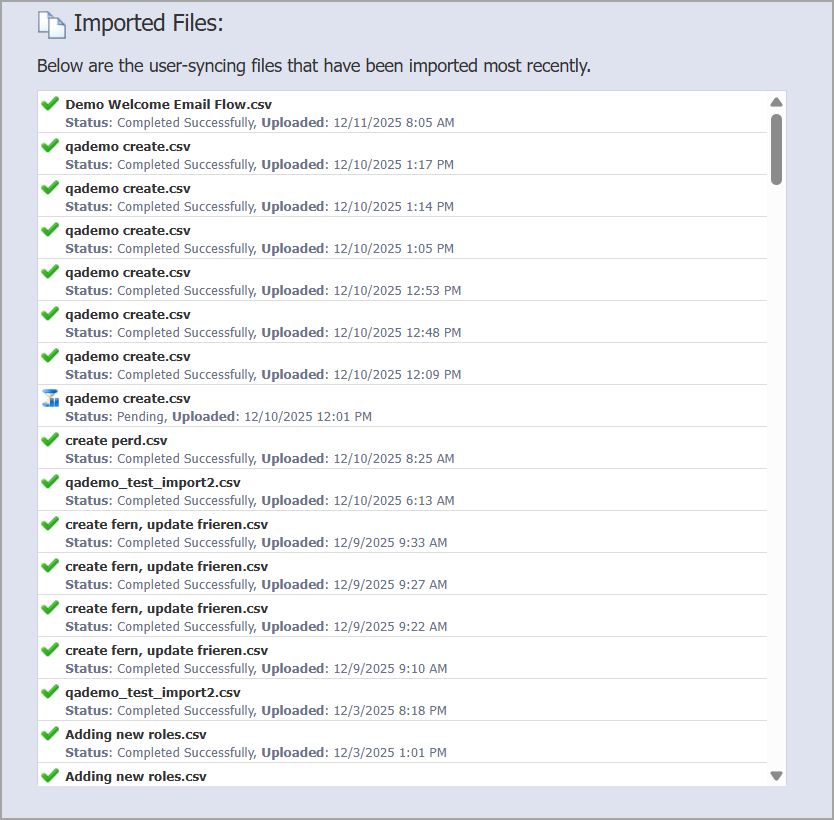
Your file becomes listed in the Imported Files box once the import completes.
Basic Troubleshooting Tips
Ensure all required fields are filled out.
Match school names exactly as they are shown in Management.
Follow the required formatting, especially for date fields.
Ensure you have all the column headers exactly as listed in the User Import.
Do not include an asterisk (*) in the required field columns.