Schools use Formspace to collect all kinds of information. For example, you might have a form to request a substitute teacher or enter a blurb to be read in the morning announcements. You might fill out a form to complete HR paperwork or manage fleet vehicles. The forms available to you are created by your school or district and can be located on the My Forms tab. Follow the steps below to learn how to find, fill out, and submit a form in Formspace.
Quick Guide
Select Submit New Form.
Choose a Form Category.
Select the form that you want to complete.
Complete the selected form.
Select Submit Form.
Illustrated Guide
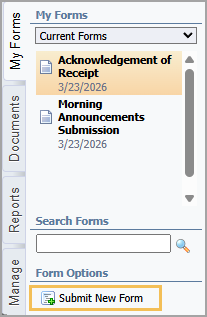
Step 1: On the My Forms tab, select the Submit New Form option in the Form Options section of the menu.
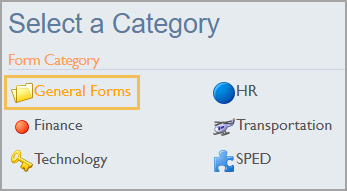
Step 2: Choose a Form Category to view forms of that type.
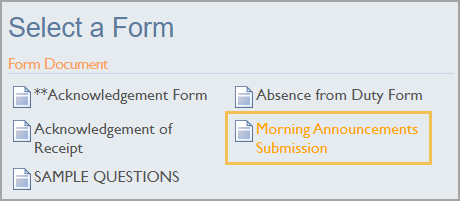
Step 3: Next, select the form that you want to complete.
Step 4: The editing interface appears and allows you to complete the selected form. The top toolbar has several options to manage this form.
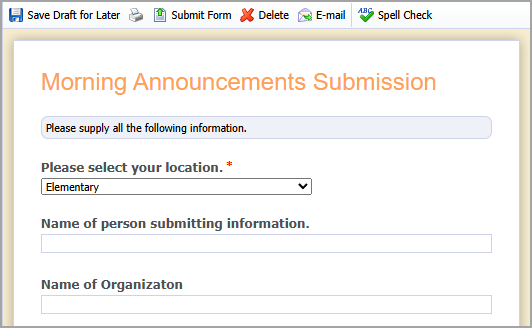
| Save Draft for Later saves all of the content in the form but does not submit it to be processed. |
| Submit Form saves the form and starts the form's workflow. |
| Delete Form deletes the form after you confirm that you want to permanently delete it. |
| Email enables you to email the form to another user within your school or district's Eduphoria database. |
| Spell Check allows you to check the spelling in your form. |


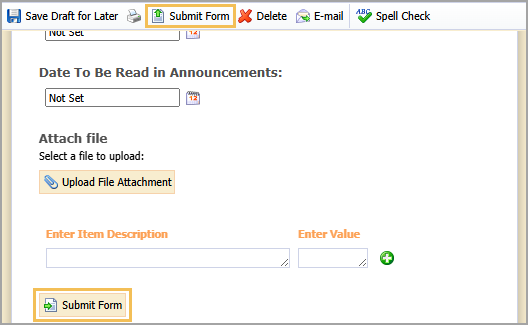
Step 5: When finished, select the Submit Form button in the toolbar or at the bottom of the form. Follow the prompts to electronically sign and submit the form.
Reviewing the Form Workflow
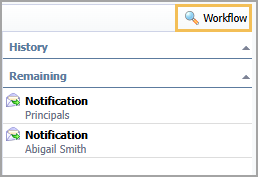
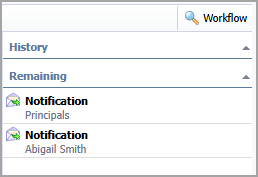
Once a form has been submitted, you can view the workflow for that form by selecting the Workflow icon in the upper-right corner. The workflow History and Remaining steps change as the workflow progresses from step to step.
Recalling a Form
On the top toolbar, you can Recall Form at any time, as long as the workflow has not been completed. Recalling a form pulls the form out of the workflow, allows you to make changes, and then resubmits the form again for review and approval. The form starts back at the beginning of the workflow.
Printing or Emailing a Form
You can also to Print Form and Email the form to another user within your school or district's Eduphoria database. To the left of the Workflow icon, a yellow sticky note with a green plus sign appears. This icon allows you to add a comment to the form without modifying the form itself.
Note: Approvers and recipients in the workflow can view all comments added by anyone involved in the workflow.
Viewing Current Forms
Any forms you have started or submitted appear in the My Forms list.
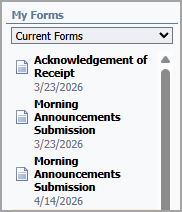
| Forms in the process of being completed and are in draft mode before being submitted for approval. |
| Forms that have been submitted for approval and are currently in the workflow process. |


Searching Forms
Users can search for Current Forms by typing key words into the Search Forms field in the lower-left corner and then hitting the enter or return key on the keyboard. The system searches current forms based on request ID, template title, workflow title, or requestor's name.

| Represents an approved step in the workflow process. |
| Represents a notification step in the workflow process. |
| Represents a Freeflow step in the workflow process. |
| Represents a denied step in the workflow process. |
| Represents an added comment in the workflow process. |
| Represents a recipient step in the workflow process. |
| Represents a recalled form. |
| Represents a completed workflow, and therefore, an approved or denied form. |


Submitted Form Status
To view the status of a current, submitted form and where it stands in the workflow:
Click on the form title under My Forms.
Once the form opens, click Workflow in the upper-right corner to open the workflow frame.
Under the History heading, completed workflow steps show the date and time of completion along with the name of the approver or person notified.
Under the Remaining heading, pending workflow steps appear along with the individuals or groups involved in that step.
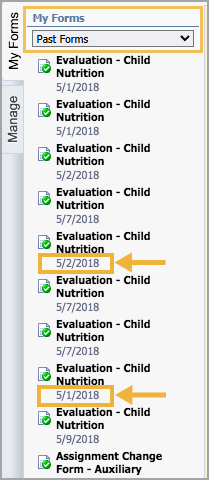
Viewing Past Forms
To view previously submitted forms that have completed the workflow process and have either been approved or denied:
Change the drop-down menu under the My Forms heading from Current Forms to Past Forms.
Click on a specific form to open and view the form.
Click Workflow in the upper-right corner to open the workflow frame and view the workflow details, whether steps were approved or denied and if any comments were entered by workflow approvers.

Past Forms are completed forms that have gone through the entire workflow process. All approval and notification steps are date and time stamped. Additionally, the name of the approver or notifier appears in the workflow.
Note: Current and Past Forms appear in order by ID# in the database tables. They do not appear by creation, submission or completion date. While each form template has a unique ID# so does each form created from that template. A user can create a form and decide to submit it for approval at a later date. This is why some forms may appear to be "out of order" due to the creation date of the form and the automated ID# tagging that occurs in the database.