.png)
Administrators can use and contribute to student forms, which are assigned to students for teacher and staff use.
Filling out a Form
Quick Guide
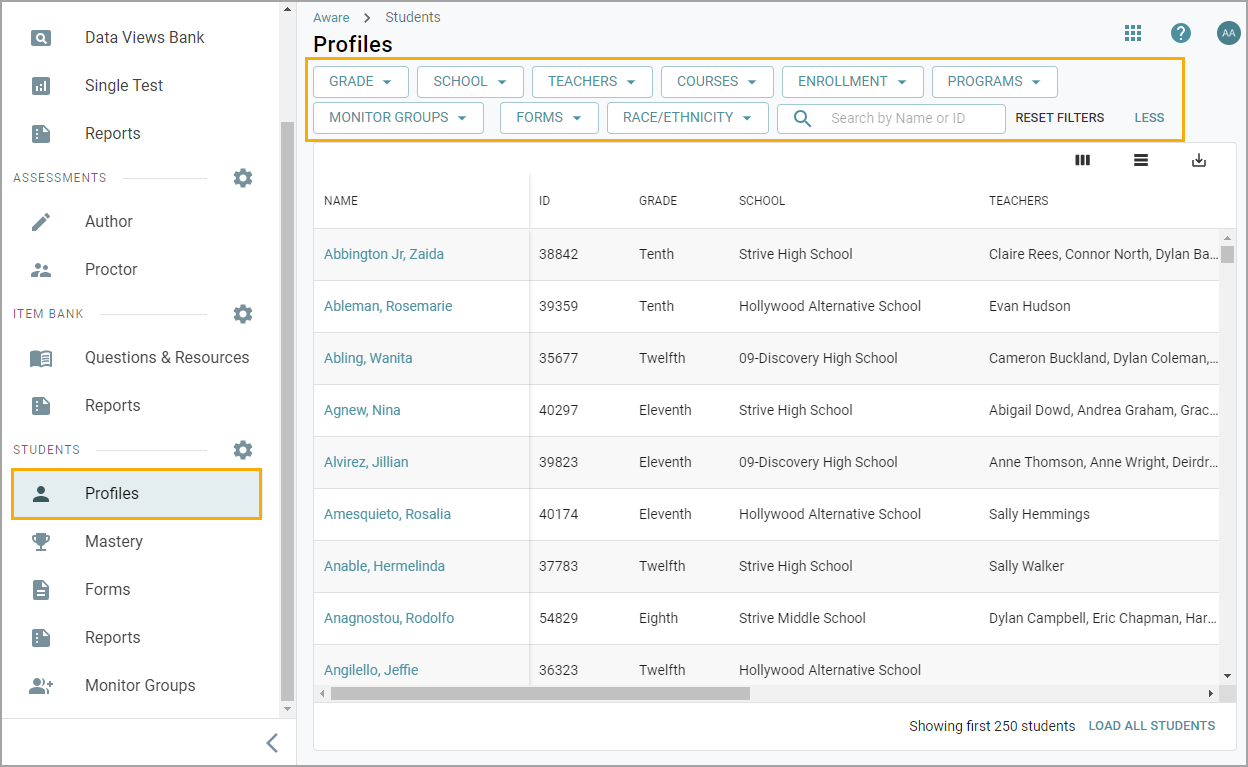
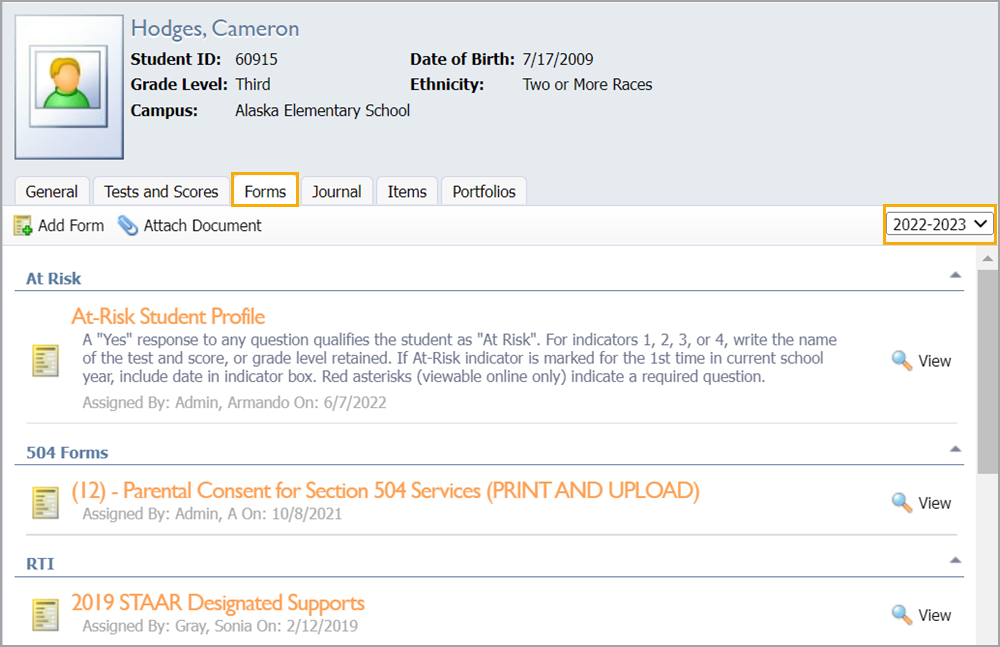
In Aware, select Profiles and search for the relevant student.
On the student’s profile, select the Forms tab.
Change years using the drop-down menu. The selected year will display only that year’s archived forms.
Contribute to a student form by selecting the View button. Users will input any required information, then select Save.
Select Mark as Updated to send an email about significant form changes to any teachers who have the student on their rosters.
Using the Log Tab
Quick Guide
Select Forms to access the desired form.
Select the Log tab to see which staff have assigned, viewed, edited, archived, deleted, or updated a form that has been added to a specific student.
To view rostered teacher activity, select the Schedule View option. Select Detail View to see the time and date anyone has taken an action on the form.
Select the Print icon to print out both the Schedule View and Detail View.
Filling out a Form
Illustrated Guide
Administrators and teachers can view, archive, and fill out student forms. However, only administrators can delete a student form.
Step 1: In Aware, select Profiles and search for the relevant student.
Step 2: On the student’s profile, select the Forms tab.
Step 3: Change years using the drop-down menu. The selected year will display only that year’s archived forms.
Step 4: Contribute to a student form by selecting the View button. Users will input any required information, then select Save.
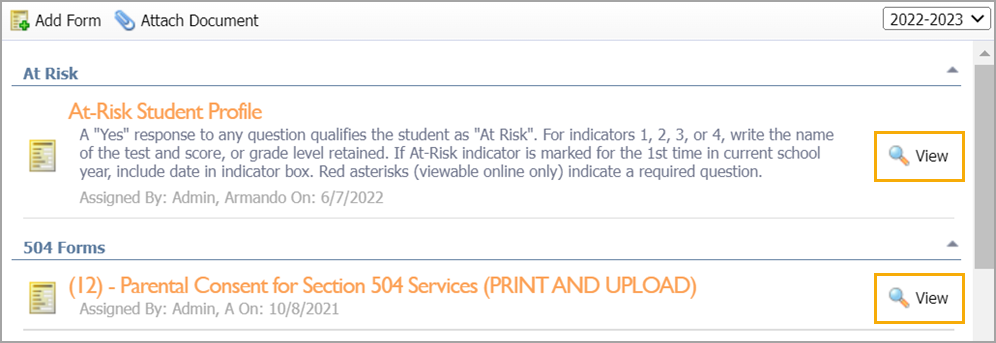
Step 5: Select Mark as Updated to send an email about significant form changes to any teachers who have the student on their rosters.

Use the Print icon to generate a PDF copy of the form. The Archive option will allow you to archive a form to show that the form is completed. Delete the form by clicking the red X icon.
The Refresh Data icon will update the Student Information and Test and Score Information question types with the student’s current data.
Warning: Be careful as this will overwrite the original snapshot of the data.
Select View All Forms to return to the form list.
Using the Log Tab
Illustrated Guide
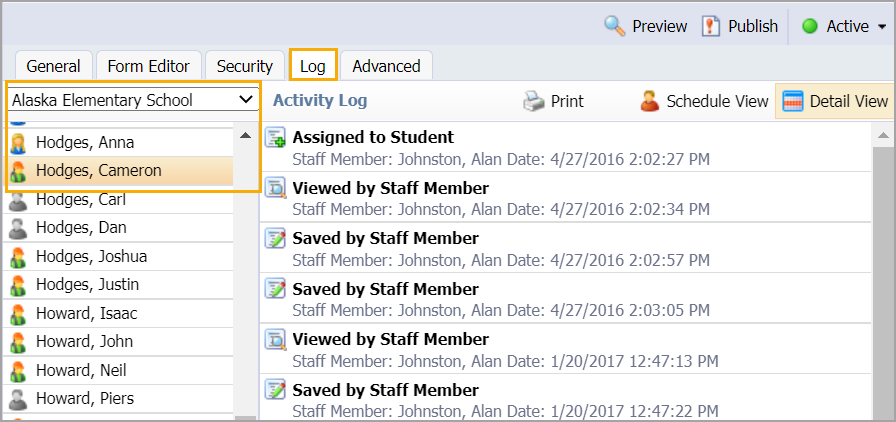
The Log tab keeps a record of staff actions on student forms. Whenever a form is added to a specific student, users can access the Log tab to see which staff have assigned, viewed, edited, archived, deleted, or updated a form. Data administrators, campus administrators, student form administrators, or anyone with Assign rights can view form logs.
Step 1: Select Forms to access the desired form.
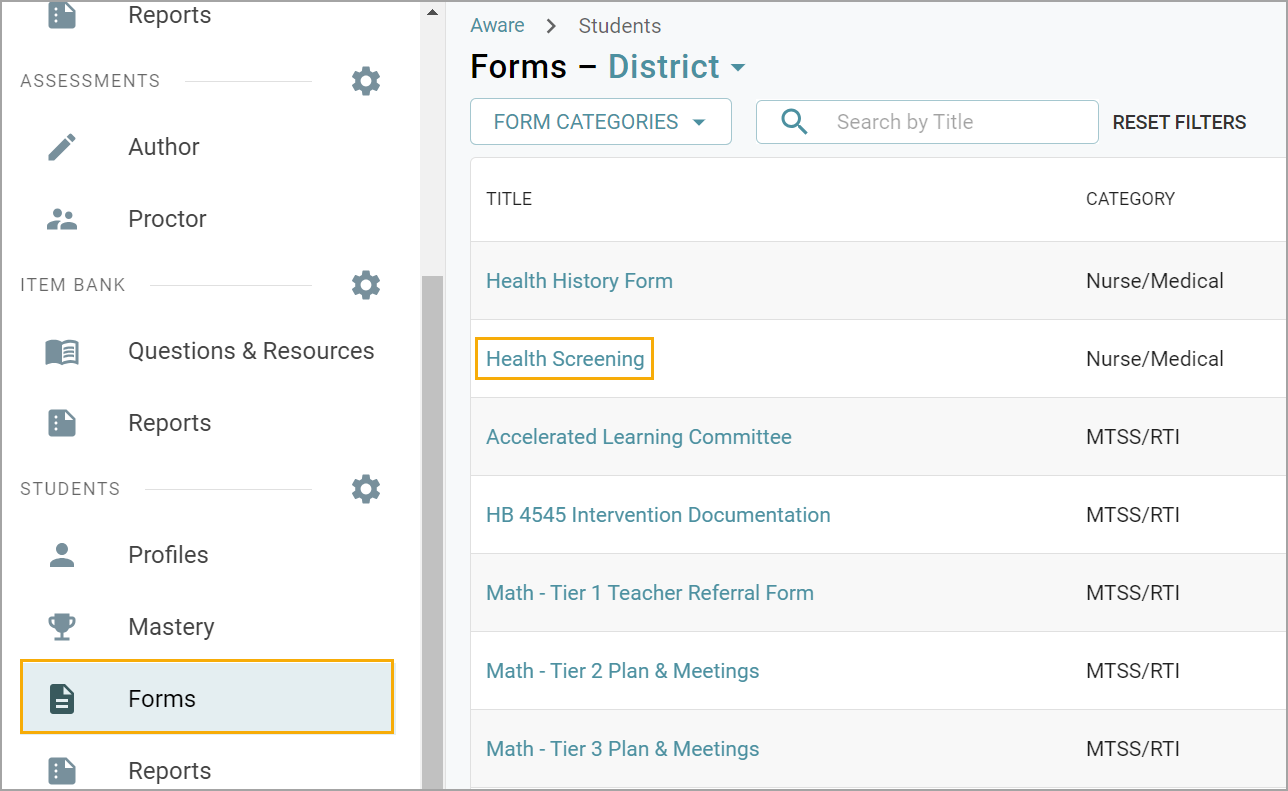
Step 2: Select the Log tab.
Step 3: Using the drop-down menu, select the campus and then the student.
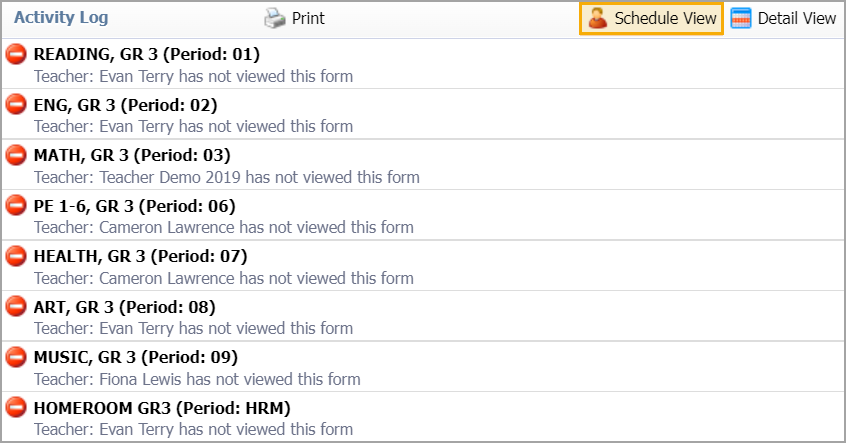
Step 4: To view rostered teacher activity, select the Schedule View option, which displays the student’s schedule. If the teacher has a green check mark, the teacher has viewed the form. If the teacher has a red minus sign, the teacher has not viewed the form.
Step 5: Select Detail View to see the time and date anyone has taken any action on the form.
Step 6: Select the Print icon to print out both the Schedule View and Detail View.
Caution: When viewing the form, if the Mark as Updated button is selected, the check will turn into a minus, and teachers will need to view the form again. Users employ this option to (1) notify teachers when a form is initially assigned to them or (2) to notify teachers when a form change requires them to review it again.