This feature allows users to create mock and real elections for a class or a school. All users have the ability to create elections in Formspace, and only the election creator can see the results.
Creating a New Election
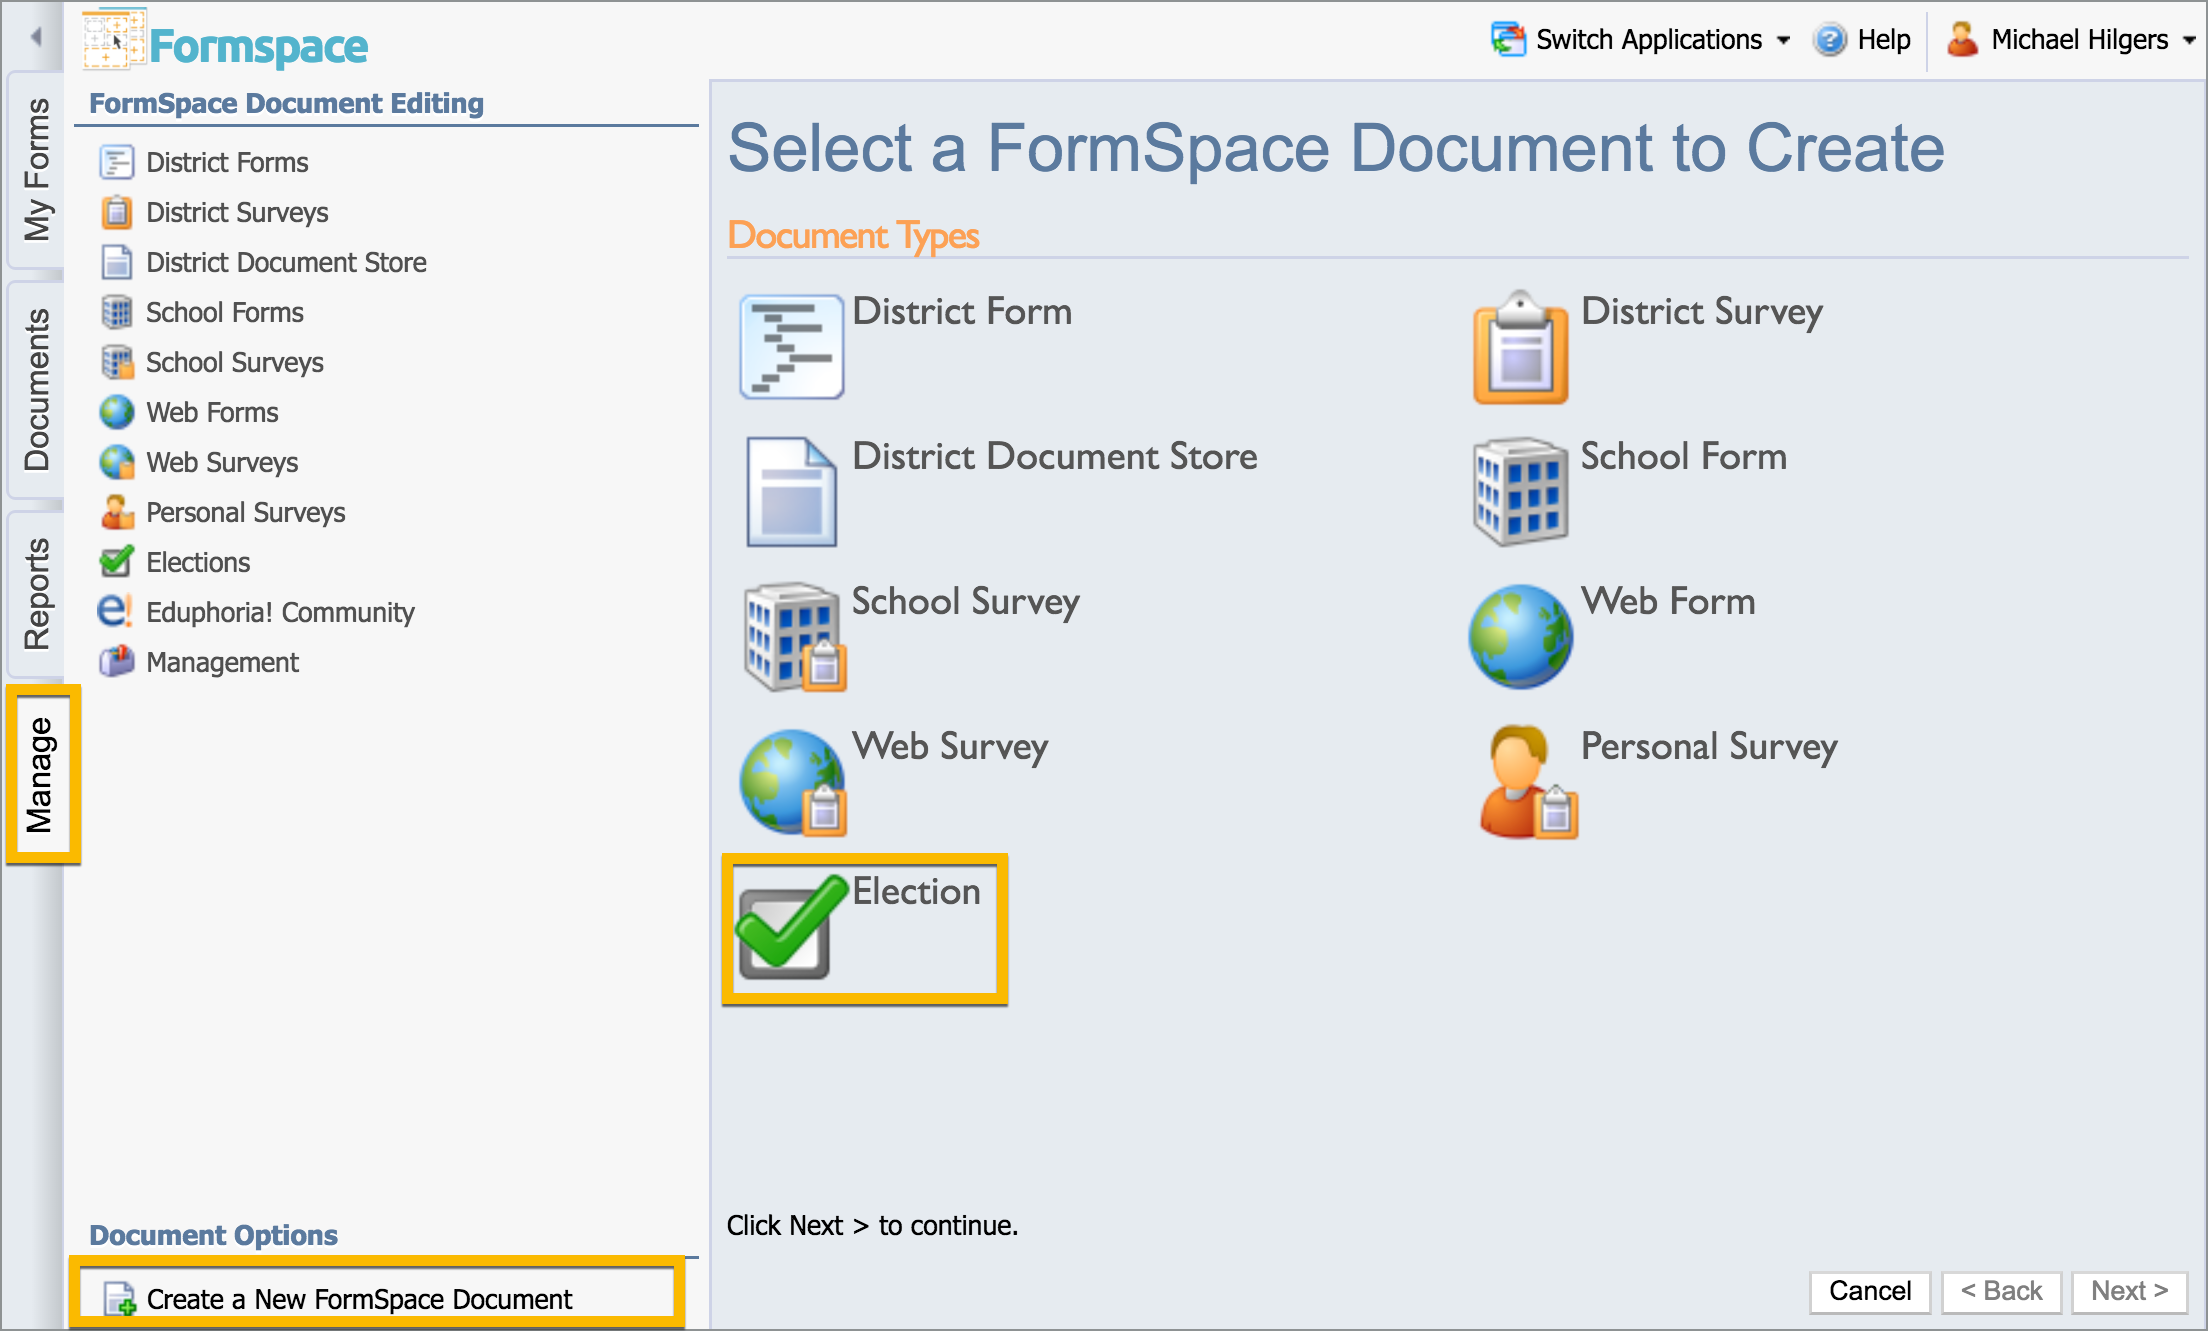
On the Manage tab, click Create a New Formspace Document.
Choose Election as the type of document to create.
Enter a title and complete the wizard.
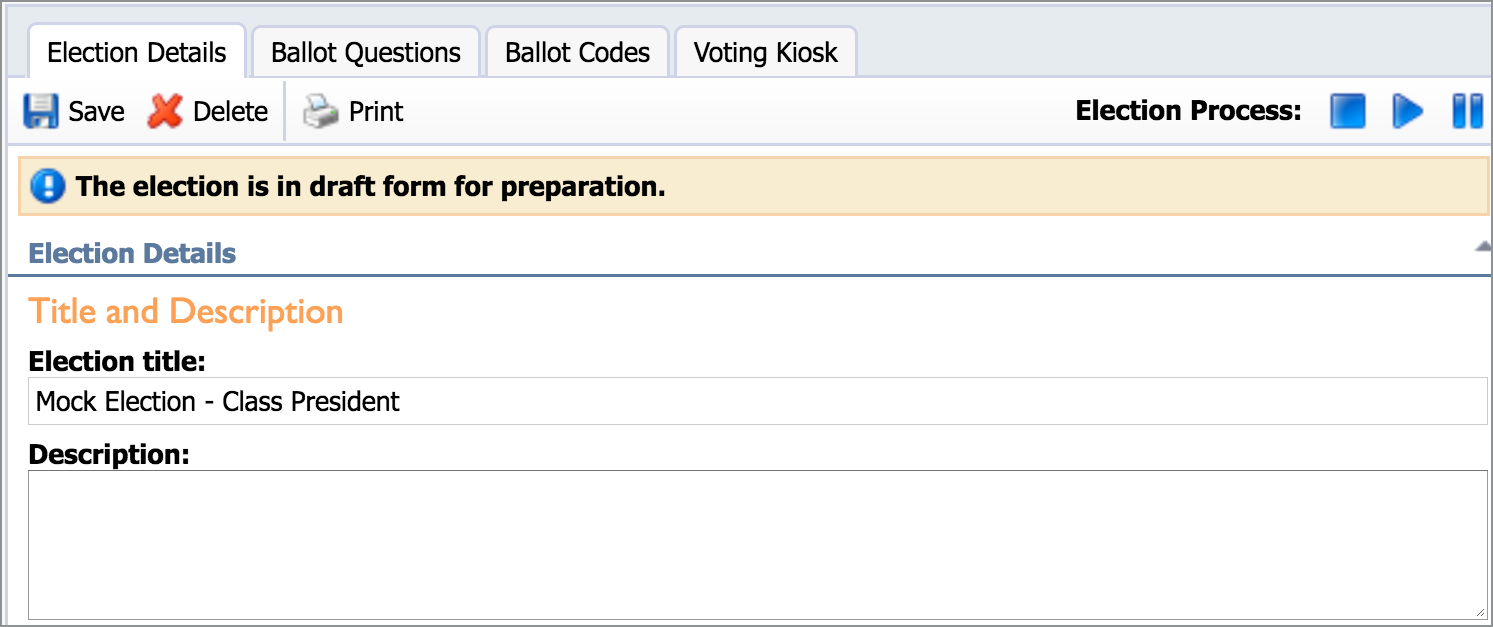
Election Details Tab
The election title and description can be edited on this tab.
Toolbar Icons
Save – Updates the information added to the election.
Delete – Removes the election from the documents.
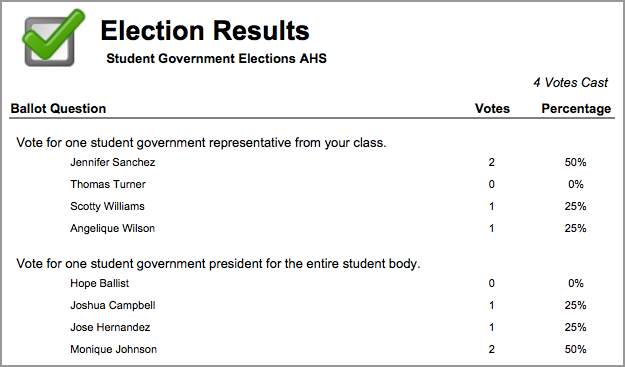
Print – Creates a PDF document with results of the election and the tally of how many participants voted in the election.
Election Status Icons
 Stops the election; no participants can vote.
.png) Begins the election; allows participants to vote.
Begins the election; allows participants to vote.
.png) Pauses the election.
Pauses the election.
Adding Questions on the Ballot Questions Tab
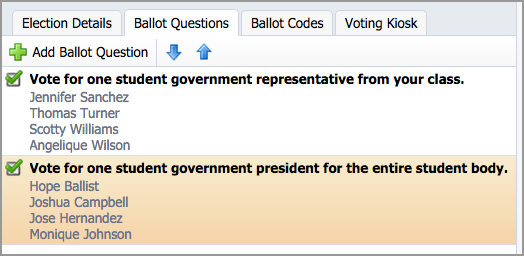
To create a ballot question, click Add Ballot Question.
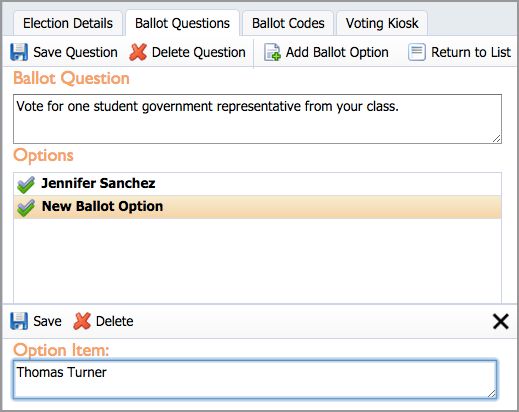
Double click New Ballot Question to begin editing.
Type the ballot question in the appropriate text box.
Click Add Ballot Option to begin entering the choices for voting.
Click on the New Ballot Option to open the Option Item editing window at the bottom of the screen.
Type in a voting option and click Save at the bottom of the screen. Add additional options and save after each item addition.
Click Save Question in the top toolbar when the question and voting options are complete.
Use the up and down arrows to reorder questions in the list.
Click Return to List to see all questions on the ballot.

Ballot Codes Tab
The Ballot Codes tab allows you to upload a list of potential codes. These codes can ensure that each voter only votes once. Ballot codes could be student IDs or randomly generated assigned numbers. Using ballot codes is optional. If no ballot codes are used, a person could technically vote more than once in an election.
Make sure the file you upload is a text file with a single code on each line with no header. For example, create a spreadsheet with a list of codes in one column and do not label the column. Save the file as a text (tab delimited) file.
To upload ballot codes, click Choose File, browse for the file and upload the file. Then complete the process by clicking Load.
To start over, click Erase Codes & Votes to reset the process.
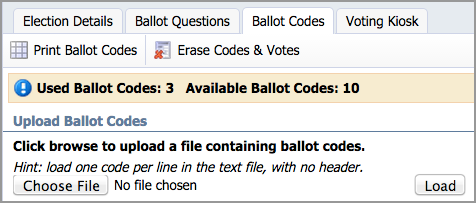
Once the codes have been uploaded, the banner shows the available ballot codes and the number of codes that have been used.
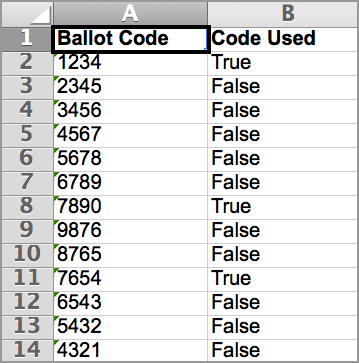
Print Ballot Codes opens a spreadsheet of the ballot codes with True or False if that ballot code has been used or not.
Voting Kiosk Tab
To begin the election, click Open Kiosk to begin voting. It's a good idea to close the browser window before voting so that only the voting kiosk appears on screen.
.png)
Make sure to go to the Election Details tab to begin the voting process by using the start, stop, and pause buttons.
Multiple Kiosks can be opened as needed on multiple computers.
Make sure when voting, voters complete the entire ballot and click Cast Ballot to enter their vote.
.png)
Results of the election can be found on the Election Details tab by clicking the Print button.
.png)
