Aware can accommodate up to five performance levels on local assessments. A district administrator with the Create Local Assessment Tests right can set the names of the performance levels for the district.
The administrator can then manage performance level defaults for each test type. When creating a new assessment, the test will inherit the default percent score cut points for its test type; however, individual assessment authors can change the percentages for a specific test.
Note: Rubric tests do not currently use performance levels.
Naming District Performance Levels
A district administrator will set up the five performance level names for the district to use across all local assessment test types.
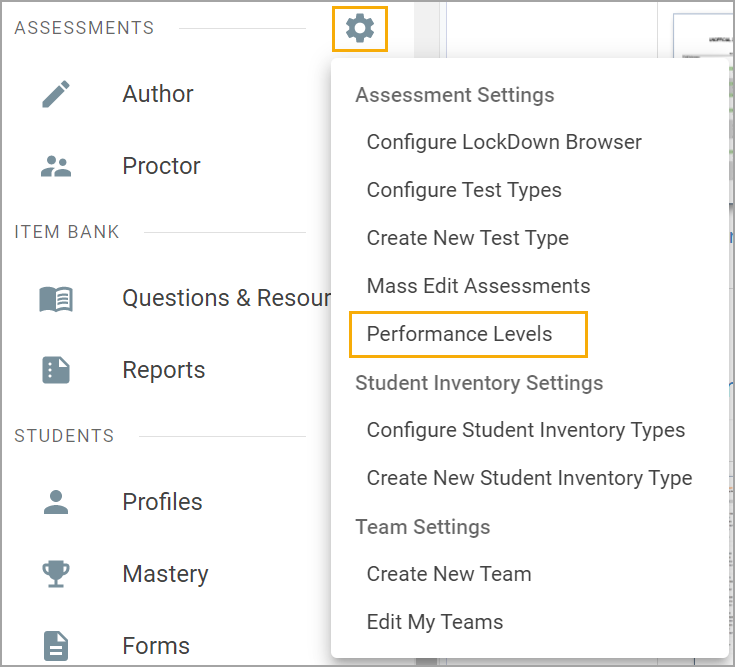
Step 1: Click on Performance Levels under the Assessments Settings gear.
Step 2: Type the names of the performance levels for use across the district, then click Save.
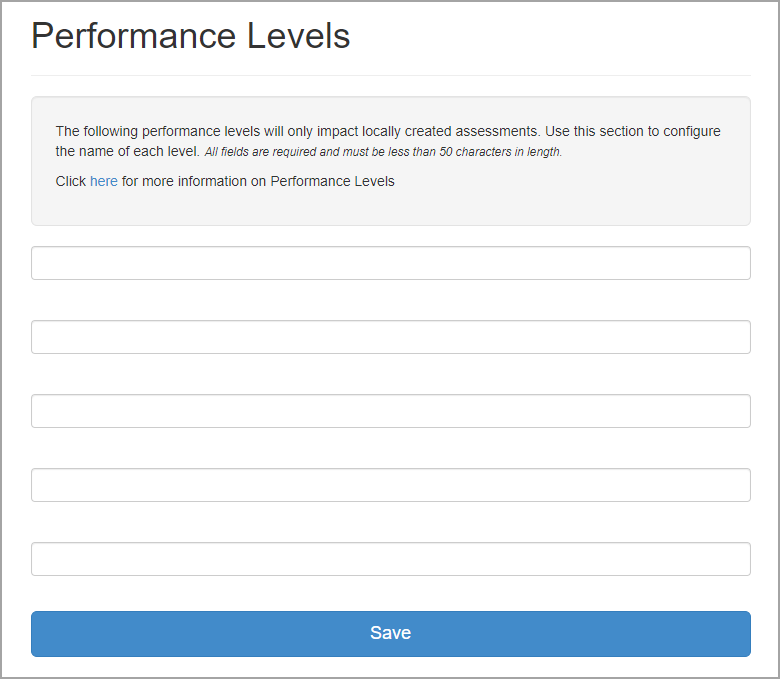
Because assessment authors will be able to see and use any and all of these possible performance levels, it is recommended a district name all of them in ascending order and develop logistics for how they might be used on different test types.
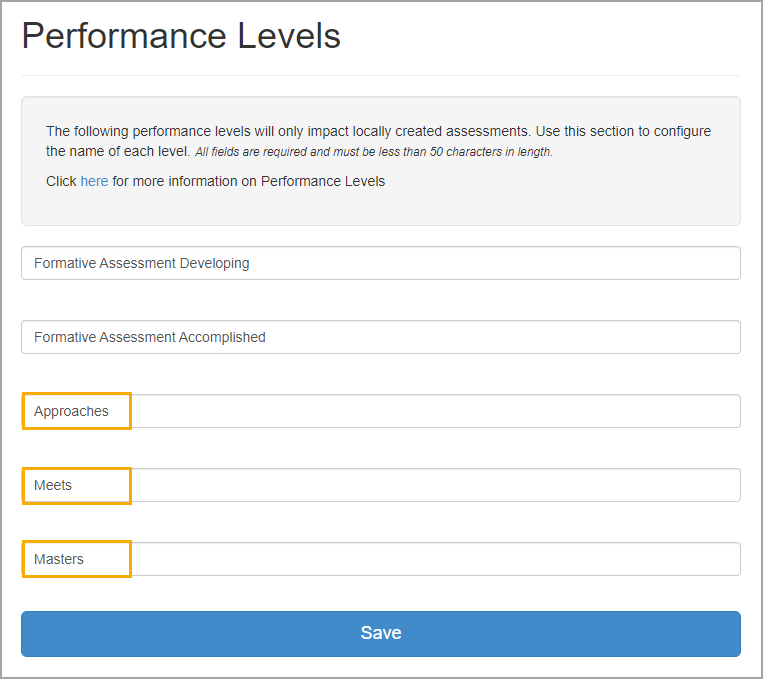
In cases where separate sets of performance levels are desired—for example, having Satisfactory and Advanced as one set and Approaches, Meets, and Masters as another set—an administrator should list these sets as below:
Satisfactory
Advanced
Approaches
Meets
Masters
In this scenario, a district may want the following example cut points for a District Unit Test test type:
Satisfactory - 70
Advanced - 90
Approaches - 54
Meets - 73
Masters - 87
Because the numerical values are not in ascending order, only one set of performance levels should be enabled at a time (Satisfactory and Advanced OR Approaches, Meets, and Masters). Having both sets enabled would impact how the Highest Performance Level Achieved column in Quick Views is intended to operate.
If districts want to compare/summarize local tests with STAAR, Approaches Grade Level, Meets Grade Level, and Masters Grade Level must go in performance levels 3, 4, and 5, respectively. If you have questions, feel free to contact support@eduphoria.net or training@eduphoria.net.
Applying District Performance Levels to Test Types
Once a district administrator has named the performance levels, they can apply them and establish their cut points to specific test types.
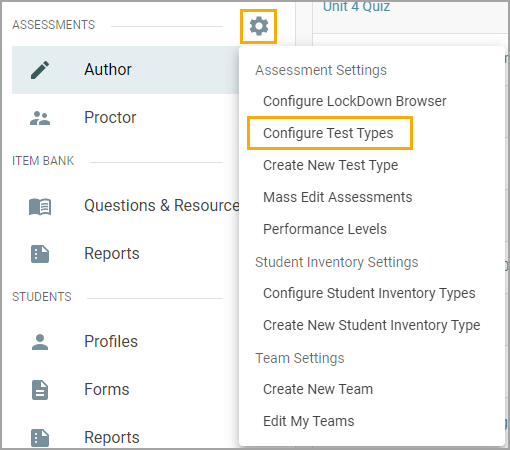
Step 1: Select Configure Test Types under the Assessments Settings gear.
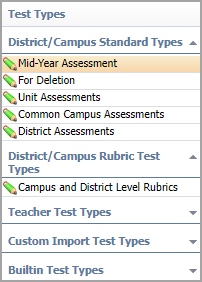
Step 2: Select a test type under District/Campus Standard Types.
Step 3: Click Edit Performance Levels under Performance Level Configuration to open a configuration modal.
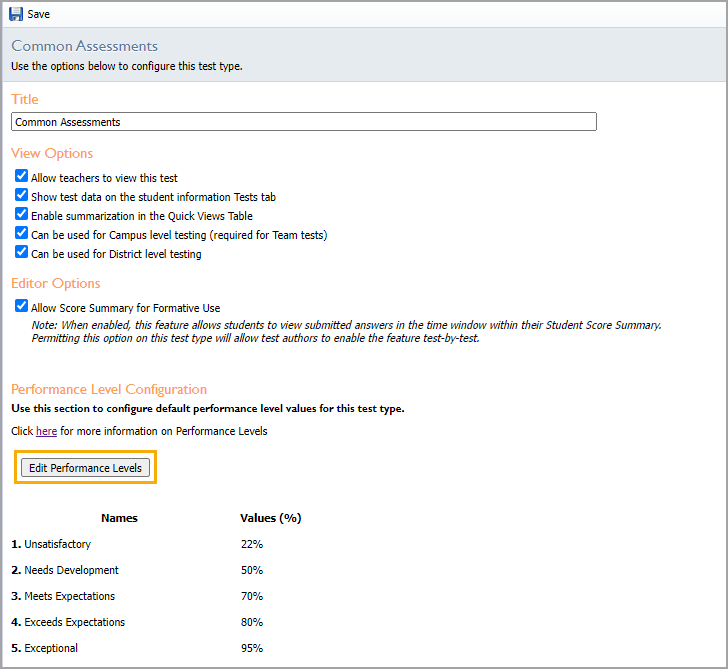
By default, historical test types will maintain any cut points they had before. You can update the cut points by inputting new ones in the Percentage box. However, for the new performance levels to apply to any historical tests, the test author will need to rescore the test.
Step 4: Check the boxes beside each performance level to include the levels you want, and uncheck the ones you don’t want. All unchecked performance levels will be turned off and will show blank fields if pulled into a data view.
The modal will automatically update to reflect your selections and percentages.
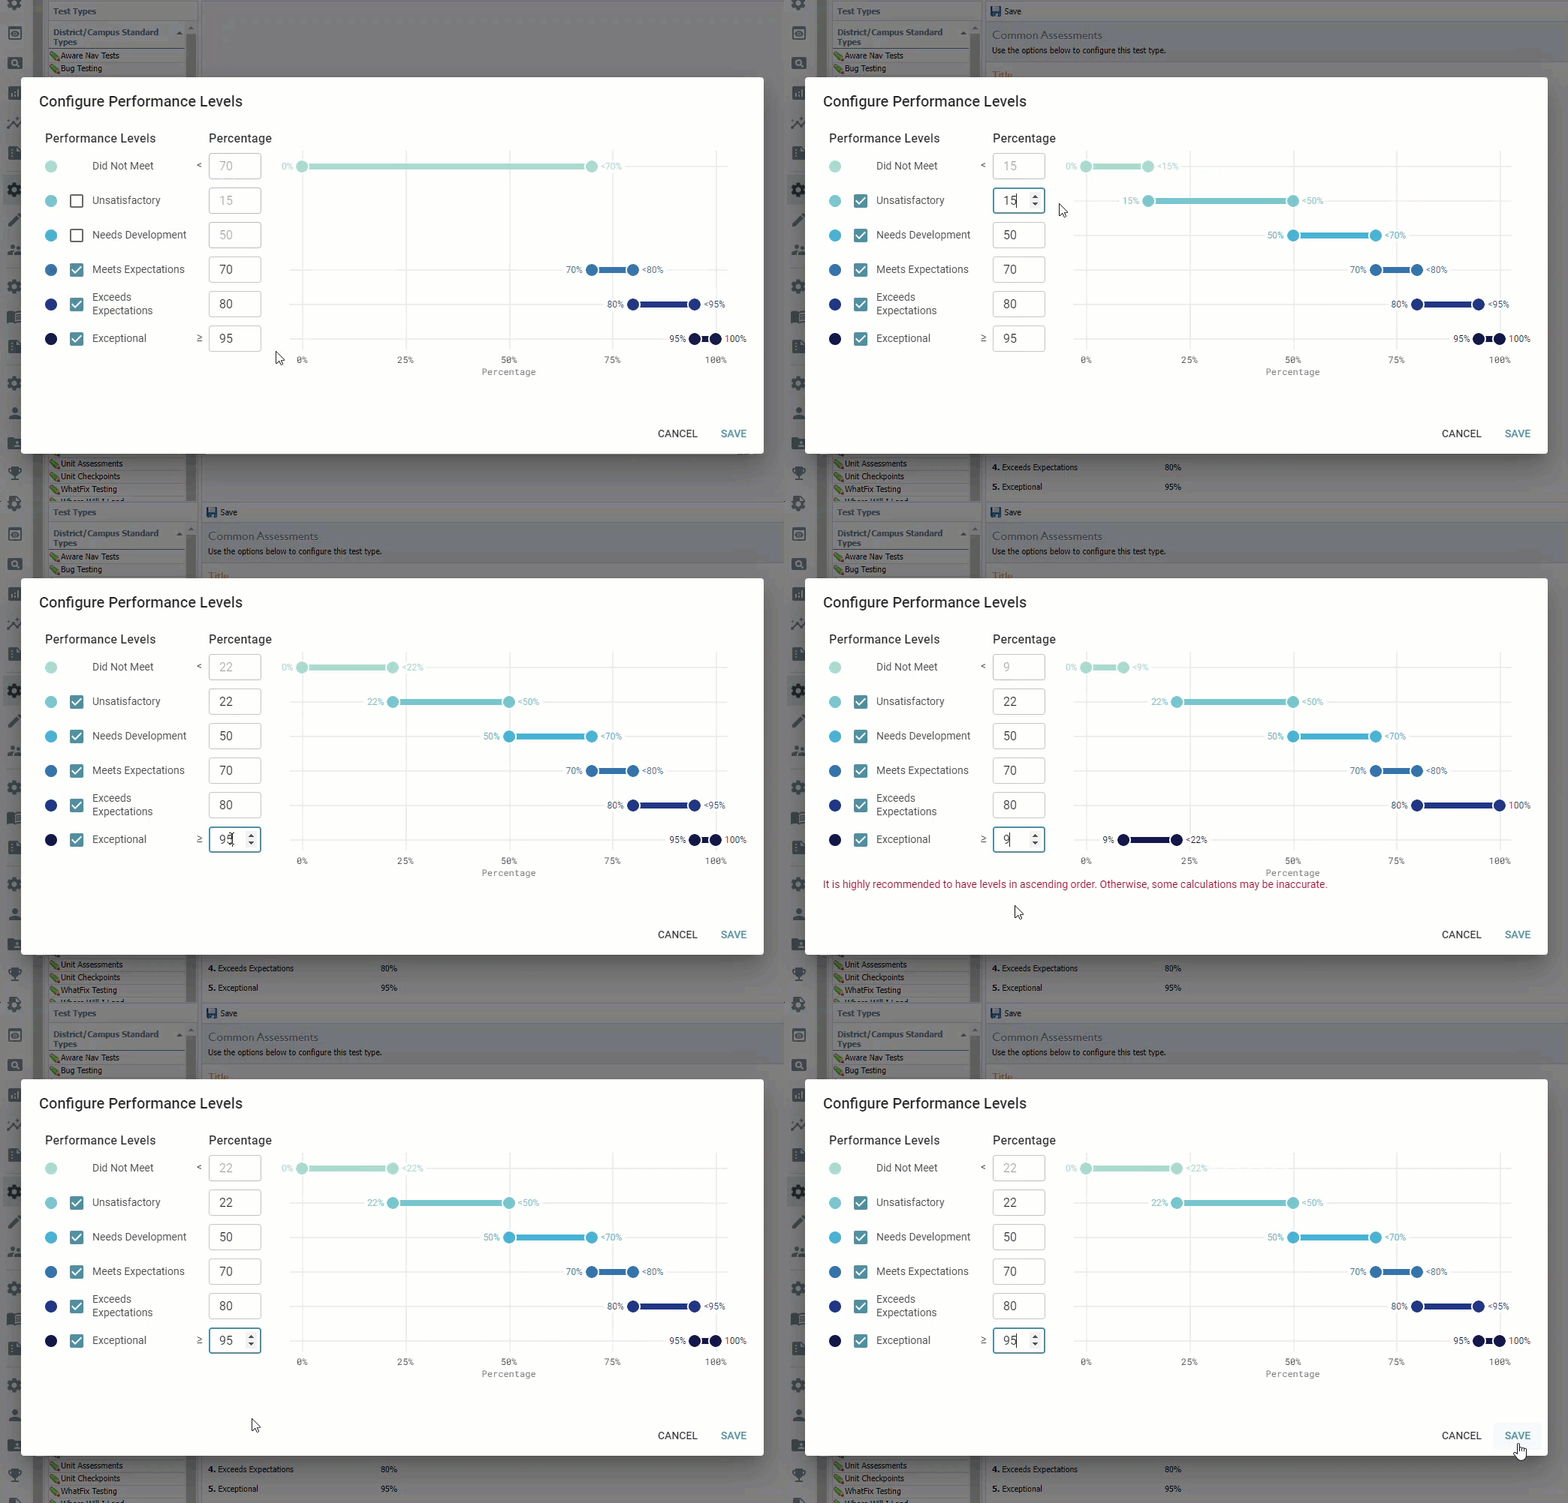
A warning will display if your levels are not listed in ascending order by percentage. Though not recommended, you will be given the option to confirm if that is your intention.
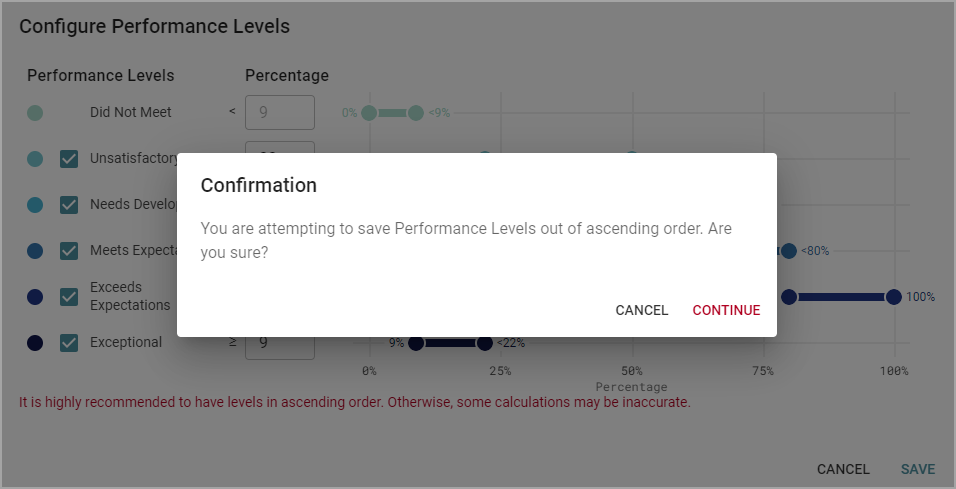
Caution: Saving performance levels out of ascending order will not allow the Highest Level Achieved column in Quick Views to function as intended. Functionality can be restored if a user turns off the performance levels at the assessment level or edits their percentage cut points.
Step 5: When finished, click Save on the configuration modal, then Save again on the test type window.
Be sure to check the appropriate boxes under View Options, so the test type can be used for District-level testing or both District- and Campus-level testing.