Appraisal administrators can edit and update evaluation templates. The best time to edit evaluation templates is between the end and the beginning of an evaluation year.
Warning: Do not update or change existing and in-use templates during the evaluation year. Instead, it is best practice to make a copy of in-use templates, which retains all settings and items of the original template.
To learn how to create an evaluation template and import a template in Form Management, visit Creating a New Evaluation Template and Importing Eduphoria Community Templates, respectively.
Editing Existing Evaluation Templates
Existing evaluation templates can fall under any of the following form types:
Evaluation
Intervention
Observation
Reflection
Summative
Walkthrough
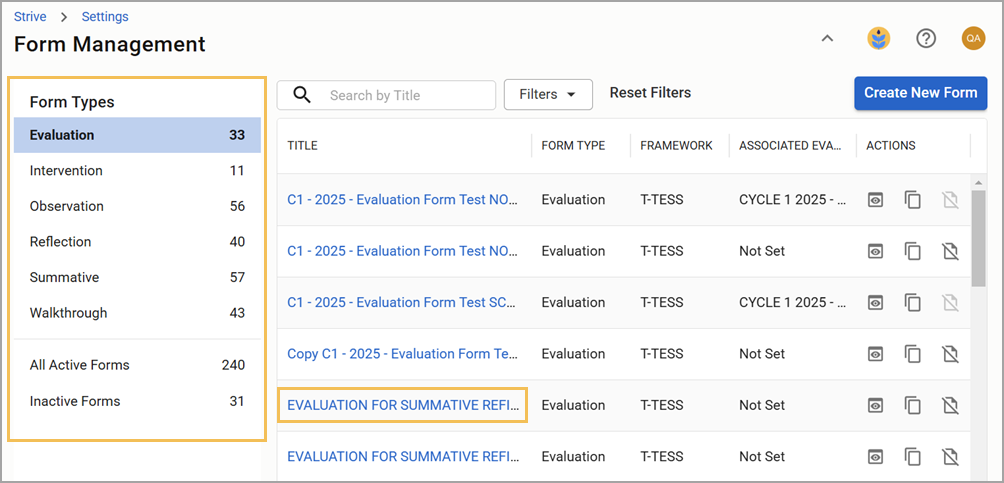
After selecting a template form, you can edit the following tabs:
Template Information Tab
You might want to rename or change basic information about a form template. Use the Template Information tab to make the following specific changes:
Change the Title of the form — Edit the title under General Template Information.
Change the Template Icon — Edit the icon under by clicking the icon to pull up other icon choices.
Deleting a template — Select Delete Template from the top toolbar.
Change how the template is scored — Change from simple, not scored to advanced, with calculations. View Setting Up a Template for Scoring for more information.
Select the Framework tied to the form — Use the drop-down menu to select a specific framework for the evaluation form.
Preview the form — Select Preview to see the content and organization of the template.
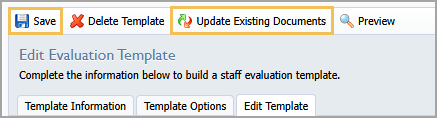
After making changes to Template Information, click Save to save changes. Click Update Existing Documents to push out updates to the document version shared with the Eduphoria Community.
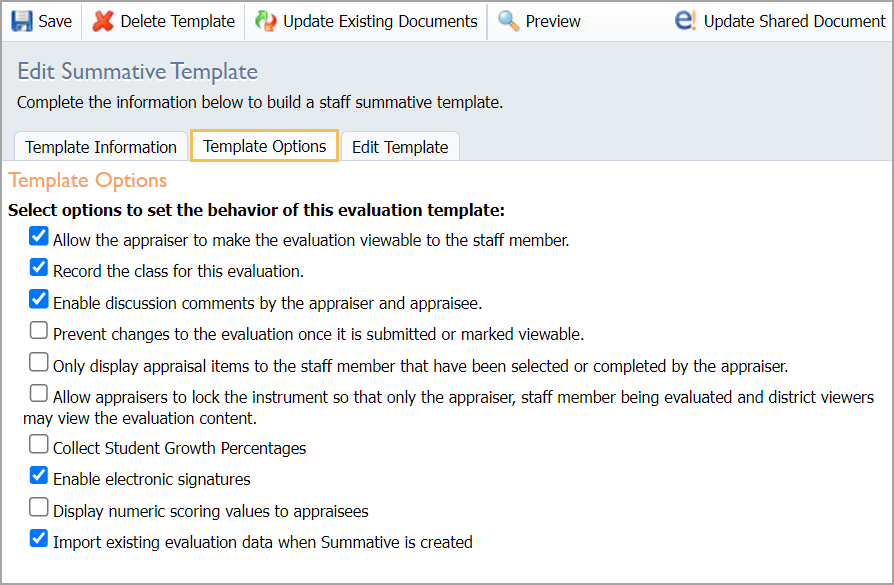
Template Options Tab
Template Options differ between form types. Check the boxes next to options specific to each form. Click Save to save changes and Update Existing Documents to push out updates to the document version shared with the Eduphoria Community.
Edit Template Tab
Under the Edit Template tab, you can add new groups, matrix groups, or items to an evaluation template.

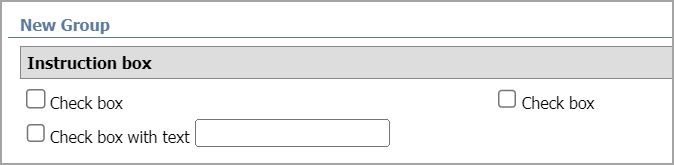
Groups
A group contains one or more items.
For instance, a section on a form entitled “Classroom Management” may contain several checkboxes about how teachers manage their classrooms. The entire “Classroom Management” section is the group, and the individual checkboxes are each an item. You can also use groups to create headers for a form without attaching items to it.
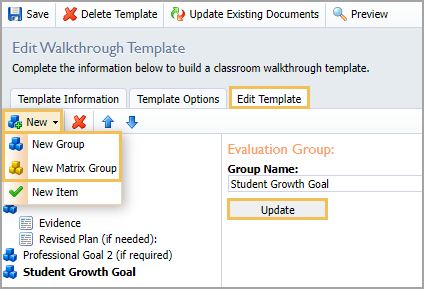
The image below shows a New Group, which includes an instruction box, two checkboxes, and one checkbox with a text field.
Items
Items can be checkboxes, checkboxes with text, comment boxes, instructions, professional goals, or student growth goals.
Matrix Groups
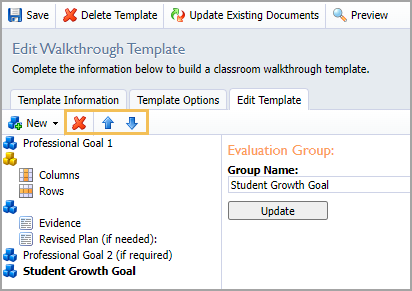
Matrix groups are special groups designed to store information in columns and rows. You can have as many rows as desired, but you can only have up to five columns. Ideally, you use matrix groups to rate staff in various areas up to five levels of performance.
Below is a preview image of how a New Matrix Group appears as columns and rows in a form.

Note: Matrix questions are required for collecting data in Detailed Analysis.
Creating and Managing Groups
Follow these steps to create and edit new groups within an existing template.
Select New and choose New Group or New Matrix Group from the drop-down menu. Type in a name for the new group under Group Name and click Update. Continue adding as many groups as needed.
To rename a group, select the Group Name field, enter a new name, and then select Update.
Use the Up or Down arrows to change the order of the groups.
Click the red X to delete the selected group or item.
Remember to select Save before exiting the screen.
Adding Items to Groups
Once you’ve added a group, you can add and edit items.
Note: This applies only to regular groups. You cannot add items to matrix groups. To learn how to edit matrix groups, see Adding a Column to a Matrix Group.
Step 1: Select the group you want to add items to.
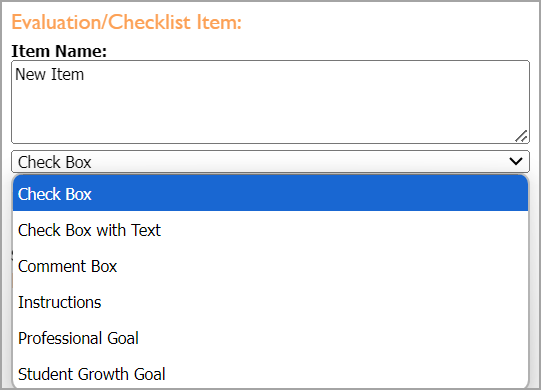
Step 2: Select New and choose New Item from the drop-down menu.
.png)
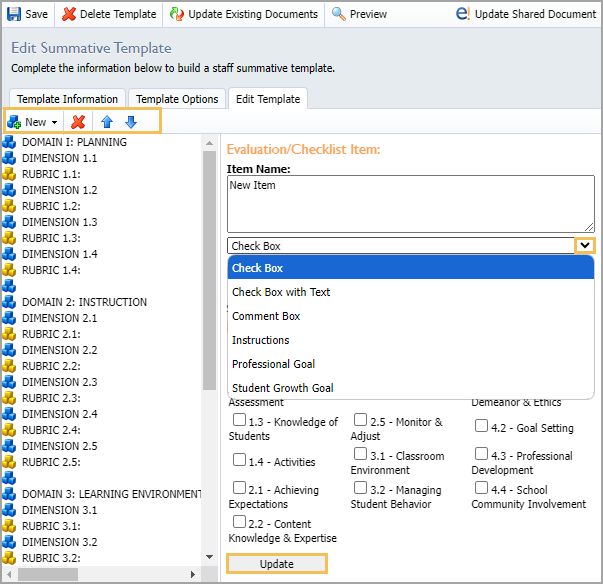
Step 3: Type in the name of the new item under Item Name and choose from the following items in the drop-down menu:
Check Box — Allows the evaluator to make selections by clicking the box.
Check Box with Text — Allows the evaluator to type text next to the checkbox, such as when you have an “Other” option.
Comment Box — Allows the evaluator to enter text, and you will need to select how many lines tall this box should be.
Instructions — Provides instructions about the template itself.
Professional Goal — Pulls enhanced professional goal information from the Evaluation Process tab into a form.
Student Growth Goal — Pulls enhanced student growth goal information from the Evaluation Process tab into a form.
Note: Check box with Text does not function on handheld devices.
Step 4: Select Update to add the item to that group.
Step 5: Continue adding as many items as needed.
Step 6: Change the item order with the Up or Down arrows.
Step 7: Click the item name again to rename the item.
Step 8: Click the red X to delete an item.
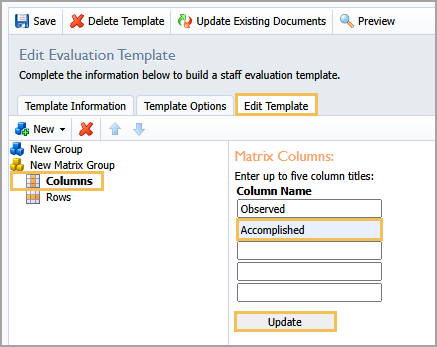
Adding a Column to a Matrix Group
Matrix groups can have up to five columns.
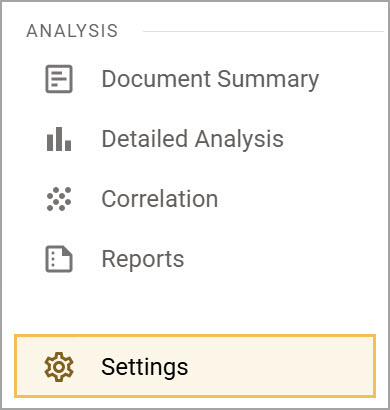
Step 1: Select Settings.
Step 2: Select Form Management.
Step 3: Open the template you need to edit.
Step 4: Under the Edit Template tab, select the Matrix Group to open up and reveal the Columns.
Step 5: Click on Columns, enter an option for a second column, and click Update.
Step 6: Click Save and then click Update Existing Documents.
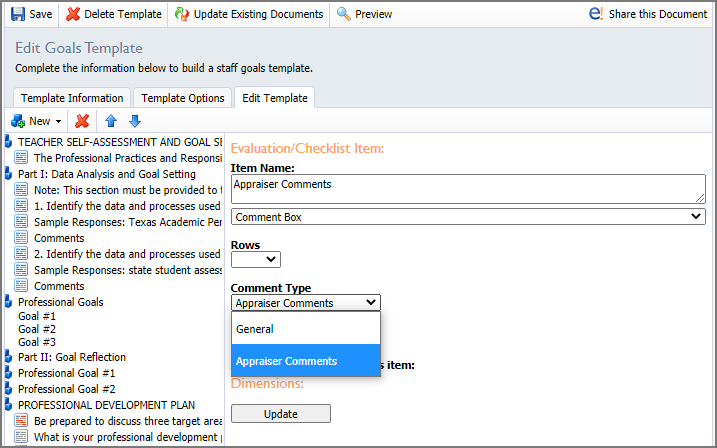
Adding Appraiser Comments to a Reflection Template
To allow the evaluator to make comments on a Reflection document, create a new item and select Comment Box as the item type. Then, use the drop-down menu to select the Comment Type and set it to Appraiser Comments.
 Once you add all the necessary groups and items, you can use the Preview button to see how the new template will look. Remember to click Save to save changes to the template.
Use the Delete Template button at the top to delete this template.
As you change the template, it will not modify the existing evaluations created using this template. However, if you wish to retroactively update all existing evaluations that have used this template to match your changes, click Update Existing Documents to update any completed templates. Use caution when updating a template, as you can erase information.
Note: To make your new evaluation template available to the evaluator, connect it to an Appraisee Type that uses that template for evaluations.