This article provides instructions for authoring an eCourse in Strive as well as steps for adding assessments, links, and embedded videos to the eCourse.
Authoring a New eCourse Element
To author an eCourse, follow these steps:
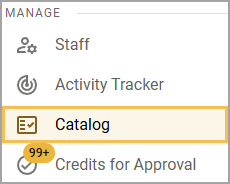
Step 1: Select Catalog from the main menu.
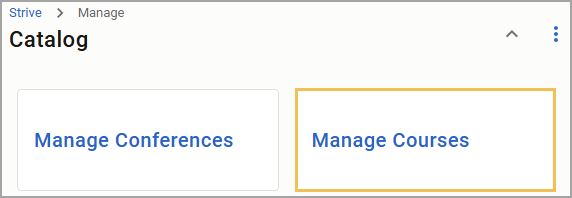
Step 2: Select Manage Courses.
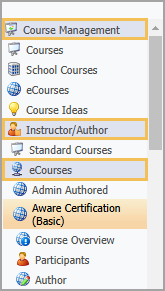
Step 3: On the Courses screen, select Instructor/Author and expand eCourses. Then, choose the eCourse you want to edit under eCourses.
Step 4: Select Author.
Note: If the course author is different from the instructor, the author only sees the Author button and not the Course Overview and Participants buttons.
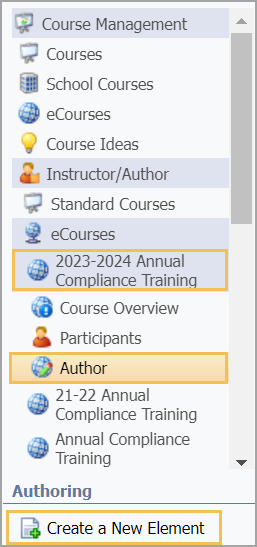
Step 5: Select Create a New Element to add or copy course content.
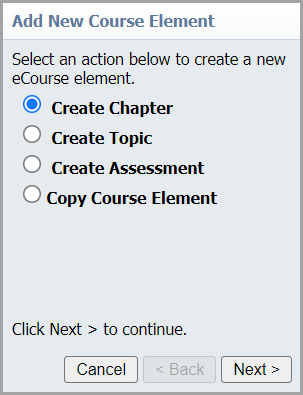
eCourse Content
An eCourse is composed of chapters.
A chapter is a collection of topics and assessments.
Assessments can either be for practice or graded.
A practice assessment allows the attendee to see the correct answers and take the test again.
A graded assessment locks students' answers for the instructor to review. Clicking on any chapter, topic, or assessment allows you to edit that element and change the order of elements using the blue arrows on the top toolbar.
Selecting a topic allows you to begin fleshing out or editing that topic using familiar word-processing options such as bullets or alignment. There are also several options unique to the eCourse.
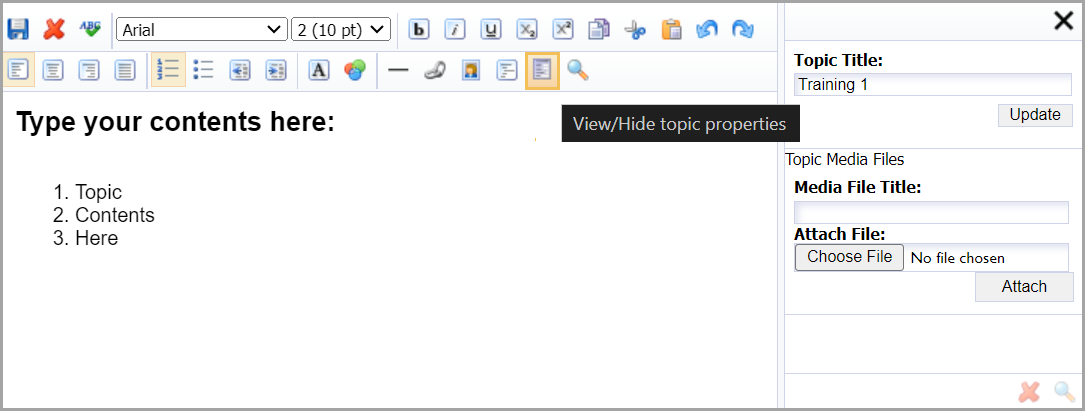
Select the View/Hide topic properties button to display and hide the properties pane. Here, you can change the topic's title and add media files. You can add any file type to the topic. Participants in the eCourse can easily view these attached files by selecting the View Topic Files button at the top of a topic.
The Insert Picture button opens a new window where you can upload a picture and then set the spacing, border, and text position for that picture.
Adding an Assessment
The assessment feature can be used for various purposes, including building full tests, quizzes, and quick checks, uploading assignments to a course, adding one-question agreements, and more.
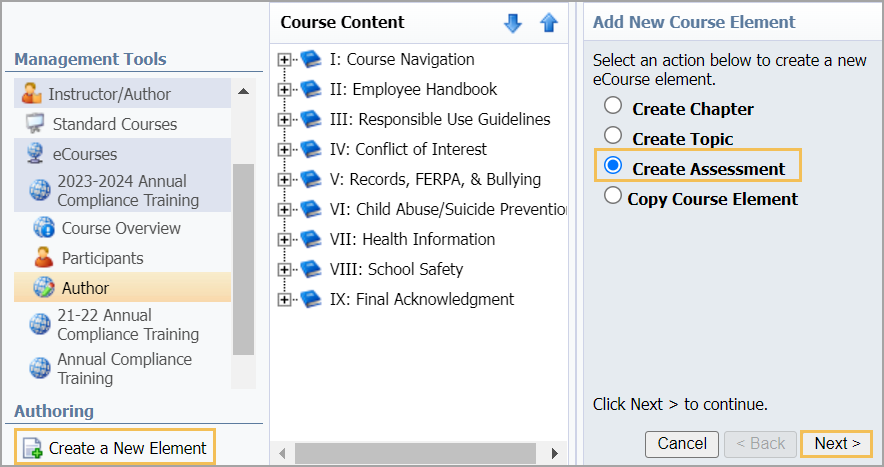
Step 1: To create an assessment, select the Create a New Element button under Authoring.
Step 2: Select Create Assessment, and then select Next.
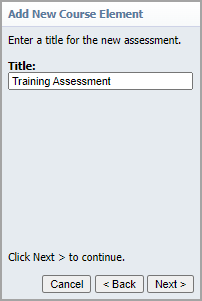
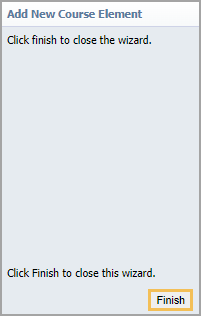
Step 3: Name your assessment, and select the chapter where you want the assessment to appear. Then select Finish.

Step 4: Using the assessment builder, select the Add Question button to begin building your assessment.
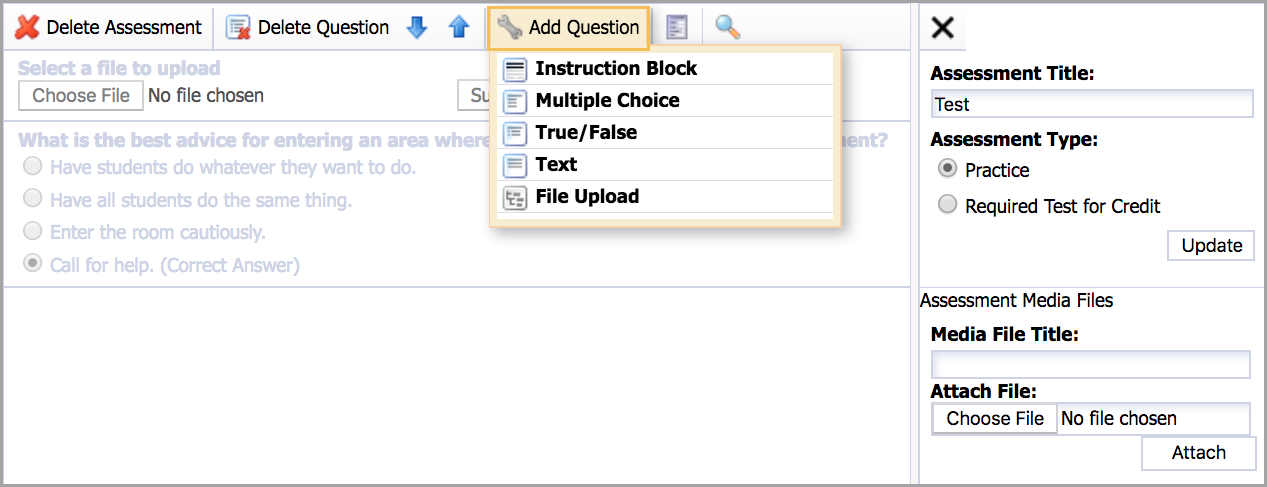
Editing an assessment is very similar to other form generations in Eduphoria tools. Assessments are essentially a series of questions created by selecting Add Question and then choosing the type of question you would like to add.
Question types include the following:
Instruction Block for providing directions
Multiple Choice (Scored by the system)
True/False (Scored by the system)
Text for fill-in-the-blank, short answer, and essay questions
File Upload to allow enrolled participants to upload an electronic document such as a presentation file or research paper for the eCourse Author/Instructor to view
Selecting a question allows you to enter that question and select the correct answer. You can then use the blue arrows and the Delete Question button to rearrange and finalize your assessment.
Note: Course instructors can only view assessment results that are required for credit.
The View/Hide topic properties button opens the assessment properties pane. Here, you can change the title and select whether this assessment is to be Practice (not graded) or Required Test for Credit (graded).
Just like in a topic, you can add in any number of file types you need. For instance, you could add a Word document that needs to be completed and then uploaded into a question for review. Also, as in a topic, the Magnifying Glass icon displays a preview of the assessment as an attendee would view it. The Delete button removes a question or the entire assessment as needed.
Once all chapters, topics, and assessments are completed, the professional development administrator can activate the course. The e-course is then ready for registration.
Adding Links and Videos
You can add links and videos to topics by either inserting or embedding a web link.
Inserting a Web Link
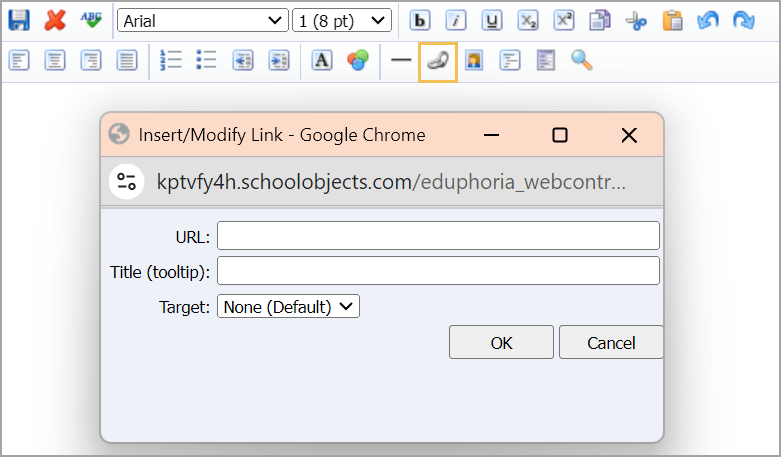
Follow these quick steps to insert a web link:
Highlight the text you want to link.
On the toolbar, click the Insert Web Link icon.
In the URL field, enter the web address.
In the Title field, you can add a tooltip to display information about the link when a cursor hovers over the linked text.
Use the Target drop-down menu to determine how the link opens.
Select OK when finished.
You can also add links and embed videos by using the Toggle HTML Source button.

First, you need to get the embed code for the resource you want to use. The video resource needs to be stored online in a video application, such as YouTube.com, such as in the steps listed below.
Step 1: Go to YouTube.com and access the video you want to use in your eCourse. Below the video, click on the Share button.

Step 2: In the resulting Share in a post window, select Embed.
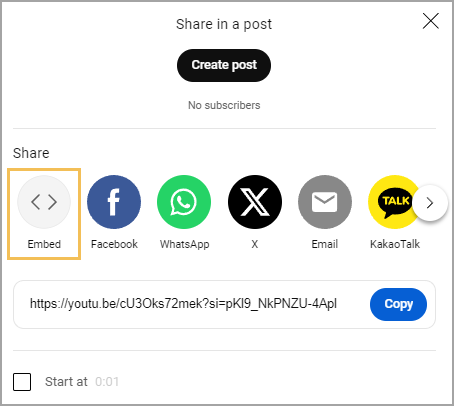
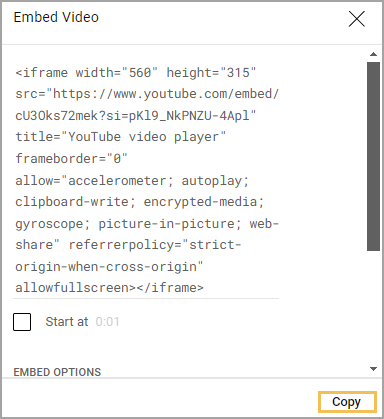
Step 3: After you click on the Embed button, the code appears. Select Copy.
Step 4: Return to your eCourse and select the area where you want to place the video.
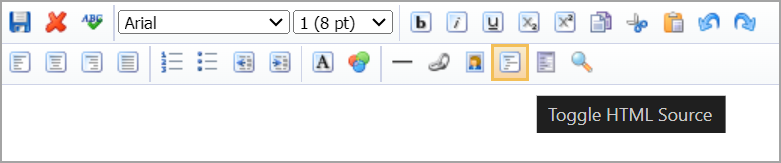
Step 5: Use the Toggle HTML Source button to view the html code. The page displays the html code for any text or information that was previously entered.
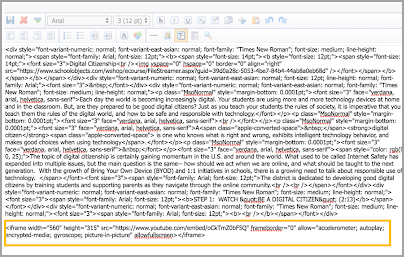
Step 6: Paste the Embed code that you copied from YouTube.com.
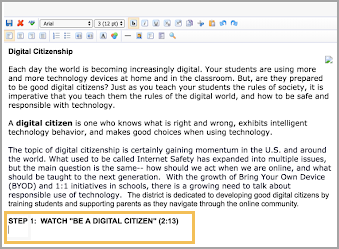
Step 7: Select Toggle HTML Source again to return to the normal view. If the video was successfully embedded, it appears on the page.

Embedding Other Types of Content
You can embed Google Forms, Google Docs, and .pdf documents stored in your Google Drive. When embedded, the content appears in the course window, so the user does not need to leave the eCourse to access content.
Before you embed a document or form, go to the document in your Google Drive and change the sharing settings to "Anyone with the link." If the share settings are not correctly set, the document does not appear in the eCourse.
To embed a Google Form in your course:
In Google Forms, open a form.
At the top right, click Send.
At the top of the window, click Embed.
To copy the HTML that appears, click Copy.
Paste the HTML into your site
To embed a Google document in your course:
Step 1: To embed a document, open the document in your browser. Select File, hover over the Share option, and then select Publish to the web.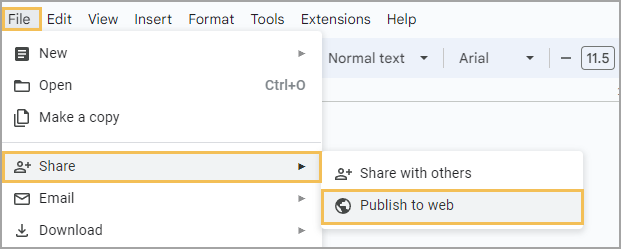
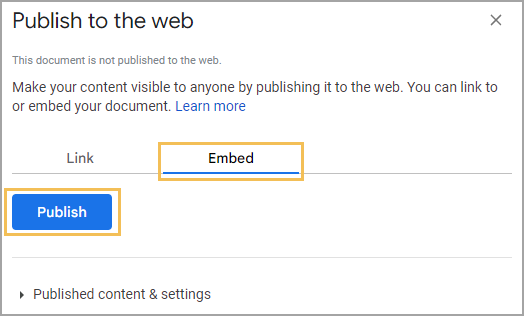
Step 2: On the Embed tab, click the Publish button.
Step 3: In the resulting confirmation window, select OK. 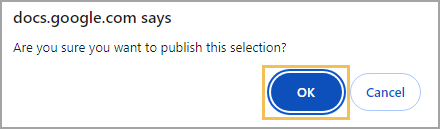
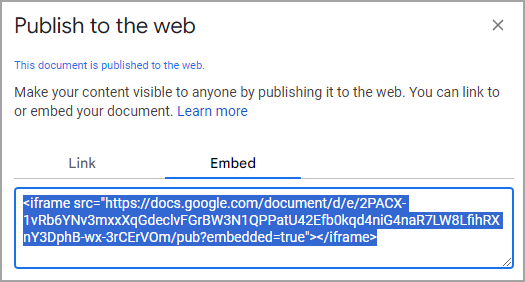
Step 4: Copy the Embed code.
Step 5: Return to your eCourse and select the area where you want to place the document.
Step 6: Use the Toggle HTML Source button to view the html code. The page displays the html code for any text or information that was previously entered.
Step 7: Paste the Embed code that you copied from the document.
Step 7: Select Toggle HTML Source again to return to the normal view. If the document was successfully embedded, it appears on the page.
Note: If you make any changes to the original document, you need to re-publish it, but you do not need to complete the embed steps again.