Eduphoria supports Secure Assertion Markup Language (SAML), which lets you provide single sign-on (SSO) access to Eduphoria staff and student accounts. With SSO, users can sign in once using their organization’s sign-in credentials to gain access to multiple systems and service providers, including Eduphoria products.
Caution: To support electronic signatures with SAML, we require users to authenticate with the IdP every time they access the software. This ensures that the proper user is logged in if a different user signed a document on the machine earlier.
The following instructions walk you through the process of setting up Microsoft Azure Active Directory (AD) and Eduphoria, so your users can log in to Eduphoria with their Microsoft Azure AD account.
Warning: Activating SAML authentication will prevent users from being able to login with an Eduphoria account. If you activate SAML with errors in the configuration setup, you will need to contact the Eduphoria support team to disable SAML due to the fact that you won't be able to log in. Eduphoria's support team must be made aware of when your district is making the configuration change so they can be on standby.
Configuring Microsoft Azure AD
Step 1: In a browser, navigate to https://portal.azure.com/ and log in.
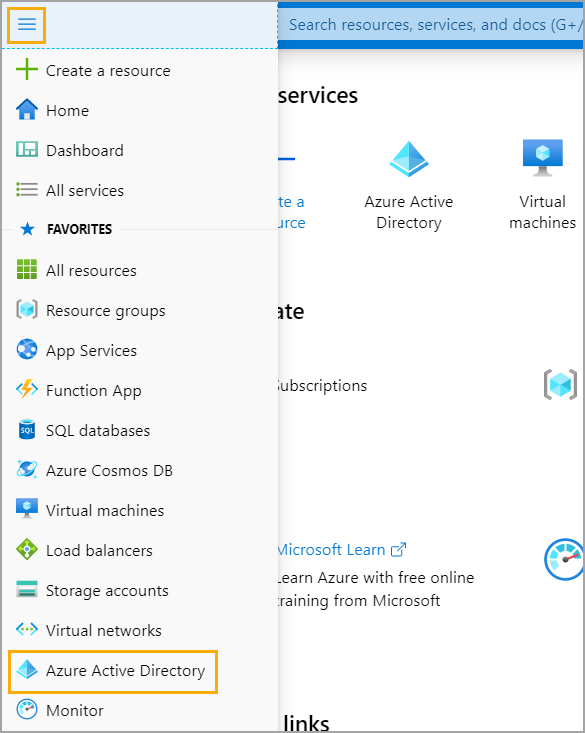
Step 2: From the portal menu, select Azure Active Directory.
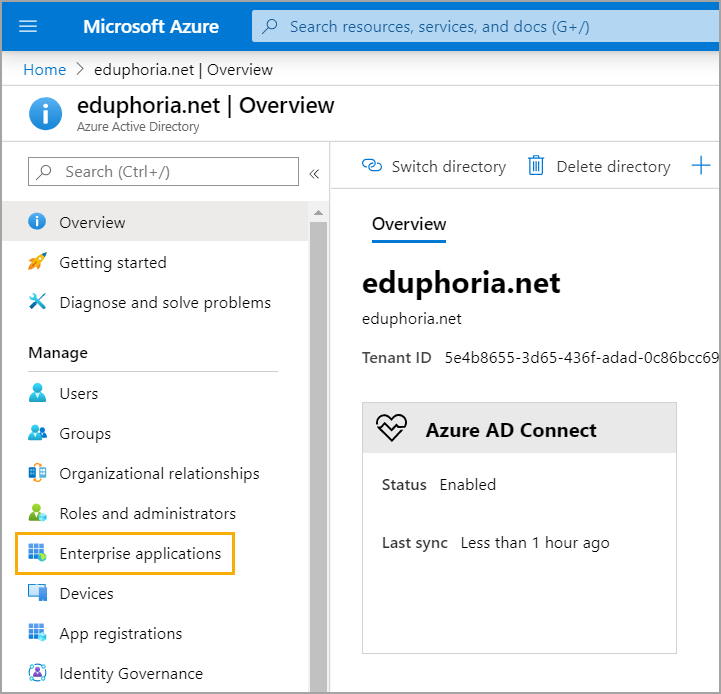
Step 3: Select Enterprise applications.
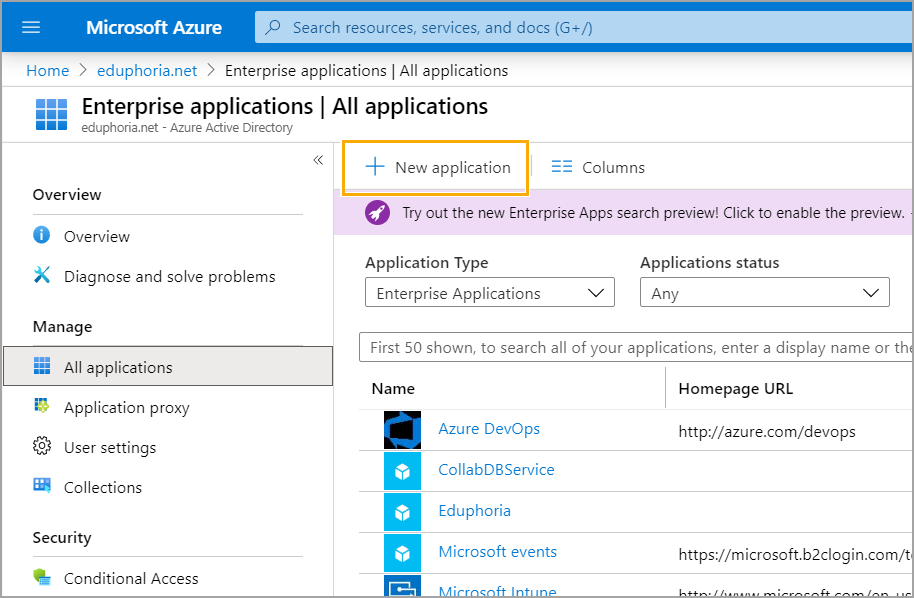
Step 4: Click the New application button.
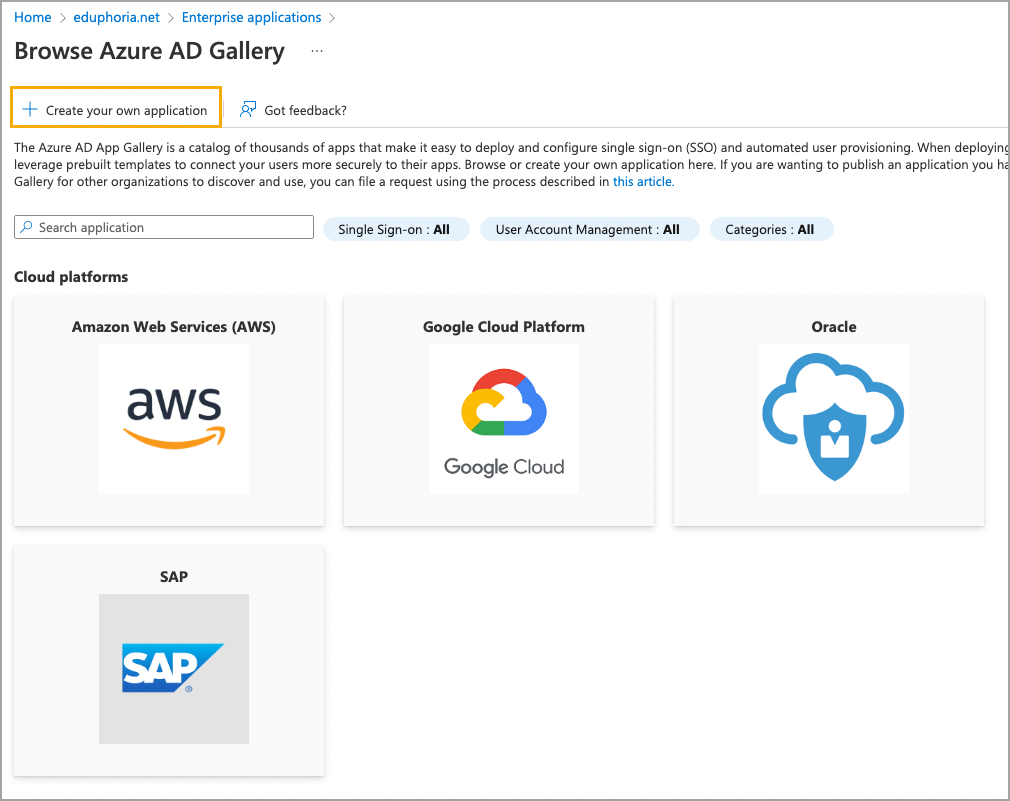
Step 5: On the Browse Azure AD Gallery screen, select Create your own application.
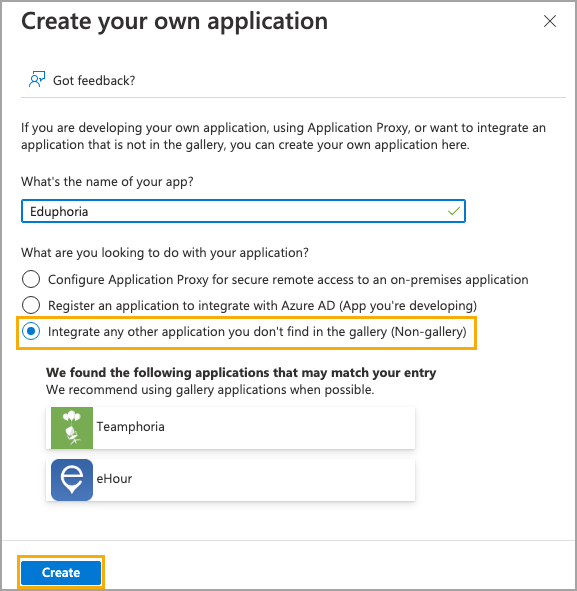
Step 6: On the Create your own application screen, select the option to Integrate any other application you don’t find in the gallery (Non-gallery). Then, click Create.
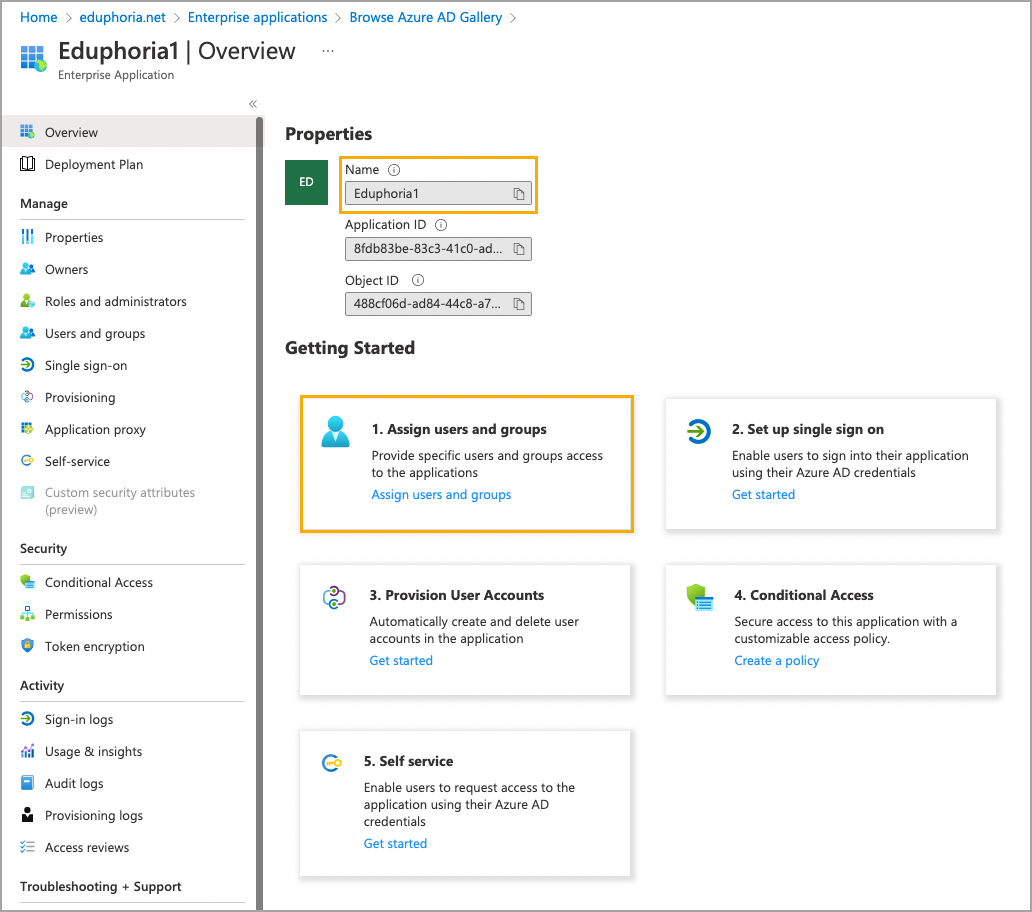
Step 7: In the new screen, type Eduphoria in the Name dialog box, and click Add. On the Overview pane, select 1. Assign users and groups.
Click Add user, then select Users and groups.
In the search box, search for and select the users and groups you want to allow to log in to Eduphoria. Click the Select button, then click the Assign button on the next screen.
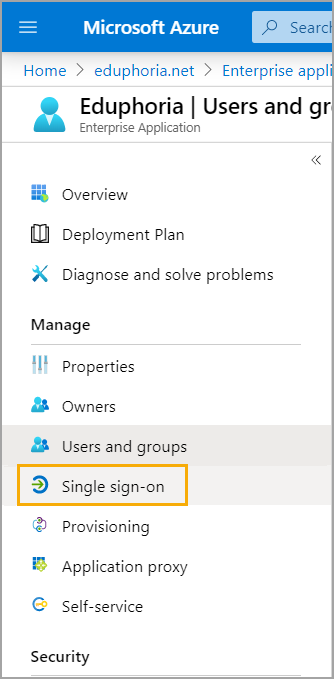
Step 8: Select Single sign-on.
Select the SAML option.
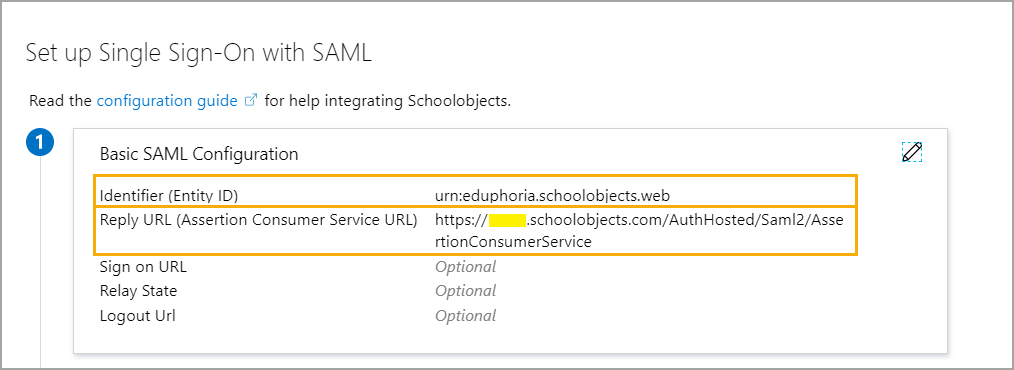
Step 9: In the Basic SAML Configuration section, click the Pencil icon to edit and then update the Identifier (Entity ID) and Reply URL with the information below. When finished, click Save. Don't make any other changes to this section.
Identifier (Entity ID): urn:eduphoria.schoolobjects.web
Reply URL: https://districturl.schoolobjects.com/AuthHosted/Saml2/AssertionConsumerService
(Replace districturl with your district’s customized Eduphoria URL.)
Step 10: In the SAML Signing Certificate section, download the Certificate (Base64), and save it somewhere you can easily find it. You will need access to the certificate when you are configuring Eduphoria in the steps below.
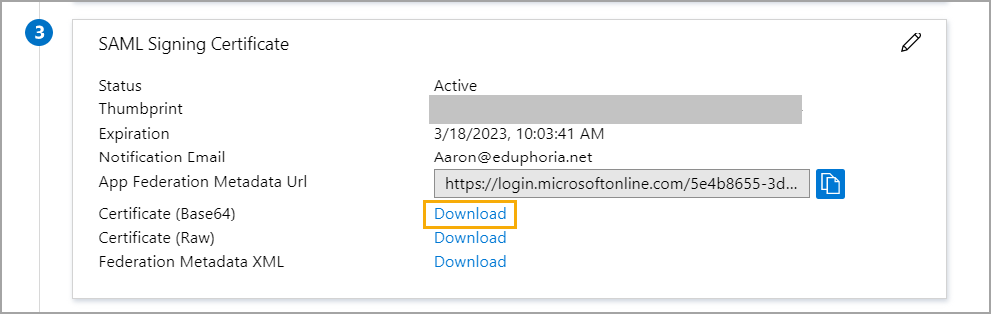
Step 11: In the Set up Eduphoria section, copy the Login URL and paste it somewhere handy (like Notepad), or leave this page open. You will need it when you are configuring Eduphoria in the steps below.

Configuring Azure SAML2 Authentication in Eduphoria
Step 1: Log in to Eduphoria and select Management.
.png)
Step 2: From the main menu, select the Security Settings gear icon.

Step 3: From the resulting drop-down menu, choose Directory Services and Student Sign-On.
.png)
Step 4: Select the SAML tab.
Warning: Do not check the box to Enable SAML2 until everything has been configured and you are ready to test. Clicking this box will require a login through SAML, and regular SchoolObjects logins will no longer work.
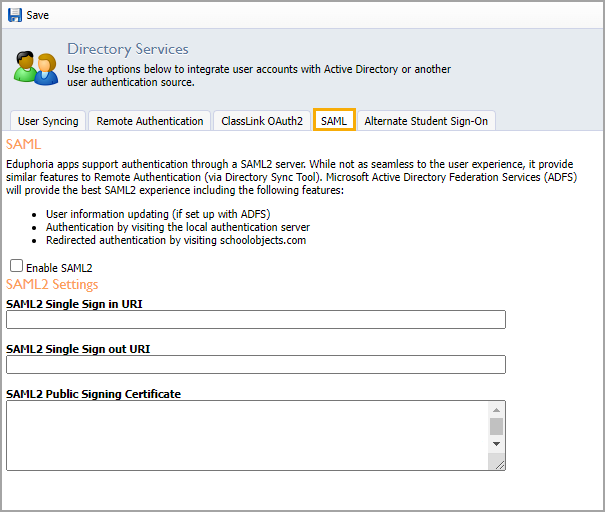
Step 5: Paste the Login URL from Azure into BOTH the SAML2 Single Sign in URI and SAML2 Single Sign out URI boxes. These two boxes should be identical.
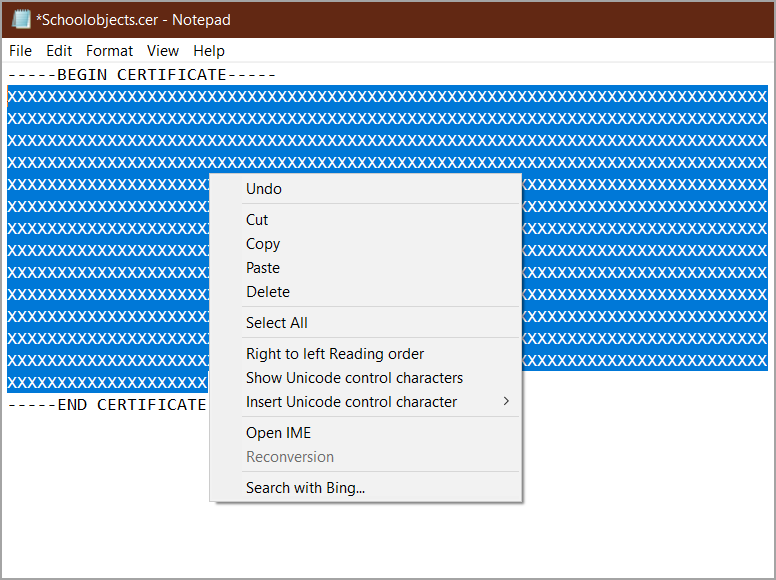
Step 6: Navigate to where you saved the Certificate (Base64) from Azure. Right-click and open it in Notepad.
Copy everything between the -----BEGIN CERTIFICATE----- and -----END CERTIFICATE----- lines, but do not copy the -----BEGIN CERTIFICATE----- and -----END CERTIFICATE----- lines themselves.
Paste the certificate info into the SAML2 Public Signing Certificate box.
Step 7: Check the Enable SAML2 box, and click Save.
Whenever a user navigates to your custom Eduphoria URL (districturl.schoolobjects.com) after a successful configuration, it will take them to the MS Azure authentication screen to log in.
Supporting Student SSO With SAML
Azure and SAML can be configured to authenticate students as well as staff members. To authenticate students you must meet the following requirements:
Students must be in a single group that contains all students. Nested groups are not supported.
Students must log in with a username that matches their student ID from the SIS, or that ID must be present in some AD field.
Caution: The username in AD needs to match the SIS ID if you have applied any of the four selections for Student Local ID Matching Logic in System Management. To verify if you need to update your selection, navigate to System Management > Directory Services & Student Sign-On > Alternate Student Sign-On > Student Local ID Matching Logic.
If the above requirements are met, you can follow these additional configuration steps to add student SSO.
Enabling SAML
Step 1: Log in to Eduphoria and select Management.
Step 2: From the main menu, select the Security Settings gear icon.
Step 3: From the resulting drop-down menu, choose Directory Services and Student Sign-On.
Step 4: Select the SAML tab.
Step 5: Select the checkbox to Enable SAML2.
Step 6: Click Save. Your Azure SAML2 configuration for Eduphoria should be complete.