Team planners allow you to build and collaborate on lesson planning with your peers at your campus or across the district.
Team planners are useful for team organizations including:
Grade Level Teams
Subject Area Teams
Curriculum Map Teams
Items to Consider
Teams can be created by any teacher, and only one member needs to create the team planner.
Teams are collaborative and there is no Team Leader.
Team members can be added and removed by any member of the team.
Principals can view all team information and content.
Once the last team member is removed, the team is deleted, and the associated content is no longer accessible. Members must be added back to the team to receive access to the planner.
Create a New Team
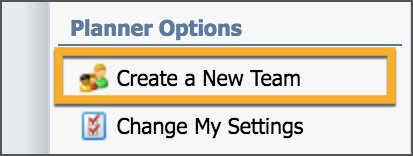
Click on the Create a New Team button.
Click Next to start the wizard.
Give the team name a detailed and distinctive name and click Next.
Add members (enter names for searching) and click Next.
Add the course(s) and click Next. You cannot edit the name of a course in a team planner.
Click Finish.
Add Content to a Team Planner
Select the Team Planner from your list of lesson plans.
Select the entry and click the Check Out and Edit button on the Entry Toolbar.
The lesson is editable to add learning standards, attachments, resources, etc.
Click Save to check the entry back in.
To continue editing this entry, you need to click the Check Out and Edit icon on the Entry toolbar.

Note: The team planner is not a live, collaborative web document allowing multiple editors at the same time. When one team member checks out an entry, this prevents other team members from accessing that entry at the same time.

Copying an Entry From the Team Planner to Your Planner
Select the lesson date on the calendar.
Click on the lesson entry.
Click the Send Lesson To... button on the Entry Toolbar.
Select the date where you want the entry to go.
Click Ok.

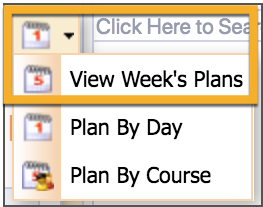
Copy an Entire Week From Team Planner to Your Planner
On the Lesson Planner toolbar, select the option to View Week's Plans.
Select Copy Week. The option for Copy Week only appears in the team planner in Week View. If selected, the entire week's plans are copied from the team planner into your own.
![]()
Best Practices for Team Planners
It is important for all teachers on a team to COPY the team plans from the team planner to individual planners. Here are the reasons why:
The Standard Coverage Report won't give you credit for your standards if it's only in the team planner.
You can differentiate your lessons for your students if you copy from the team planner to your individual planner.
The team planner could accidentally get deleted if all of the members are removed.
Using Discussion Threads
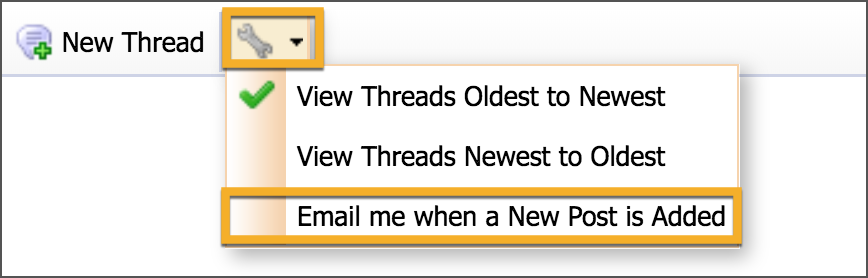
Team planners have a built-in discussion board for each daily or weekly lesson for all members and the campus principals to discuss lesson content. Post new threads and reply as needed. There is an option on the menu bar (in the wrench icon) to receive an email when a new post is added.
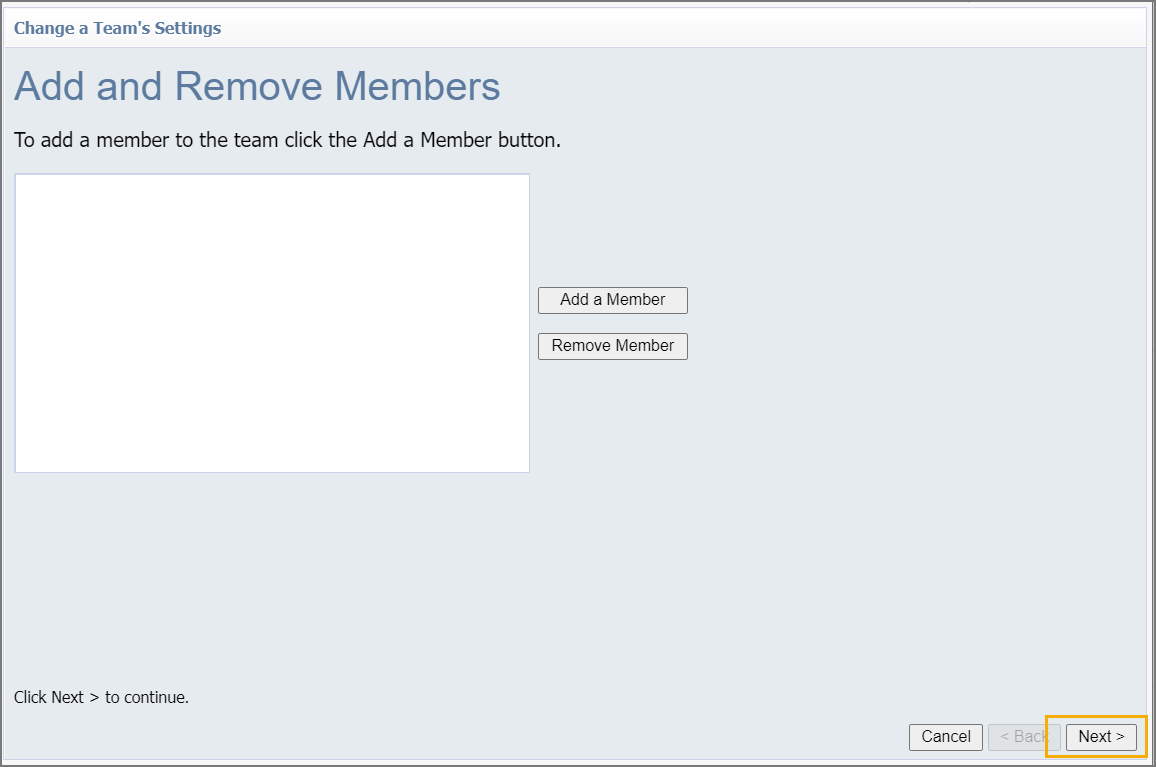
Deleting a Team Planner
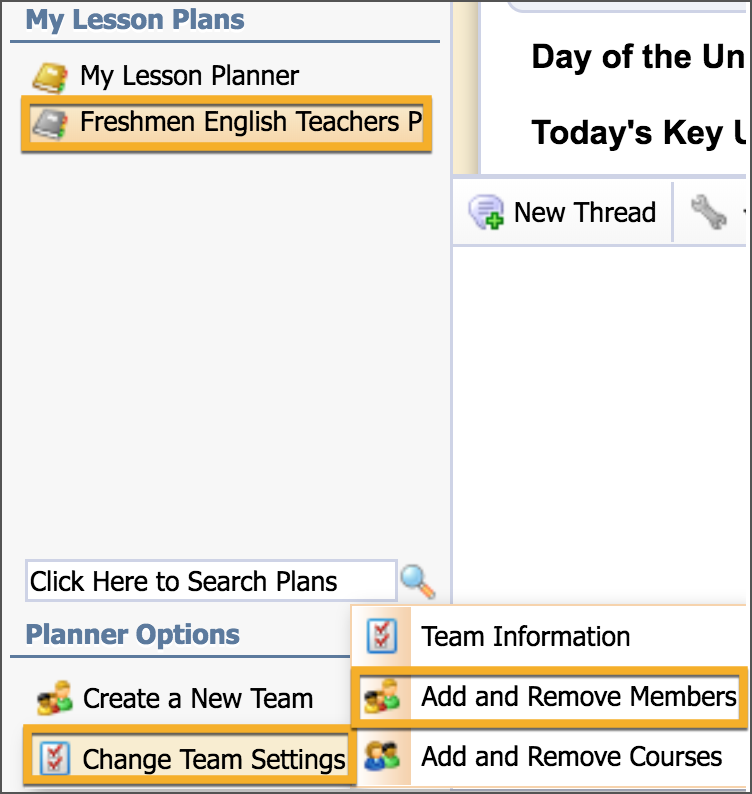
Select the team planner.
Click on Change Team Settings.
Click on Add and Remove Members.
Select the member you want to remove and click the Remove Member button.
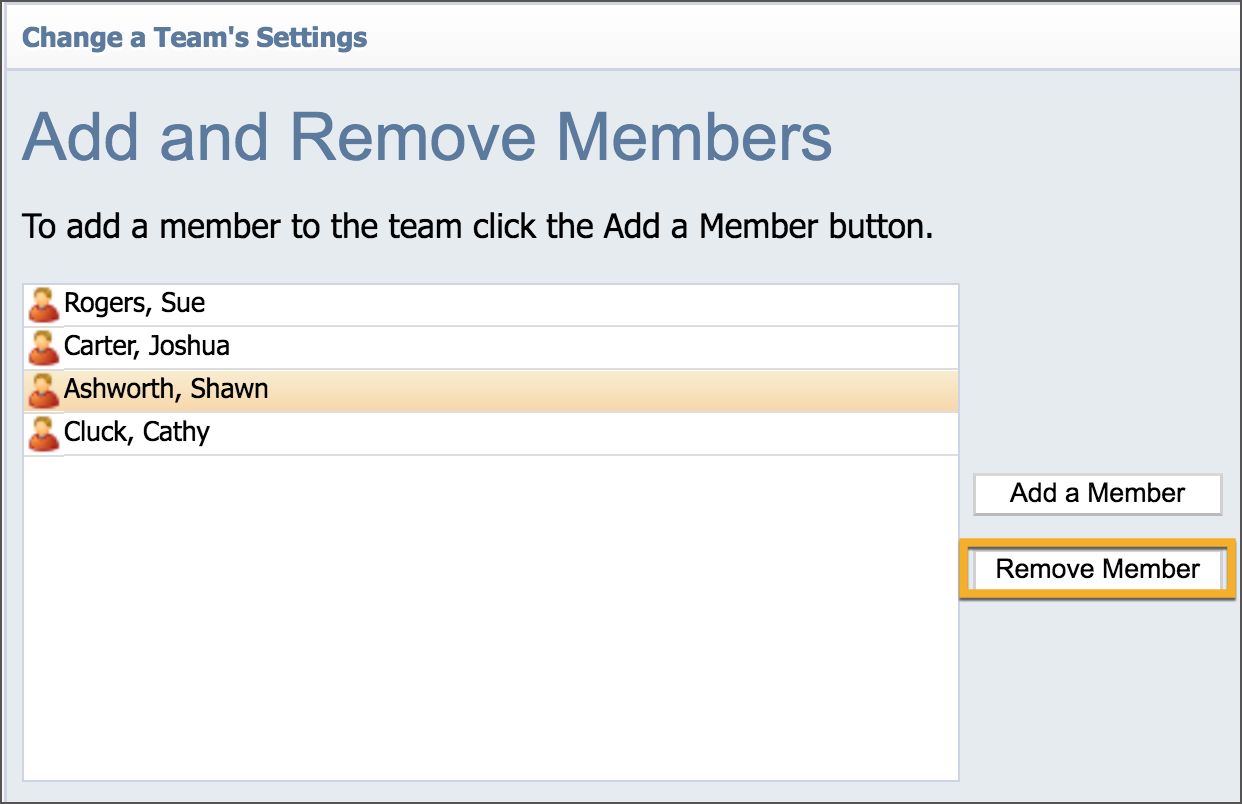
Select Next.
Caution: Removing all members and then selecting Next will delete all plans. Be sure this is the correct intention before moving forward.