Connecting Facilities&Events to Helpdesk provides a way to pull data from both systems for cleaner reporting. It can be useful to track support tickets for items reserved or checked out in Facilities&Events.
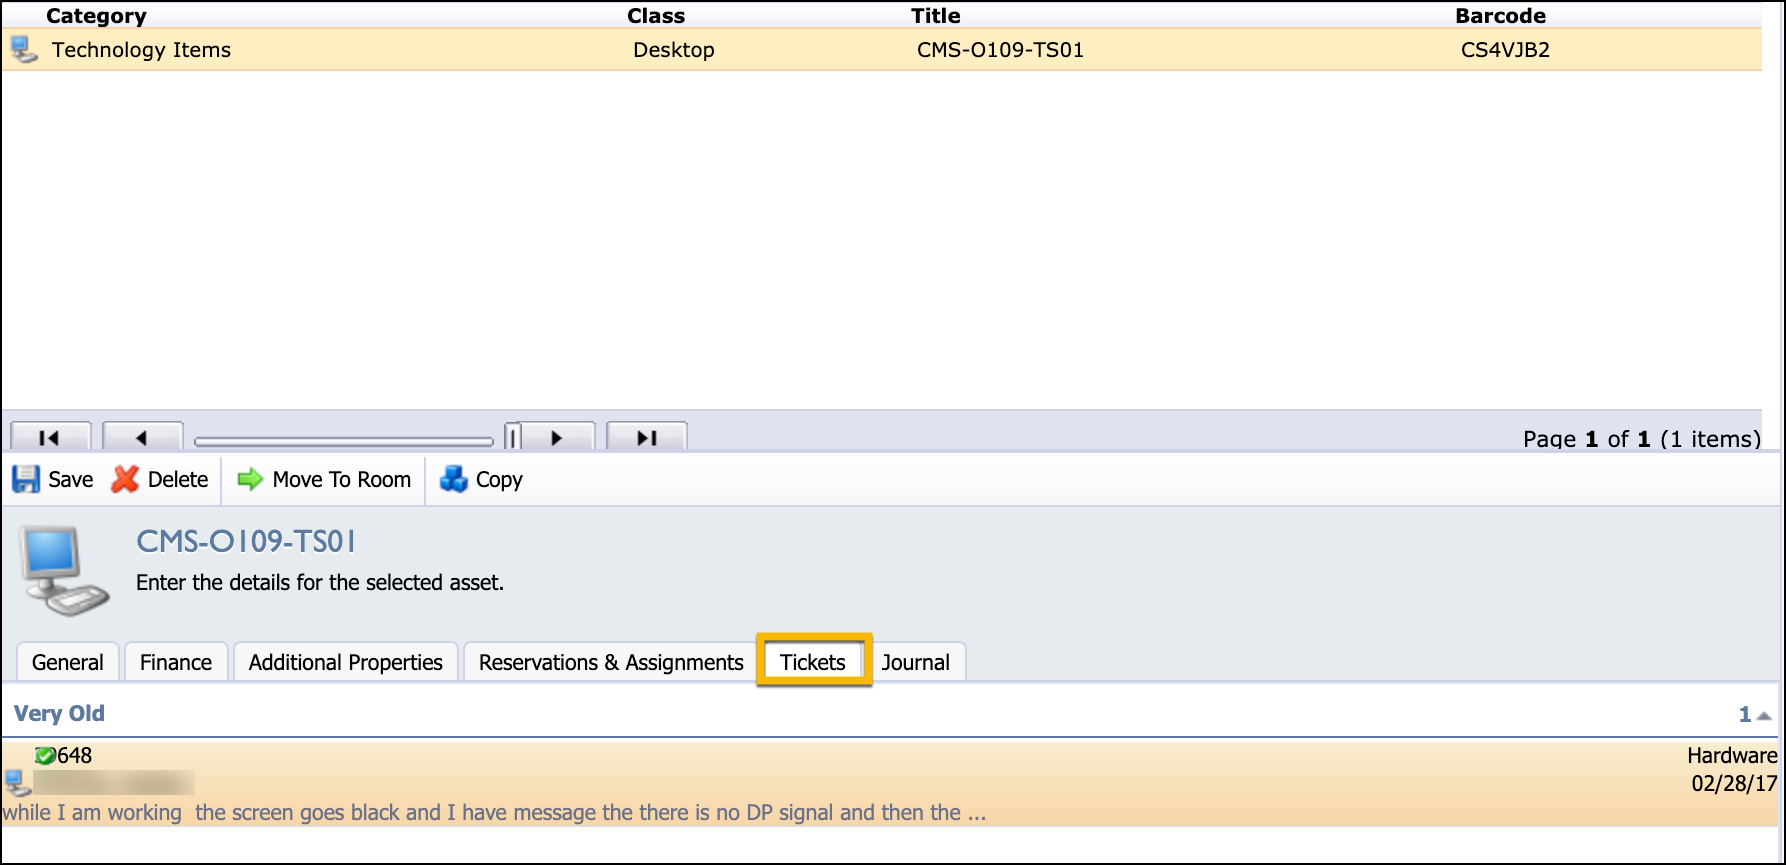
The image below is from Facilities&Events when viewing an item. There is a Tickets tab that connects to any support tickets entered in Helpdesk for the item tracked in the Facilities&Events inventory.
Facilities&Events
The person with System Administrator role for Facilities&Events manages the settings and has access to create or manage Custom Properties.
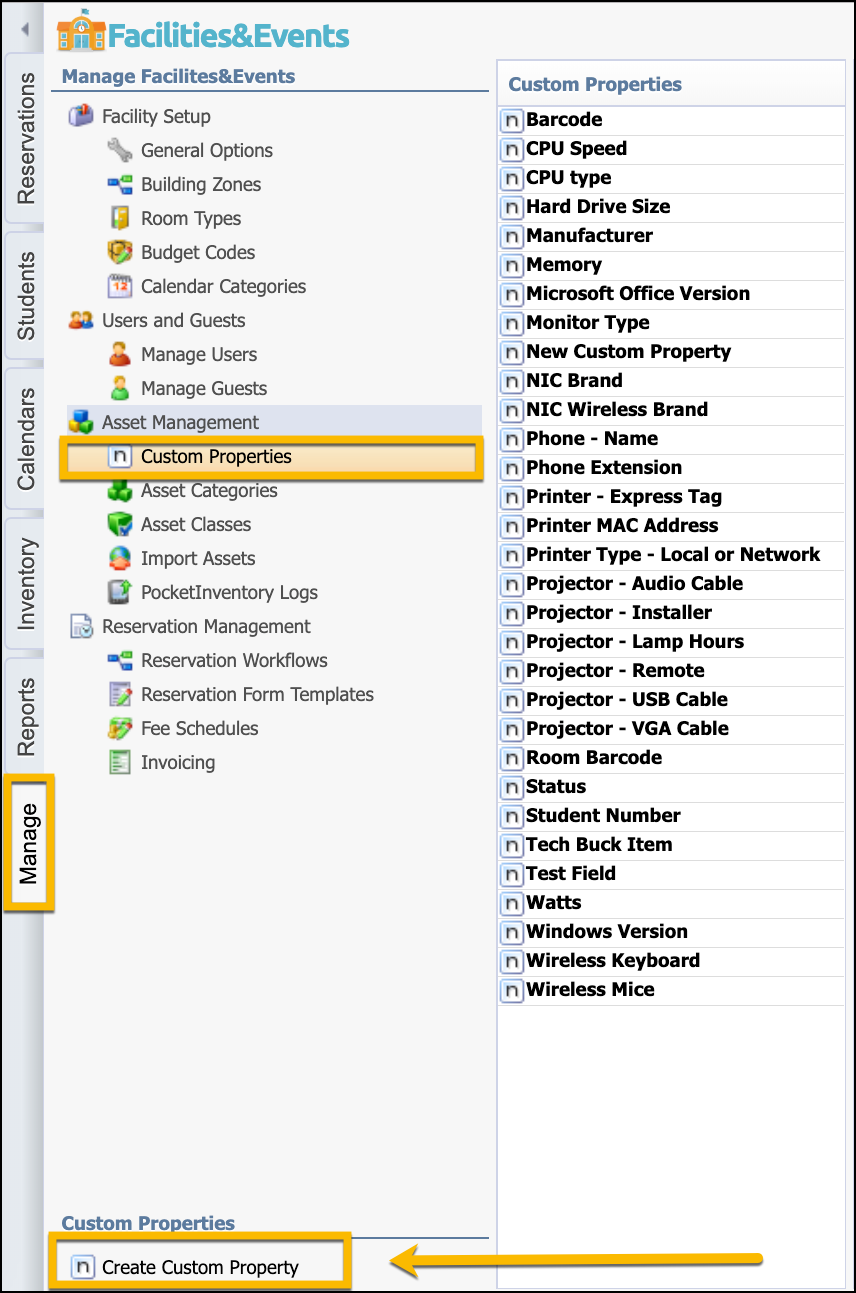
Step 1: Access Facilities&Events.
Step 2: Select the Manage tab.
Step 3: Under Asset Management, select Custom Properties.
Step 4: Use the Add a Custom Property button at the bottom to create new custom properties.
Note: Consider the type of custom properties you want to track between Helpdesk and Facilities&Events. You might only want to connect by barcode or manufacturer. You do not want to create too many fields to need to connect together.
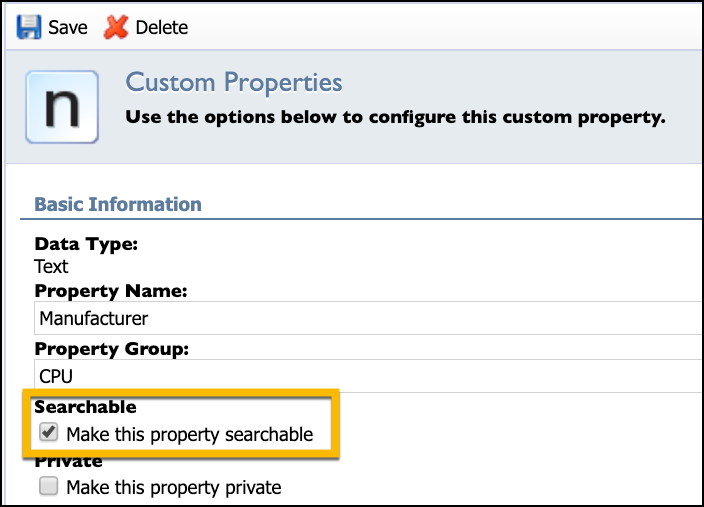
Step 5: Once you create a custom property, click on it to check options before moving forward.
Step 6: Make sure the property is selected as searchable and not marked private.
Once you have created the custom properties in Facilities&Events, move to use Helpdesk to continue forward.
Helpdesk
The following steps occur within the Helpdesk application.
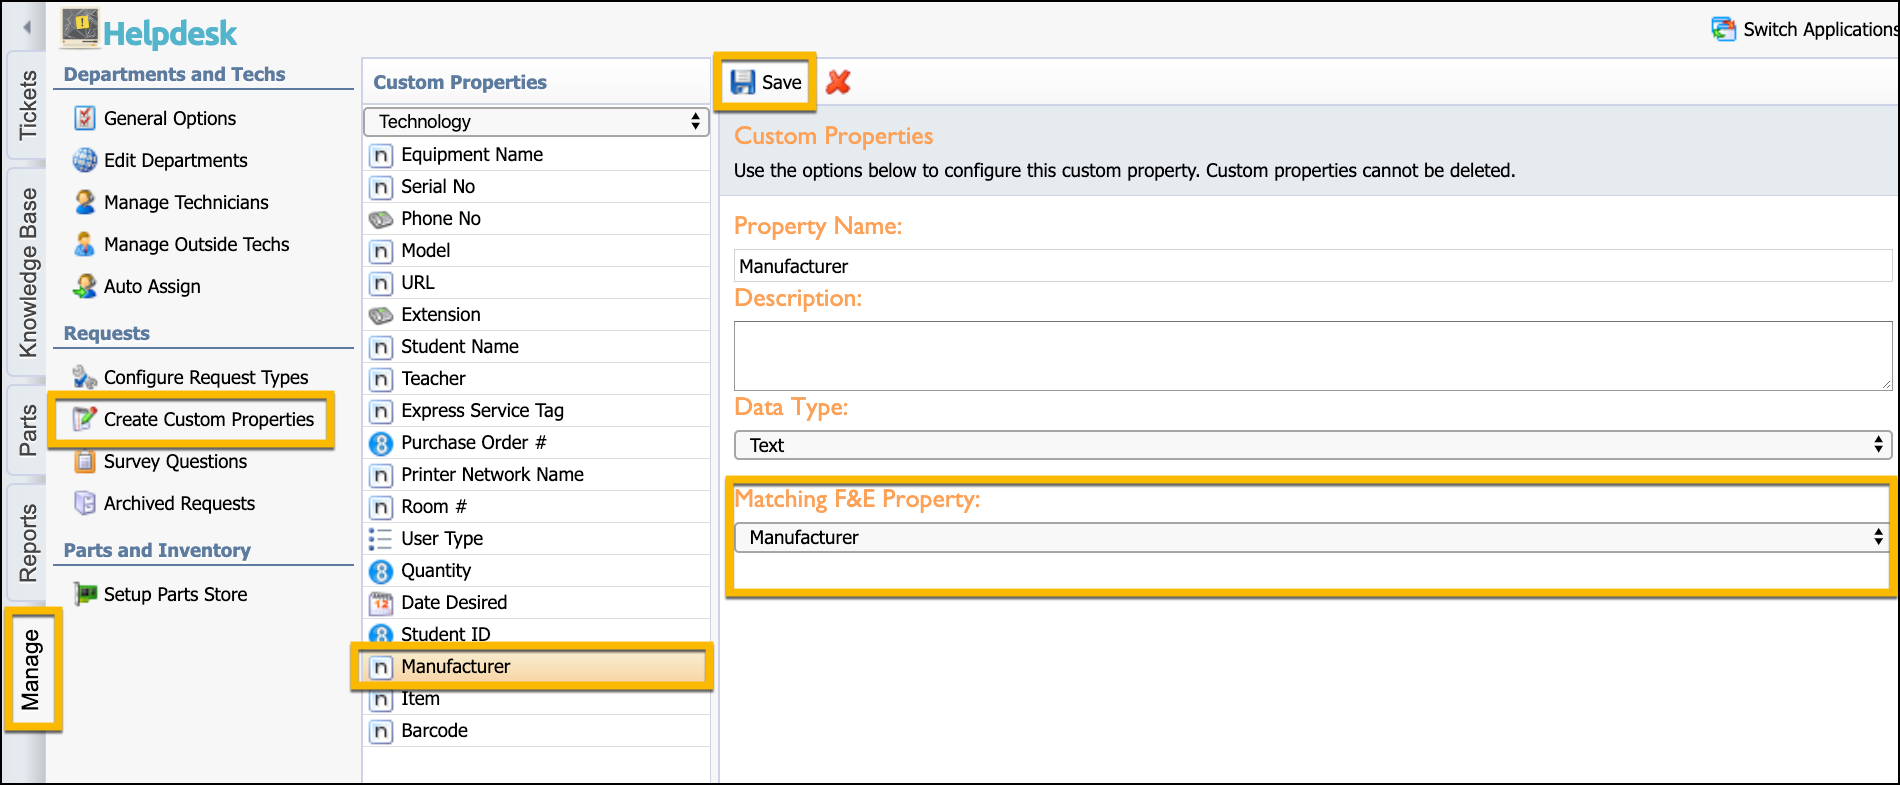
Step 1: Select the Manage tab.
Step 2: Under Requests, select Create Custom Properties.
Step 3: If you do not have any properties, click the Add Custom Property button to add a matching property to what you created in Facilities&Events.
Step 4: Click on a property to define the matching property in Facilities&Events.
Step 5: Click Save.
Helpdesk: Define Who Enters Custom Property Data
The final step in connecting the applications is to decide who will enter the information to be tracked in a Helpdesk ticket to the custom properties in Facilities&Events.
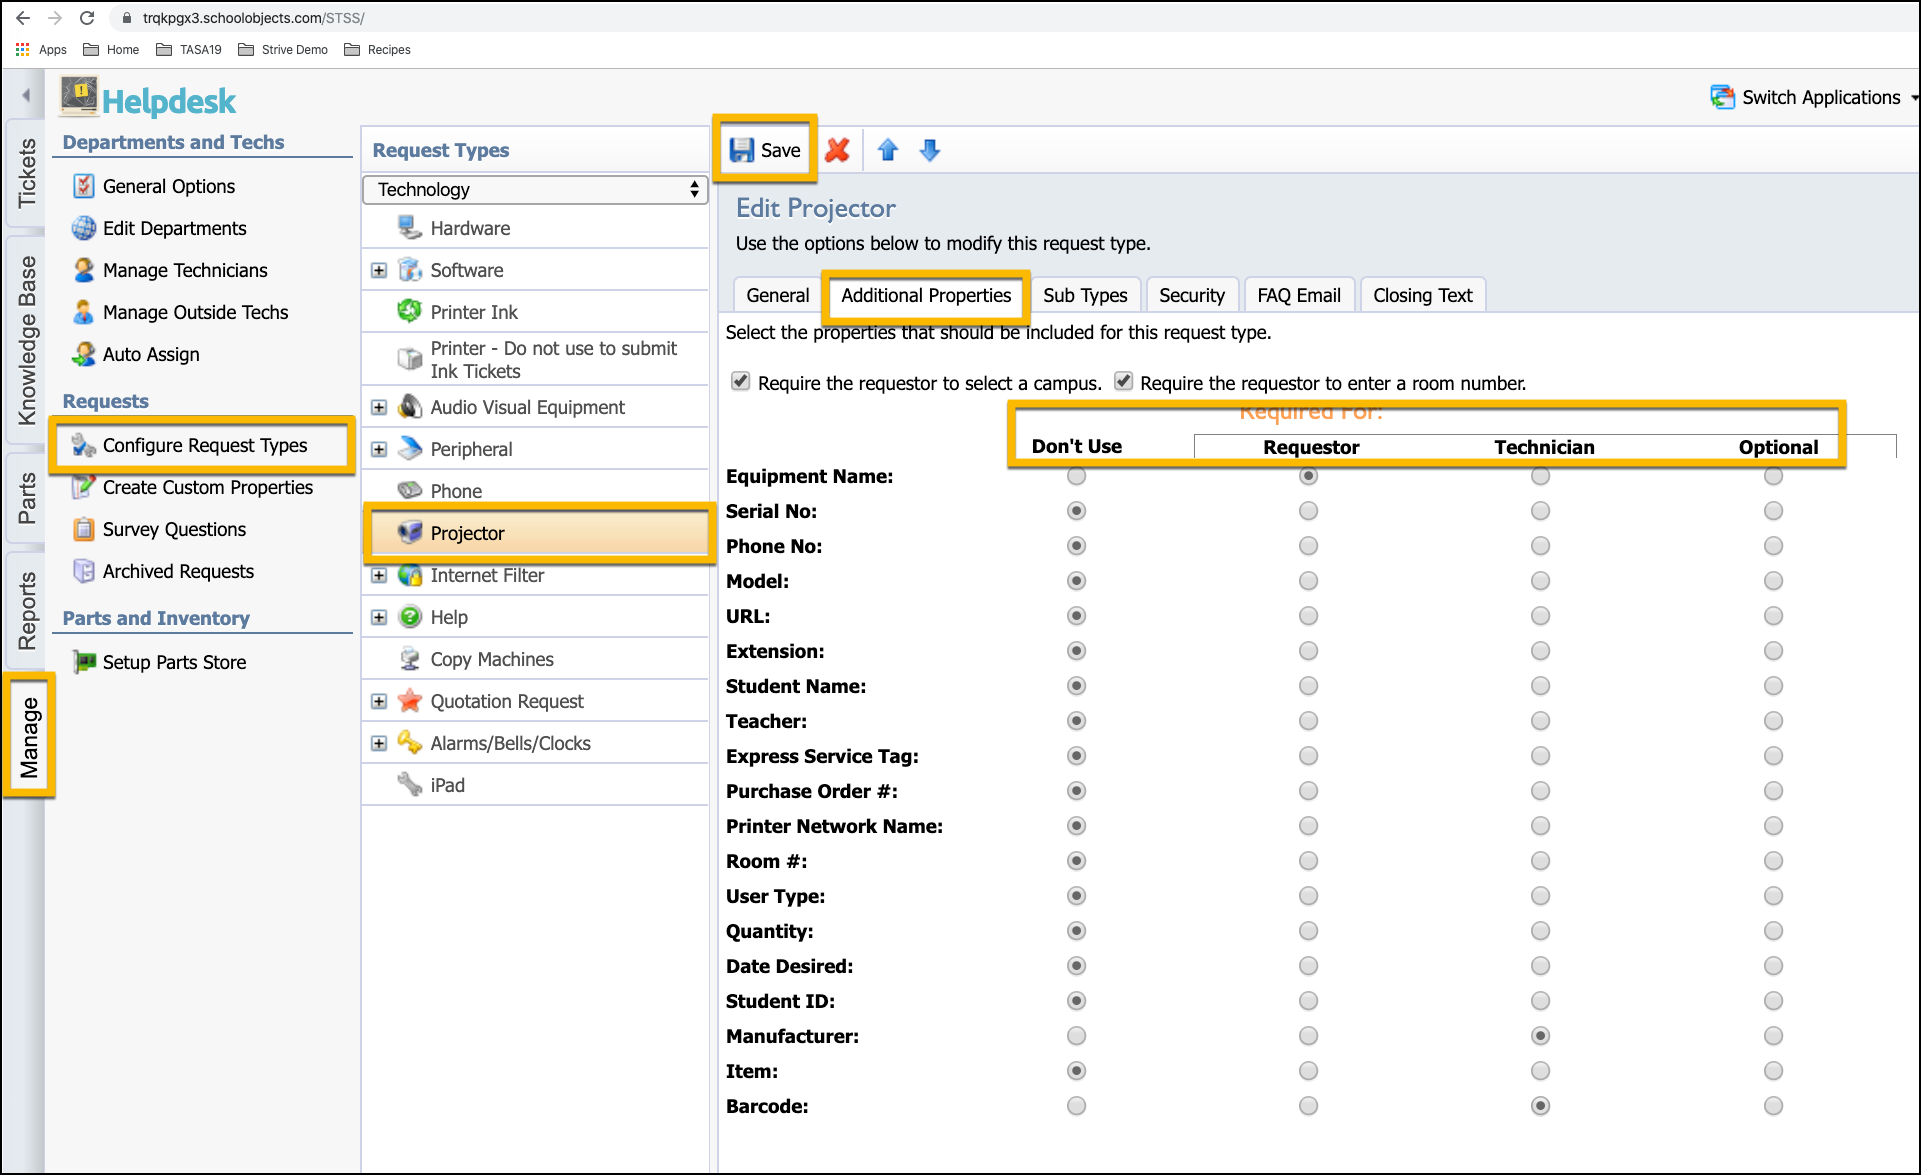
Step 1: Select the Manage tab.
Step 2: Under Requests, select Configure Request Types.
Step 3: Select the department at the top if using multiple departments.
Step 4: Select the Request Type Item.
Step 5: Select the Additional Properties tab.
Step 6: Use the options to select who will enter the information on the specific custom field.
Note: You don’t need to use all properties. Only select the custom properties from which you need to collect data from Helpdesk into your Facilities&Events properties.
Additional Property Explanation
The Additional Properties tab contains the following Required for options you can assign to each property for the request type using the radio buttons:
Don't Use – This option means the property will not be available for requestor or technician to complete. The property field will not show up on the support ticket request form.
Requestor – This option means the property will only be available for the requestor to use to enter information. It will be an input field on the initial support ticket request form that a requestor completes.
Technician – This option means only the technician will be able to enter information into the property field once the ticket is assigned to them.
Optional – This option means that the property field can have information entered by either the requestor or the technician.
After the fields are defined for who will enter information, Facilities&Events is linked to Helpdesk, where information can now be shared as fields are completed in Helpdesk tickets.