Student access lists allow rostered teachers access to custom lists of students. This feature can also be used to allow any user with an Eduphoria account to create a custom list of students for analysis. This is useful for co-teachers, special education personnel, 504 and ESL coordinators, or other non-rostered personnel who need access to group or individual student data. Learn more about using data analysis with student access lists.
Quick Guide
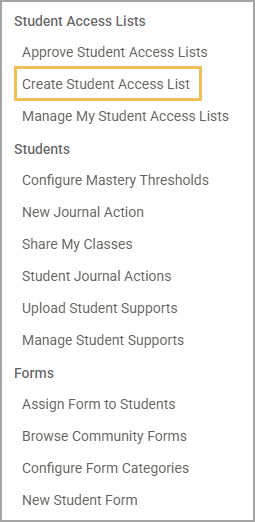
Navigate to the Students Settings gear () in Aware.
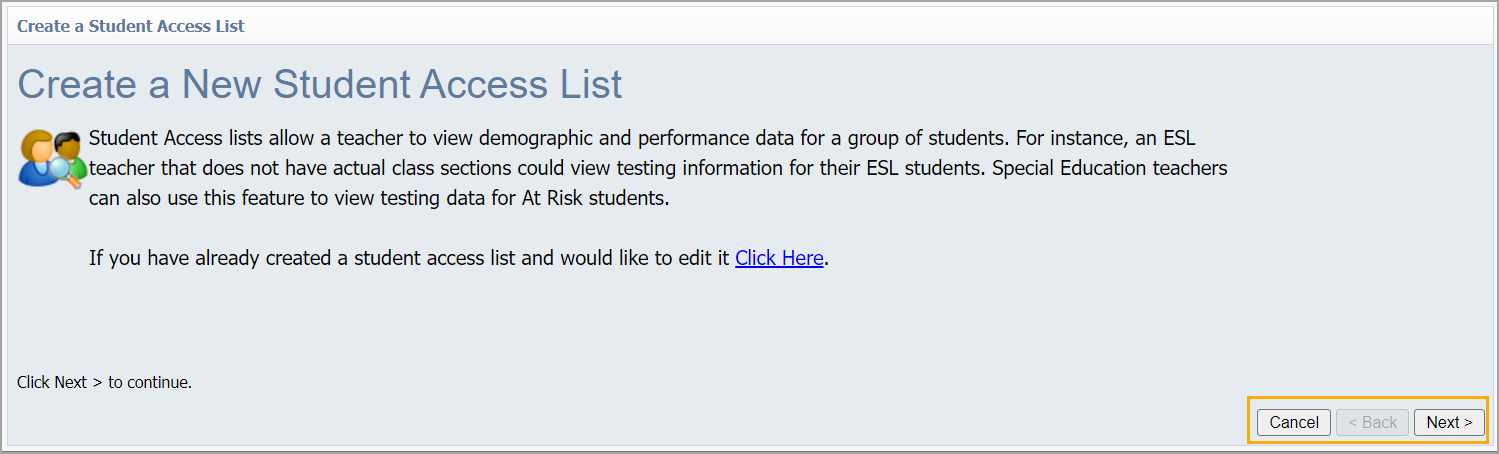
Select Create Student Access List to open the creation modal.
Click Next to continue.
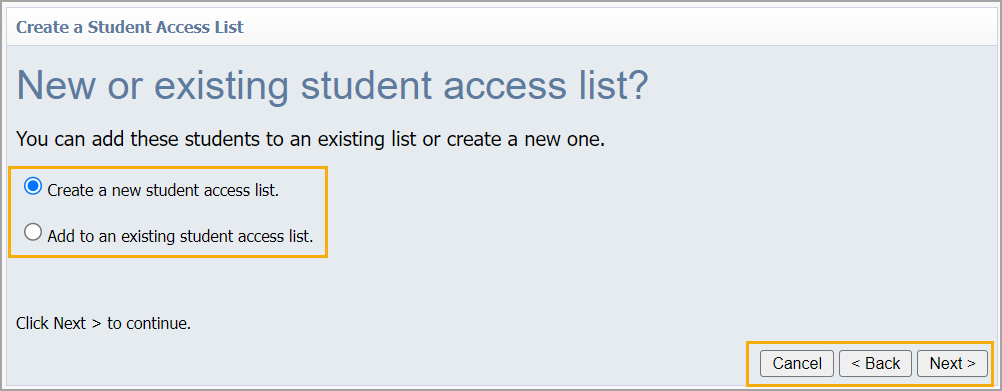
Select Create a new student access list or Add to an existing student access list. Click Next to continue.
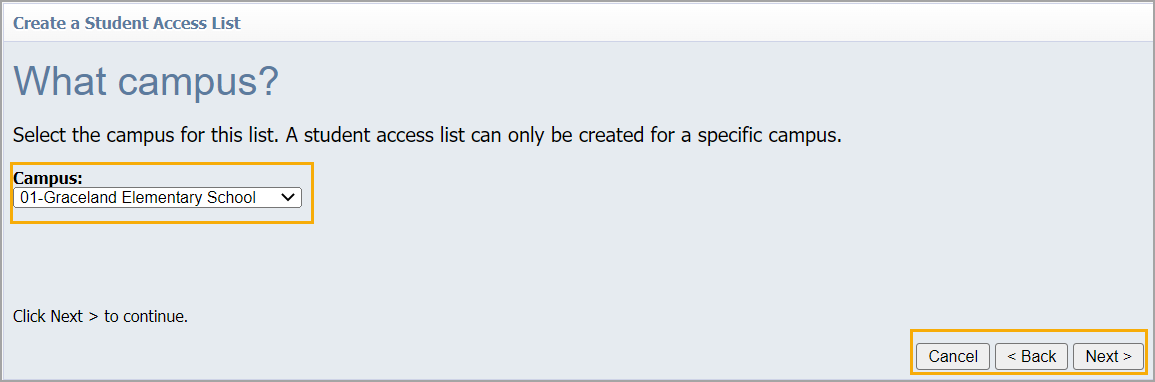
Select the school for the list. A student access list can only be created for a specific school.
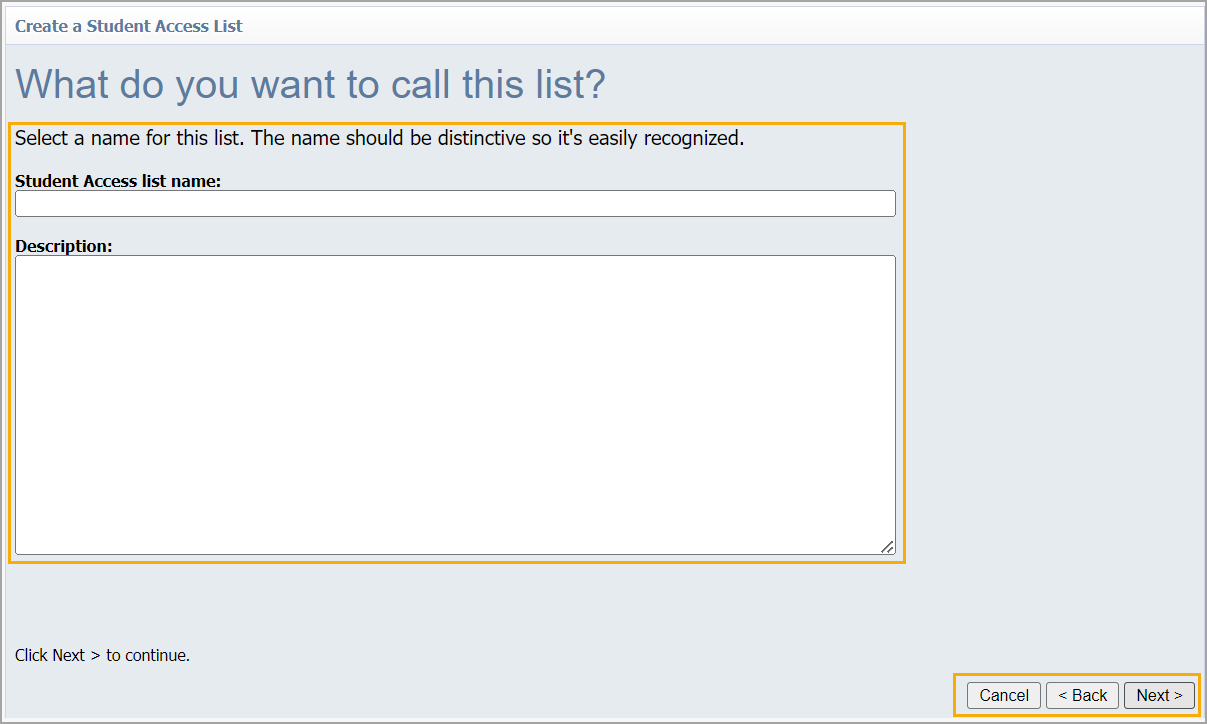
Select a name for the list. Add a description if desired.
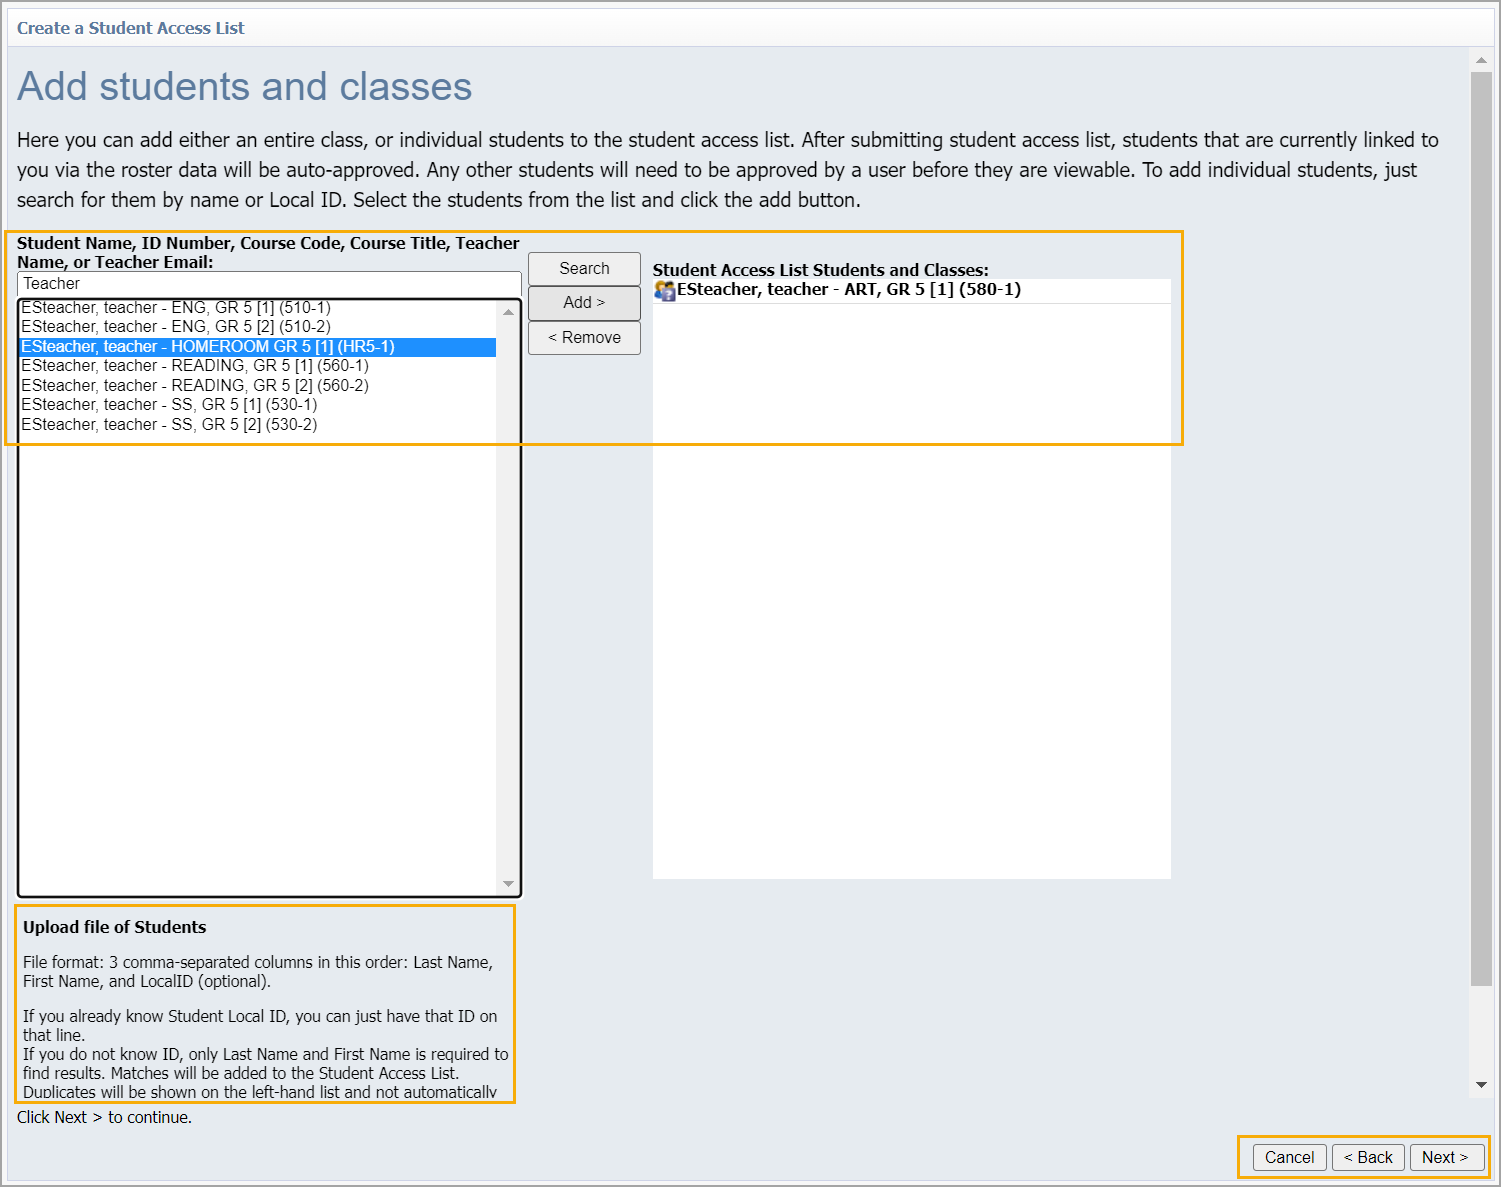
Add students by searching for their name, ID number, course code, course name, teacher name, or teacher email. Alternatively, upload a CSV file that includes columns for Last Name, First Name, and LocalID.
Click Next, then click Finish.
Illustrated Guide
Step 1: Navigate to the Students Settings gear () in Aware.
.png)
Step 2: Select Create Student Access List to open the creation modal.
Step 3: Click Next to continue.
Step 4: Select Create a new student access list or Add to an existing student access list. Click Next to continue.
Step 5: Select the school for the list. A student access list can only be created for a specific school.
Step 6: Select a name for the list. Add a description if desired.
Note: Your district may have a naming convention in place for Student Access Lists. If not, consider a name that indicates the purpose of the list.
Step 7: Add students to the list by searching for any of the following and clicking Add:
Student Name
Student ID Number
Course Code
Course Name
Teacher Name
Teacher Email
Alternatively, you can upload a CSV file that includes columns for Last Name, First Name, and LocalID. If you already know the student’s Local ID, you can just have that ID on the line. Without knowing the student’s Local ID, you must include and fill out their first and last name to find results.
Step 8: Click Next, then click Finish.
Additional Information
If students are rostered to you, the system automatically approves the list. A list deletes automatically when students no longer appear on your roster. Students who are removed from rosters throughout the year are automatically removed from lists.
If you are creating a student access list with students not rostered to you, that list must be approved by an administrator at your school. Lists remain in Pending Approval until approved. Learn more about approving student access lists.
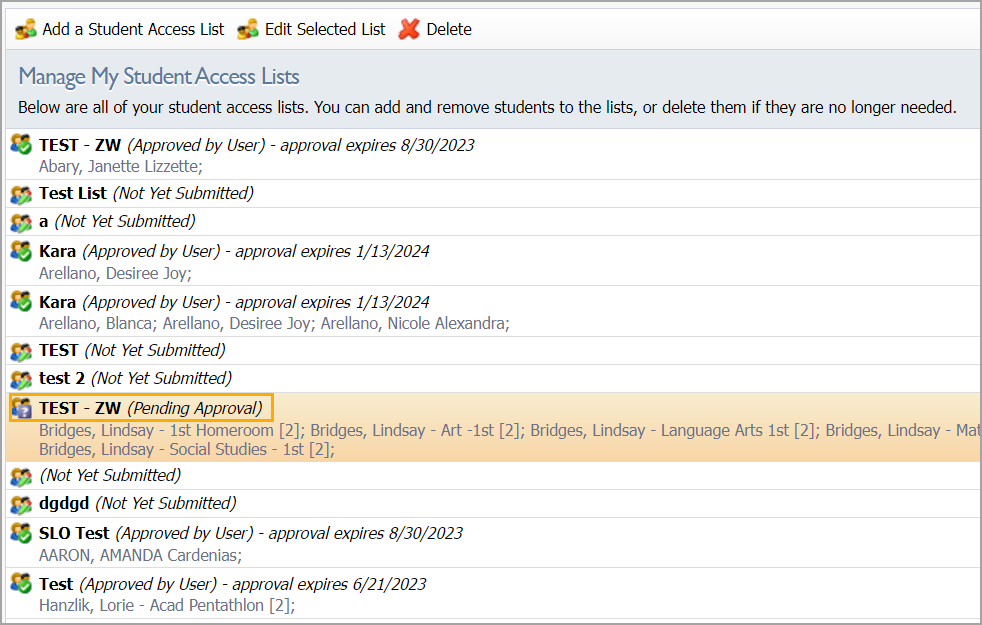
Approved student access lists return to a Pending Approval state after 11 months. Resubmit a list for approval to continue using the list.