You must first mark an asset as assignable, so that inventory managers or teachers can assign it to students.
Making Individual Assets Assignable
If you want to mark individual assets as assignable, follow these steps.
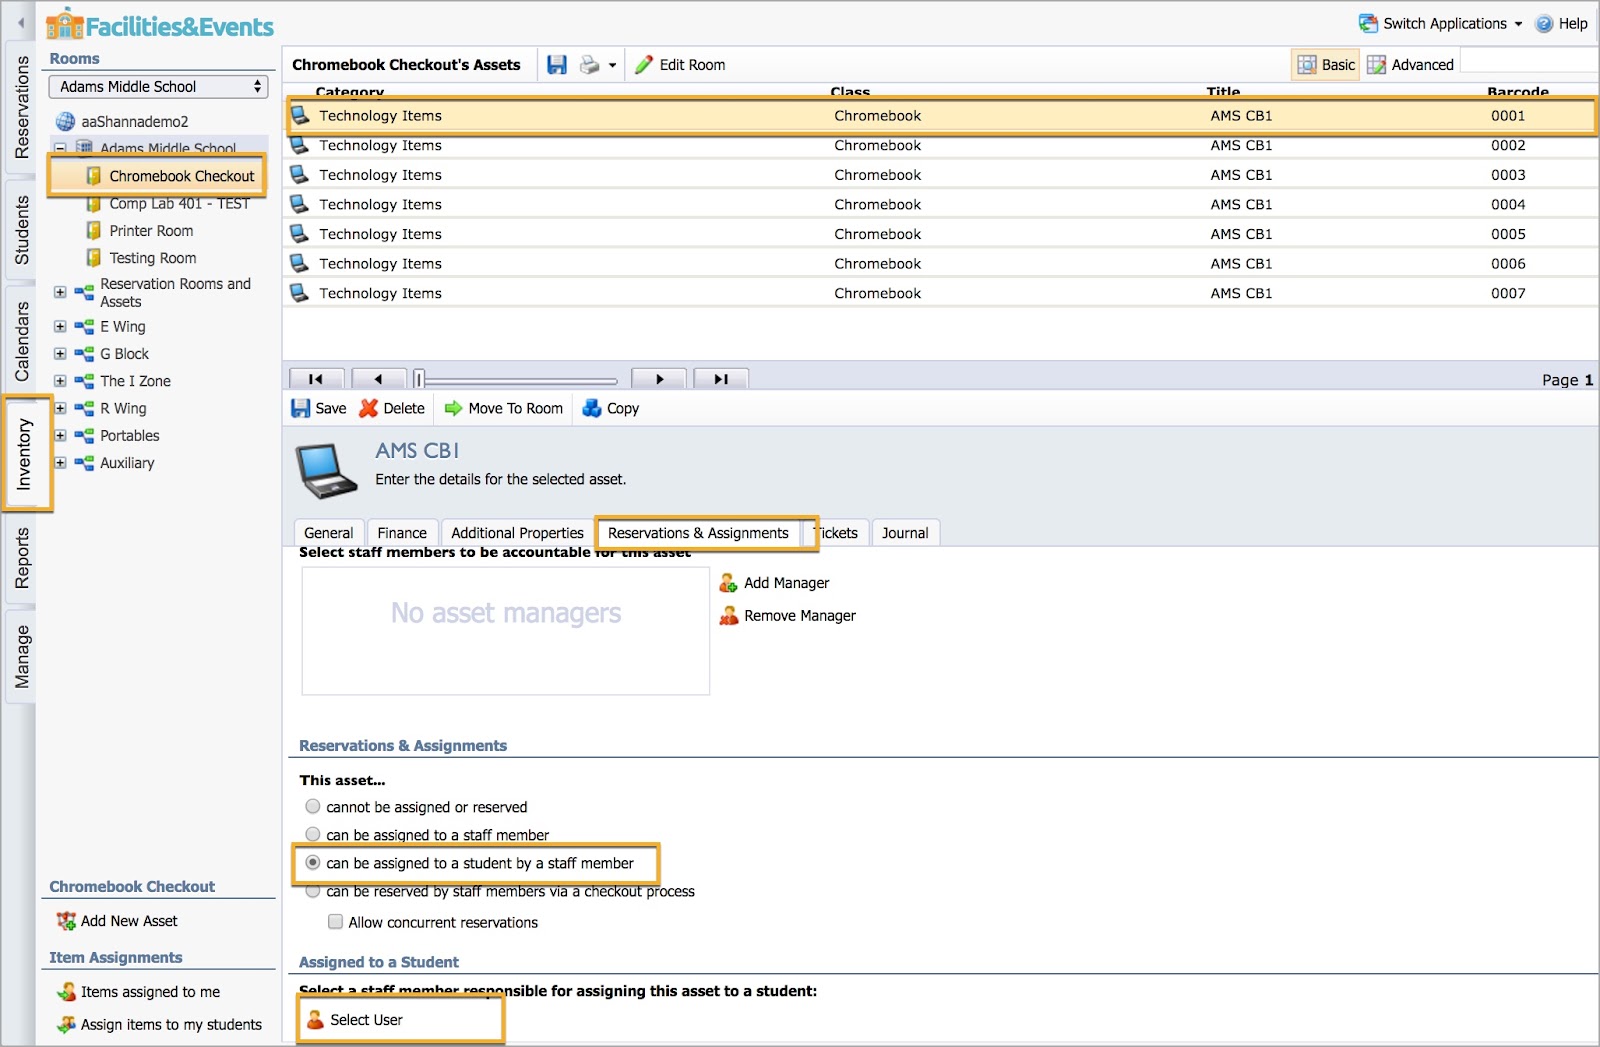
Step 1: Go to the Inventory tab.
Step 2: Select a school or department, then select a Room.
Step 3: Find the asset, then double-click it.
Step 4: Select the Reservations & Assignments tab.
Step 5: Select the radio button for can be assigned to a student by a staff member.
Note: You can also perform an optional search for a user who can be responsible for assigning the asset. This is only necessary for a user who does not have additional rights in Facilities&Events to assign assets to students. A good use of this feature would be for a certain teacher so that they could assign the asset to their student roster.
Making a Group of Assets Assignable
If you want to marka group of assets as assignable, follow these steps.
Step 1: Go to the Inventory tab.
Step 2: Select a school or department, then select a Room.
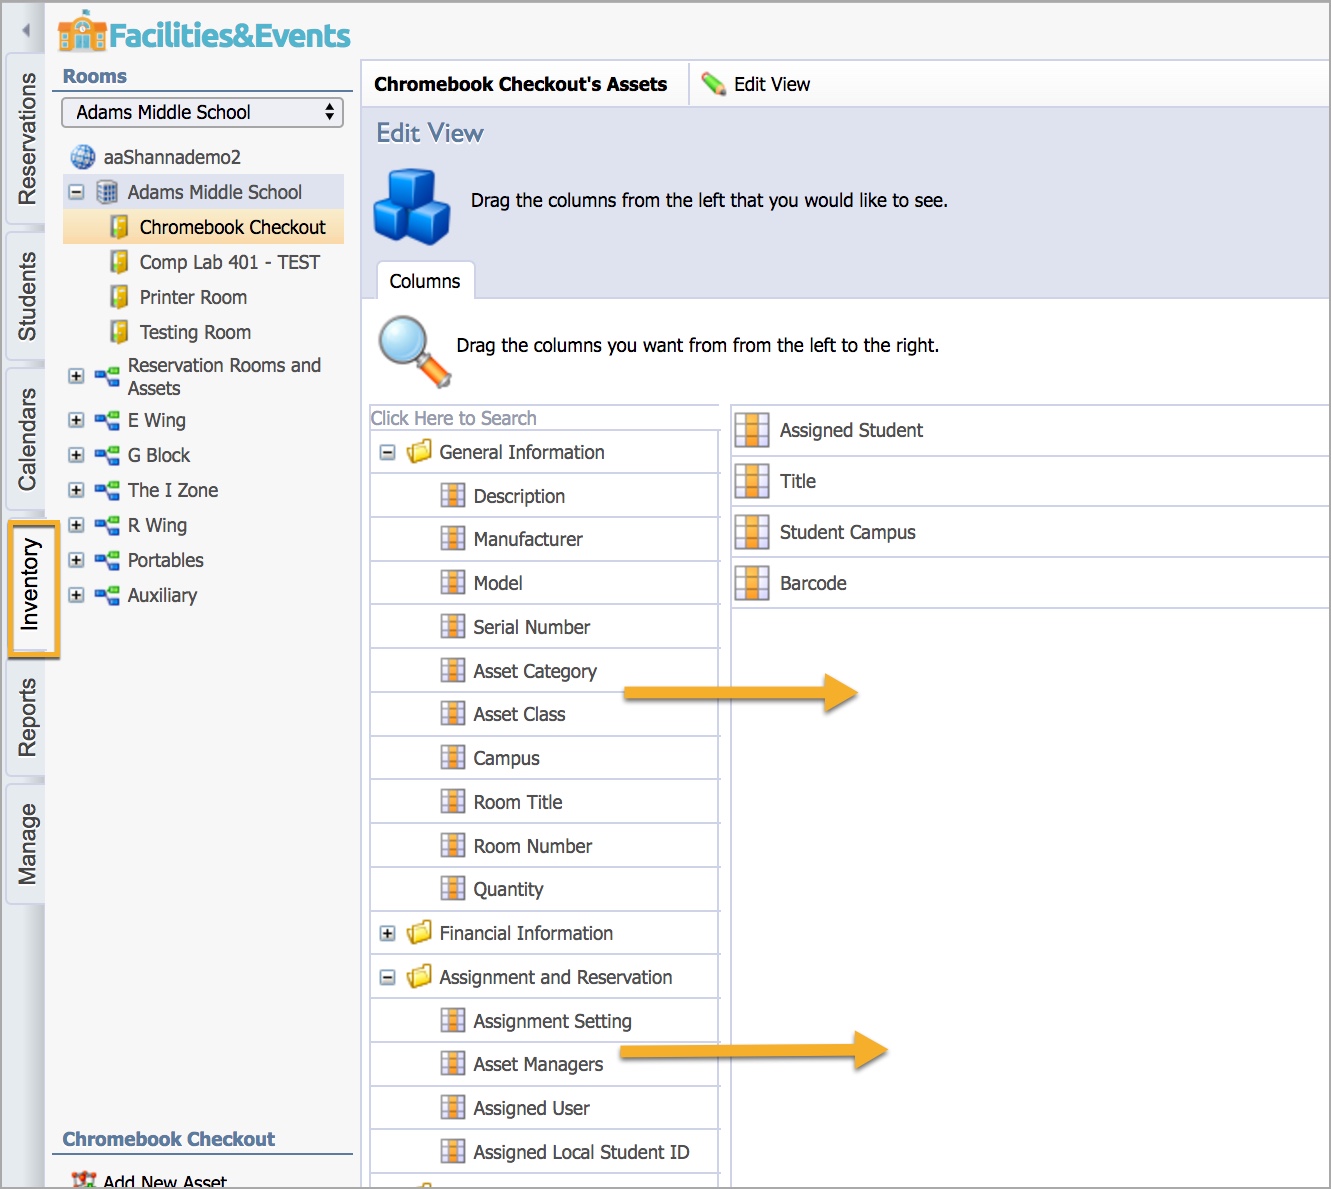
Step 3: Select the Advanced view.
Step 4: Select Edit View.
![]()
Step 5: Drag over fields that are necessary to know which assets must be assigned.
Step 6: Select Update.
Step 7: Click on one asset or use the Control or Shift key to select multiple assets.
Step 8: Select Mass Edit to allow you to change the details of multiple assets at a time.
Step 9: Drill down to Reservations & Assignments, then Settings.
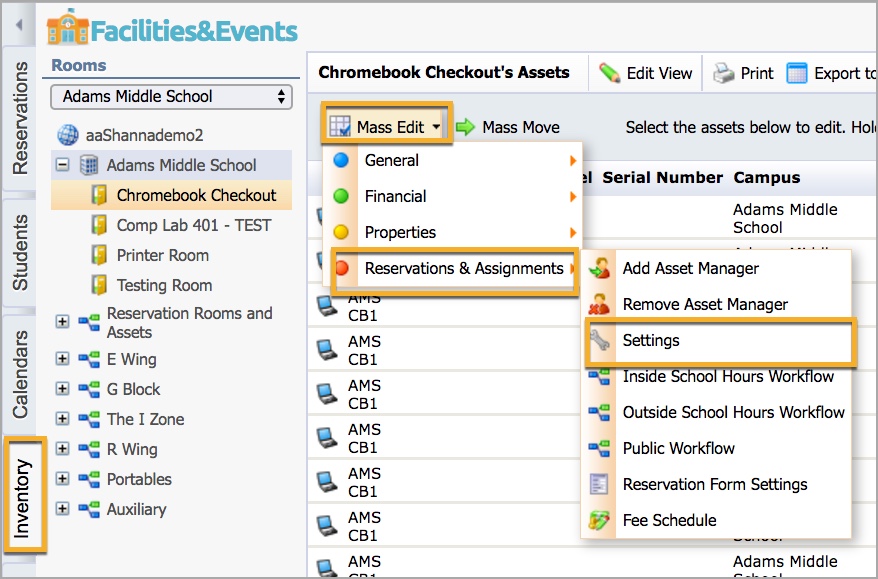
Step 10: Select the radio button for can be assigned to a student by a staff member.
Step 11: If there is a user that either doesn’t have the inventory manager role or isn’t a teacher with students in the roster, then select a staff member to give them rights to assign those assets to students.
