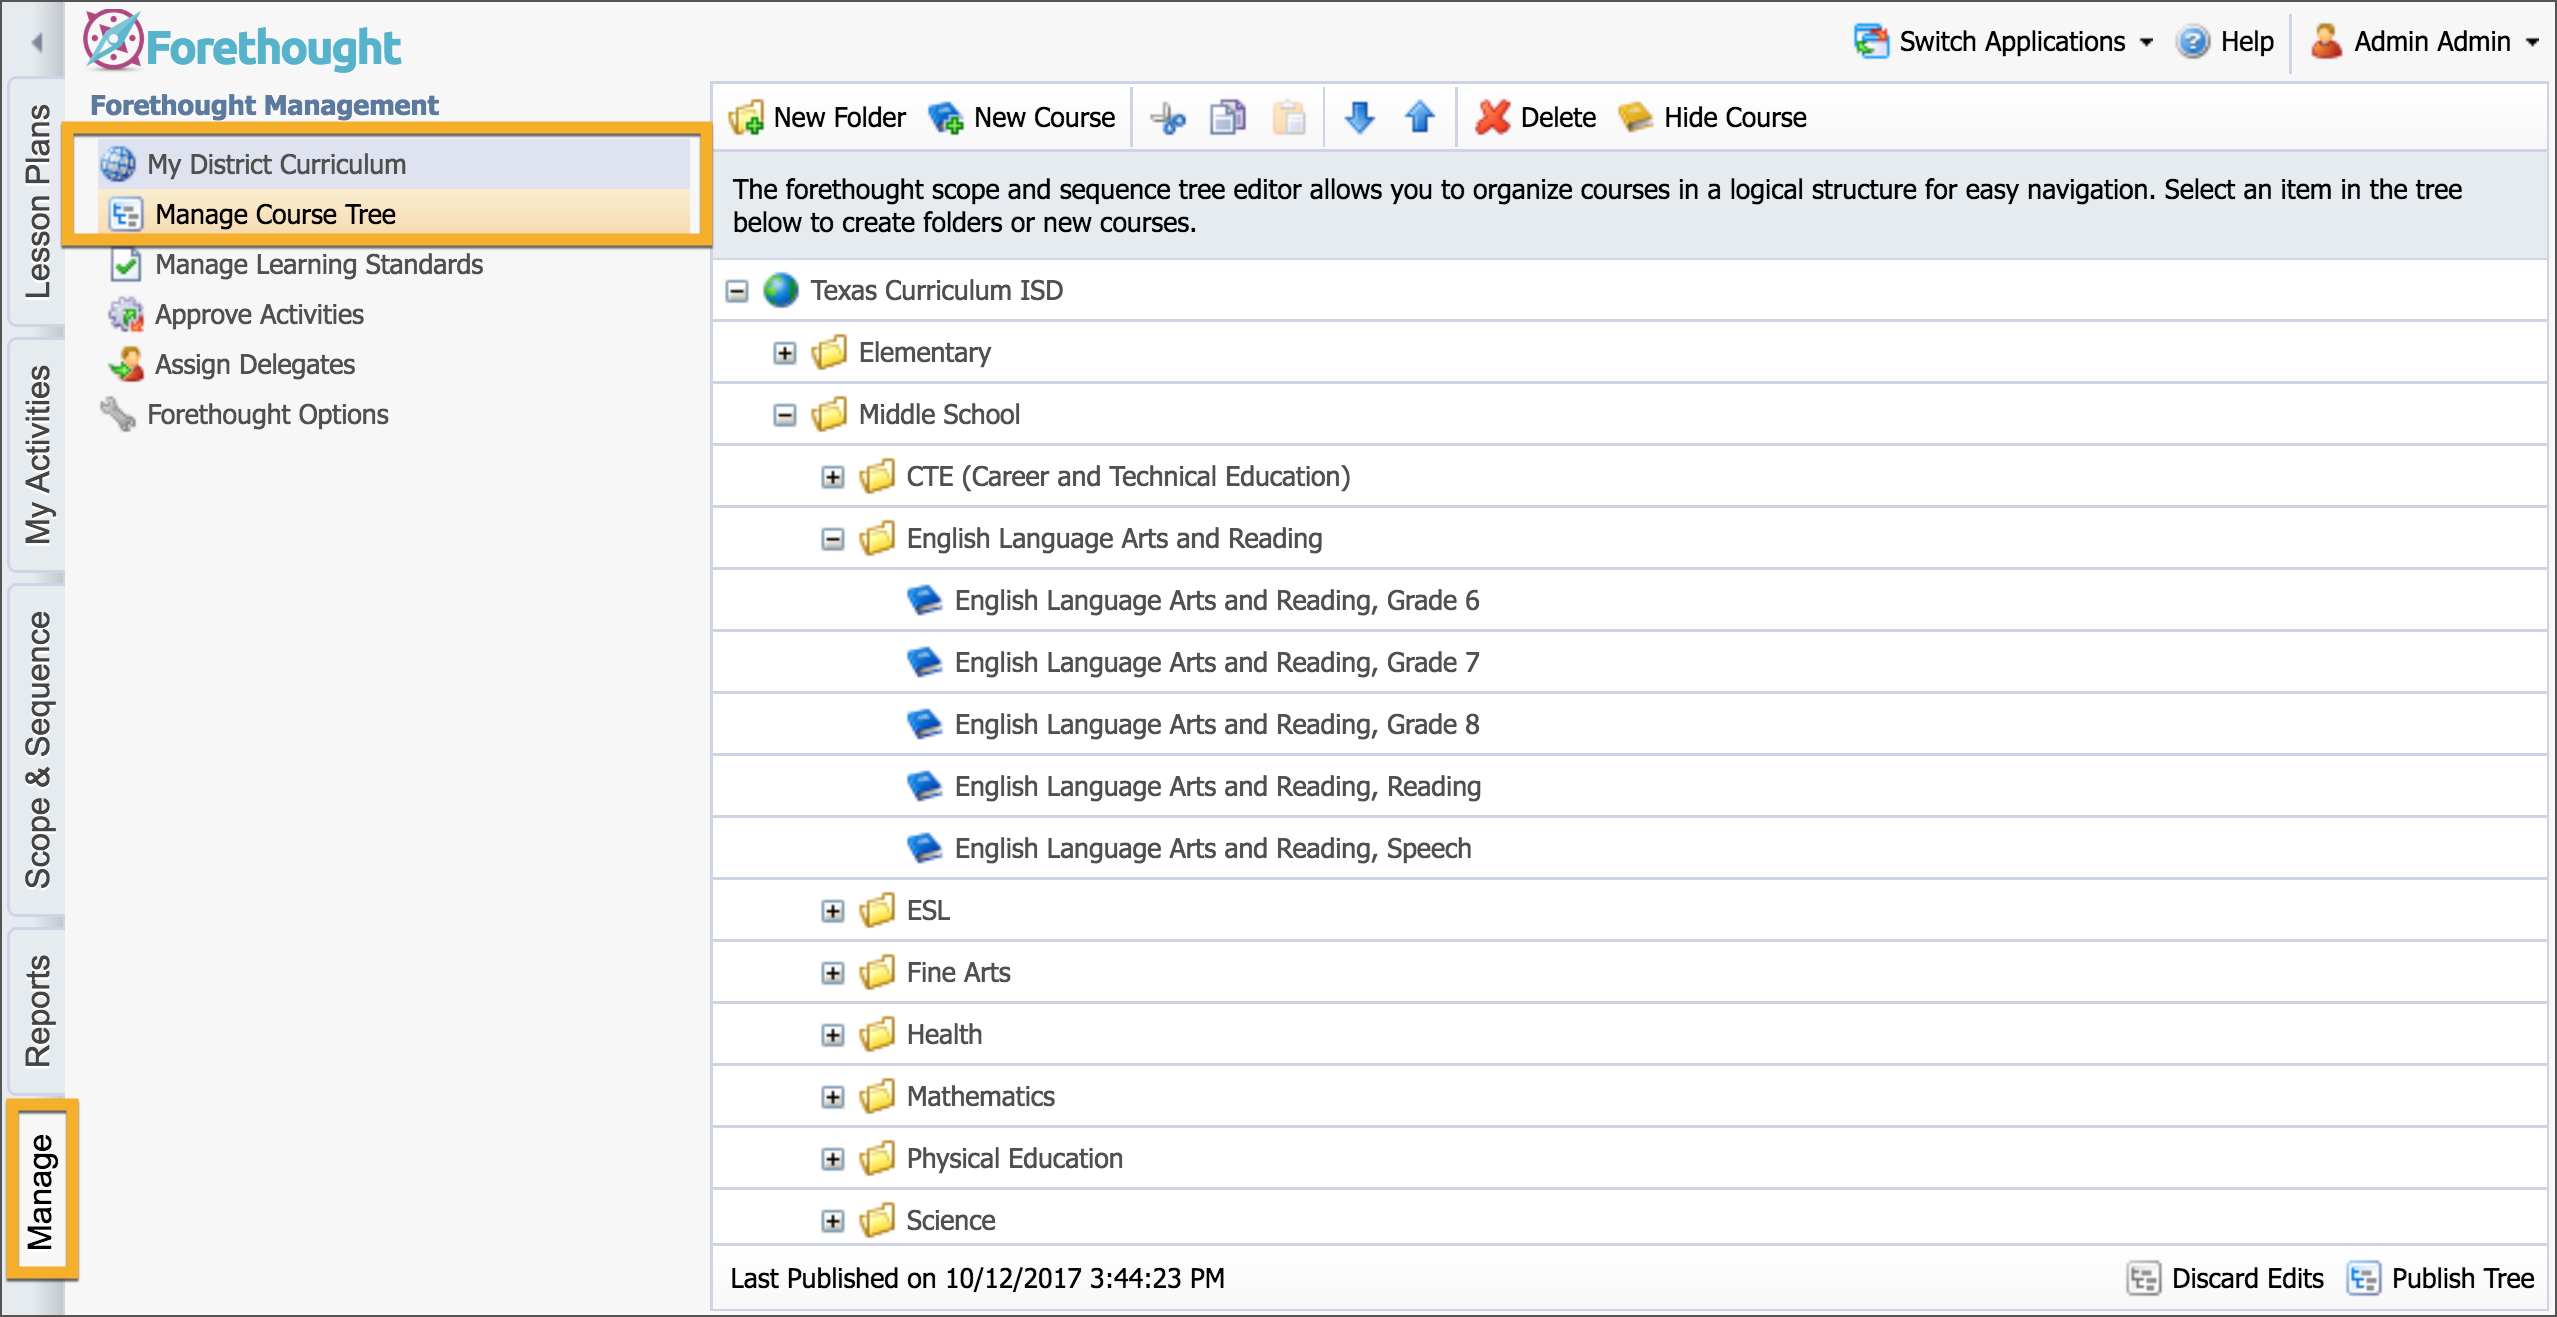
Courses are created and organized in the Manage Course Tree interface. The tree allows courses to be organized by schools, grade levels, content areas, or any other method of organization that your district desires. The course tree is the foundation for which all curriculum entry begins.
There are three types of entries in the tree, which are:
Root Entry — Visualized by the global icon and represents the entire district. This entry cannot be deleted. The district name, however, can be changed by double-clicking the icon, making changes, and then clicking out of it.
Organization Folders —These are the folders that contain other folders or the courses themselves. Districts can organize these folders as they choose by using schools, grade levels, content areas, or other methods.
Courses — Courses are the lowest denominator in the course tree. Learning standards can be applied to courses for teachers to use when building their lesson plans.
Building the Course Tree
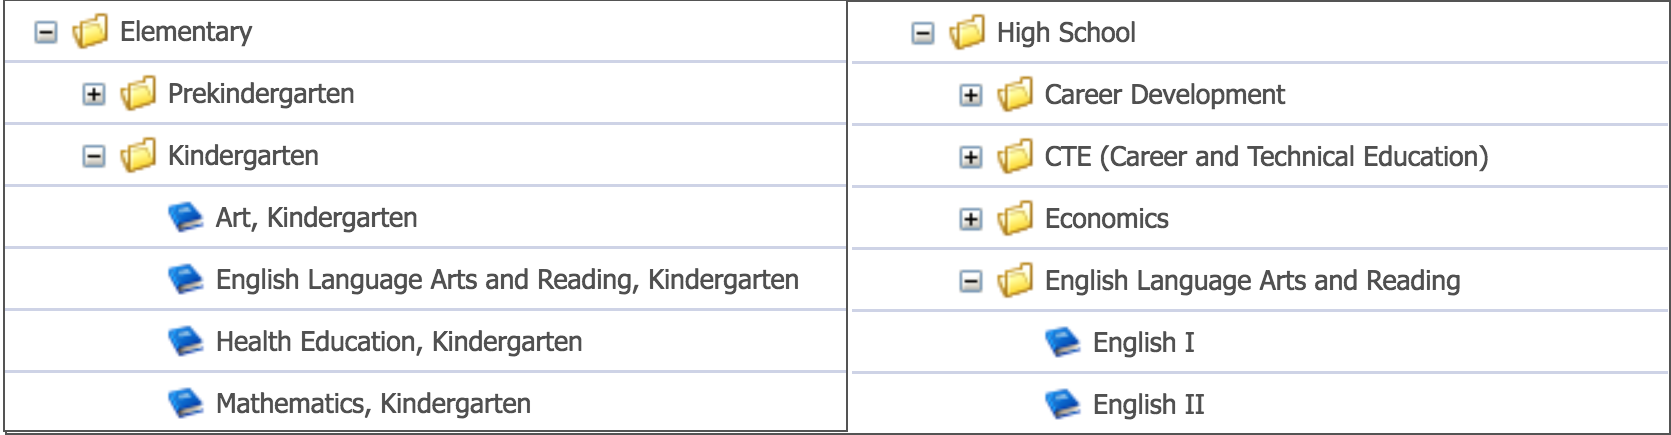
The top level of the default course tree is structured into school-level folders: elementary, middle, and high. The elementary level breaks the courses down into grade-level folders. The middle and high levels divide the courses into their respective subject areas. This method of organization is simply one example. These can easily be reorganized to match your district.
Renaming the Root Entry
Double-click on the root entry.
Change the text of the root entry.
Click off of the entry.
Creating a Folder
Select the root entry or another folder.
Click the New Folder button on the toolbar.
Enter the folder name.
Click the Save button.
Note: You cannot create a folder inside a course.

Creating a Course
Select a folder to place the course.
Click the New Course button on the toolbar.
Enter a name for the course.
Click the Save button.

Note: Only published trees are available for assigning and editing learning standards.
Copying Courses
The two types of copy options are outlined below:
Deep Copy—A deep copy creates a new course and duplicates all learning standards and associated courses. This would be most appropriate for courses like Algebra I, where the middle school curriculum might be different from the high school curriculum.
Mirrored Course — A mirrored course places the exact same course in multiple places in the tree. Any changes made to one course will impact any mirrors. This is appropriate for courses where the curriculum is the same at the middle and high school levels.
Select a course to be copied.
Click the Copy button on the menu bar.
Select the type of copy operation to perform.
Select a destination folder.
Click the Paste button.
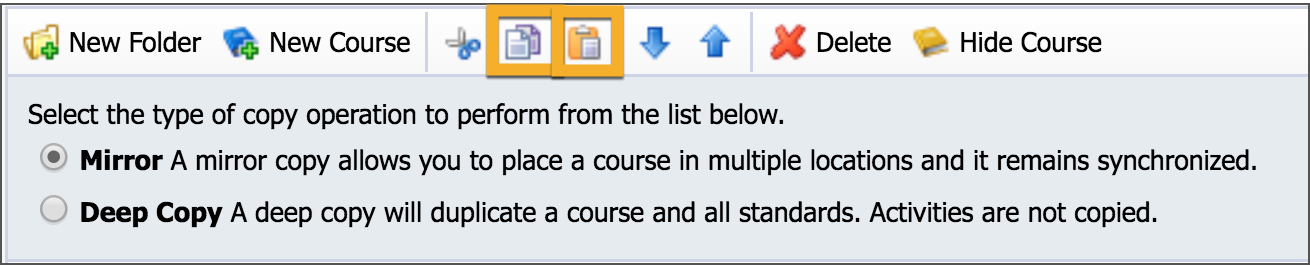
Note: Courses can be copied to various parts of the course tree, but cannot be copied directly beside the original course. While Forethought offers tremendous flexibility in organizing courses, using options like mirrored courses should be used sparingly to simplify long-term management.
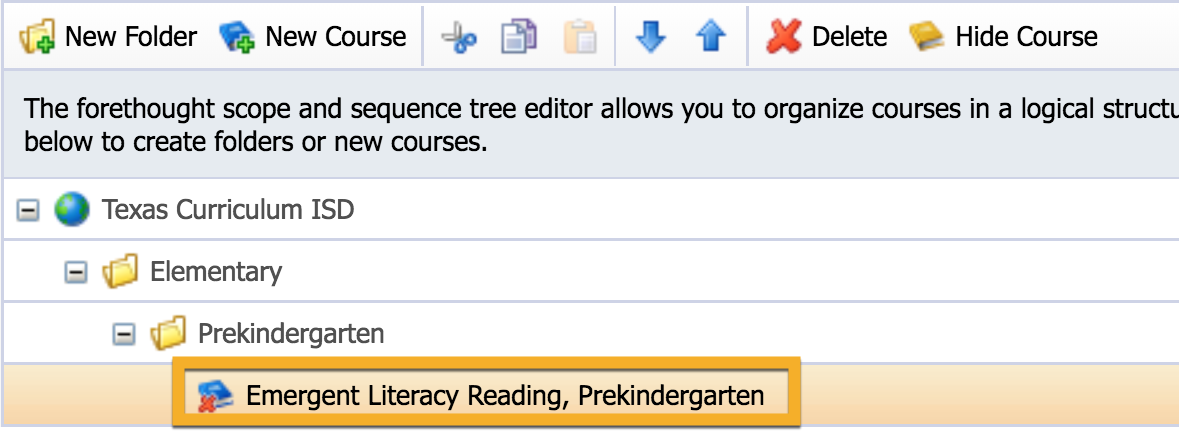
Deleting a Course
Courses should only be deleted when absolutely necessary. This most often occurs when initially experimenting with structure and design. Instead of deleting courses, you can simply hide them in case they are needed later.
Select a course and click the Delete button.
![]()
This sets the course to be deleted when the course is next Published. To set the course to not be deleted, select the course and click the Delete button again. This is an extra safeguard to make sure you really do want to delete that course.

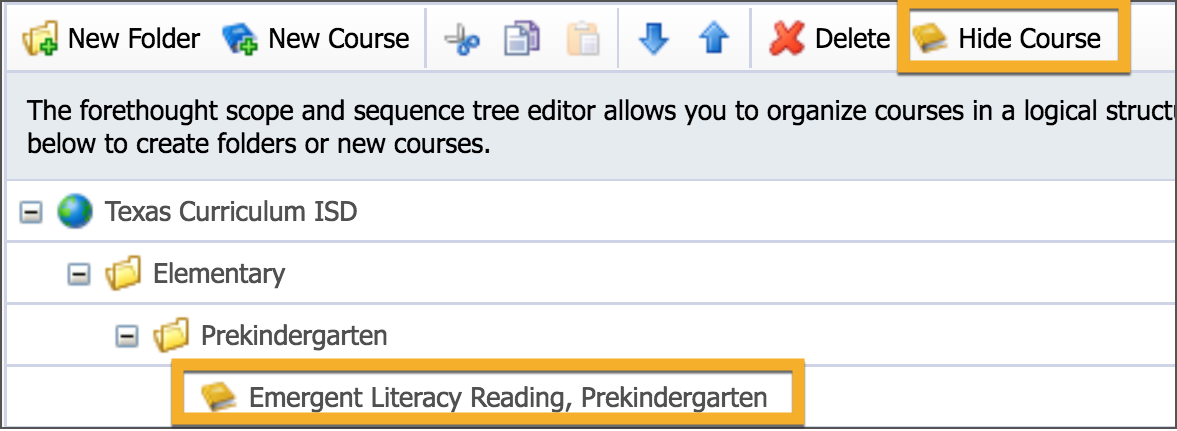
Hiding a Course
The preferred method for making a course unavailable in the district scope and sequence is to hide it. This preserves all learning standards and activities if the course needs to become active in the future.
Select a course and click the Hide Course button.
The course icon turns gold, indicating that it is no longer visible. A course can be made visible again by selecting it and clicking the Hide Course button again.
Moving Courses and Folders
![]() To move a folder to another area in the tree:
To move a folder to another area in the tree:
Select the folder to be moved.
Click the Cut button (scissor icon).
Select a folder to place the course.
Click the Paste button.
You can also drag and drop it into another folder, which will prompt you to confirm your action. You can also use the blue arrows to move courses and folders up and down in the tree.
Moving a folder will also move any other courses or folders within it. Moving a course preserves all course content (standards and activities).
Publishing the Tree
![]()
As an extra safety mechanism for both the course tree and all individual courses, Forethought creates two copies of the course tree. All work is conducted on the draft copy of the tree. All changes and edits occur on this copy thus leaving the published copy unaffected. All teachers and curriculum editors use the published copy to find courses in the tree. To finalize your changes and make edits public, you must publish the tree. This not only finalizes your changes but also creates a future fall-back point for removing unwanted changes.
The latest date and time of publishing appear on the bottom status bar.