.png)
The Student Forms toolset enables districts to create and organize online forms pertaining to PGPs, RTI documentation, LPAC documentation, etc. District-level form creators and campus administrators can create, add, edit, and view student forms as appropriate.
Adding Form Categories
Form categories are used to properly divide forms within a student's profile properly.
Step 1: From the Student Settings gear in Aware, select Configure Form Categories.
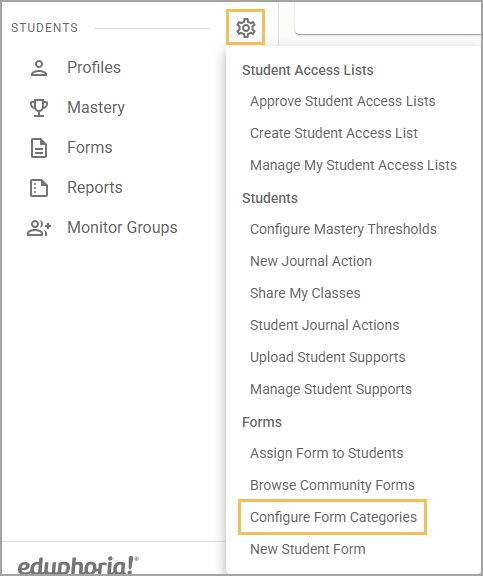
Step 2: Enter the category name.
Step 3: Choose a category icon.
Step 4: Click the Plus sign to add the category.
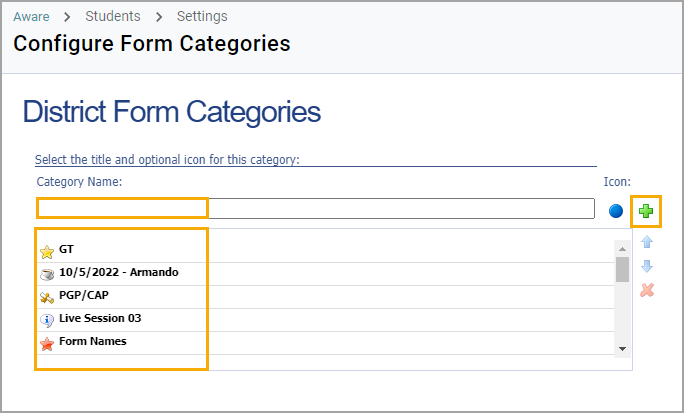
To delete a category, select the category and click the X icon. To edit a category, select the category, make any changes in the box, and click the Edit icon. Use the up or down arrows to move categories.
Creating a Form
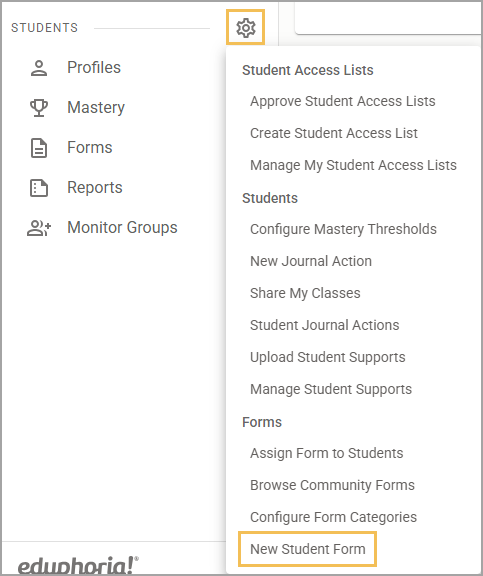
Step 1: Navigate to the Student Settings gear and select New Student Form.
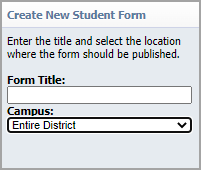
Step 2: Choose whether to create a new, empty form or copy an existing form. Select Next to continue.

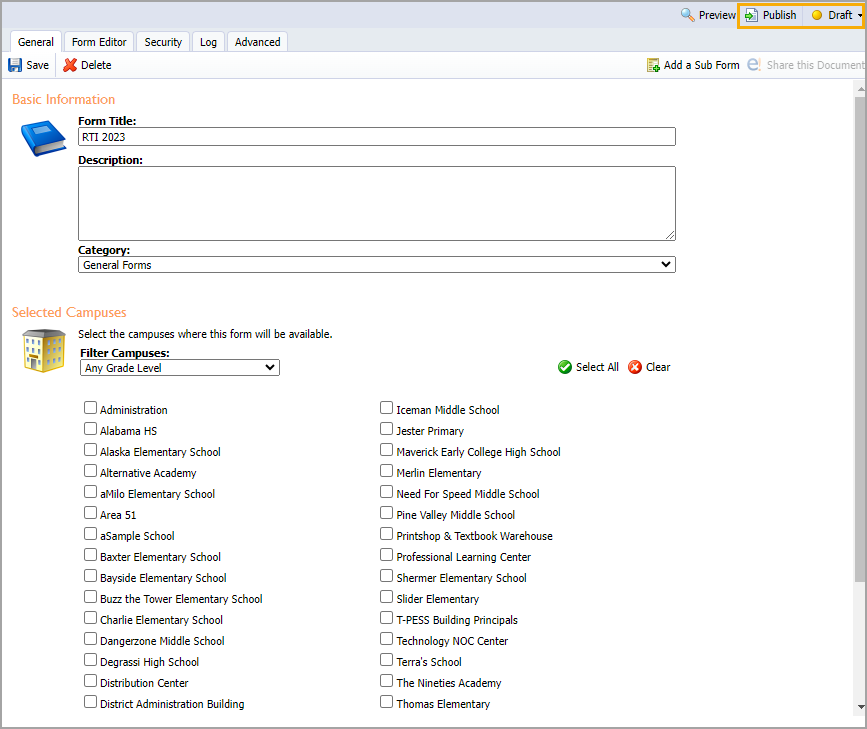
Step 3: Add the title and the campus that will be using this form.
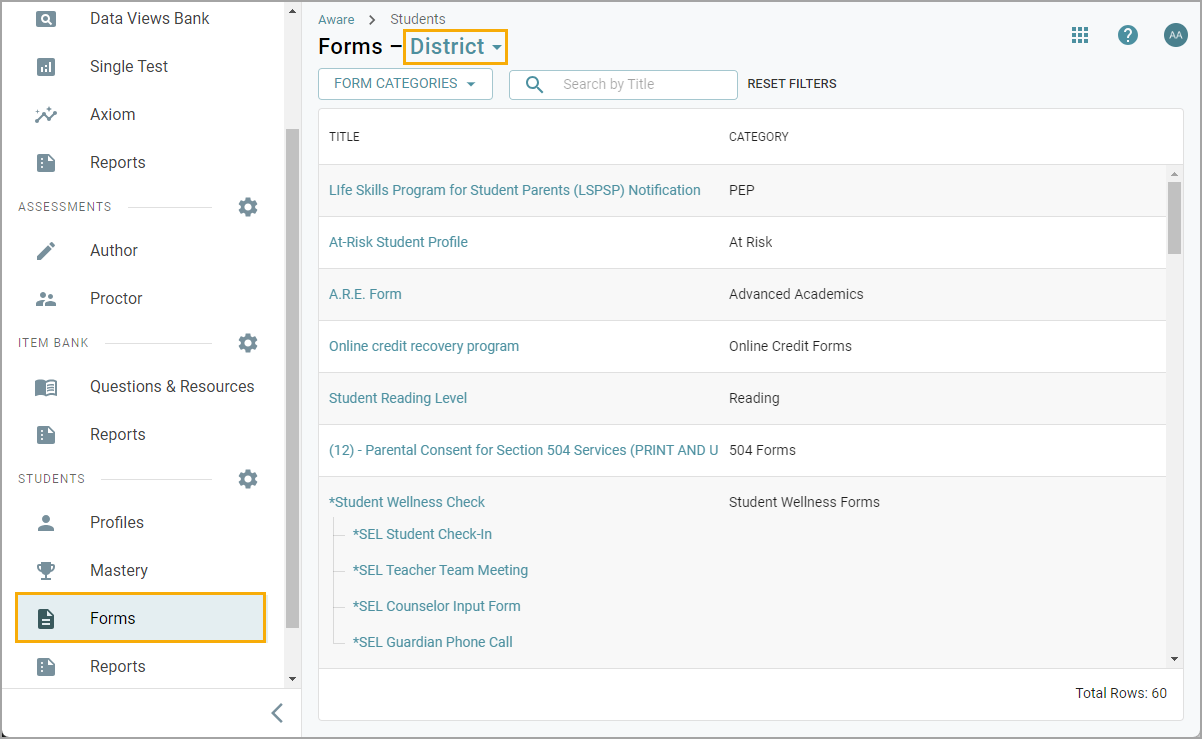
The form will appear within the Forms table, depending on if it is available for the entire district or a single campus. Select the drop-down arrow to choose between District and School forms.
Publishing a Form and Making It Active
After you make changes to a form, click Publish. The Publish button controls when a form is updated once a user has edited it. In order to add the form to a student, it will need to be made Active by clicking the Draft button. The Active/Draft button controls the form’s visibility to the end user
General Tab
The General tab contains comprehensive information about the form. In this tab, users can edit the title and description as well as change the form category.
To make the form available only on specific campuses, select the campuses by using the grade level filter or by selecting each campus from the list of campuses shown. If the form will be used across the district, do not select any campuses.
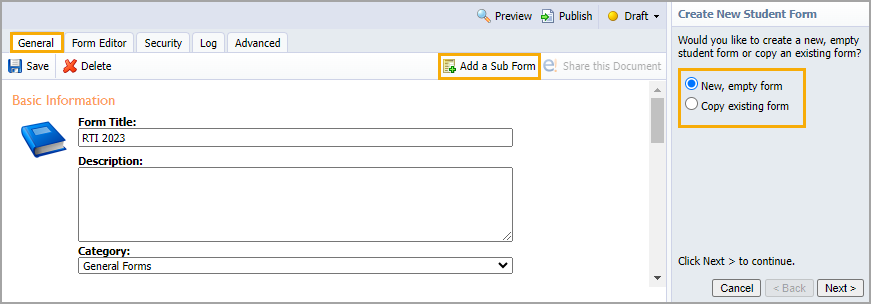
A sub form can also be added or copied by clicking Add a Sub Form and following the creation wizard. Sub forms are designed to addend or update any information in the primary form. For instance, users can employ sub forms to document RTI meetings. Users can add sub forms multiple times.
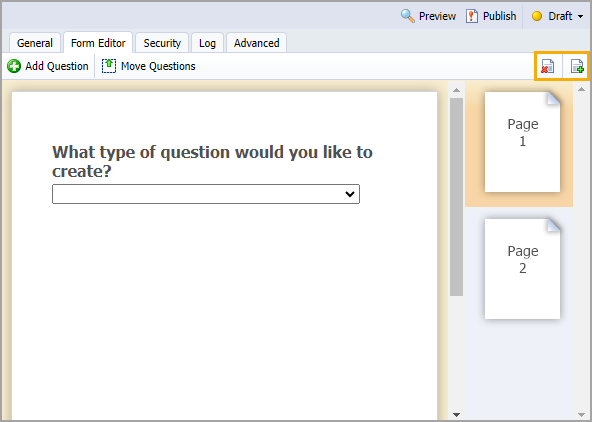
Form Editor Tab
The Form Editor tab enables users to create and edit the form question by question.
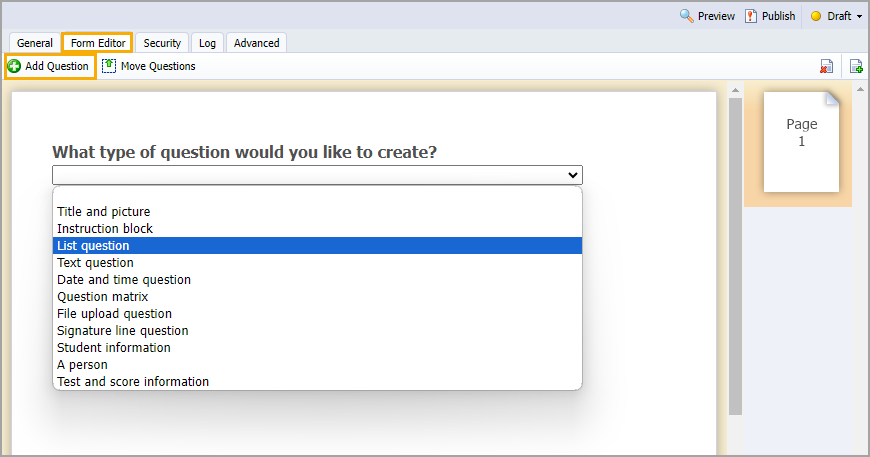
Step 1: Select the Form Editor tab, and select Add Question to add a question.
Warning: If a required question remains incomplete, none of the entered data will be saved for any data fields.
Step 2: From the drop-down menu, select a type of question to add. Depending on the question type added, the controls will differ.
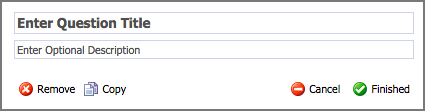
Step 3: Once you have entered question information, click Finished.
Pages
The Pages feature allows you to have a single form that acts as multiple pages. While a single page has no question limit, adding multiple pages can make a form flow more smoothly. Pages also serve as good divisions of a form as each one can have a separate title at the top.
Refer to the following steps to add or delete a page:
Click the Add New Page icon and select the newly-created page to edit the form.
Click the Remove Selected Page icon to delete a page.
Question Options
Each question type has specific options to customize.
To remove a question, do the following:
Click the Edit button.
Click Remove.

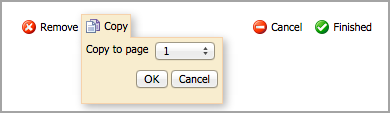
To copy a question, follow these steps:
Click the Edit button.
Click Copy and select which page to which you would like it to be copied. It will appear at the bottom of that page.
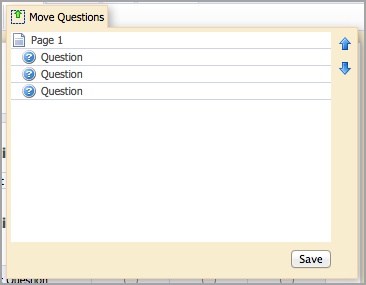
To move a question, complete the following:
Click Move Questions.
Select a question, and use the arrows to move the selected question up or down.
Click Save when finished.
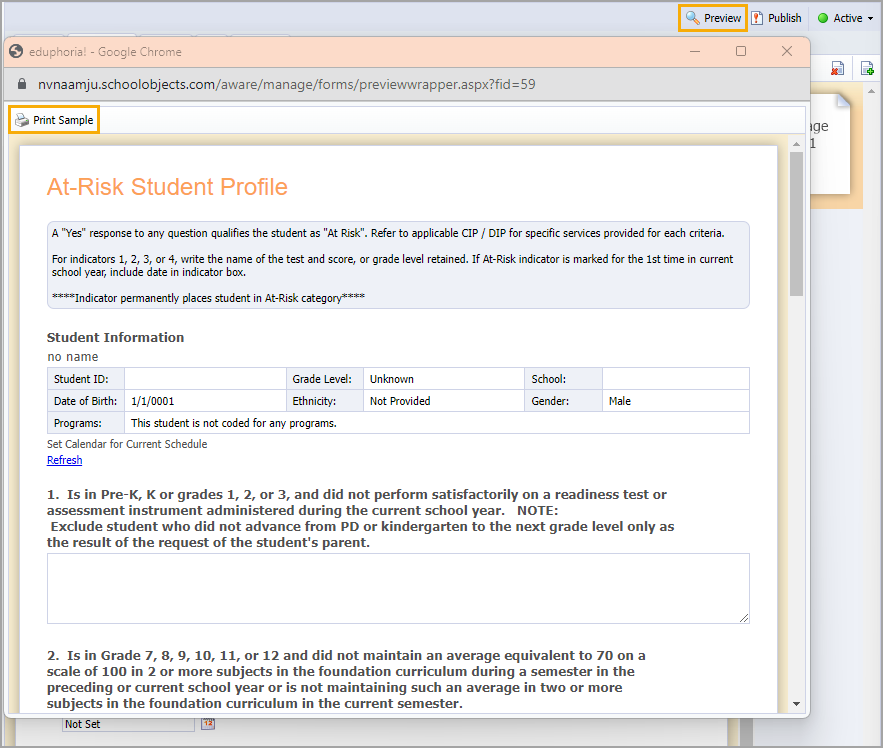
To preview a form, click the Preview icon to open a new window. Users can print the form by clicking Print Sample.
Question Types
There are several question types available. Controls and question options will differ for each question type.
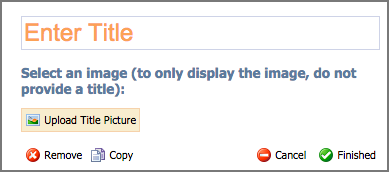
Title and Picture
A Title and Picture question allows users to upload a picture to a question. Users can do so in addition to or in place of providing a title.
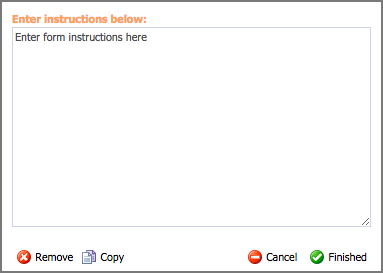
Instruction Block
An Instruction Block is designed to provide additional information for staff filling out the form. It can also be used for basic form divisions.
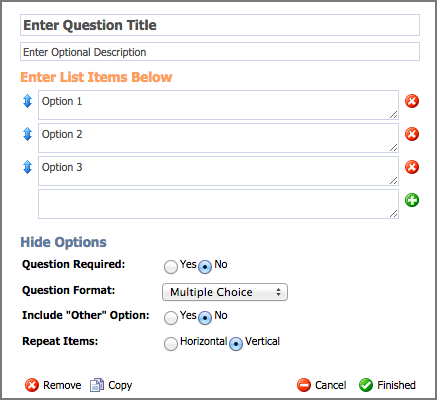
List Question
A List Question prompts users to choose from a list of options. This can be multiple selection, multiple choice, or a drop-down menu.
Users have additional question options from which to select:
Question Required
Questions Format
Include “Other” Option
Repeat Items
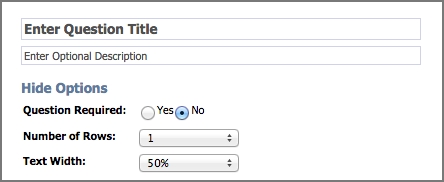
Text Question
A Text Question provides a place on the form for the staff member to have a place to type text. Users have additional question options from which to select:
Question Required
Number of Rows
Text Width for the staff member filling out the form
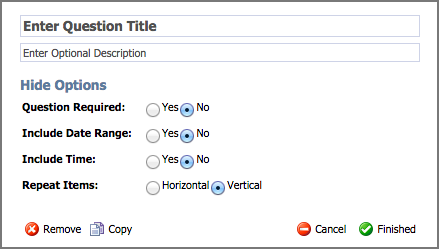
Date and Time Question
A Date and Time Question allows the user to select a date and time on the form. Users have additional question options from which to select:
Question Required
Include Date Range
Include Time
Repeat Items
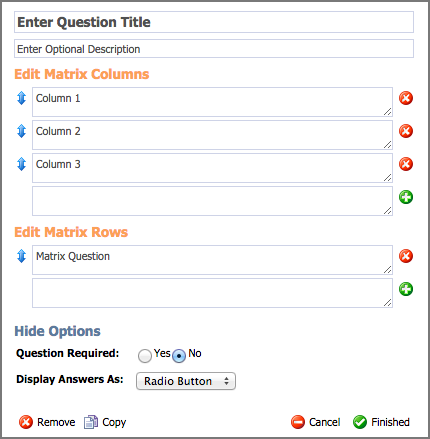
Question Matrix
A Question Matrix provides a matrix for the staff members to fill out the form. Users have additional question options from which to select:
Question Required
Display Answers as Radio Buttons or Check Boxes
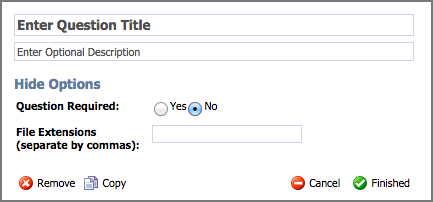
File Upload Question
A File Upload Question provides a way for the staff member to upload a file to the form. Users have additional question options from which to select:
Questions Required
Suggested File Extension
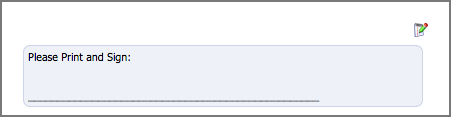
Signature Line Question
A Signature Line Question will allow for a signature line with a prompt if the form needs to be a hard copy with a signature.
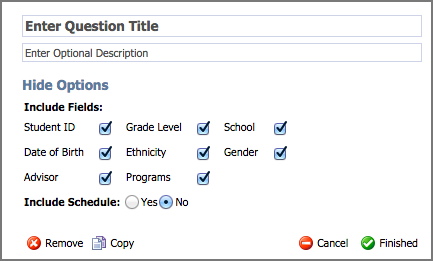
Student Information
A Student Information question type will pull the following student demographic information into a table on the form:
Student ID
Grade Level
School
Date of Birth
Ethnicity
Gender
Programs
Student Schedule
If a user marks Yes on including a student’s schedule, this option auto-allows radio buttons.
A Person
A Person question type allows the staff member filling out the form to enter a staff member’s name that will appear on the form, as well as grant the staff member access to the student’s profile.
Note: When filling out the form, enter the staff member’s username or email address and click Save.
Users have additional question options from which to select:
Question Required
Grant Data Access

Test and Score Information
Test and Score Information pulls the student’s test information from their profile onto the form. Users have additional question options from which to select:
Question Required
Test Type
Subjects
Years Shown
Users can select one or more subjects by holding down the Ctrl key on Windows and the Command (⌘) key on Mac.

Graduation Planning
A Graduation Planning question type provides a place to fill out the student’s CAP.
Security Tab
The Security tab controls who can assign, view, and edit the form.
Assigning Student Forms gives staff members the Assign right, allowing them to assign the form to a student and view the form log. There are four ways to grant the rights:
Staff members that can view the student’s information can assign this form.
Selecting this option allows anyone with rights to the student information through a role or by the student roster to assign the form.
Only those with “Assign Student Forms” rights can assign this form.
Selecting this option allows anyone with Assign Student Forms rights to assign the form.
Only the following staff members.
Selecting this option allows users to choose which individual staff members can assign the form.
Additional viewing/editing rights may be granted when this form is assigned to a student.
Selecting this option allows the person who assigned the form to manually grant viewing or editing rights to specific individuals.
Viewing Student Forms grants staff members the right to view the form once it is assigned to a student. The three ways to assign viewing rights are discussed above.
Editing Student Forms grants staff members the right to edit the form once it is assigned to a student. The three ways to assign editing rights are discussed above.
Deleting Student Forms grants staff members the right to delete the form once it is assigned to a student. The three ways to assign deleting rights are discussed above.

Log Tab
Users can learn more about the Log tab as they use Student Forms.