Frameworks connect data from multiple steps in the process or different templates based on the dimensions to which the elements are tagged. Learn more about building and modifying frameworks.
Quick Guides
Adding Framework Dimensions to Templates
Go to Settings > Form Management.
Select a template matching your framework.
On the Template Information tab, use the Framework drop-down menu to select the framework that matches the template.
Select Save.
Tagging Matrix Group Items
Create or open a template that uses matrix groups. Then, on the Edit Template tab, expand a Matrix Group to open the container and select Rows.
Double-click a row item to open it in the edit box.
Select the dimension from the list and click Update Row.
Using the Dimensions drop-down menu, choose the dimension to apply to the row.
Repeat for each matrix group item in the form.
Select Save and then Update Existing Documents.
Tagging Evidence, Comments, and Checkboxes
Create or open a template that uses matrix groups. Then, on the Edit Template tab, expand a Group to open the container and select an item in the group, such as a checklist item.
In the Item Dimensions section, select the checkbox for each dimension you want to add.
Click the Update button.
Repeat each item in the form.
Select Save and then Update Existing Documents.
Illustrated Guides
Adding Framework Dimensions to Templates
Evaluation Templates are developed using a variety of items, groups, and matrix groups for entering evaluation information. Each of these items can have dimensions and standards tagged for reporting.
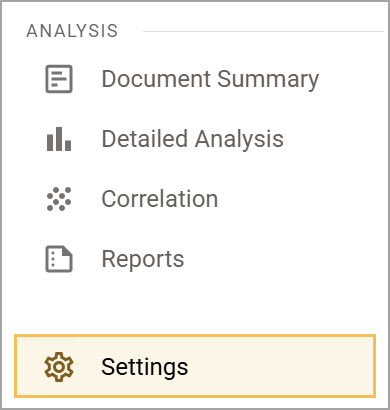
Step 1: Select Settings from the navigation menu.
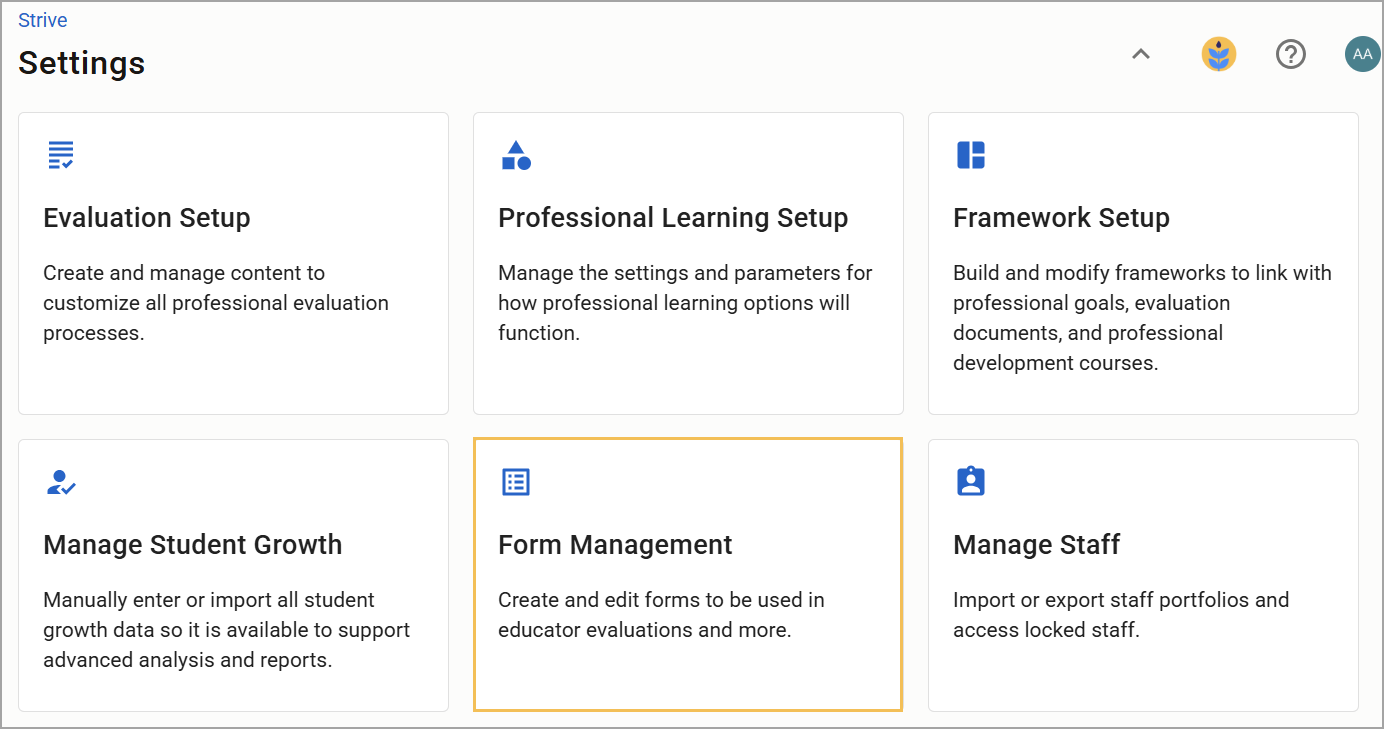
Step 2: Choose Form Management.
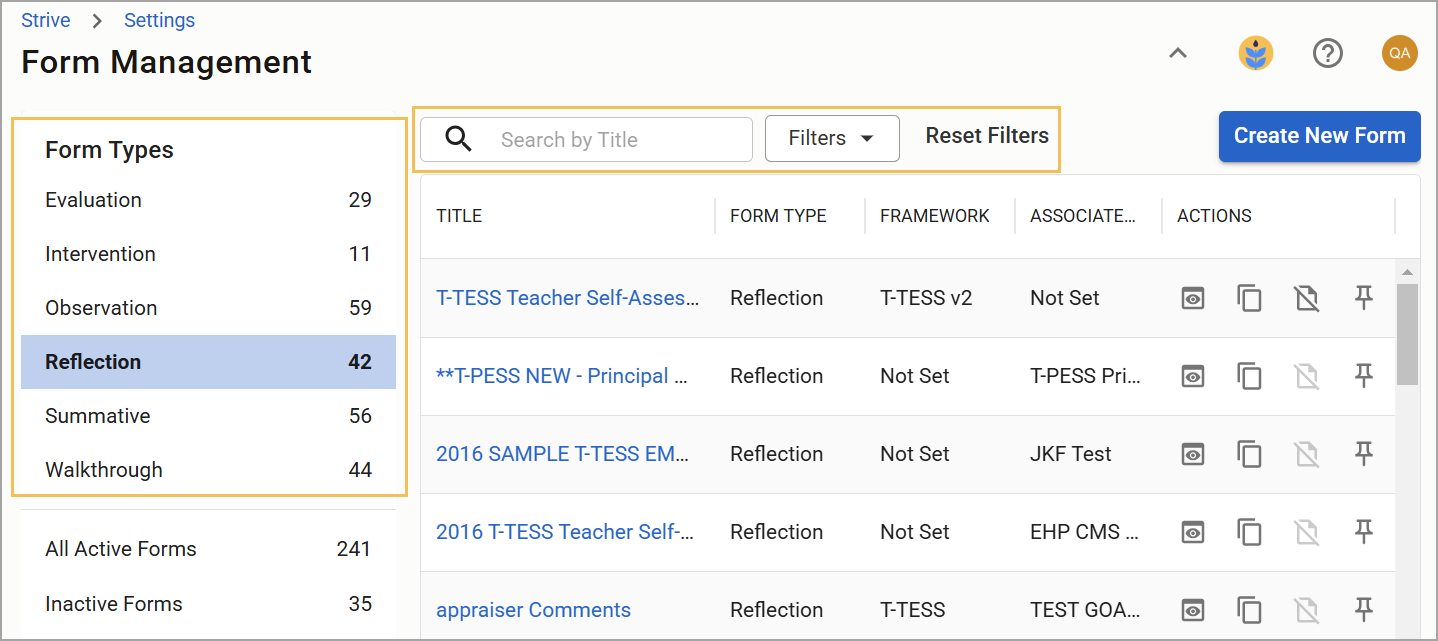
Step 3: Select a template matching your framework from the appropriate form type. You can search by title or use the filters to help locate a template form.
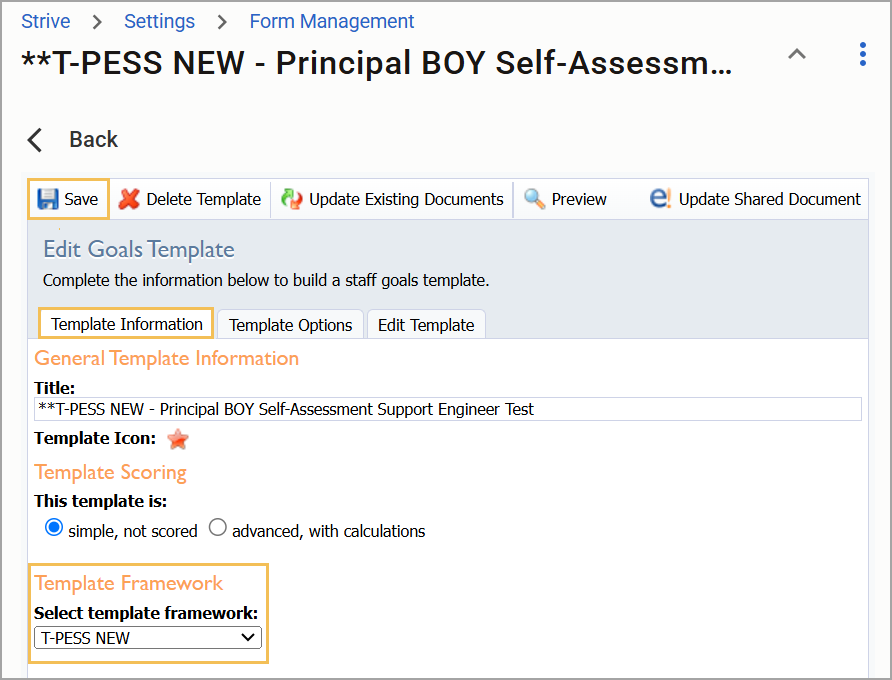
Step 4: On the Template Information tab, use the Template Framework drop-down menu to select the framework that matches the template.
Step 5: Select Save.
Tagging Matrix Group Items
Matrix Groups are designed to store information in columns and row format. This format can be used to rate staff on various descriptors for up to five levels of performance.
Step 1: Create or open a template that uses matrix groups. Then, on the Edit Template tab, expand a Matrix Group to open the container and select Rows.
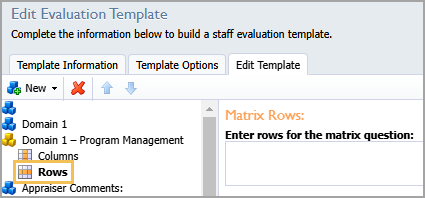
Step 2: Double-click a row item to open it in the edit box.
Step 3: Select the dimension from the list and click Update Row.
Step 4: Using the Dimensions drop-down menu, choose the dimension to apply to the row.
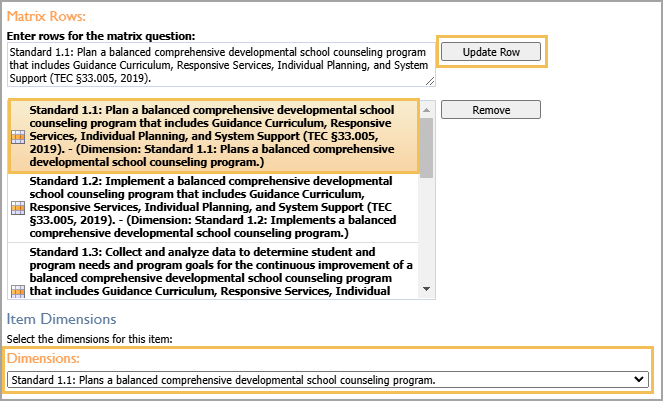
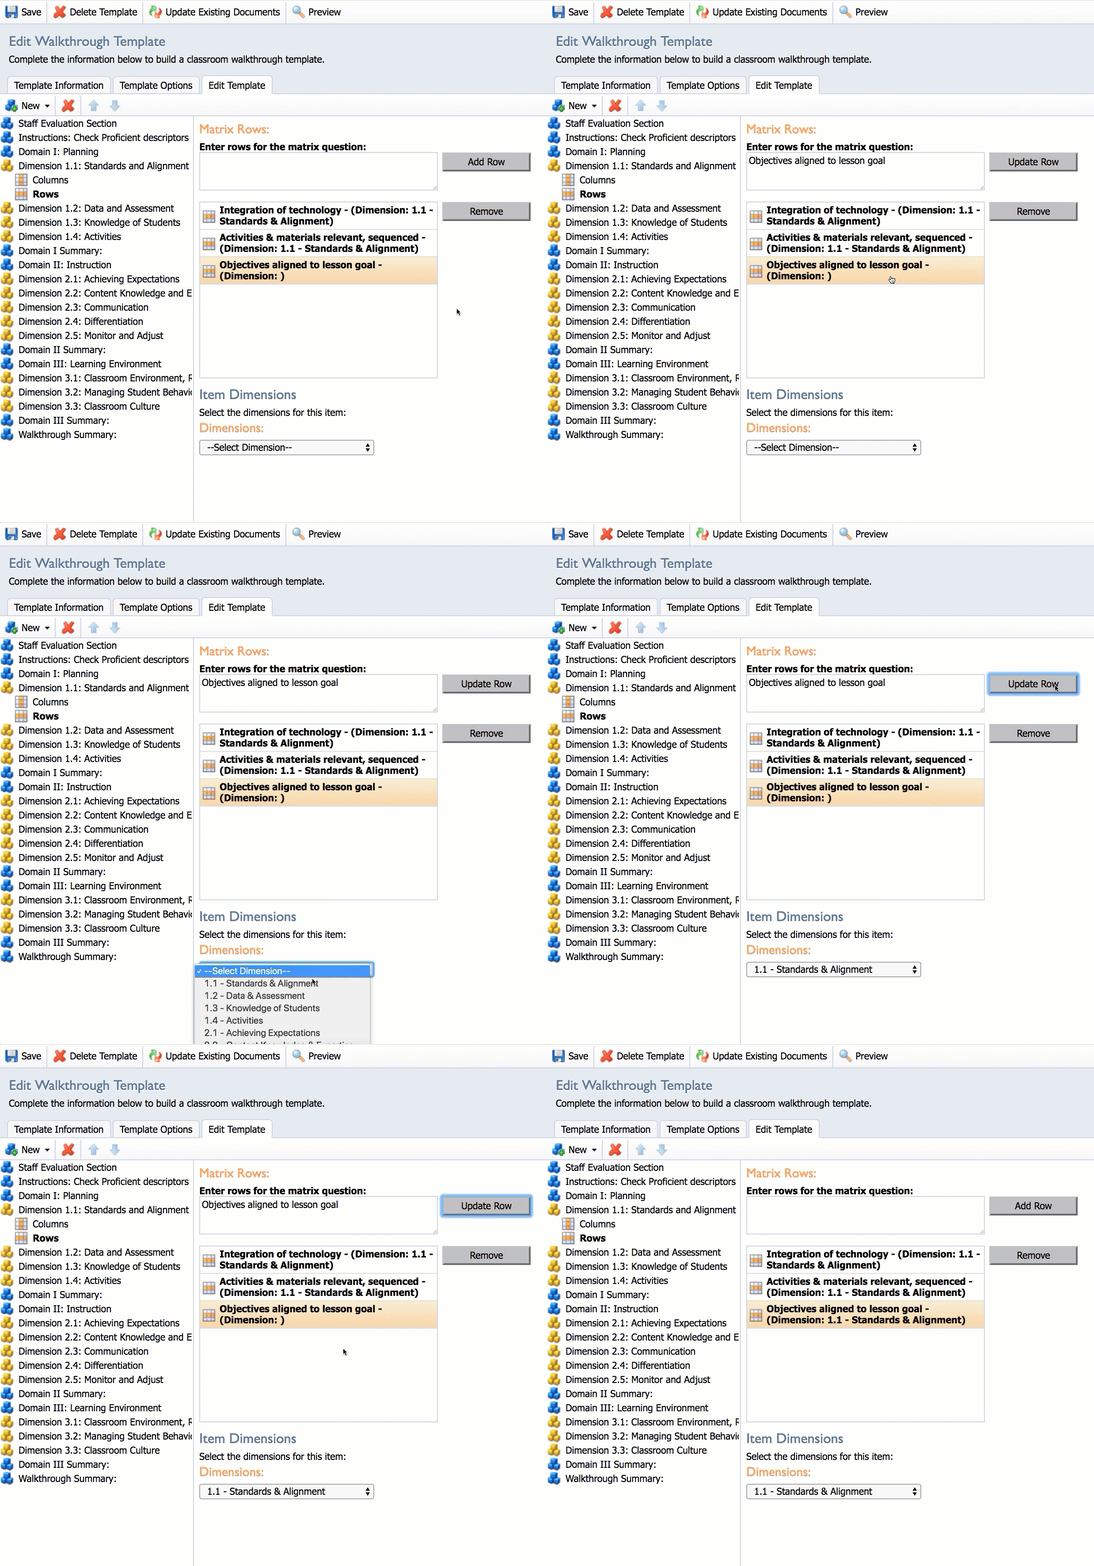
Step 5: Repeat these steps for each matrix group item in the form.
Step 6: Select Save and then Update Existing Documents.

Note: If you are updating a document that has already been used, select Save. Then, click the Update Existing Documents button to apply these tags to evaluations that have already been completed. If you do not select Update Existing Documents, the changes only apply to new documents.
Tagging Evidence, Comments, and Checkboxes
Note: Tags are invisible to evaluators and staff members. Tags are only visible to Appraisal Administrators who set them up to help with reporting, analysis, and the Summative Panel.
Evidence and comments use the Comments item type that can be added to a Group. Groups are indicated by the blue building blocks icon.
If the item you are adding is related to a single dimension, select the item, and tag it to that dimension. If the item is related to more than one dimension, such as a comments box for the entire domain, determine the best way to use those comments. You can either tag all of the dimensions in that domain or not tag any.
Note: When tagging multiple dimensions to a comment or evidence box, those comments appear in all dimensions in the Summative Panel. The evaluator must then copy the specific portion of the comments to the correct dimension in the document.
Step 1: Create or open a template that uses matrix groups. Then, on the Edit Template tab, expand a Group to open the container and select an item in the group, such as a checklist item.
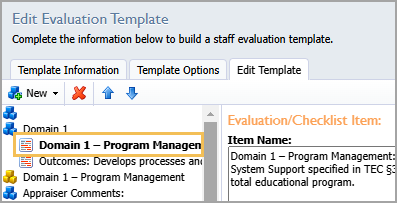
Step 2: In the Item Dimensions section, select the checkbox for each dimension you want to add.
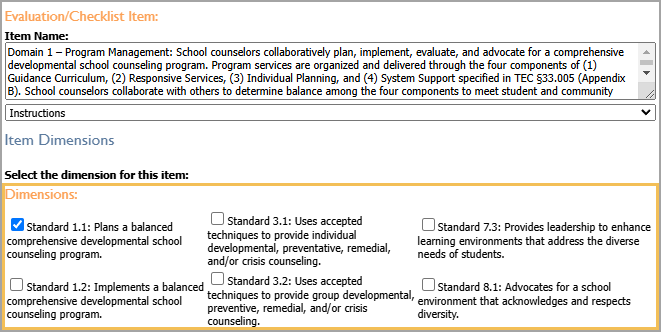
Step 3: Click the Update button.

Step 4: Repeat these steps for each item in the form.
Step 5: Select Save and then Update Existing Documents.

Note: If you are updating a document that has already been used, select Save. Then, click the Update Existing Documents button to apply these tags to evaluations that have already been completed. If you do not select Update Existing Documents, the changes only apply to new documents.