Saved Filters allows a user to save a set of filters as a preset. Saved Filters can be accessed from the Bookmark icon in Quick Views, Single Test Analysis, Author Assessments, and Student Profiles. You can save multiple filters and toggle between them quickly.
Navigate to the relevant section to learn more about Saved Filters:
Creating Your First Saved Filter
Note: You do not need to select every field to save a preset. Text entered into the search box cannot be saved as part of a Saved Filter.
Quick Guide
Select any combination of filters from the toolbar within the tables for Quick Views, Single Test Analysis, Author Assessments, and Student Profiles.
Select the Bookmark icon.
Ensure the chips show the selected filters and name the filtered view. Click Create.
Illustrated Guide
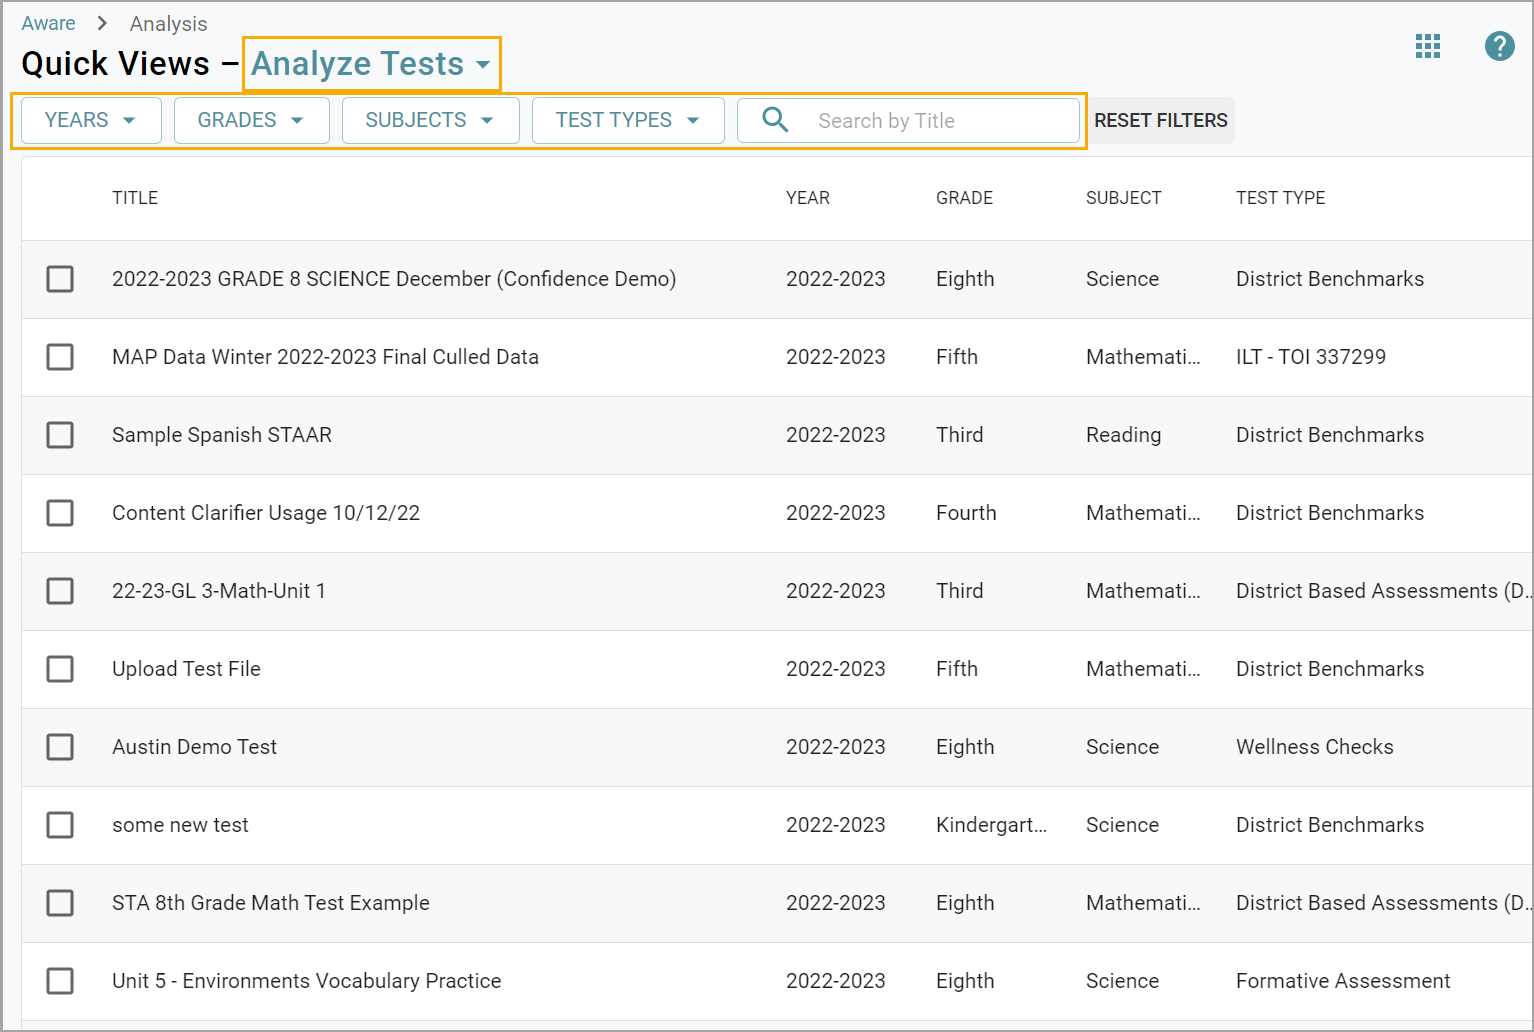
Step 1: Select any combination of filters from the toolbar. Each table view may contain different filters depending on user type.
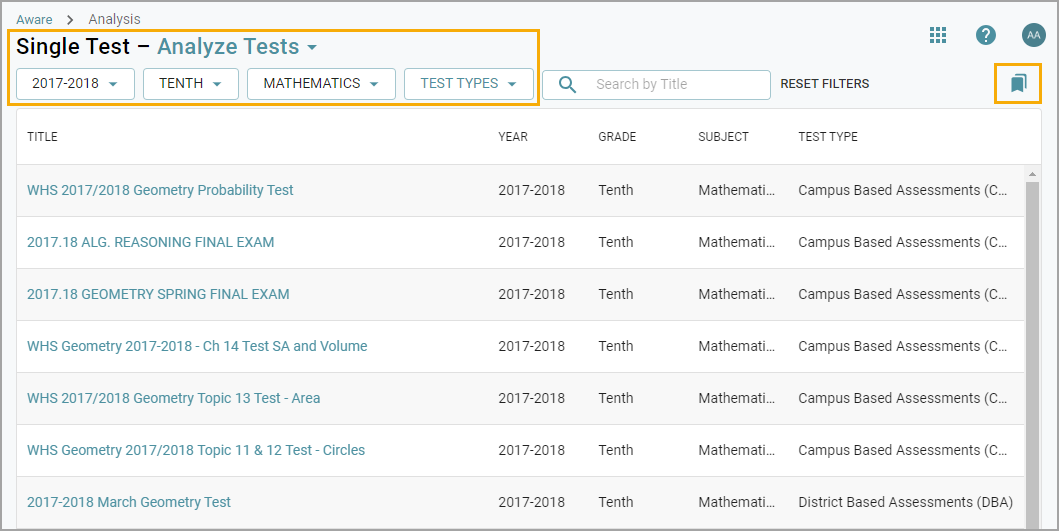
Quick Views and Single Test Analysis Filters: | Profiles Filters: | ||
|---|---|---|---|
|
| ||
Author Assessments Filters: | |||
|
|
| |

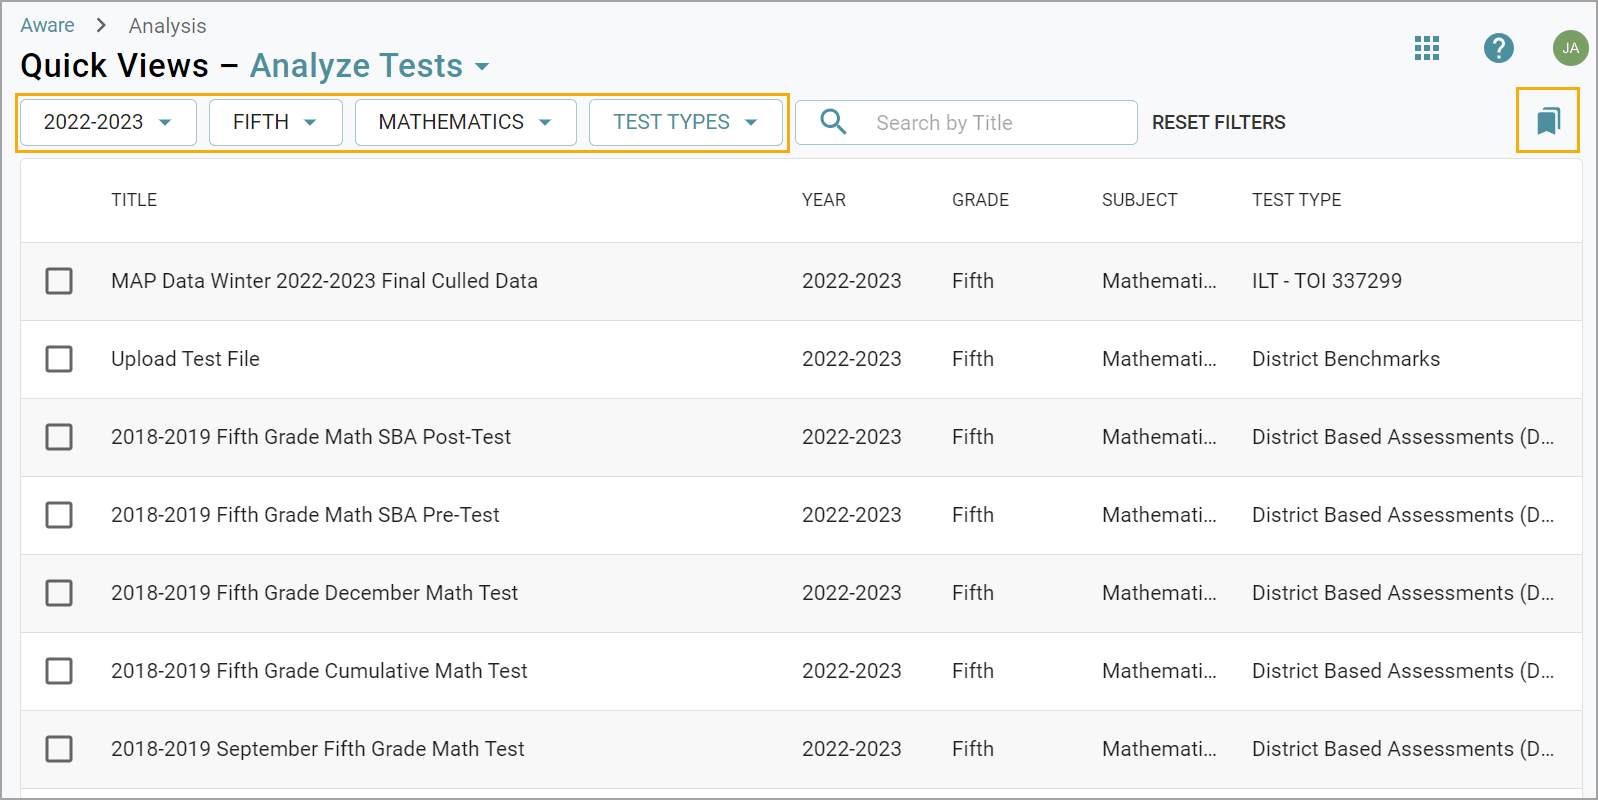
Step 2: Select the Bookmark icon.
Step 3: Ensure the chips show the selected filters and name the filtered view. Click Create.

Creating New Saved Filters After the First
You can save several filter presets, particularly if you manage a variety of subjects or grades. Create Saved Filter presets for different groups of assessments.
Quick Guide
To create another Saved Filter preset, select a new series of filters and click the Bookmark icon.
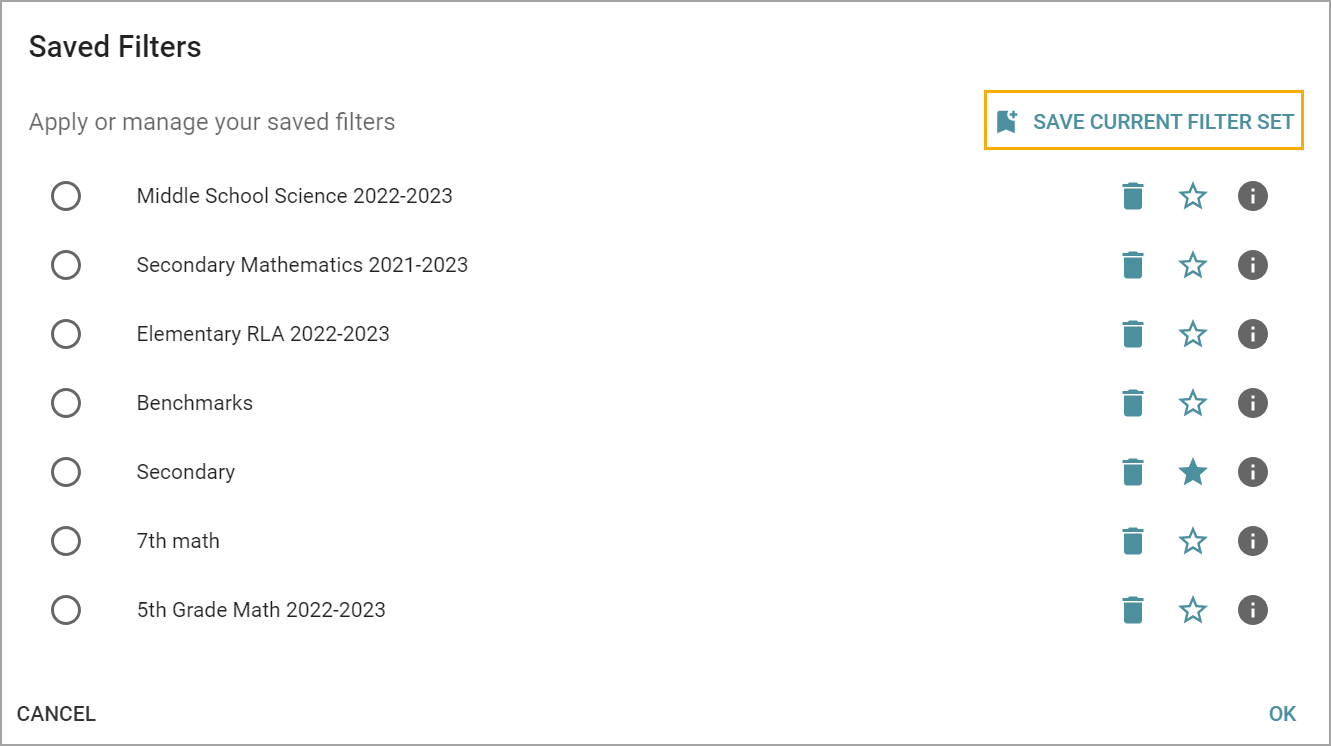
Click Save Current Filter Set.
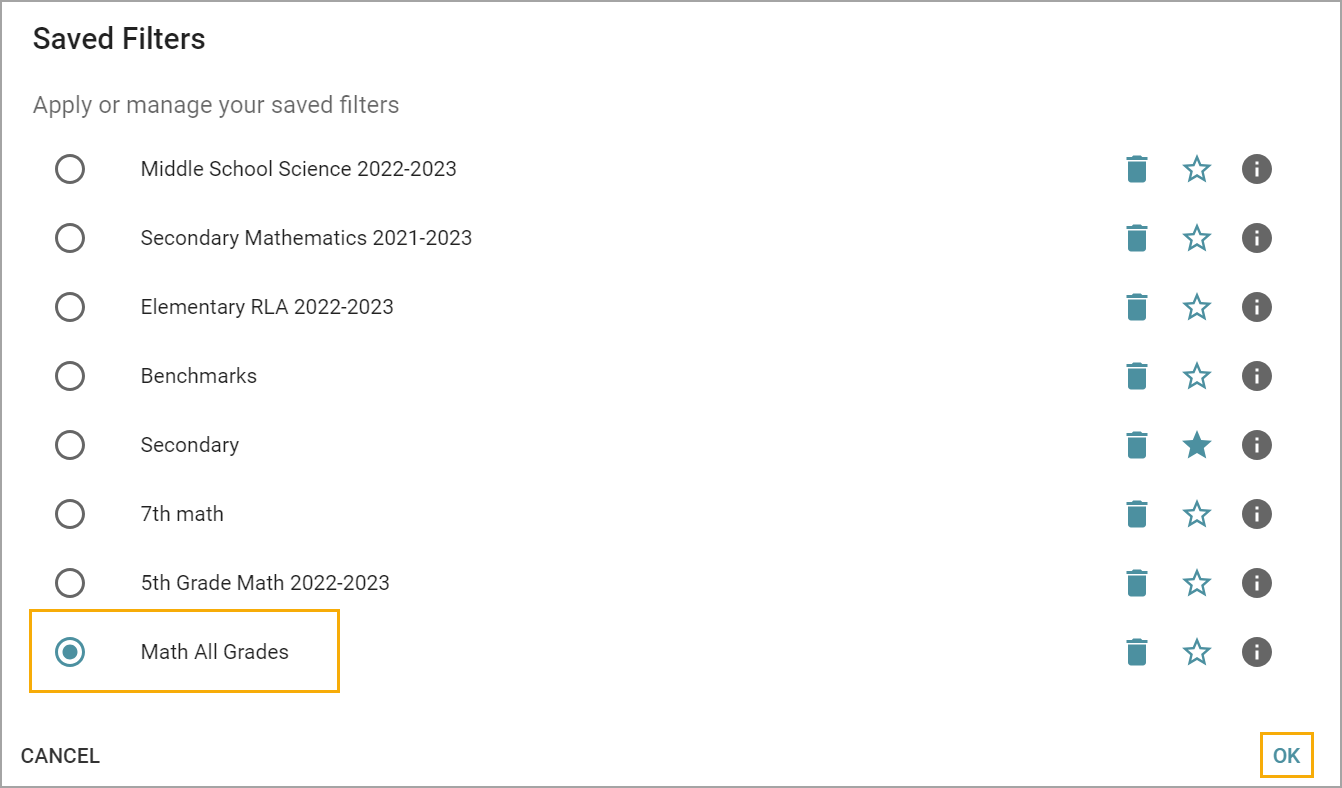
Name the filter set and click OK.
Illustrated Guide
Step 1: To create another Saved Filter preset, select a new series of filters and click the Bookmark icon.


Step 2: Click Save Current Filter Set.
Step 3: Name the filter set and click OK.
Accessing, Choosing, and Deleting Saved Filters
Caution: You cannot edit Saved Filter presets. If needed, delete a Saved Filter preset and create a new one. Deleting Saved Filter presets cannot be undone.
Quick Guide
Select the Bookmark icon to load created Saved Filter presets.
Select the desired Saved Filter preset and click Apply.
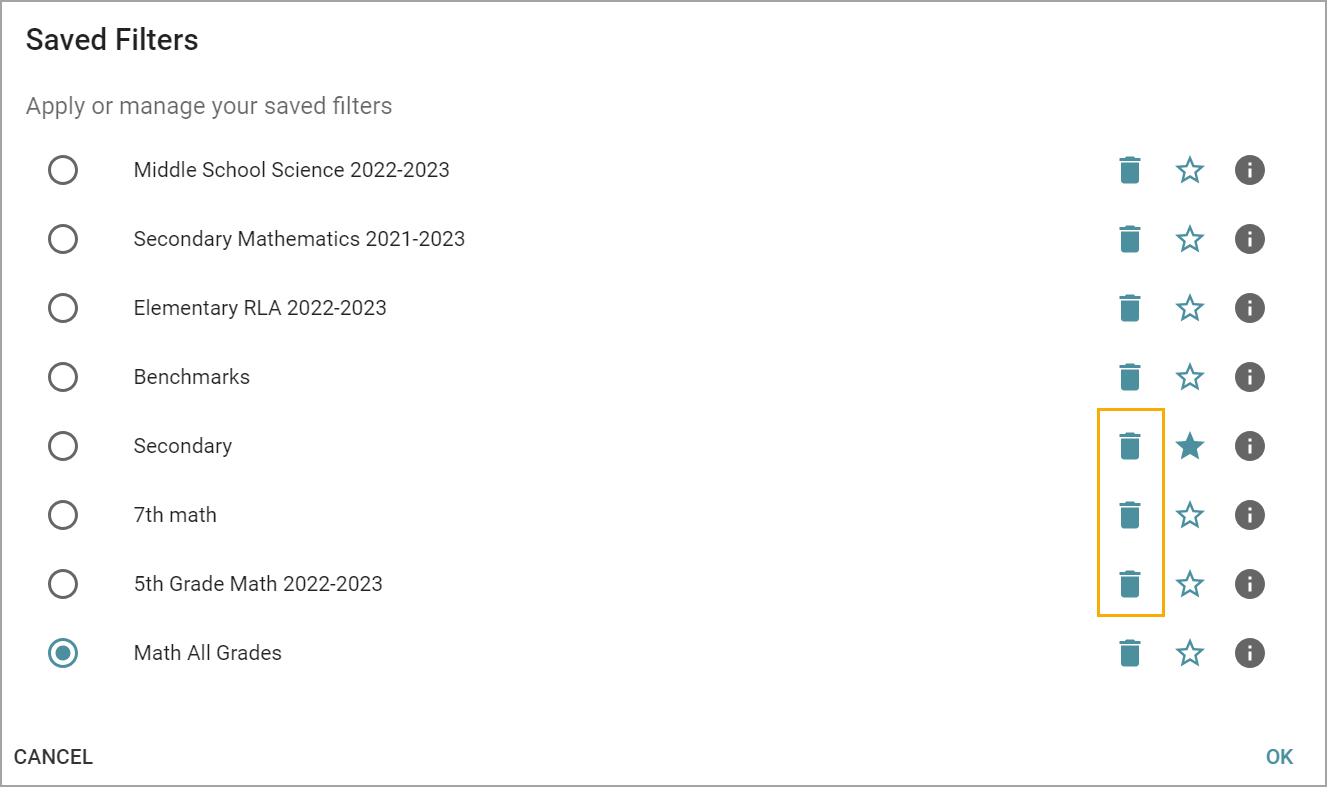
Click the Trash Can icon to delete a Saved Filter preset.
Hover over the Information icon to see the Saved Filter details in the preset.
Illustrated Guide
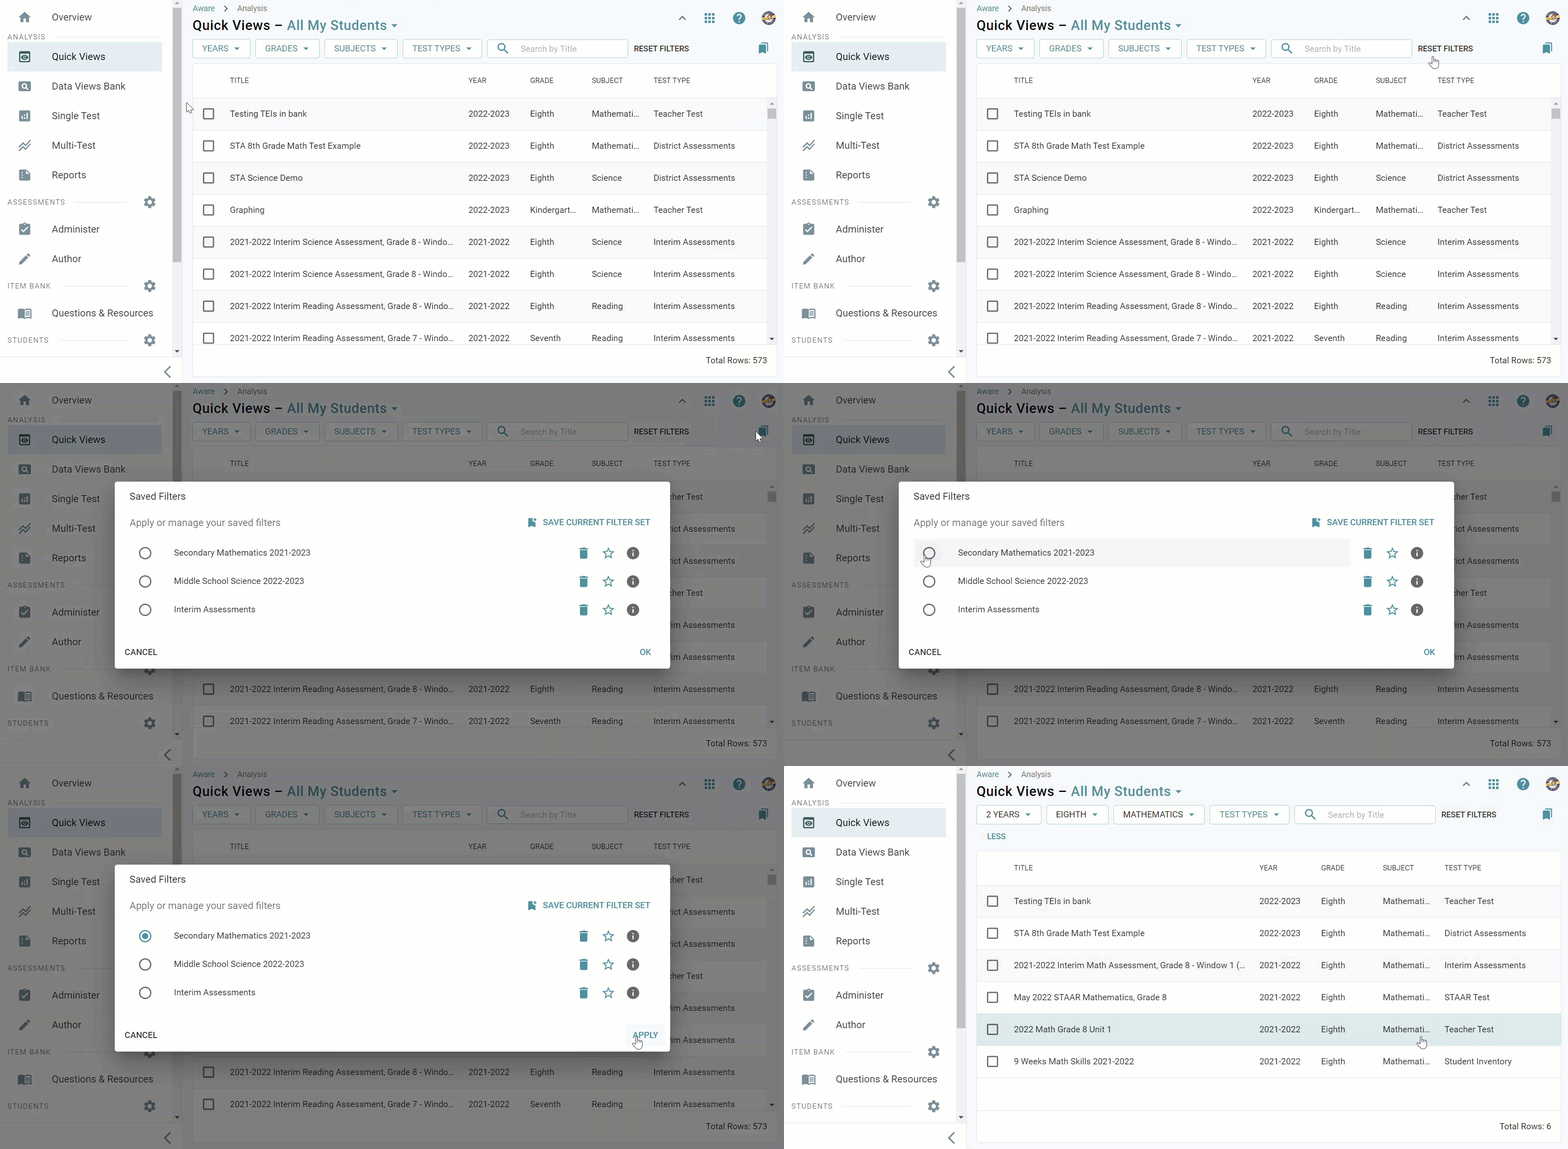
Step 1: Select the Bookmark icon to load created Saved Filter presets.
Step 2: Select the desired Saved Filter preset and click Apply.
Step 3: Click the Trash Can icon to delete a Saved Filter preset.
Step 4: Hover over the Information icon to see the Saved Filter details in the preset.

Setting a Default Saved Filter
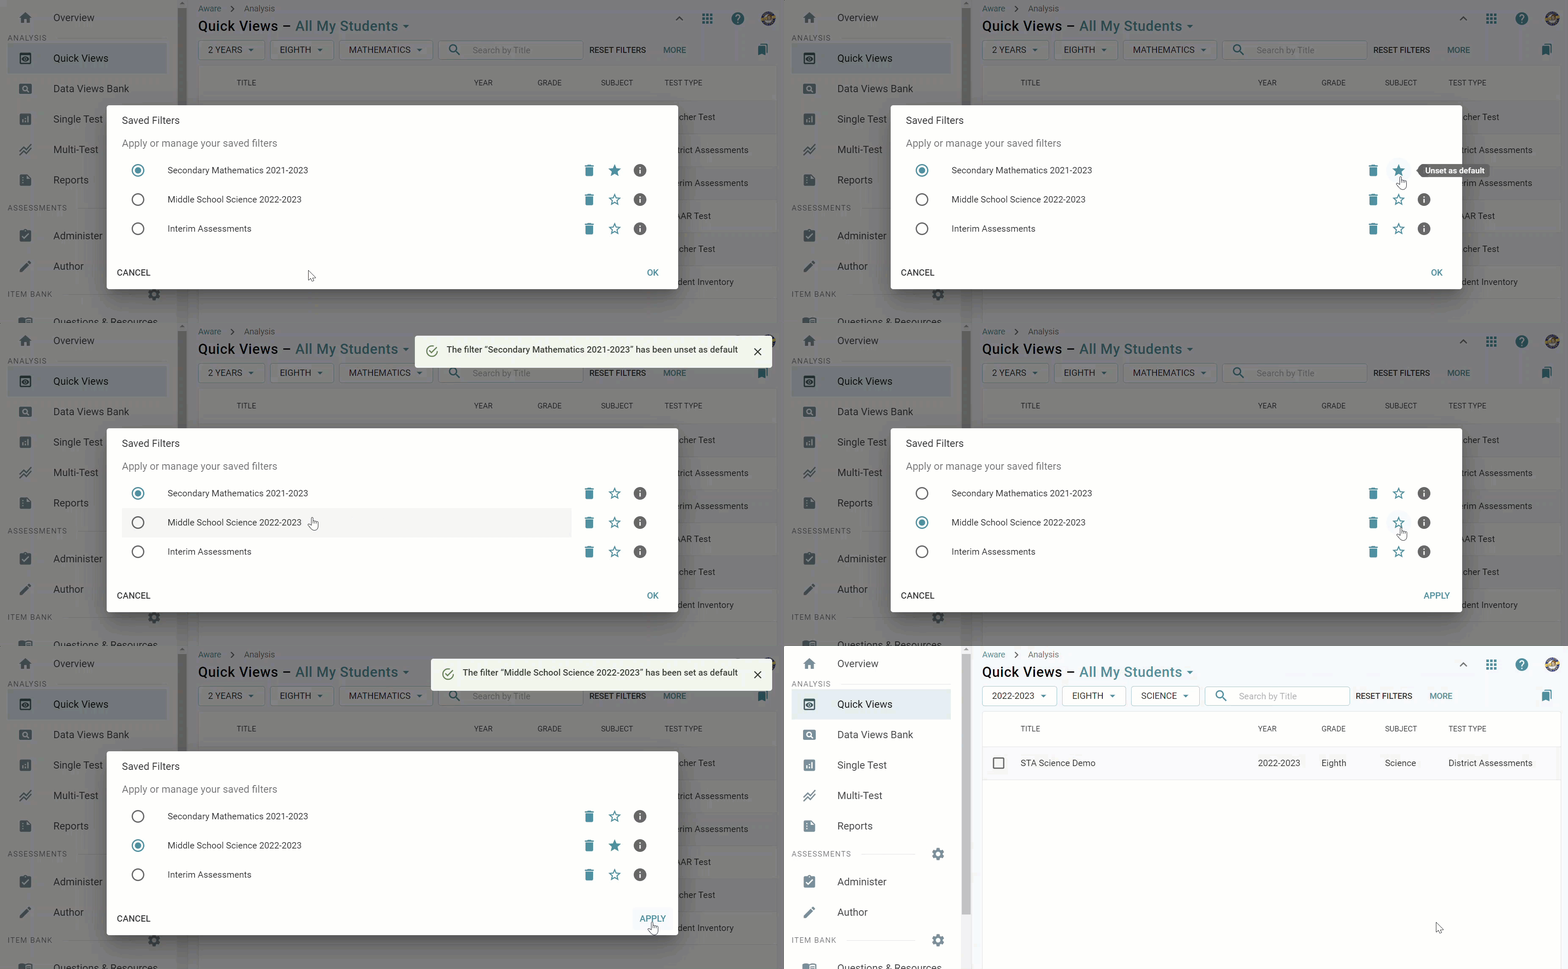
Make a Saved Filter preset the default preset by selecting the Star icon next to the preset’s name and clicking OK.
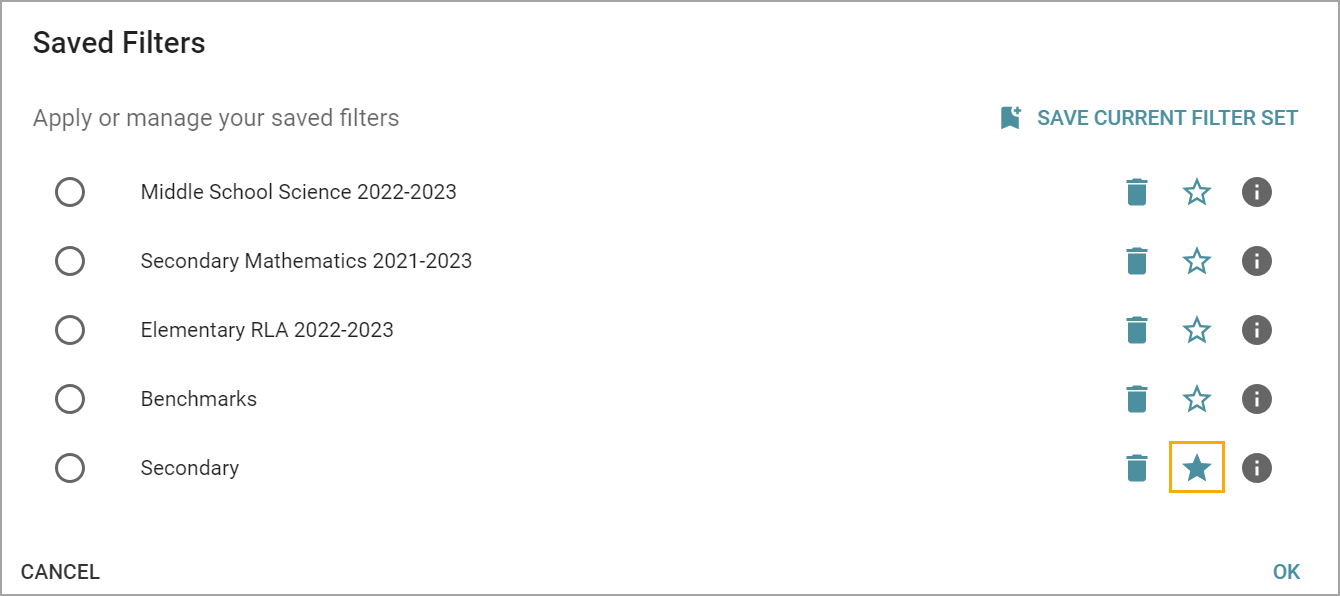
Favoriting a Saved Filter preset loads the table with the selected filters every time. You can select only one Saved Filter preset as a default per table. Default filters can be altered at any time. Select another Star icon to change the default. To remove a default, click the Star icon again to deselect it. Apply your changes.
