Users who are course instructors can access Course Management once they select Catalog, then Manage Courses.
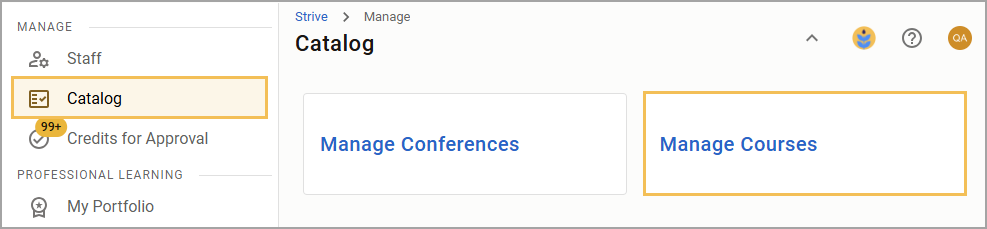
Click on Courses or eCourses based on the course type you need to access. Review eCourse management in Creating an eCourse.
After clicking Courses, review a list of your courses for the most recent month. You can click on the drop-down menu to select any other month you have courses. Each course shows the title of the course followed by the date and time.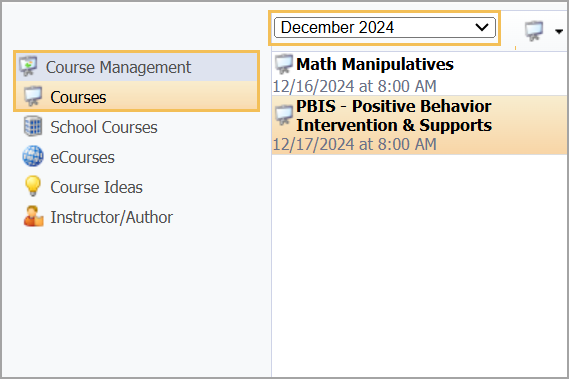
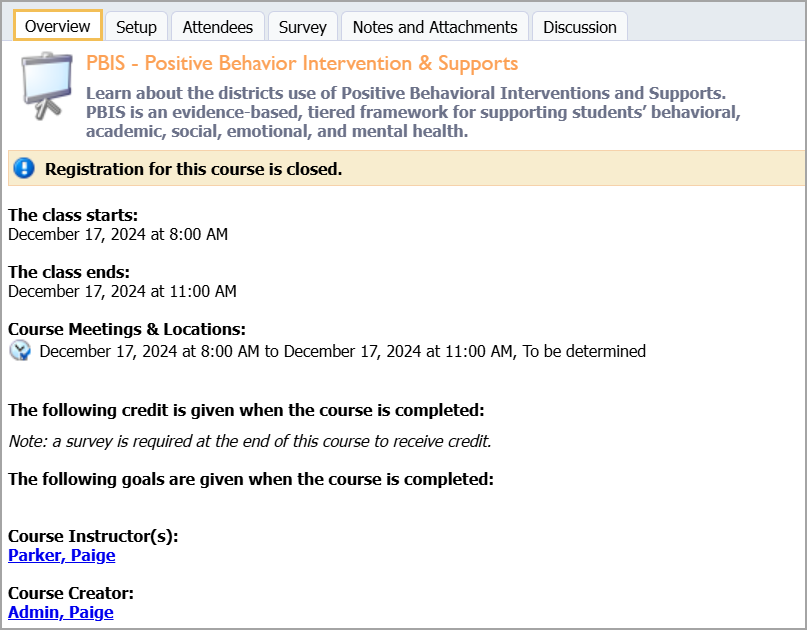
Selecting a course in the list presents you with that course's information. The first Overview tab displays the course time, location, credits, instructor(s), and directions. You can also see whether registration for the course is open or closed.
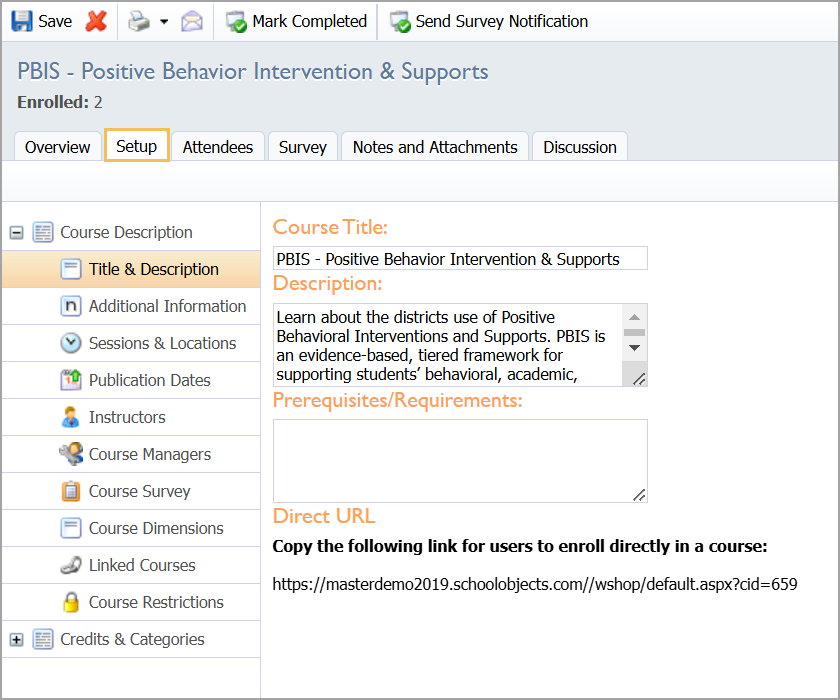
Use the Setup tab to establish and edit various information and settings about the course, including assigning locations, making a course survey required, and more. You can learn about these settings in Modifying Course Description Settings and Modifying Course Credits and Categories.
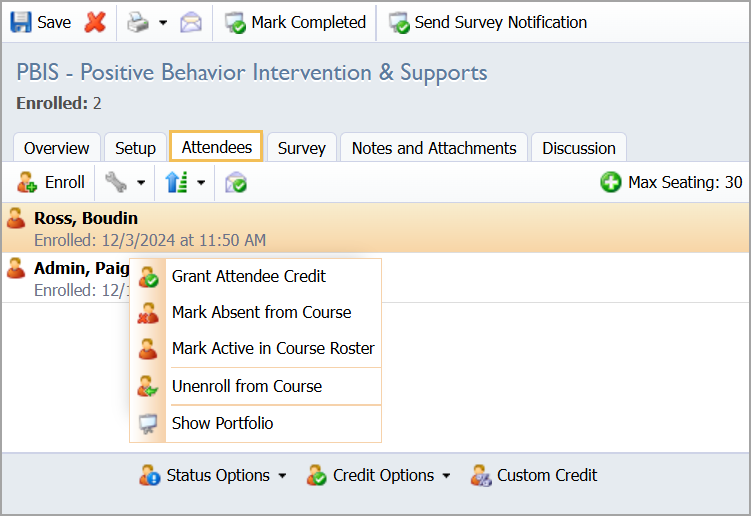
The Attendees tab is where the instructor can take attendance for the class, as long as the professional development manager has allowed it. The instructor can click on each staff member and mark them absent if necessary.
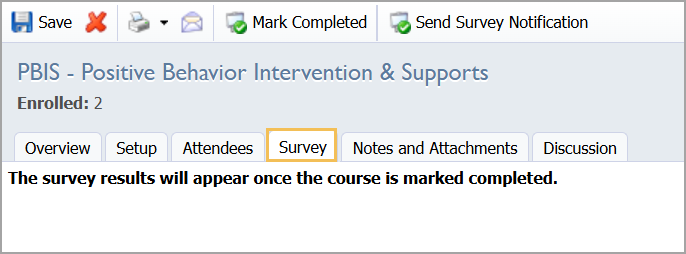
The Survey tab allows the instructor to send survey notifications to attendees after the course begins. Survey results appear after selecting Mark Completed for the course, but doing so will grant and deny credit based on survey requirements, and staff members can no longer answer and submit surveys.
The Notes and Attachments tab allows you to enter notes that are available to the staff members enrolled in this course. Using the toolbar, you can access the standard word processing options to create your class notes. You can also attach files to the notes using the Paper Clip button in the bottom right.
Once completed, check the Notes Visible checkbox, and click Save. Otherwise, attendees of your course will not be able to view the notes.

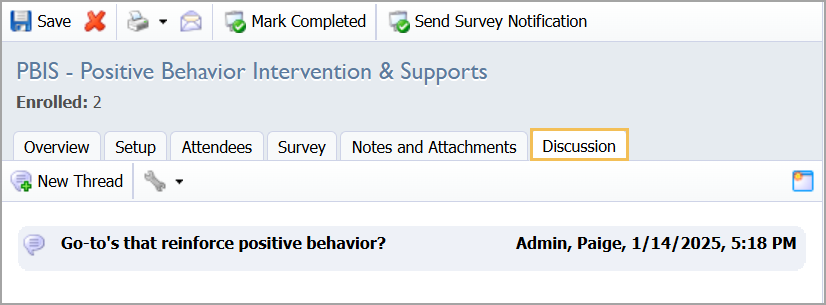
The Discussion tab allows the instructor and the attendees to participate in a message board-type discussion. By posting threads and replying to those threads, everyone in the class can participate in an online discussion. Use the New Thread and Reply buttons to do this. The Wrench icon allows you to view threads from oldest to newest or newest to oldest and set up email notifications for you when someone adds a new post. Selecting the Calendar icon allows discussions to be opened in a new window.
Warning: Discussion posts and comments cannot be edited or deleted after they've been posted.
Finally, an instructor can email the entire class using the Email Class button on the toolbar. Email Class opens an editor to compose an email message that will be sent to all attendees.
Note: If the option "use mail client for email dialogs" is enabled under General Options tab > Messaging, the email will not be sent by the server. Instead, it will open your default email program and populate the "To:" field with the email address of every attendee. This will allow you to send the email as yourself instead of as the system.

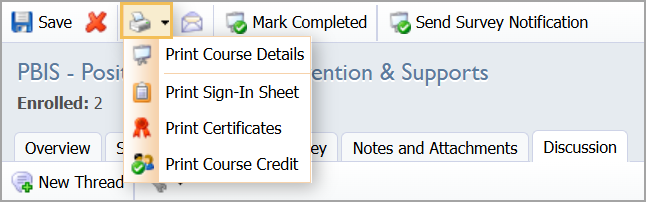
Instructors can also print the course details, a sign-in sheet, and the course credit information using the Course Reports button.