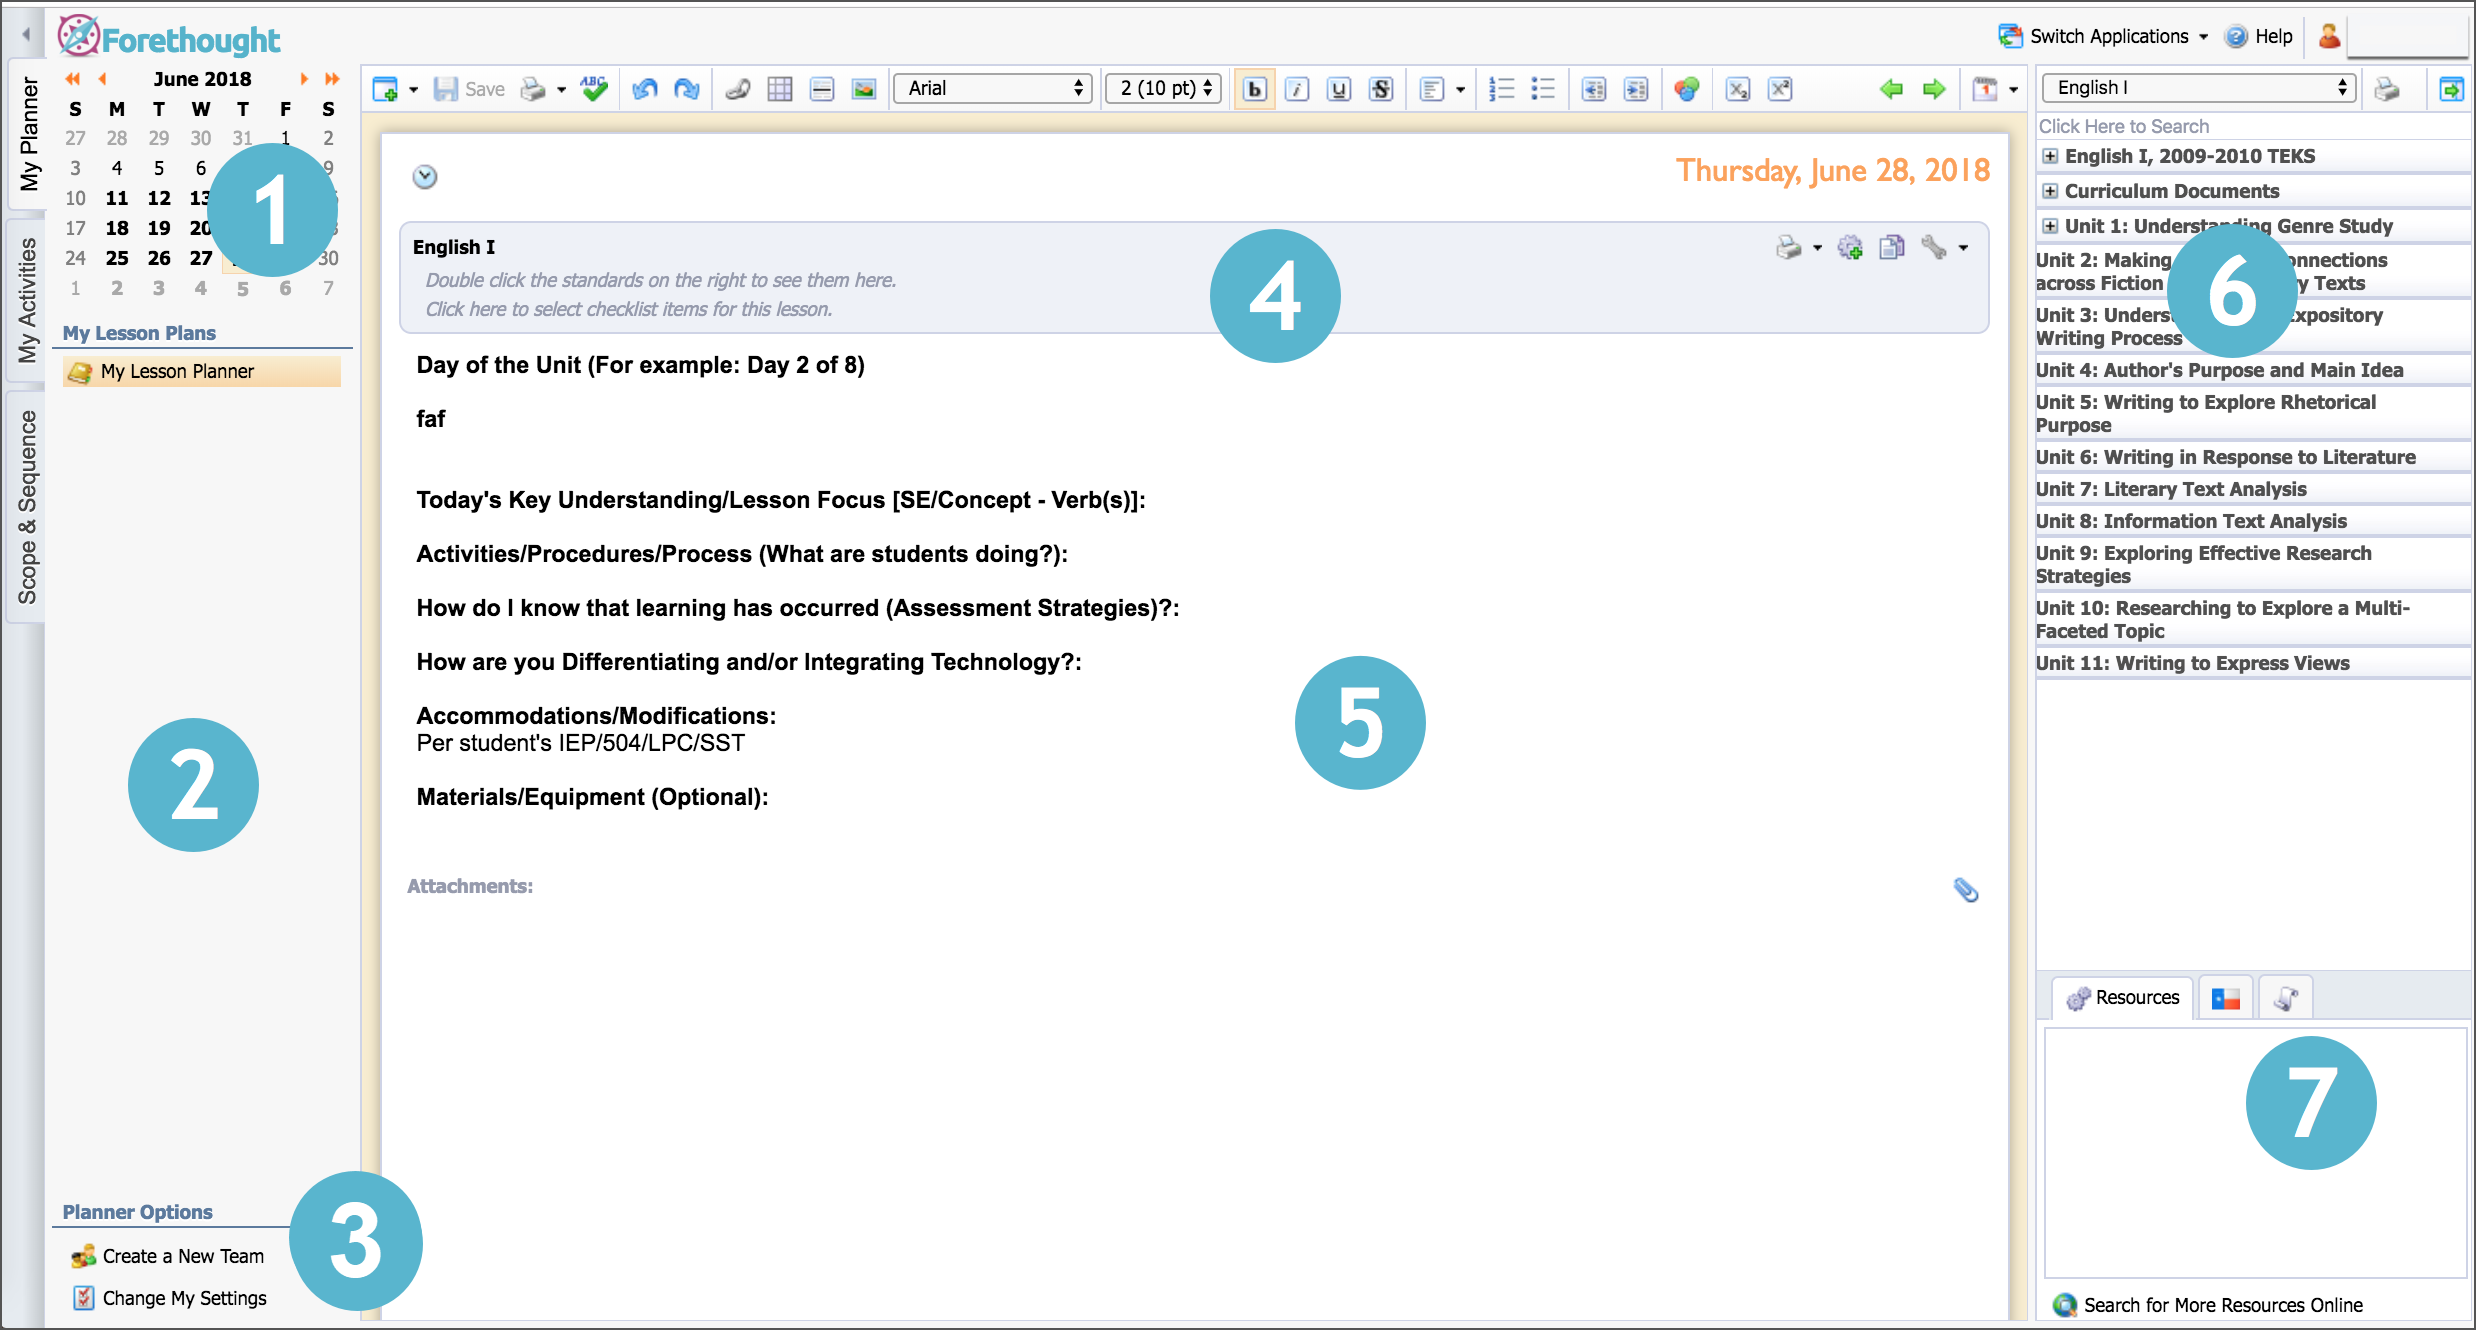
1. The Calendar displays the current month with arrows (< / >) to change between each month. Days with lesson plans appear in bold text. Select a day to start planning for that day. Using the double arrows (<< / >>) lets you view lessons from previous years. Lesson plans are not deleted from year to year.
2. The Planners List is a list of all available planners. It always starts with your personal planner (My Lesson Planner) followed by any team or shared planners to which you have access.
3. Planner Options allow you to Create a New Team. In addition, Change My Settings allows you to edit your schedule and share your planner with other staff members.
4. Standards & Checklists allows you to attach standards or checklists to the plan. Click in the grey box to open the list of checklists to add to a lesson. As you double-click learning standards on the right side, they attach the lesson planner in this grey box.
5. Clicking an entry in the Lesson Plan Content Area makes that entry active. You can then begin planning for that particular course by using the toolbar options to customize your lesson content and by adding learning standards from the Curriculum Pane on the right.
6. Selecting a course in the lesson planning area updates the learning standards in the Learning Standards List to reflect the selected course.
7. Clicking on a learning standard in Details and Resources displays the following information:
Resources — Linked lesson resources.
Standards — Linked standards.
Texas Flag — Associated TEKS/STAAR and Knowledge & Skill Statements (TX customers only)
Red Ribbon — Associated State Standards which are identical to selected standard (non-TX customers)
History — Dates when that standard was last used in a lesson plan.
Note: For more information about each item in this list, see Write a Lesson Plan.