Prior to making reservations, there are a few things Facilities&Events administrators should determine, such as reservation properties, reservation workflows, and forms for reservations. All of this takes place on the Manage tab.
Limiting Reservations to User's Schools
By default, staff members can make a reservation at any school throughout the district, but you can limit reservations to just their school. Users with the Checkout on All Campuses right still have access to all schools and will be able to reserve rooms and assets across the district.
To limit reservations to a user’s school, follow these steps.
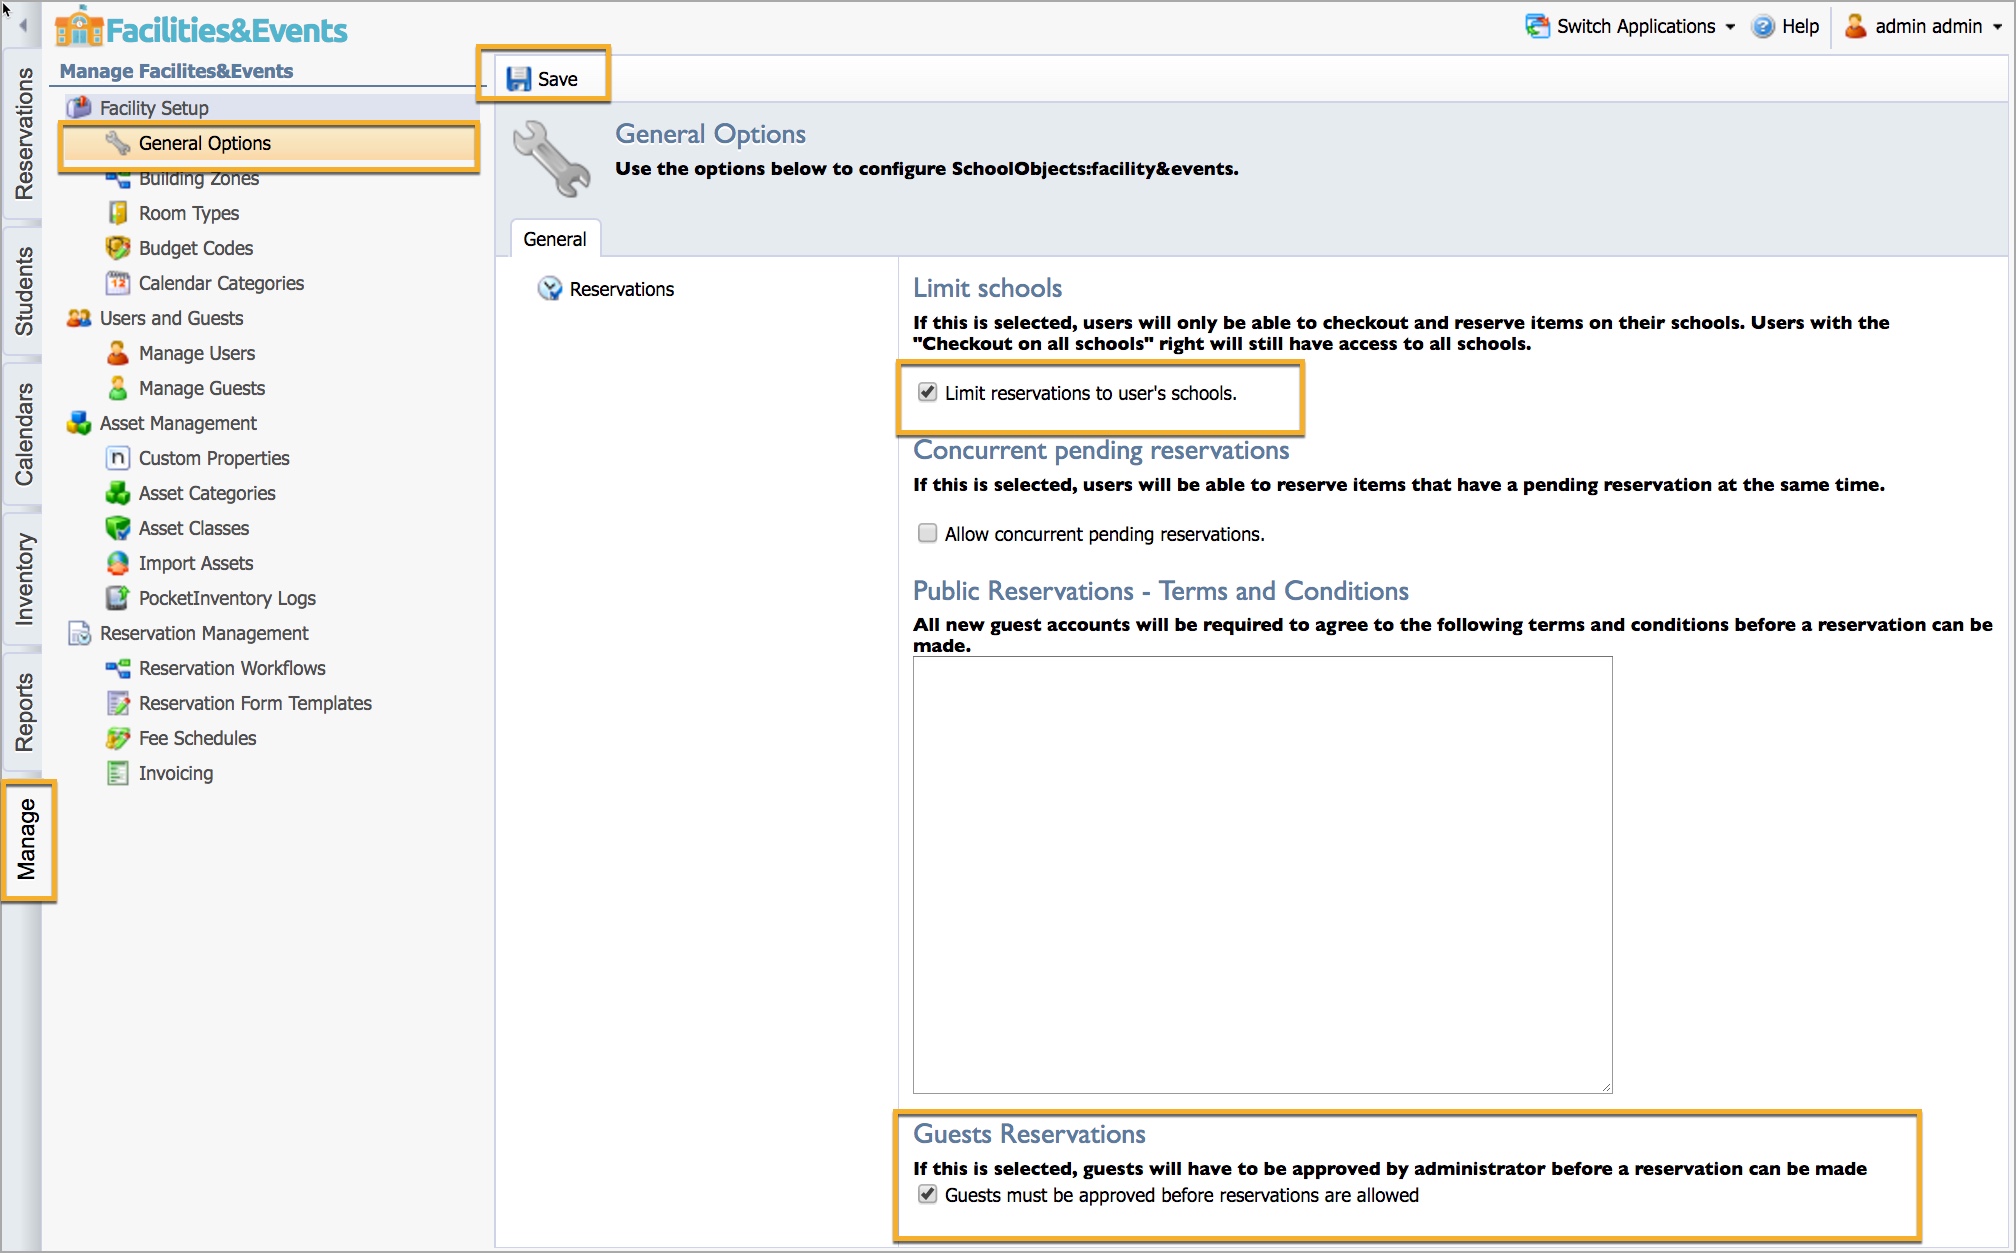
Step 1: Select the Manage tab.
Step 3: Select General Options under Facility Setup.
Step 4: Check the box next to Limit reservations to user's schools.
Step 5: Click Save.
Guest Reservations
Opening up reservations to out-of-district guests is an option you can select in General Options. A Facilities&Events System Administrator must approve guest accounts before the reservation process begins for that user.
You can also type or copy and paste from a document the Terms and Conditions that would appear during the Guest Registration process in this section. Click Save after entering these terms.
Reservation Properties
Reservation properties are the bits of information a requester will view and filter when completing a reservation request.
Step 1: Select the Manage tab.
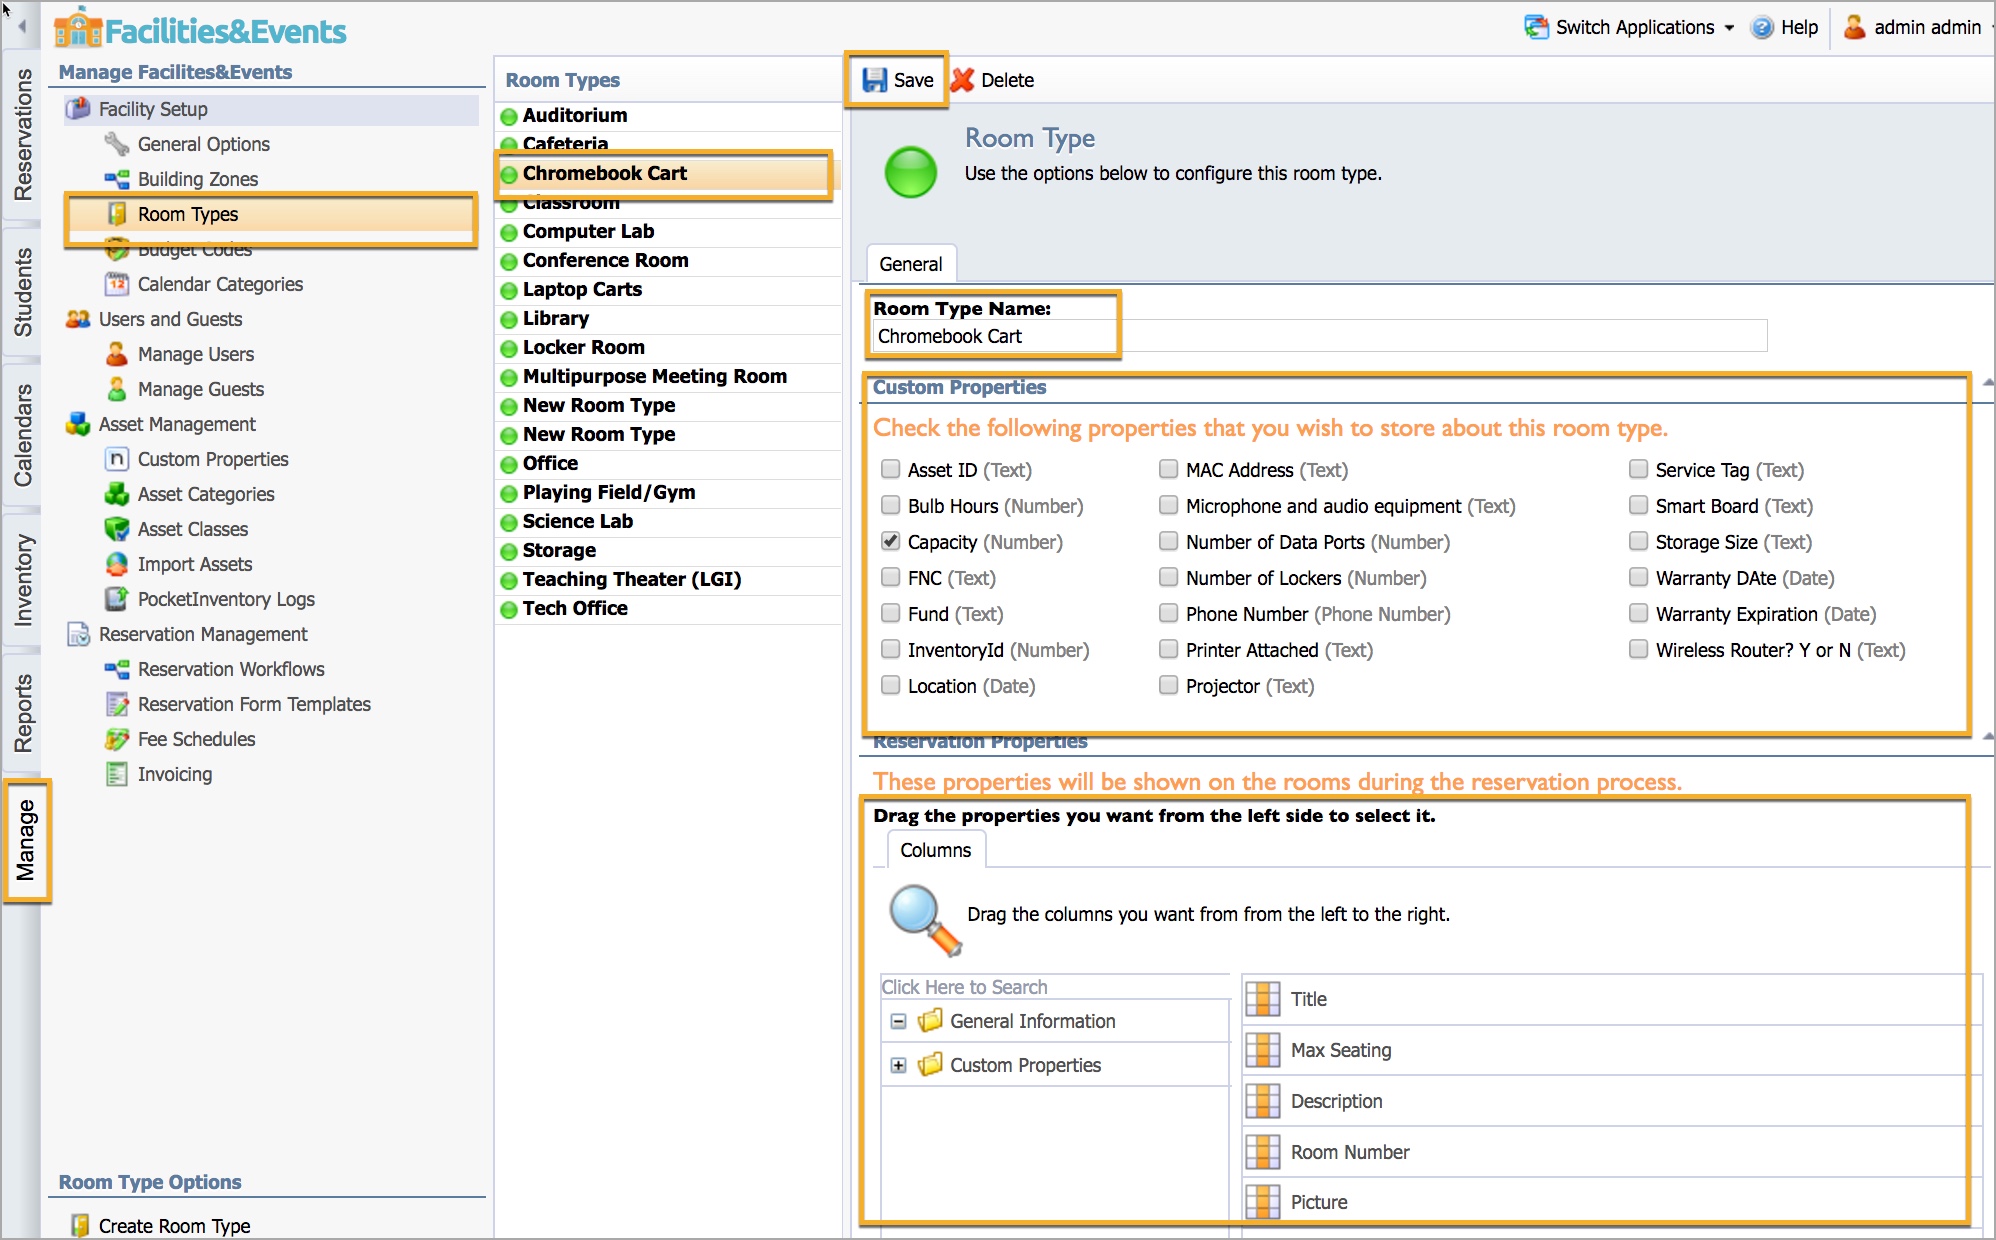
Step 2: Select Room Types under Facility Setup.
Step 3: Select a Room Type.
Step 4: Under Custom Properties, check items the Inventory manager would want to track in reporting features.
Step 5: Under Reservation Properties, drag and drop from the left to the right information you want the requester to filter and view when they make a reservation.
Step 6: Click Save.
Step 7: Repeat this process for Asset Classes.
Reservation Workflows
A workflow is created for reservations that either require more than one approver or need a notification step, in addition to the approval step. If there is only one approver for a room or asset reservation, you don’t need to set up a workflow.
Creating a Reservation Workflow
Step 1: Select the Manage tab.
Step 2: Select Reservation Workflows under Reservation Management.
Step 3: Select Add New Workflow.
Step 4: Title the workflow and click Save.
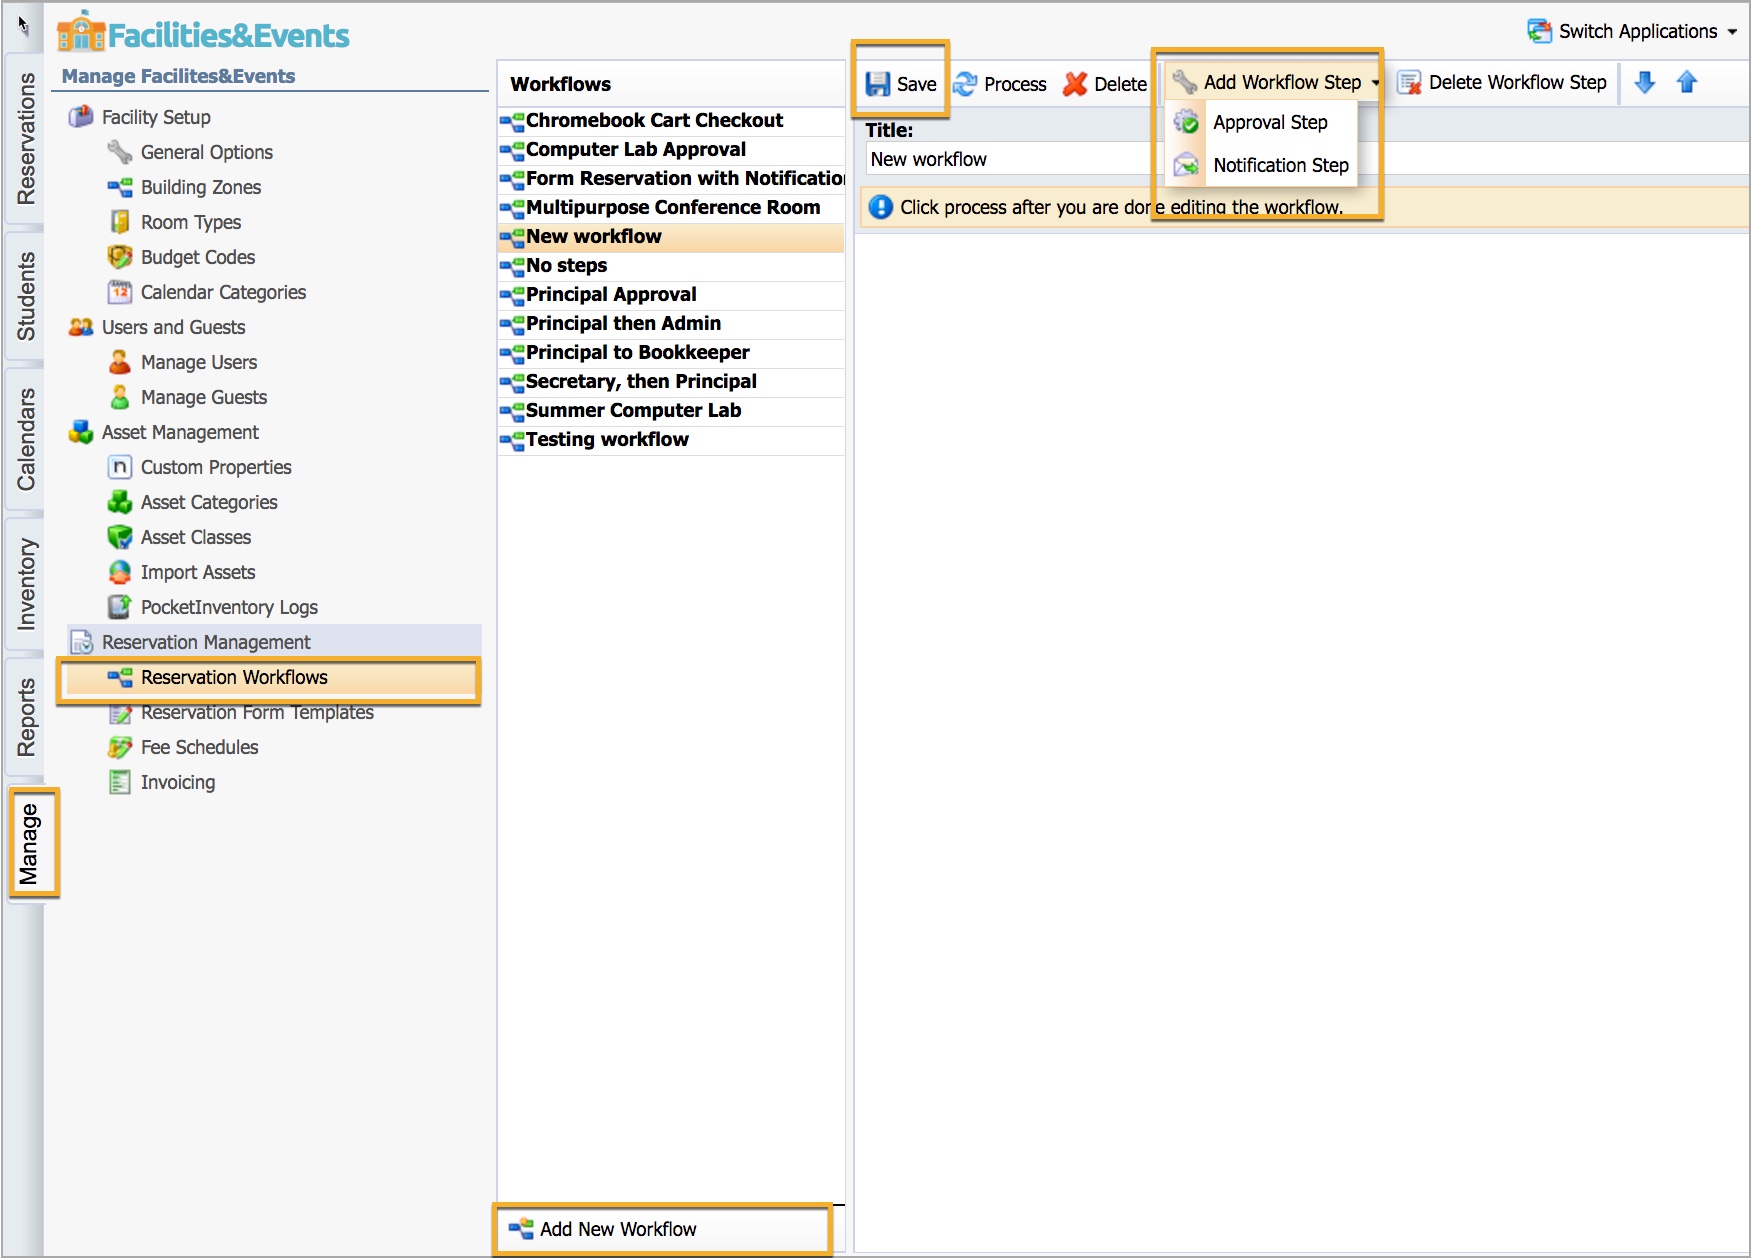
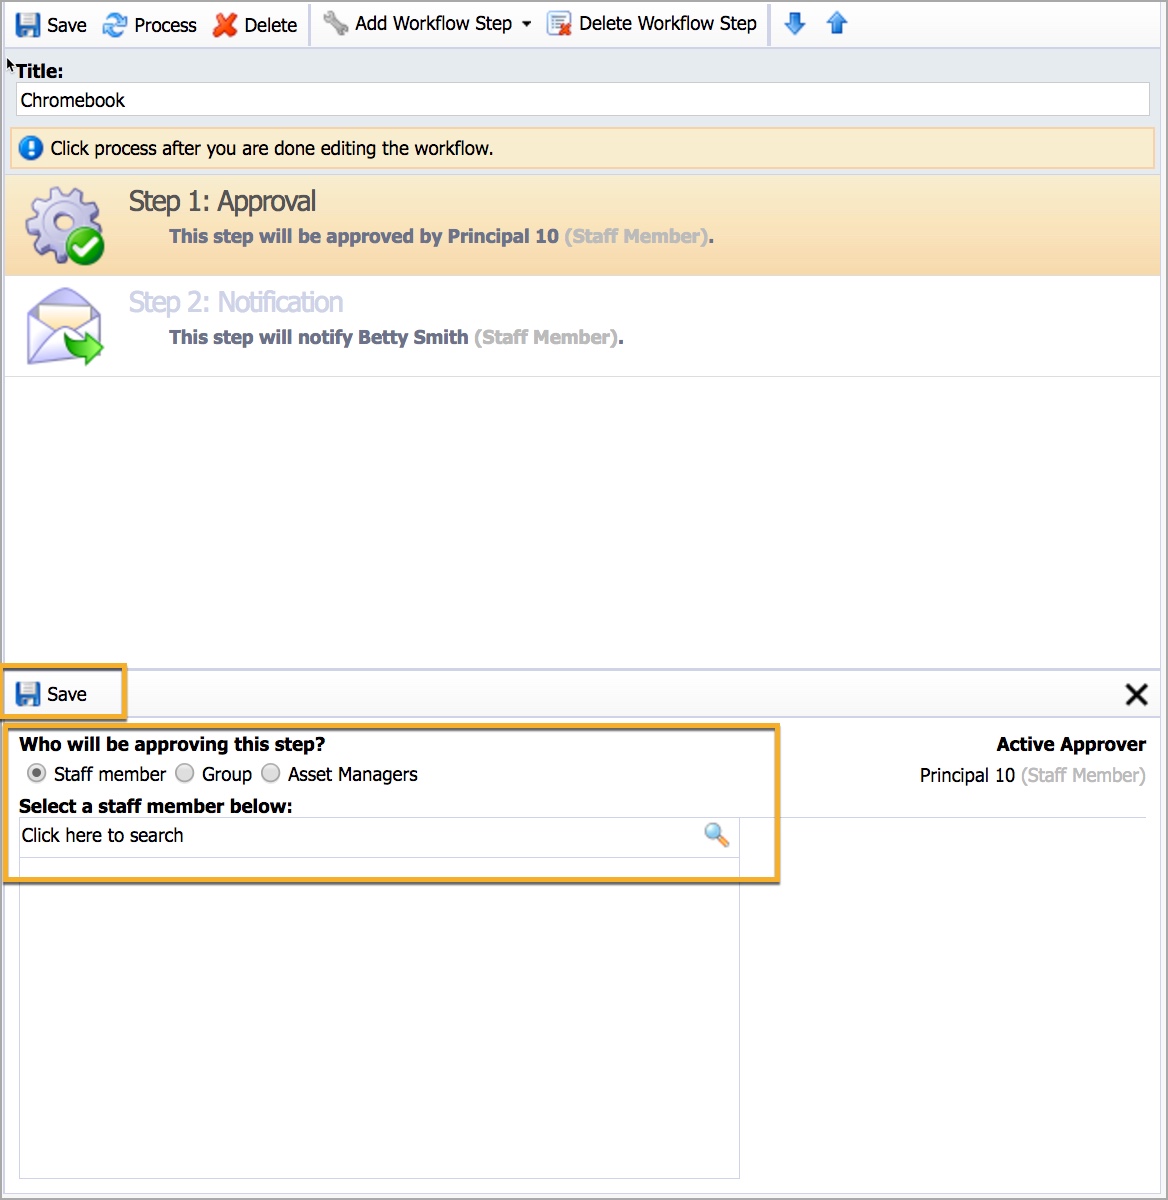
Step 5: Select Add Workflow Step to add one or both of the following:
Approval Step – All actions in the workflow stops with this step. The designated person must approve the reservation in order for the next step to occur. If the request is denied, the workflow does not continue to the next person. Only approved requests carry over to the next person.
Notification Step – The notification step sends an email to the staff member(s) and continues to the next step.
Workflow steps do not need to follow any specific order.
Step 6: Use the blue arrows to reorder workflow steps by moving them up or down to the desired step.
Step 7: Choose who will be the active approver of the step from the following options:
Staff Member – Search by name for specific staff members.
Group – Groups are pulled from custom groups designed in the Management application. Open Management > Organization tab > Users and Guests > Manage User Groups. If you select Group, there are more options for how the group settings can work:
Limit to Campus – This option only allows staff reservations to choose from assets limited to their assigned school.
Require All – This option requires every member of the entire group to approve the reservation.
Asset Manager – This option requires the asset manager assigned to the asset to approve the reservation.
Step 8: Click Save and then Process
Now you can select this workflow when creating the reservation process for a particular room or asset.
Reservation Form Templates
Each time a requester makes a reservation, the default form always requests a Title (required) and Reason (optional) for the request.
You can add more information to reservation forms using Reservation Form Templates. These templates are then assigned to specific assets to allow different types of information to be gathered pertaining to specific reservation items.
For example, if your reservation is for using a stage, you can build a form that asks for microphones, lighting, and stage setup. If your reservation is for a computer lab, you can build a form asking about printer needs, logins, and default web browsers. For a multipurpose room, a form can ask the requestor about table setup, use of food and drink in the room, and janitorial services.
The workflow process then can send the form contents to all the staff in the workflow approval and notification settings to know what is needed for the specific event.
Creating a Form Template
Follow these steps to create a new form template.
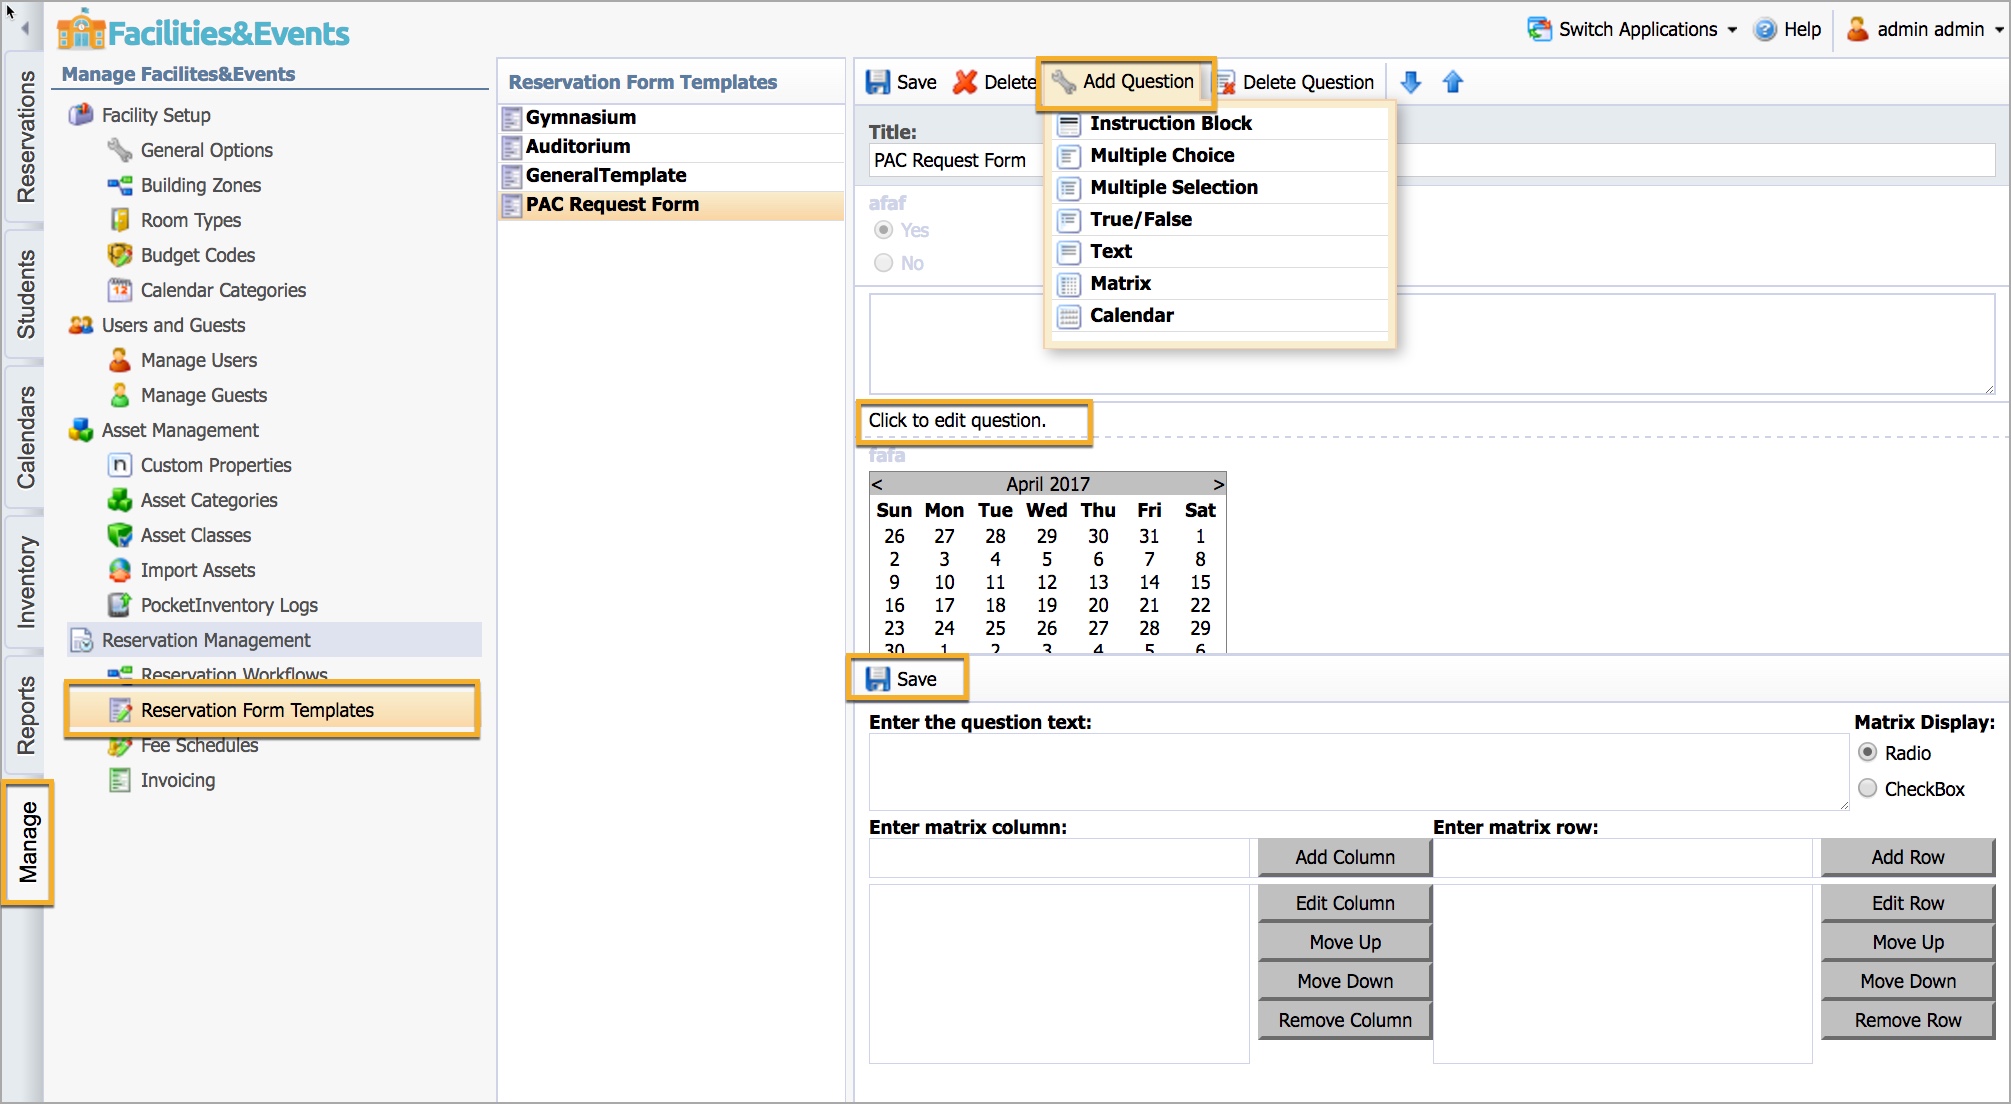
Step 1: In the Manage tab under Reservation Management, select Reservation Form Templates.
Step 2: Select Create Form Template.
Step 3: Enter a Title for the form and click Save.
Step 4: To add questions, click the Add Question button and select a question type from the list:
Instructional Block – Lets you add information in blocks for requestors to view, such as “This lab does not permit food or drink.”
Multiple Choice – Adds an option where the user can only select one response for the question.
Multiple Selection – Provides check boxes for users to select multiple responses for the question.
True/False – Can be turned into a Yes/No question.
Text – Allows the requester to respond by typing a response into a number of rows determined in question setup.
Matrix – Creates columns and rows for responses in radio or checkbox format.
Calendar – Drops a calendar into the form for requestors to select a date.
Note: The reservation form contains the fields for selecting dates from a calendar. This calendar field in the Reservation Form template is useful for allowing users to select an alternative date for their reservation.
Step 5: Select Click to edit question to adjust the content.
Step 6: Each type of question type selected will have its own question controls. Select the options for your questions.
Step 7: Click Save in each question property box as you change question controls.
Step 8: Use the blue Up and Down arrows to move question order.
Step 9: Use the Delete Question button to remove questions.
Step 10: Once your form is complete, click Save on the top menu bar.
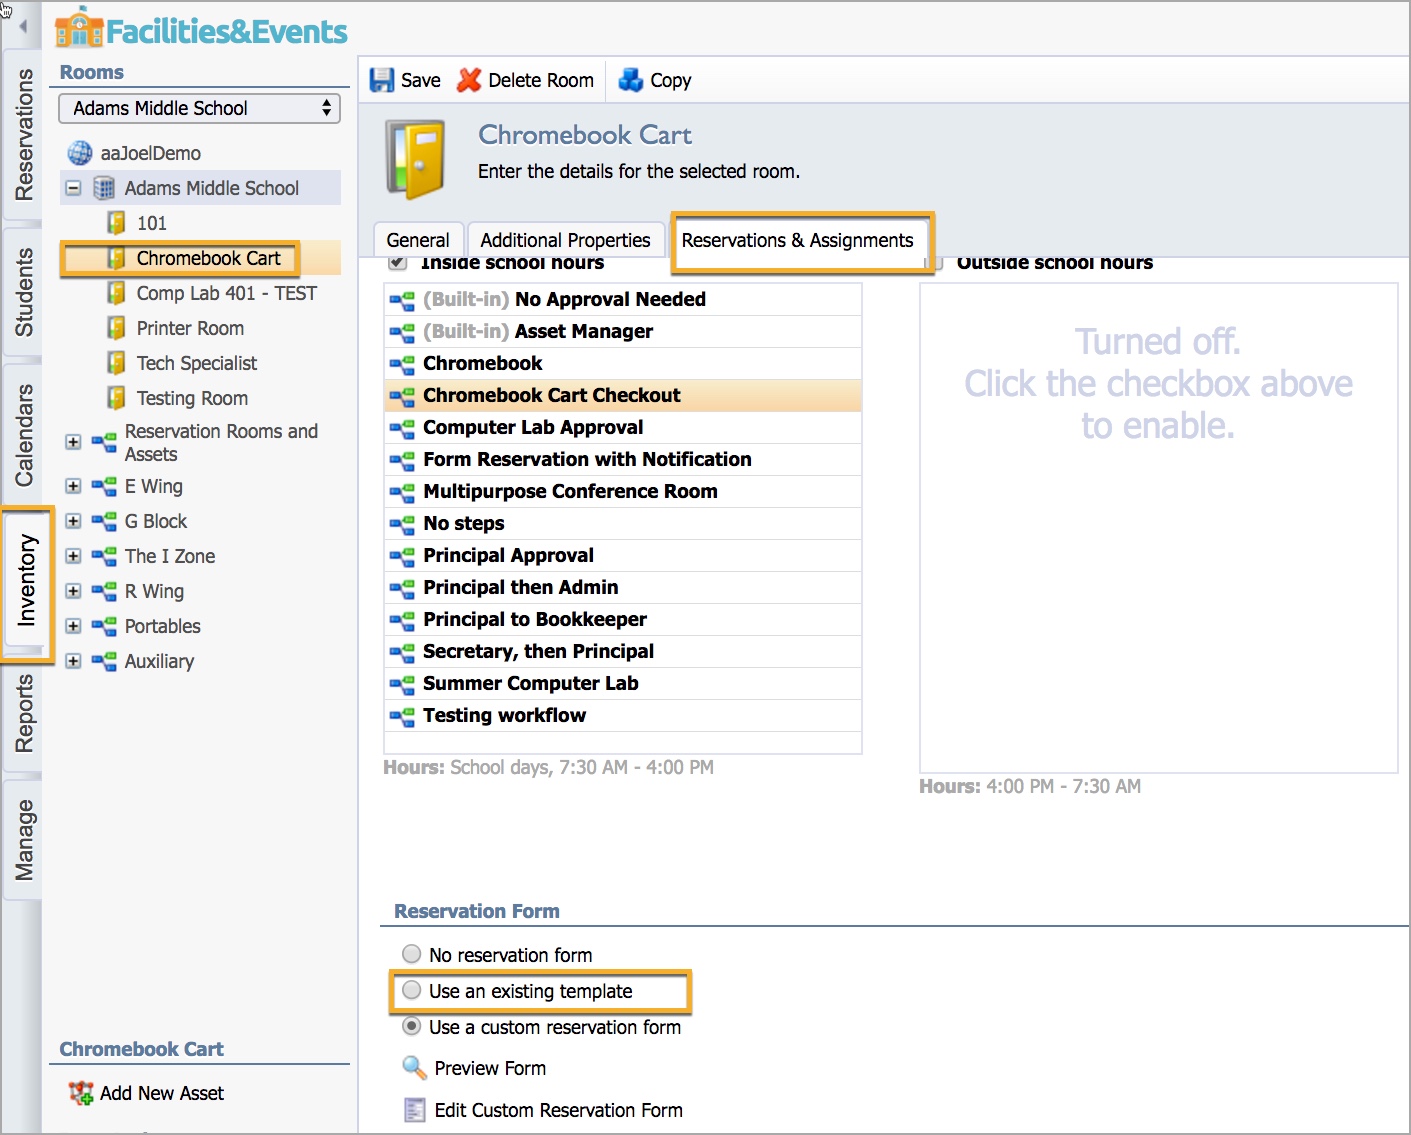
Saved templates are available in the Reservations & Assignments tab for each room or asset in the Inventory tab. This allows you to attach the reservation form to the reservation workflow for these assets.