Anyone with the Manage Inventory right in Facilities&Events can add a lab to a school.
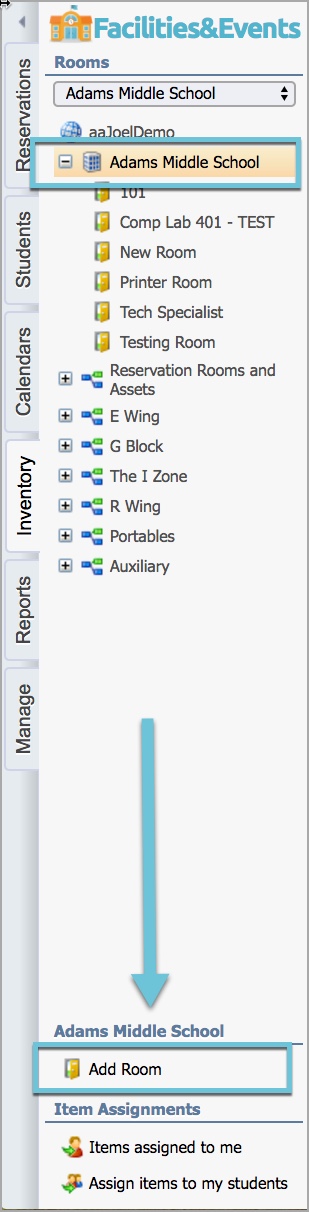
Step 1: Select the Inventory tab.
Step 2: Choose the school.
Step 3: Select Add Room, which appears at the bottom of the screen.
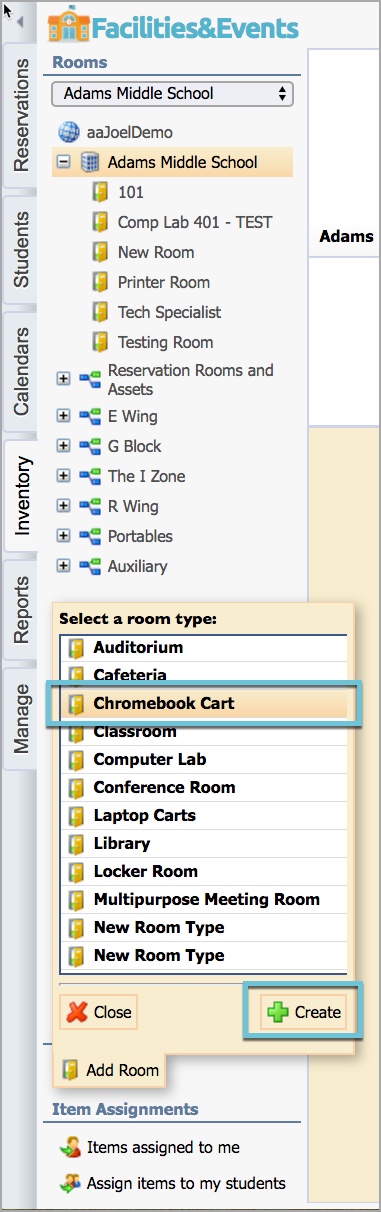
Step 4: From the list of room types that appears in the pop-up window, select the room type entered from Step 1: Create the Mobile Lab. Then, click the Create button to add the new room to your school list.
Step 5: Click on this new room, and then select Edit Room from the top menu bar.
Step 6: In the General tab, you can add basic information about your mobile lab based on the Custom Properties added in Step 1: Create the Mobile Lab.
Room Title – Name your lab as it is called at your school (e.g., Chromebook Cart 1, Chromebook Lab 2, iPad Cart #3, etc.).
Room Number – Repeat the name from Room Title.
Max Seating – Enter the number of users who can access the cart. For a computer cart, enter the number of devices on the cart. For a portable lab, enter the number of users who can use one cart.
Description – These details are what will appear in the Reservation form to describe the item. Be brief.
Step 7: Click Save.