Throughout the school year, evaluators can conduct observations and walkthroughs as part of the evaluation process for their staff members. Once evaluators have created the appropriate documents and scheduled the date and time as needed, they can access the document and complete the necessary items for the observation or walkthrough before letting their staff view the document.
Note: Documents can still be edited after selecting Let Staff View () until the staff member complete their signature. To continue editing the document, your staff member must first clear their signature.
Quick Guide
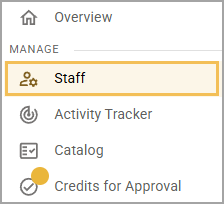
Select Staff () from the main menu.
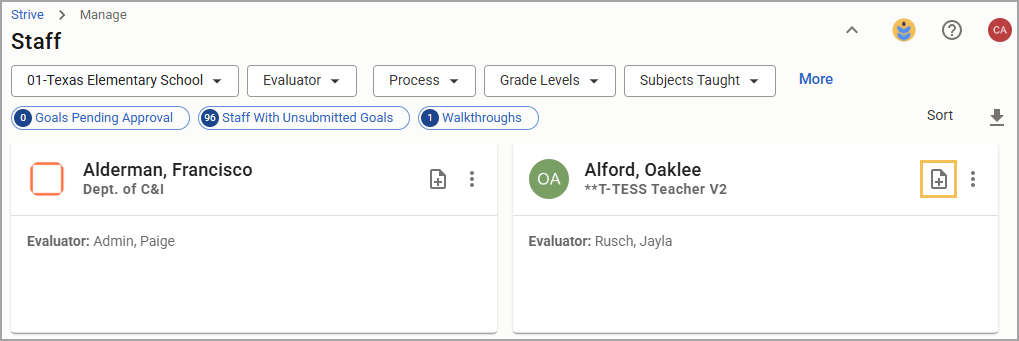
Select the Quick Start a Document icon () on the staff member card, or select the staff member’s name and then the Plus icon () to add a new document to the desired Walkthrough or Observation section.
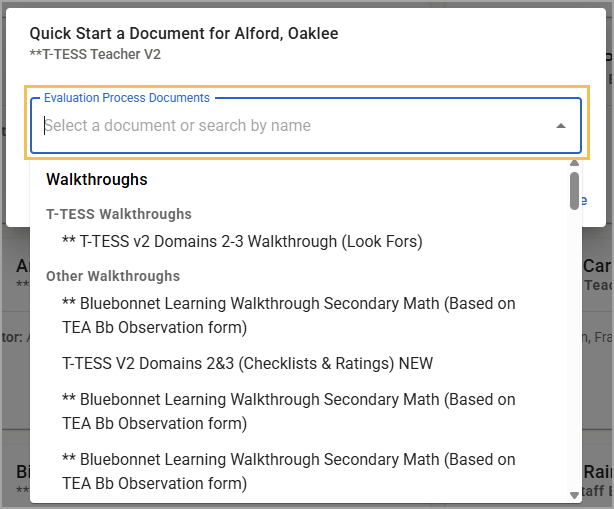
Use the drop-down menu to select the desired evaluation process document.
Set the grade level, subject, start time, and end time, and then select Create.
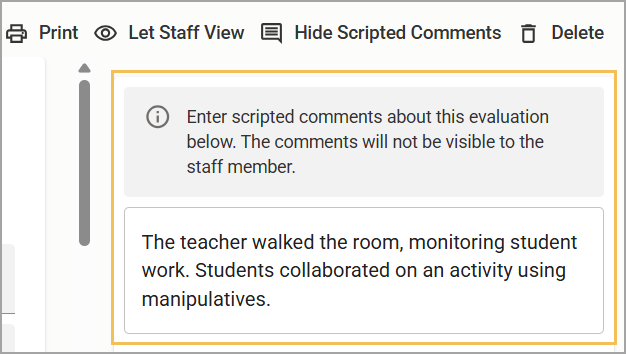
Select Show Scripted Comments () to script walkthroughs and observations.
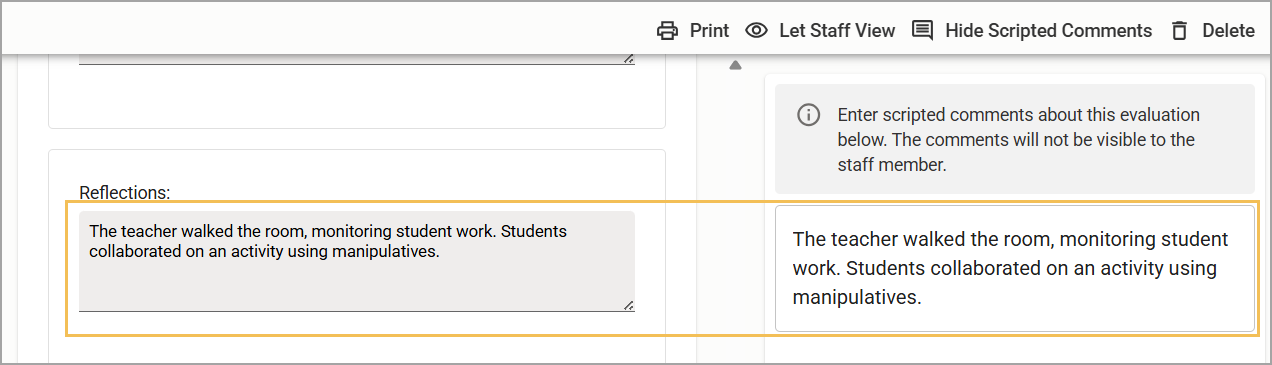
Transfer comments to evidence or comment boxes.
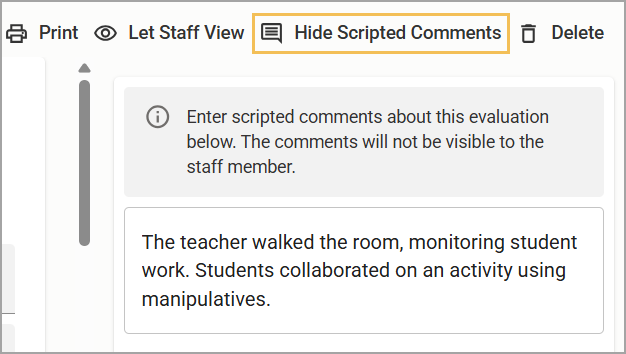
Select Hide Scripted Comments () to close the frame.
Complete all evaluation items.
Select Let Staff View ().
Illustrated Guide
Step 1: Select Staff () from the main menu.
Step 2: Select the Quick Start a Document icon () on the staff member card, or select the staff member’s name and then the Plus icon () to add a new document to the desired Walkthrough or Observation section. You can access any previously created documents by clicking their name.
Step 3: Use the drop-down menu to select the desired evaluation process document.
Step 4: Set the grade level, subject, start time, and end time, and then select Create.
Note: You can adjust the date after document creation.
.png)
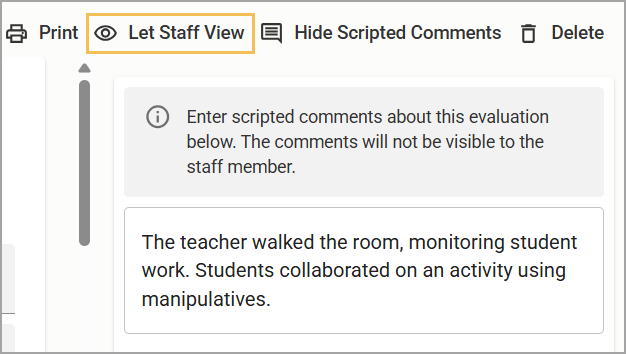
Step 5: Select Show Scripted Comments () to script classroom walkthroughs and observations.
Note: Staff members cannot view scripted comments. Scripted comments serve only as the evaluator's documentation during the evaluation. Scripted comments are available to the evaluator throughout the life of the document, even when archived.
Step 6: Drag and drop or copy and paste statements from the scripted comments into the evidence or comment boxes in the evaluation.
Step 7: Select Hide Scripted Comments () to close the frame.
Step 8: Complete all items in the document. Your work saves automatically, with a notification appearing in the right-hand corner displaying the current save status.

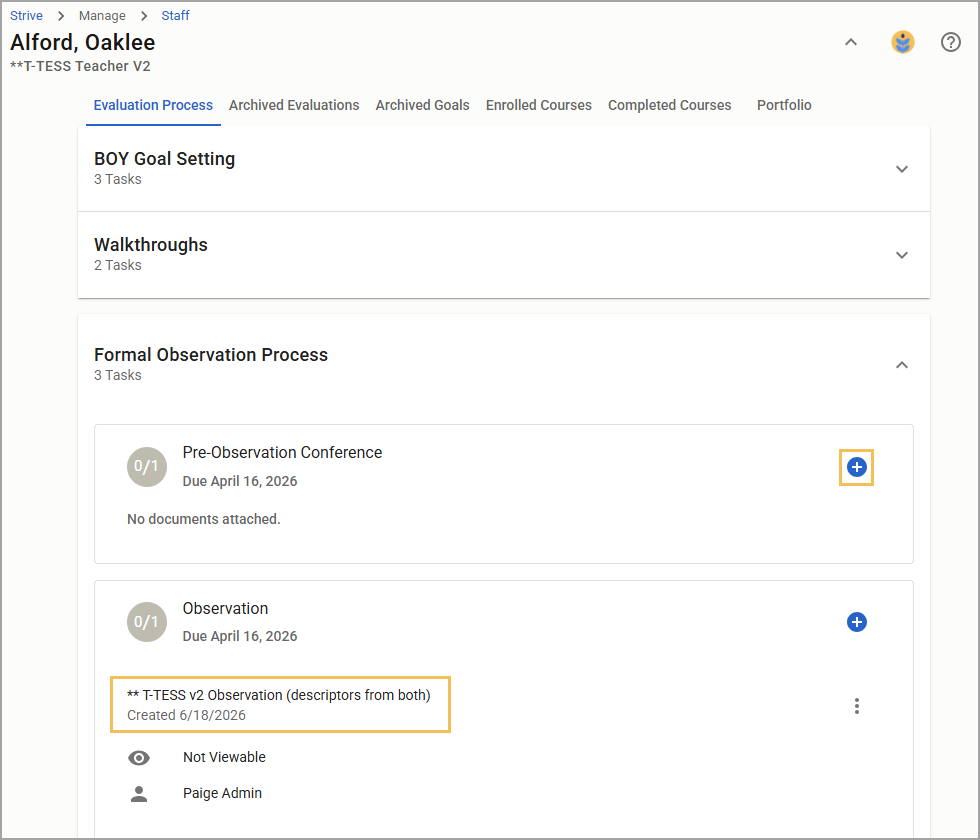
Step 9: Select Let Staff View () to allow the staff member to see the document. The staff member cannot see the evaluation document, which has a Not Viewable status, until the evaluator selects Let Staff View (). Select this setting only when the document is completely filled in and ready for the staff member to view.
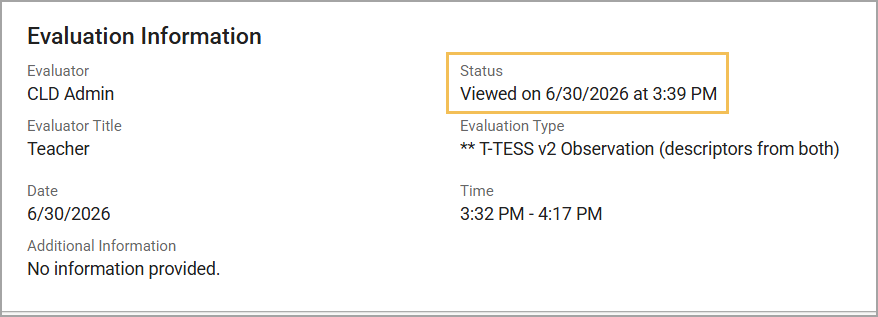
When the evaluator selects Let Staff View (), the status changes to Marked Viewable and shows the date of the change.

When the staff member views the document, the status changes to Viewed and shows the date when the staff member opened it.