Once you have created a monitor group, you might need to make changes, such as updating the name of the group, adding or removing students, or deleting the group if it is no longer needed. This article goes over some common actions that you might take to effectively manage your monitor groups.
Viewing Existing Groups
To view any existing groups, select Monitor Groups (). You will see personal groups and campus and district groups if you have access to at least one student in the group.
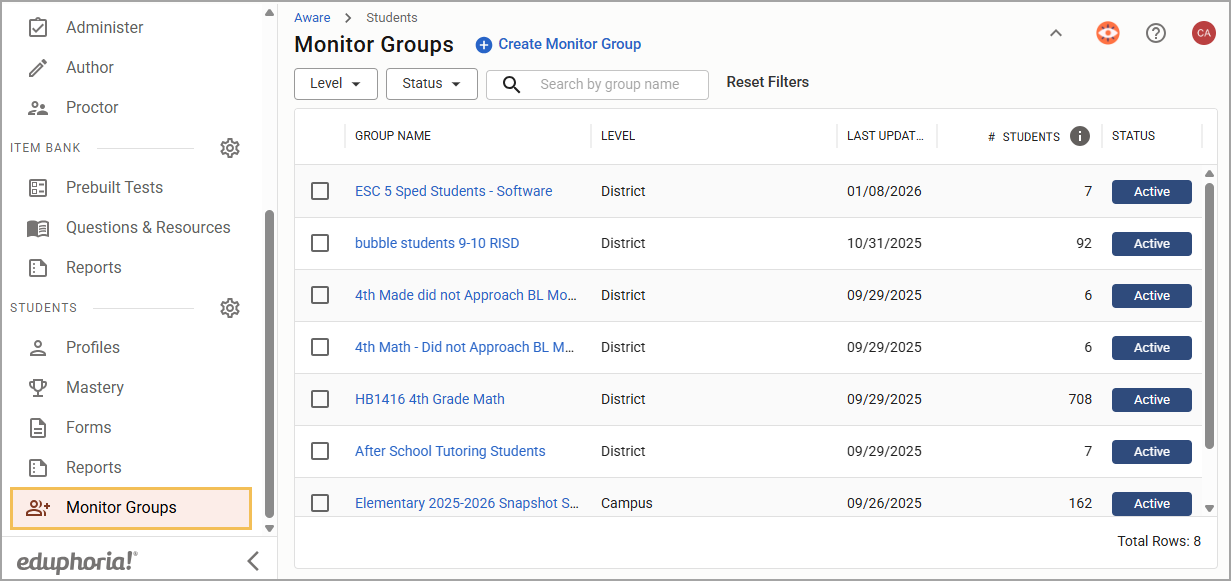
The student count on the main page lists the total number of students in the group, including inactive students.
Viewing Active and Accessible Students
To see the total number of active and accessible students in a group, select the Monitor Group name and open the details page. Select a student’s name from the list to open their student profile.
.png)
Adding or Removing Students
To add or remove students from an existing group, click the three vertical dots () and select Manage Students.
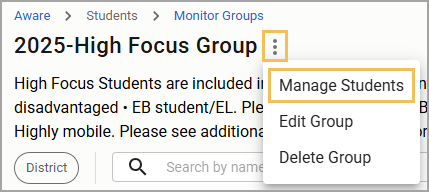
This will open a table of existing students. Remove students by clicking the icon next to their name or by deselecting the checkbox next to their name in the table. Click Apply to finalize your changes.
Adding or Removing Students By Uploading a File
Add students to an existing monitor group with a text file by clicking the Upload File button ().
.png)
Drag the text file into the window or select the Choose File button to select the file manually. This will only add students to the monitor group; it will not override, duplicate, or remove students.
.png)
Text files should include only student ID numbers, each on a separate line, with no additional formatting.
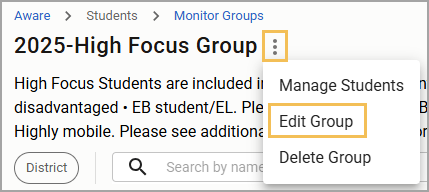
Editing the Group Name or Description
To edit a Monitor Group’s name or description, select Edit Group. The title has a limit of 150 characters, and the description has a limit of 300 characters.
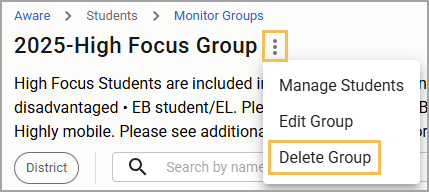
Deleting a Monitor Group
To delete a Monitor Group, select Delete Group. You will be asked to confirm that you want the Monitor Group deleted.