Sharing a prep gives selected users the right to view, contribute, or own the shared content. For example, you might share a prep with your team to collaborate on your instruction or share your prep with a coach or mentor to receive constructive feedback.
There are three permission levels that you can grant to your collaborators, as well as the option to remove anyone who no longer requires access:
Owner – The Owner has full access to the prep. The creator of a prep is the default owner but can assign the role to someone else if necessary.
Contributor – A Contributor can edit the prep, including adding other contributors. Contributors cannot add owners, change the visibility setting, or delete the prep.
Viewer – A Viewer can see everything within a prep but cannot make any changes.
Remove – This option removes permissions so that the user no longer has access to the prep.
Quick Guide
Select My Planners from the main menu.
Open the prep that you want to share.
Select the Share icon ().
In the Invite people or teams field, search for and select people or teams.
Use the drop-down menus to assign a permission level to each selected person or team.
Select Done.
Illustrated Guide
Step 1: Select My Planners from the main menu.
.png)
Step 2: Open the prep that you want to share.
.png)
Step 3: Select the Share icon () at the top right of the prep.
.png)
Step 4: In the Invite people or teams field, begin typing a name, email address, or team name for the person or team you want to invite. Select the name of the person or team when it appears in the list.
Tip: When searching for a team, type the team name as it appears in Aware’s Assessment Settings or Management’s Teams.
.png)
Step 5: Select the drop-down menu next to each name to assign a permission level.
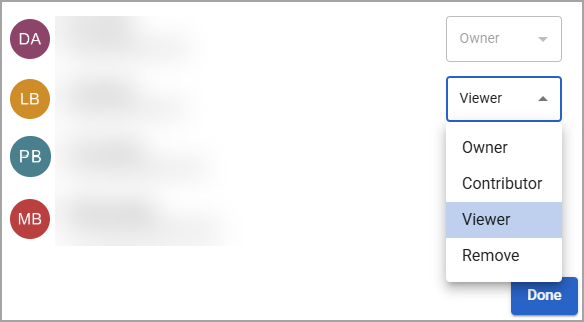
Step 6: Select Done to save your settings.
