The Administration tab is where test authors assign students to an assessment and determine when and how the system collects data. Administrators have access to more settings than teacher users.
Assigning an Assessment to Students
To assign an assessment to students, select the Administration tab in the test authoring interface and then choose Students from the Students/Collection toggle at the top of the screen. From here, you can select which schools will participate in the assessment.
The grade level defaults to the test’s grade level and filters to show only those schools with students in that grade level. You can use the Grade drop-down to change the grade level if necessary.
Select the checkbox for each school to add them individually or click Select All to select the checkboxes for all schools in the list. Likewise, you can select Clear All to clear all checkboxes.
.png)
In the Additional Options section, you can assign a student to a test using the following options:
Students in Selected Courses
Select the appropriate roster courses for the test. Students in selected courses is the most widely used option because it allows teachers to print their own answer documents by their roster classes. This is also the best choice for allowing online testing.
.png)
Students by Their Homeroom/Advisor Teachers
For each campus, select the homeroom/advisor teachers for the test. This option isn’t used often because districts rarely import their advisor teachers.
.png)
All Students in the Test’s Grade Level
Select All students in the test’s grade level if all students for an entire grade will take the test and answer documents do not need to be organized by courses or teachers. This option is generally used for “mock” test situations.
Note: Only the test administrator can print answer documents by grade level. This option is not broken up by class and cannot be used for online testing.
.png)
All Students at Selected Campuses
For each school you selected, all students for each school will be assigned to the test. It’s uncommon for users to choose this option because tests are rarely made for multiple grade levels.
.png)
Students for Selected Teachers for Printing
For each school, select the teacher associated with the test. If you choose this option, benchmark printers and administrators will be unable to print answer documents for the teacher. Only the teacher will be able to print the answer documents.
.png)
Student Filtering
Student filtering limits the printing of answer documents by program status, form, monitor group, or grade level.
Students can meet either criterion selected if multiple filters are applied across the same category. For example, if At Risk and Section 504 are selected, any students who are At Risk or Section 504 will be included. However, if Third Grade is also selected, only Third Grade At Risk or Third Grade Section 504 students will be included.
.png)
.png)
.png)
.png)
Collection Settings
Choose Collection from the Students/Collection toggle at the top of the screen to determine when and how the system administers the test, along with the methods used to collect the students’ responses.
Available Dates
Set a Start Date and an End Date determine when the test is available for teachers. The dates do not affect scanning.
.png)
Print Settings
If there aren’t any interactive item types on the assessment, you can switch on the Enable plain paper testing setting.
One this setting is enabled, you can select the checkboxes for either or both of the following options:
Teachers Allowed to Print Answer Documents
Teachers Allowed to Print Test Booklet
By enabling plain paper testing, administrators will always be allowed to print the test.
Under Preview Settings, you can turn on Enable teachers to preview online test. Select Hide item images from analysis views if you want to prevent users from viewing the questions during item analysis.
.png)
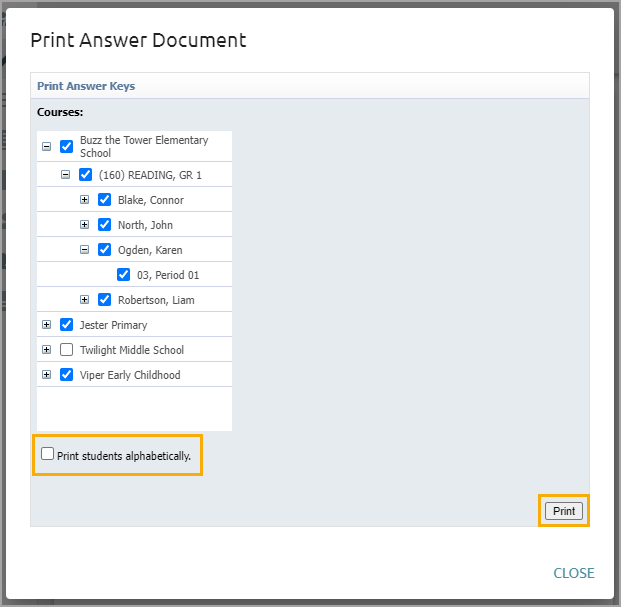
To print the answer documents as a testing administrator, click the Print Answer Documents button. While the test is in a Pending state, this button will read as Print Sample.
The wizard displays a list of schools, courses, teachers, and sections that will print. You can clear the checkboxes for any of these to narrow down which answer documents will print. By default, answer documents are sorted alphabetically by teacher, course, and section. Select the Print students alphabetically option for easier searchability of students.
General Settings
Determining Which Questions Teachers Can Answer and Score
The Questions teachers can answer and score setting controls how teachers submit and score answers for their students on assessments.
There are two options that the test administrator can choose from when administering a test:
Constructed Response and Text Entry questions only - Answers are grayed out for the teacher except for constructed response and text entry. If the student wrote a short answer response on the answer document, the teacher can view a digital image of the student’s answer on the test entry screen as they score the document. If a scoring guide has been included on the test, the teacher can also view the scoring guide while scoring the test.
All questions - Teachers can answer all questions at any time before or after scanning.
.png)
Disabling Enter Answers
Disable access to Enter Answers prevents teachers from viewing or previewing any item on an assessment through the Enter Answers feature. Teachers can still administer assessments as usual.
Note: This will block the teacher from being able to score constructed response and text entry questions.
.png)
Enabling Pre-Printed Form Testing
Toggle on Enable third-party pre-printed form testing, if needed, and select View Possible Forms to see which forms are usable with the test and which may be unsupported. Alternatively, select Export Slug File.
.png)
Uploading Data Files
Test authors can import student test scores from another system if the file is formatted correctly as a CSV file.
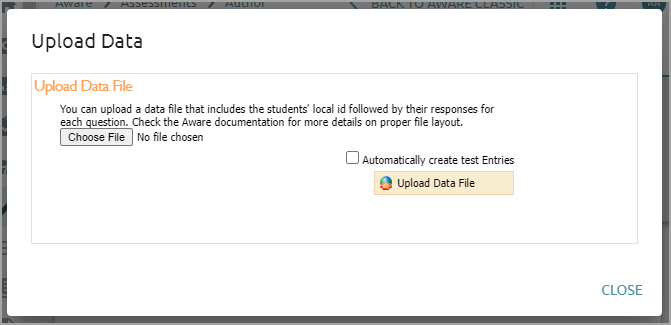
Under Upload Data Files, select Upload to open a wizard where you can choose a CSV file from your computer.
.png)
You can upload a data file that includes the students’ local IDs, followed by their responses to each question. You can also check the box to Automatically create test Entries if desired. When finished, click Upload Data File.
Rescore a Test
Click Rescore if you need to change any of the following for an assessment:
Performance levels
The test key
Item weighting
Learning standards
Delete Answer Sheets
There are two ways to delete answer sheets.
The first is by student. Click Delete Answer Sheet if a student’s answer sheet was accidentally scanned and the score needs to be removed. Select the student from the list, and choose Remove. If a student’s answer sheet is removed, the document cannot be rescanned because the code at the bottom of the answer sheet becomes invalid.
The second is by deleting all answer sheets. If the assessment needs to be changed, such as by adding or removing a question, you can select Delete All Answer Sheets. This will delete all student scores associated with the assessment, which you can now modify.
Warning: Use caution when deleting answer sheets. If you select either option, all previously-printed answer sheets will become invalid, and you will need to reprint new answer sheets.