Users with the Manage Student Supports right in Aware can assign testing supports to students using a few different methods:
Teachers have the greatest control over student support management if you select Teachers under Online Testing Proctor Controls on the Online tab. Eduphoria recommends that users choose the setting that best matches their test administration needs.

Note: The online testing system checks for student supports when test entries are generated. A test entry is where the student’s answer data is stored and is generated in four ways:
An administrator makes an online test available from the Administer () screen.
A district- or school-level user makes an online test available using the Proctor Panel.
The answer sheet PDF is generated.
A teacher marks a test to be proctored online in the Tests Available section and navigates to the Online Test Proctoring screen either by selecting the assessment’s hyperlink or selecting the Online Test Proctoring tab.
Syncing Student Supports for an Online Test
If a student’s supports change before an online assessment, their supports can be updated two ways:
The first time the student logs in to take a test, the student supports tied to the test entry update automatically. This happens only on the first login attempt for a test, when the test entry is created. Subsequent logins do not automatically sync.
Note: This automatic sync update was released in September 2026. Only test entries created after the update was released will sync automatically.
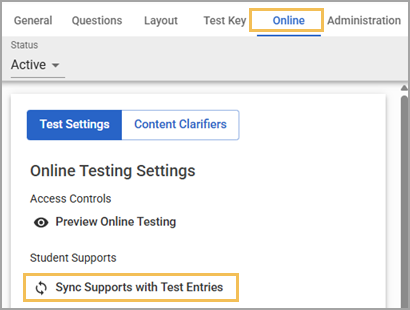
If a student’s supports are updated after the test entry is created, a test author or administrator can use the Sync Supports with Test Entries button in the Online tab of the test that needs updates. The Sync Supports with Test Entries button syncs test entries for all students tied to the assessment.
Note: If the assessment is a teacher test, the teacher can sync supports. If it is a district or school test, only users with the appropriate rights to modify or create that level of test can sync supports. Supports that are manually enabled in Online Test Proctoring will not be not overridden by the Sync Supports with Test Entries button in Author.
Mass Assigning Student Supports
If you are assigning supports for students for the first time or have many support changes to make (such as at the beginning of the school year or a new semester), follow these instructions.
Quick Guide
Click the Download link below to download the Student Supports Template.csv file.
Enter the required support information for the appropriate students. In the CSV template, place a “1” in each field to activate the support and a “0” or blank space to turn off the support or leave it deactivated.
Select the Students Settings gear () in Aware’s navigation bar to begin the mass upload process.
Select Upload Student Supports.
Select Choose File to find the file you want to import. If you want the importer to ignore blank cells, then check the box for DO NOT override blanks in file and set to 0.
Select Upload.
Illustrated Guide
Step 1: Click the Download link below to download the Student Supports Template.csv file. Support for the legacy import template will persist for a short time. However, it cannot be used to update the subjects added in February 2026.
Step 2: Enter the required support information for the appropriate students.
In the CSV template, place a “1” in each field to activate the support and a “0” or blank space to turn off the support or leave it deactivated. Supports for each subject must be separated by individual rows, which means that students with supports across multiple subjects are listed more than once.
Note: Not all subjects are required for every student when making updates via mass import. For example, if you’re updating supports for math, you can delete all other subject rows. The deleted subject rows will not update or change the saved student supports. If you leave cells blank (including entire subject rows), the importer reads them as “off” or “0” and deactivates the support. If you leave cells blank and check the box for DO NOT Override blanks in file and set to 0, then the importer ignores blank cells.
Step 3: To mass upload and assign testing supports for students, select the Students Settings gear () in the navigation bar.
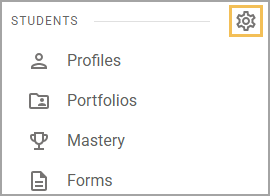
Step 4: Select Upload Student Supports.
Note: All subject names must match exactly as they are listed in the template. For example, “Math” does not import and must be listed as “Mathematics” instead. Additionally, students are linked to supports by their student ID, not their name.
.png)
Step 5: Select Choose File to find the file you want to import. If you want the importer to ignore blank cells, then check the box for DO NOT override blanks in file and set to 0.
Step 6: Select Upload.
.png)
Note: If you import student supports using Secure File Transfer Protocol (SFTP), select Show jobs imported via SFTP to see a record of successful and unsuccessful imports via SFTP. Visit Access Keys for more information.
Using the Manage Student Supports Table
An administrator with the Manage Student Supports right can view, audit, and export a table of student supports for printing.
Quick Guide
Select the Students Setting gear ().
Select Manage Student Supports.
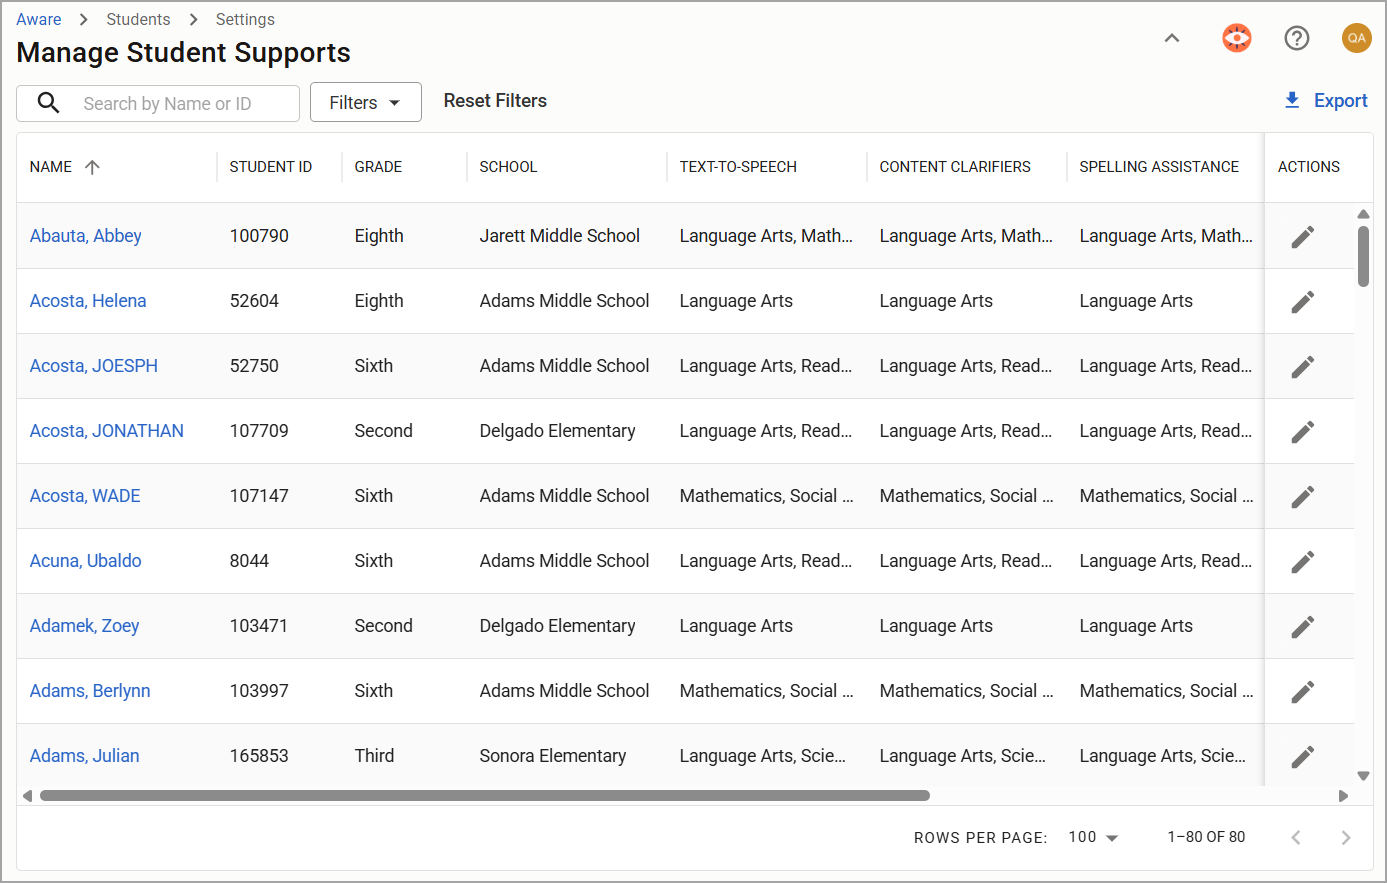
In the table, review the list of students, alphabetized by last name, along with their student IDs, grade, school, and the subjects assigned to each support.
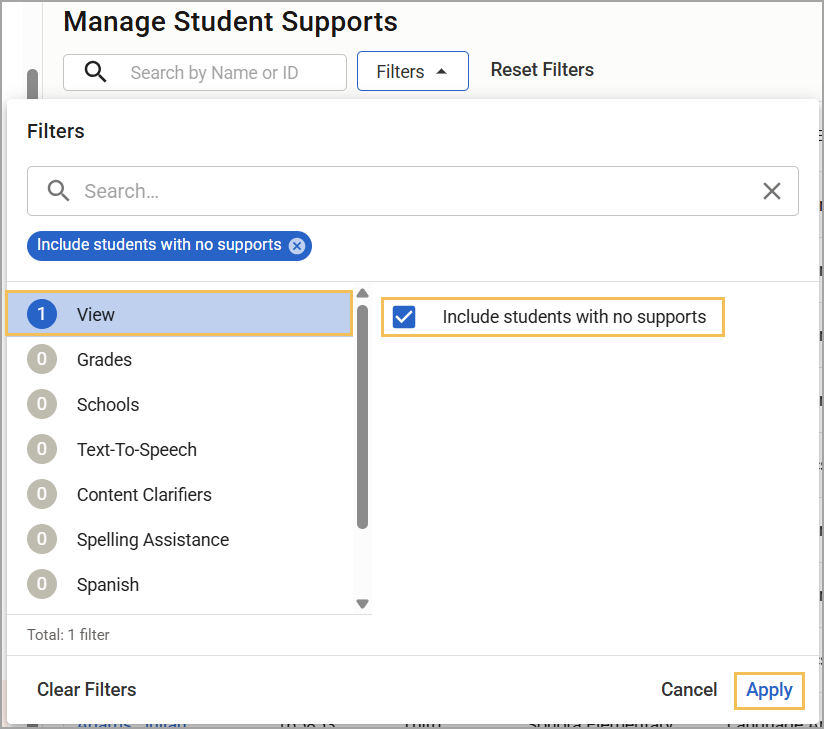
Use the filters to narrow down students by grade level, school, subject, and support type. Check the filter option Include students with no supports to show students without any assigned supports.
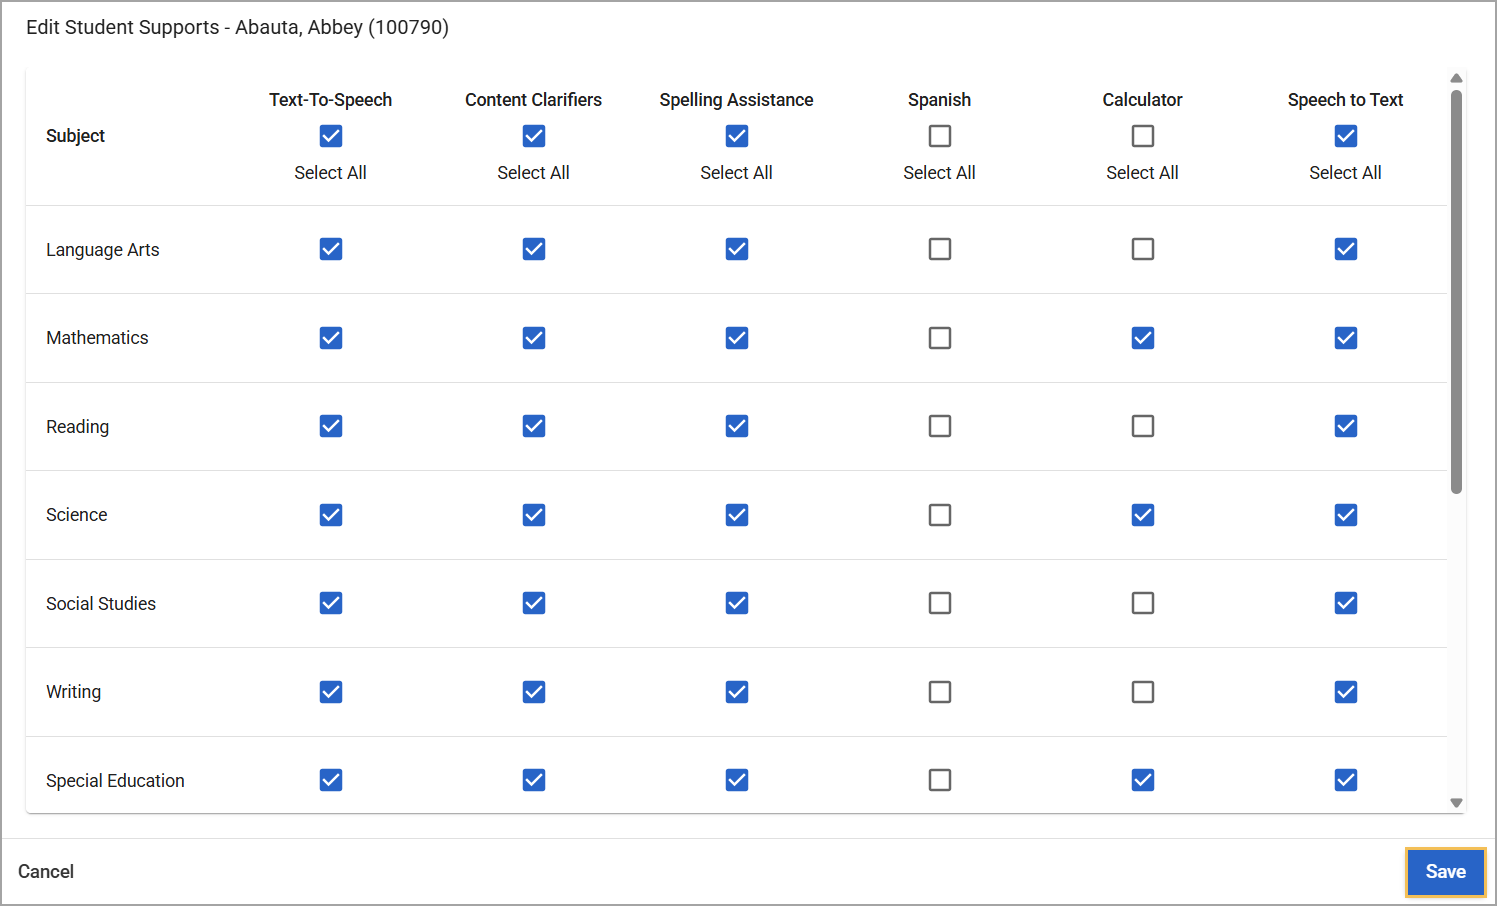
Click the Edit icon () under the Actions column to manage supports from the table.
If needed, select Export () to create a CSV file containing the filtered table data. You can use the export from this table in the mass importer.
Illustrated Guide
Step 1: Select the Students Setting gear ().
.png)
Step 2: Select Manage Student Supports.
.png)
Step 3: In the table, review the list of students, alphabetized by last name, along with their student IDs, grade, school, and the subjects assigned to each support.
Step 4: Use the filters to narrow down students by grade level, school, subject, and support type.
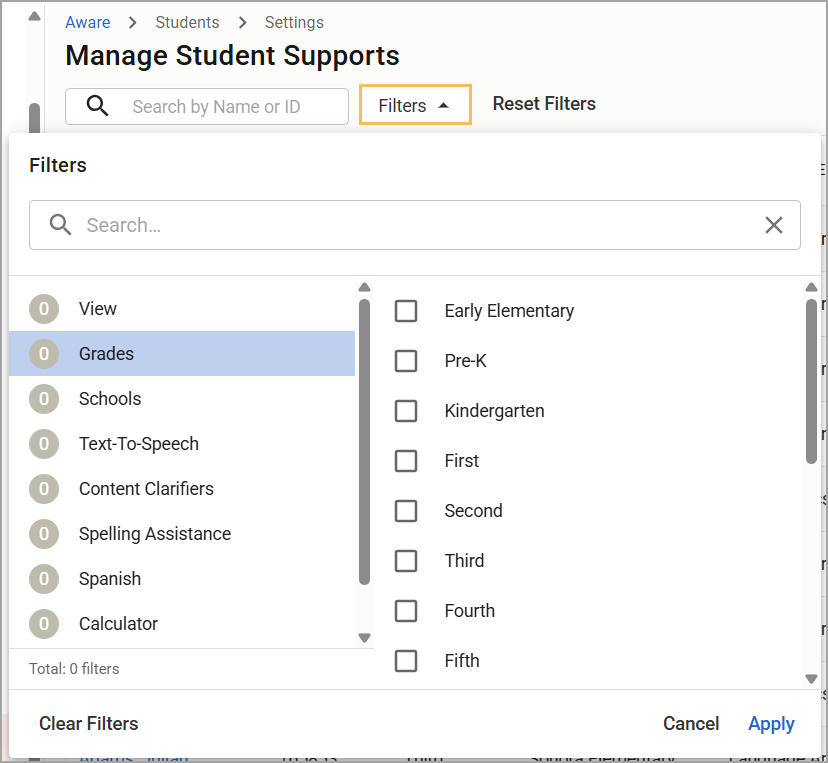
Only students with assigned supports appear in this table by default. Check the filter option Include students with no supports to show students without any assigned supports.
Step 5: Click the Edit icon () under the Actions column to manage supports from the table. The modal allows the user to change the supports and save them manually. You can also update them manually on the student profile.
Note: Removing all supports in the modal also removes the student from the Manage Student Supports table unless you have checked the Include students with no supports filter. If an error occurs, add supports back to the student via import or in the student’s profile, run a new supports import, or check the Include students with no supports filter option.

Step 6: If needed, select Export () to create a CSV file containing the filtered table data.
Tip: You can use the export from this table in the mass importer. If desired, export the report, edit it manually, then import it to reflect changes. See the Mass Assigning Student Supports section for more details.

For more information about student supports, check out these resources.