School districts can decide what applications are allowed while using LockDown Browser. Only district-level data administrators can access allowlist options.
Note: Allowlisting options does not allow students to switch between an assessment and other applications. Allowlisted applications run in the background behind the testing window. For example, students may participate in a Zoom conference with a teacher but will not be able to switch to the Zoom application to view the video while taking an assessment in Aware.
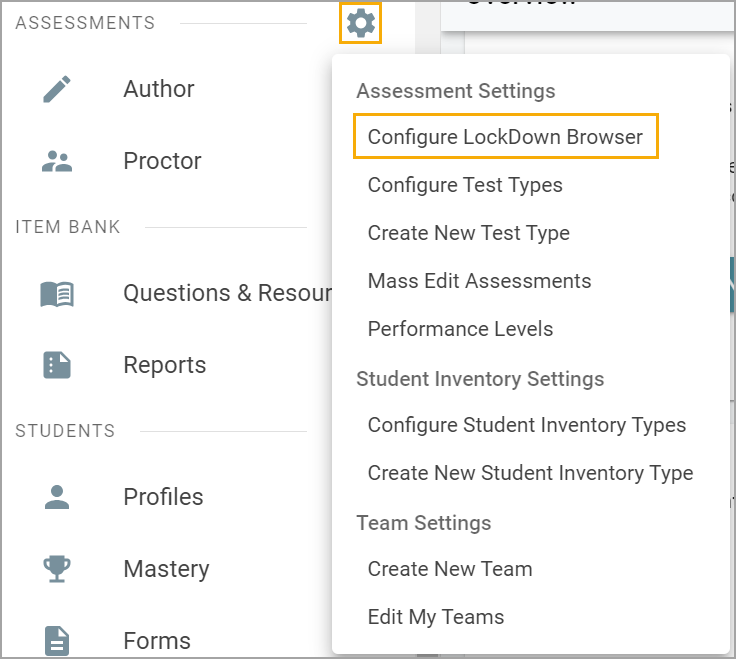
Step 1: Navigate to the Assessments Settings gear in Aware.
Step 2: Select Configure LockDown Browser.
Note: To access Configure LockDown Browser from Assessments Settings, you must have the Create Local Assessment Tests right assigned to you at the district-level, meaning you have access to this right for all campuses. Roles and rights are configured by your Eduphoria system administrator in Management.
Step 3: Click Add New Allowlist Item and enter the name of the process you want to allow. Lab administrators can use the Lab Installer Links downloads in a lab setting.
.png)
Application names are specific to the operating system on which LockDown Browser is running. Windows and macOS systems differ. For example, to allowlist Zoom on Windows, you need to enter “zoom.exe”. To allowlist Zoom on macOS, you need to enter “us.zoom.app”.
Caution: It is important to note that if your district operates both Windows and macOS systems, you will need to enter both the Windows and macOS entries.
To find the correct process name to allowlist in Windows, launch the application you would like to allowlist, then launch the Task Manager and use the text from the “Name” column in the “Details” tab.
To find the correct process name to allowlist in macOS, launch the application you would like to allowlist, then launch Activity Monitor and use the text in the “Process Name” column.