To create a short answer or essay constructed response question, begin by creating a new assessment in Aware or navigating to an existing one.
Note: An assessment with a constructed response question will remain print and online friendly with multiple choice, multiple selection, numerical response, and resource items. Assessments with interactive response items may be printed as test booklets only.
Creating a Constructed Response Question
Quick Guide
When working on an assessment, go to the Questions tab and do the following:
If this is the first time adding a question, select the Constructed Response button.
If you want to add more questions, select the Add () button and choose Constructed Response from the drop-down menu.
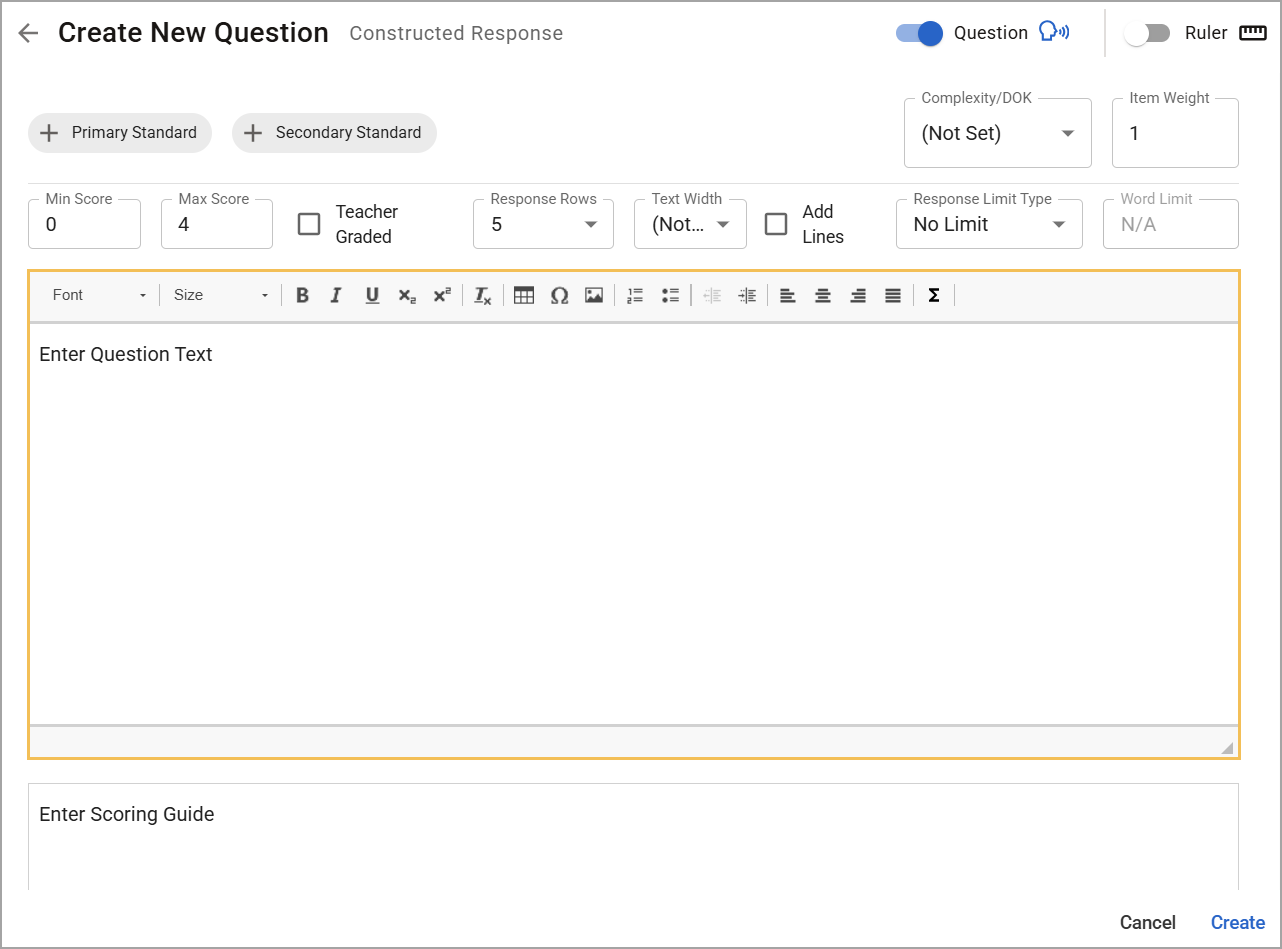
Write and format the constructed response question in the text box labeled Enter Question Text.
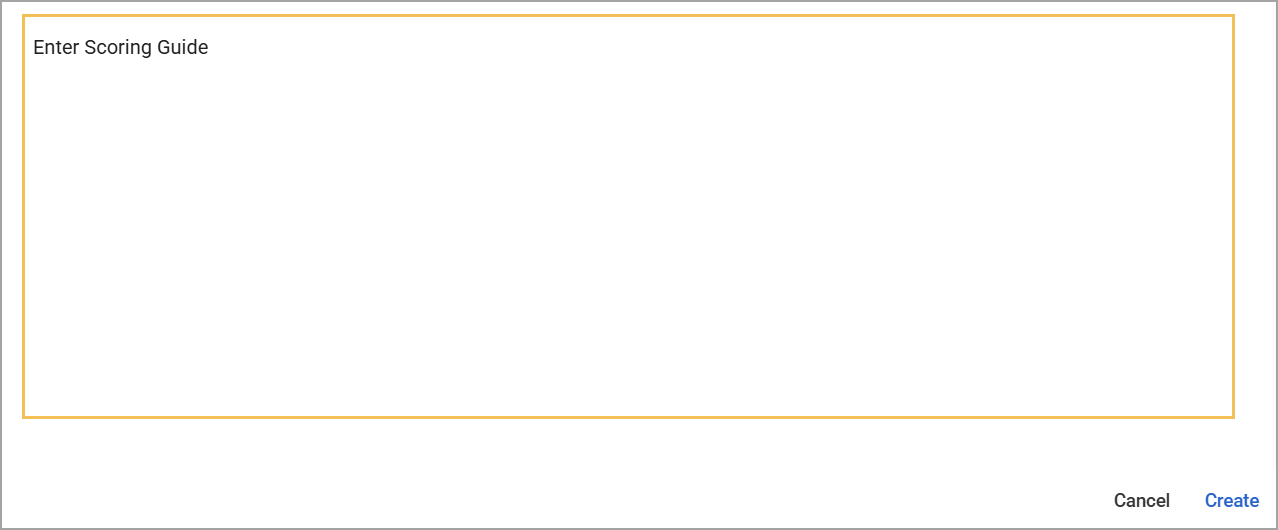
Enter the scoring rubric into the text box labeled Enter Scoring Guide.
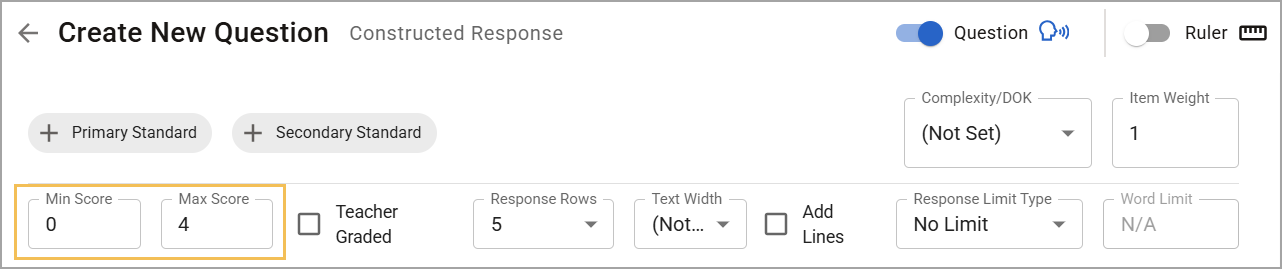
Set the scoring range using Min Score and Max Score.
Check or uncheck the Teacher Graded checkbox depending on how the teacher would prefer to score constructed response questions. If unchecked, set the number of Response Rows and the Text Width. Select the Add Lines checkbox to provide lines for students to write on for the printed answer sheet.
Set the Response Limit Type to No Limit, Word, or Character.
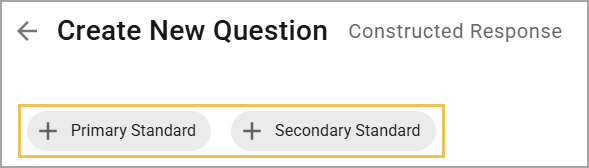
Select Primary Standard and Secondary Standard to add up to two learning standards.
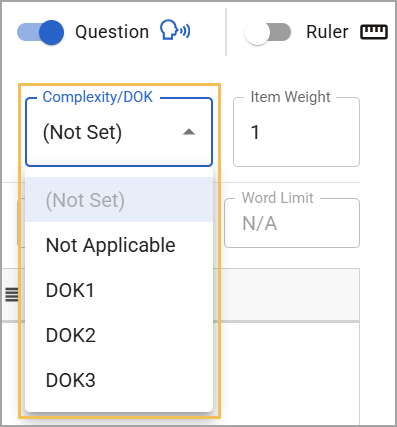
Set Complexity/Depth of Knowledge.
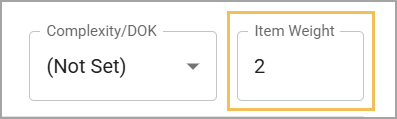
Assign Item Weight.
Click Create or Update when finished.
Illustrated Guide
Step 1: When creating a new assessment question in Aware, navigate to the Questions tab and do the following:
If this is the first time adding a question to the assessment, select the Constructed Response button.
If you want to add more questions to an existing assessment, select the Add () button above or below an existing question and choose Constructed Response from the drop-down menu.
.png)
.png)
Step 2: Write and format the constructed response question as desired. Type your question into the text box labeled Enter Question Text. Once the test author adds the question to the test, the system adds the question number. There is no need to add an item number to the question text box.
Click the right lower corner of the text box and drag to increase or decrease the text box size.
Step 3: Enter the scoring rubric into the text box labeled Enter Scoring Guide. You can type your scoring guidelines, use a previously created scoring rubric by copying and pasting the rubric into this field, or take a screenshot of the rubric and add the image to this field. The rubric is a scoring guide and is not interactive at this time.
Step 4: Set the scoring range using Min Score and Max Score.
Step 5: Select the Teacher Graded checkbox, and a score range of 0-9 appears on the answer document. The students will then write their answers on a separate paper. The teacher bubbles in the appropriate score on the answer document.

Leave the box unchecked if you want students to write their response during the online test. If the question is not teacher-graded, select the number of Response Rows and the Text Width. This setting establishes the typing space online and the writing area on the printed answer document. After testing, the teacher enters the scores using Enter Answers.

Response Rows default to 5 and provide a designated space for students to respond during online testing and on printed answer documents.
Text Width can be set as the following options:
(Not Set)
25%
50%
75%
100%
You can also check the box for Add Lines, which provides lines for students to respond on the printed answer sheet. This setting does not impact the online testing experience.
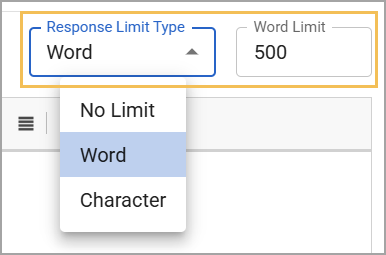
Step 6: Set the Response Limit Type as any of the following options:
No Limit – There are no limitations to how many words or characters the student can enter.
Word – Students cannot enter more text after they reach a set number of words.
Character – Students cannot enter more text after they reach a set number of characters (letters, numbers, and symbols).
If you selected Word or Character, then enter a number to set either the Word Limit or Character Limit. Spaces do not count against the character limit.
Step 7: Select Primary Standard and Secondary Standard to add up to two learning standards.
Step 8: Set Complexity/Depth of Knowledge by choosing from the following options:
(Not Set)
Not Applicable
DOK1
DOK2
DOK3
Step 9: Assign Item Weight to increase or decrease the raw value, which changes the percent value of that item within the overall percent score.
Step 10: When finished, click Create or Update.
![]()
Student Experience
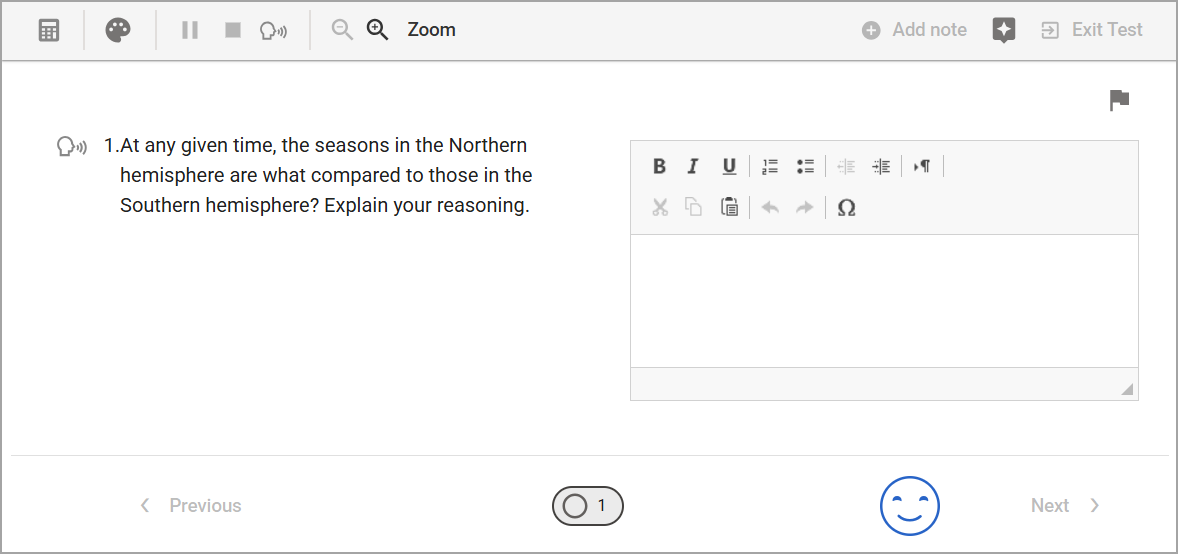
Students will see the constructed response question during testing. They can use the rich text editor to format their response in the text box, which includes the ability to insert special characters.
Scoring
Teachers can score their students’ constructed responses in a few ways, depending on whether they administered a paper or online assessment.
Answer Documents
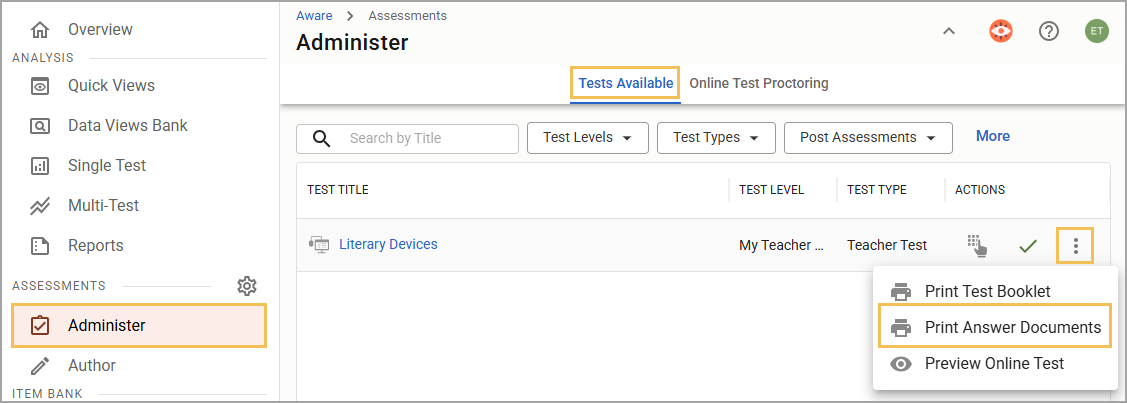
If you administer a paper assessment or check the box for Teacher Graded to allow students to record constructed responses on a sheet of paper, you can print answer documents for scoring. Obtain answer documents by clicking on Administer () > Tests Available > The appropriate test > More Actions () > Print Answer Documents.
Online Responses
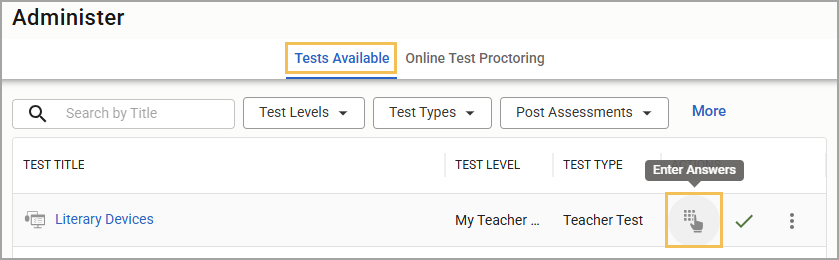
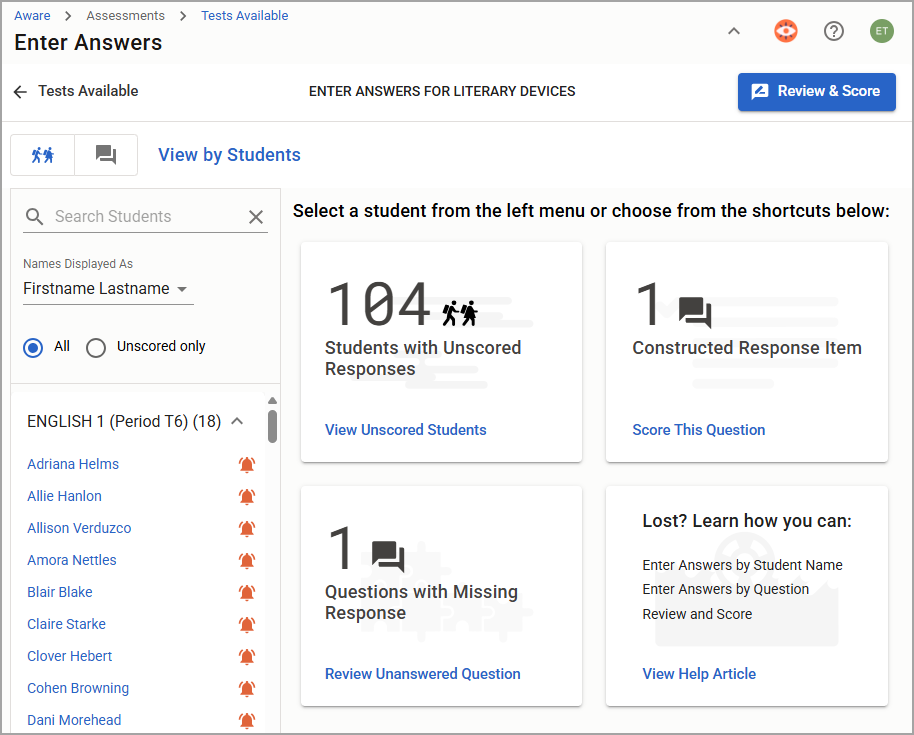
If you administer an online assessment, you can score your students’ answers and constructed response items using the Enter Answers feature. Locate Enter Answers by selecting Administer () > Tests Available > select the appropriate test > Enter Answers icon.
Once you select and load your student groups, you can review unscored responses, score constructed response items, and finalize student scores.
Tip: If you prefer to print the responses that students entered online, you can do so using the Student Constructed Response Tool in Analysis Reports.
AI Scoring
Aware Premium users can also use AI Scoring to grade their students’ constructed response answers that have questions connected to a resource, or reading passage. Within the Enter Answers interface, teachers can submit all constructed response answers for AI Scoring, override AI-provided Scores as needed, and review and edit AI Scoring rationale and feedback to the student.
Select the Score All AI CRs button to initiate AI Scoring. The system checks all Constructed Response questions with AI Scoring available that have not been scored. Responses are then queued and sent to the Large Language Model (LLM) for scoring.
Caution: The LLM scores student responses using the chosen rubric and the embedded reading passage and question from the test in Author. Requesting AI scores for Constructed Response questions that are not associated with reading passages and a relevant question will result in highly unreliable and inaccurate scores.

To learn more about Eduphoria’s guidelines for using AI Scoring, visit Using AI Scoring as a Teacher and the AI Scoring FAQ. To learn how a district administrator can turn on the AI Scoring setting at the district, test type, test, and question levels, visit Using AI Scoring as an Administrator.
Data Analysis
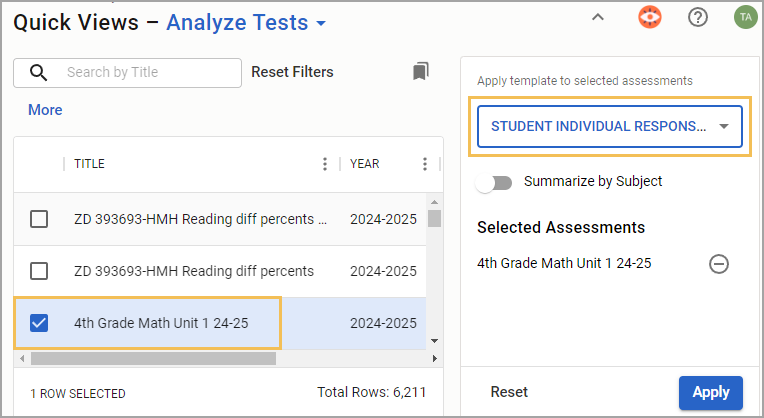
Viewing Responses in Quick Views
Question Type is available in Quick Views. Access Quick Views through the navigation bar or through the Quick Views card.
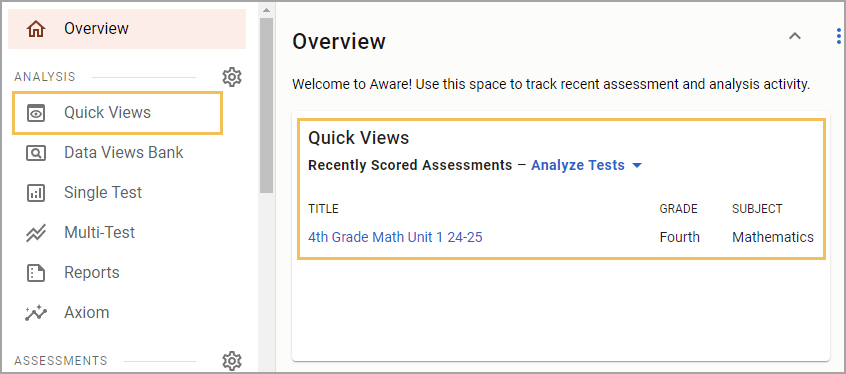
Once in Quick Views, use the search field to find and select the assessment(s) you want to analyze. Choose the Student Individual Responses template from the drop-down menu. Select Apply to continue.
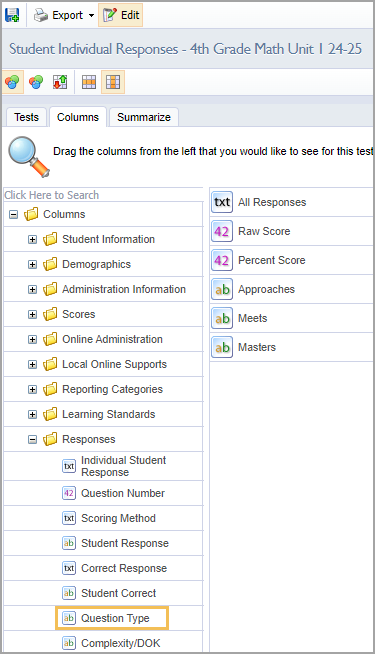
Show or Hide the Question Type Column
If the table does not display the type of question, you can customize which columns appear or do not appear from the Edit menu. Select the Columns tab, and then expand the Responses folder. Drag the Question Type option to the empty space on the right side of the screen. Then, select Update to apply your changes. For more information, see Editing Data Views as a Teacher.
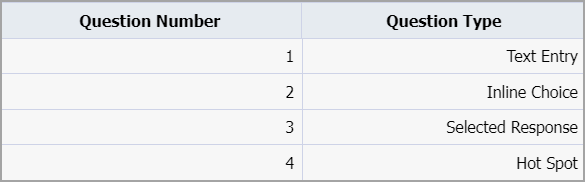
The Question Type column shows the type of question asked and the corresponding question number. Teachers may view the exact question in the Enter Answers screen and modify student answers if needed.
Allowing Teachers to Answer and Score Assessment Questions
For district- and school-level tests, the Questions teachers can answer and score option must be set to All Questions to enable editing privileges. Locate this setting in Administration > Collection > General Settings when authoring or editing an assessment in Aware.

Student Constructed Response Tool
You can view and print constructed responses that students entered online using the Student Constructed Response Tool in Analysis Reports. Responses are collected through both online testing and scanned documents. If a test has no constructed response question types, the report will not run, and users will see a pop-up notifying them of the problem. Teachers choose between consolidated (grouped by question) or detailed (grouped by student) views.
Note: The Student Constructed Response Tool shows students from a “where they are now” perspective, meaning that the Testing School and Testing Teacher columns display the students’ current roster information.
To learn more about running this report, see Report Types.
