Preps are specific to the classes you teach and are often linked to a course and roster section. If you teach multiple classes, you create a separate prep for each class. You can then add plans to your preps, tailoring lessons, activities, and resources to meet the needs of each class.
Examples:
A secondary Math teacher has been assigned 3 periods of Algebra II, 2 periods of Algebra I, and 1 period of Calculus. This teacher creates 3 preps.
A self-contained elementary teacher has 4 preps, including Math, Science, History, and Language Arts.
An elementary music teacher might have only 1 prep if they teach mixed-grade-level classes, or they can separate preps by grade level.
Note: You cannot edit planners from past years. Once the end date of an instructional calendar has passed, the calendar is locked, and you can no longer make changes to preps, plans, or units for that year. If you want to reuse an older plan, you can copy plans from a past year to an active planner then make adjustments to the plan as needed.
Quick Guide
Select My Planners from the main menu.
Select + New Prep.
Select the Edit icon () to assign a color and pattern to the prep.
In the Prep Name field, enter a name for the prep.
From the Link a Course drop-down, select a course to link to the prep.
From the Roster Sections drop-down, select a roster section to link to the prep.
From the Plan Templates drop-down, select a template to use.
In the Invite people or teams field, search for and select people or teams.
Select Add Prep.
Illustrated Guide
Step 1: Select My Planners from the main menu.
.png)
Step 2: Select + New Prep to open the Add New Prep window.
.png)
Step 3: Select the Edit icon () to assign a color and pattern to the prep. This becomes the image used for the prep tile in My Planner and of the header when viewing your plans.
.png)
Step 4: In the Prep Name field, enter a name for the prep. This usually corresponds to the name of the class you teach. For example, you might create a prep called “Math, Grade 4” or “Chemistry, 3rd Period”.
.png)
Step 5: From the Link a Course drop-down, select a course to link to the prep. Linking a prep to a course allows you to easily connect standards or curriculum components from the course to the prep. Connecting a prep to a course also allows district leaders to view plans in the prep when conducting an analysis.
.png)
Step 6: From the Roster Sections drop-down, select a roster section to link students to the prep.
.png)
Step 7: From the Plan Templates drop-down, select one or more templates to provide a basis for creating your prep, if the appropriate template is available.
The selected template(s) appear in the planning area for your prep along with the Blank Plan and More Templates… options. When you select a template, the plan populates with the template’s content blocks, allowing you to create plans more quickly and with less manual work.
.png)
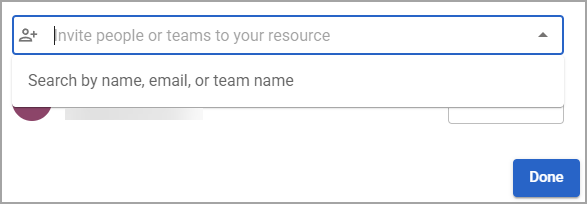
Step 8: In the Invite people or teams field, begin typing a name, email address, or team name for the person or team you want to invite. Select the name of the person or team when it appears in the list.
Step 9: Select the drop-down menu next to each name to assign a permission level.
Owner – The Owner has full access to the curriculum component. The creator of a curriculum component is automatically assigned as its owner but can assign this role to someone else if necessary.
Contributor – A Contributor can edit the curriculum component, including adding other contributors and linking or unlinking child components. Contributors cannot add owners, change the visibility setting, or delete the curriculum component.
Viewer – A Viewer can see everything within a curriculum component but cannot make any changes to the component.
Remove – This option removes permissions so that the user no longer has access to the component.
Step 9: Select Add Prep.

The prep appears in your planner. You can now add plans to your prep.