You can import content for courses, units, lessons, and resources by selecting the Import option on the Courses screen. To manually create a course, see Creating a Course. For information about importing a course from Google Drive, see Importing a Course from Drive.
Quick Guide
Select Courses from the main menu.
Select the New button, and then select Import from Computer.
Use the file manager to locate and select one or more files to import.
Confirm the name of each file and then do the following:
If importing a single file, select Import.
orIf importing multiple files, select the Import files as one course checkbox to add all files to a single course or leave it empty to create a new course from each file. If selected, a Course Title field appears where you can enter a custom name for the course. Select Import.
A checkmark appears next to each file name to confirm a successful import. Select Go to Course to continue building the course or Close to return to the Courses screen.
Illustrated Guide
Step 1: Select Courses from the main menu.

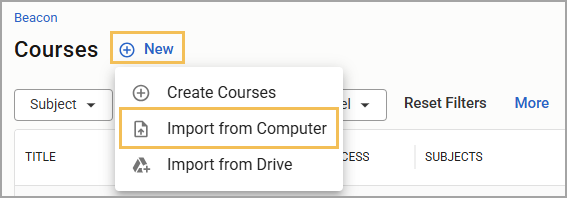
Step 2: On the Courses screen, select the New button. Then, select Import from Computer to open a new window.
Step 3: Using the file manager window that appears, locate and select one or more files to import.
Caution: Beacon displays file names as they appear at the time of upload. Make sure the file name in your file manager matches how you want it to appear in Beacon so that you do not need to rename it later.
Step 4: Upon selecting your file(s), an Import Content window appears. Confirm the name of each file and then do the following:
If importing a single file, select Import.
or
If importing multiple files, select the Import files as one course checkbox to add all files to a single course or leave it empty to create a new course from each file. If selected, a Course Title field appears where you can enter a custom name for the course. Select Import.
.png)
Step 5: A checkmark appears next to each file name to confirm a successful import. Select Go to Course to continue building the course or Close to return to the Courses screen.
.png)