Evaluation forms offer options to enhance security in the evaluation process. Evaluators can enable the setting to lock the document from a form’s Advanced Options (), so that only the evaluator and the staff member can view its contents. From that point, the evaluator can lock and unlock any documents they create for the staff member based on that form.
Quick Guide
Select Staff () in Strive’s main menu.
Locate the staff member for whom you want to create a document.
Select the Quick Start a Document icon ().
Use the drop-down menu to locate and assign details to the document, then select Create.
Complete the locked document as needed, and select Let Staff View () once you need the staff member to access the document. The evaluator and the assigned staff member both see the Locked icon () on the document. Only the evaluator can select View Locked () to switch the document view from Locked to Unlocked.
If needed, you can lock the document again by selecting View Unlocked ().
Illustrated Guide
Step 1: Select Staff () in Strive’s main menu.
.png)
Step 2: Locate the staff member for whom you want to create a document.
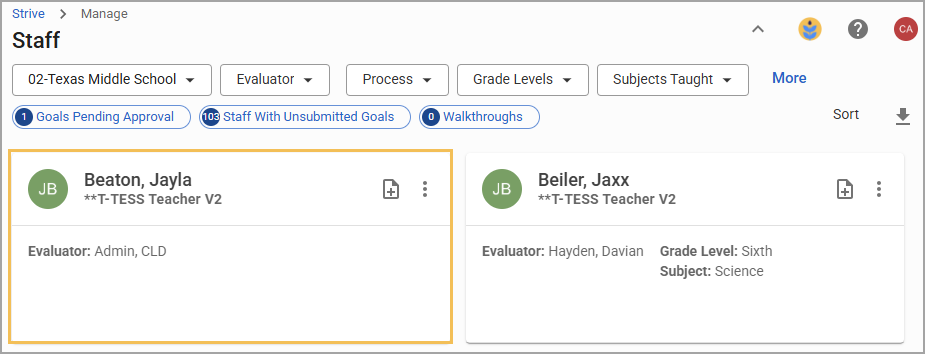
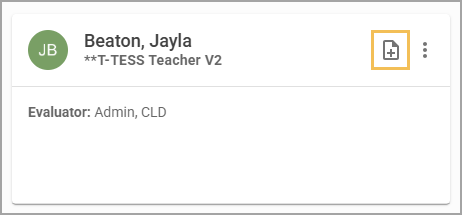
Step 3: Select the Quick Start a Document icon ().
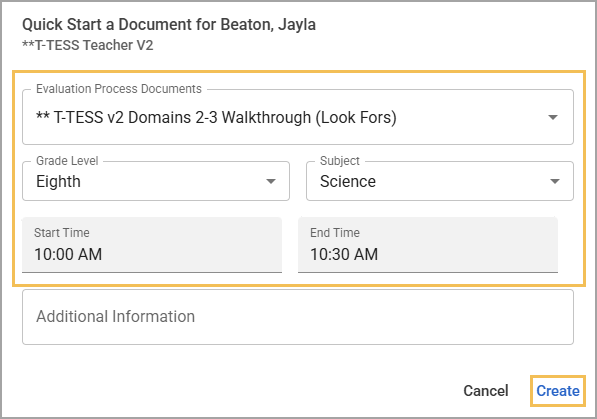
Step 4: Use the drop-down menu to locate and assign details to the document, then select Create.
Step 5: Complete the locked document as needed, and select Let Staff View () once you need the staff member to access the document. The evaluator and the assigned staff member both see the Locked icon () on the document.
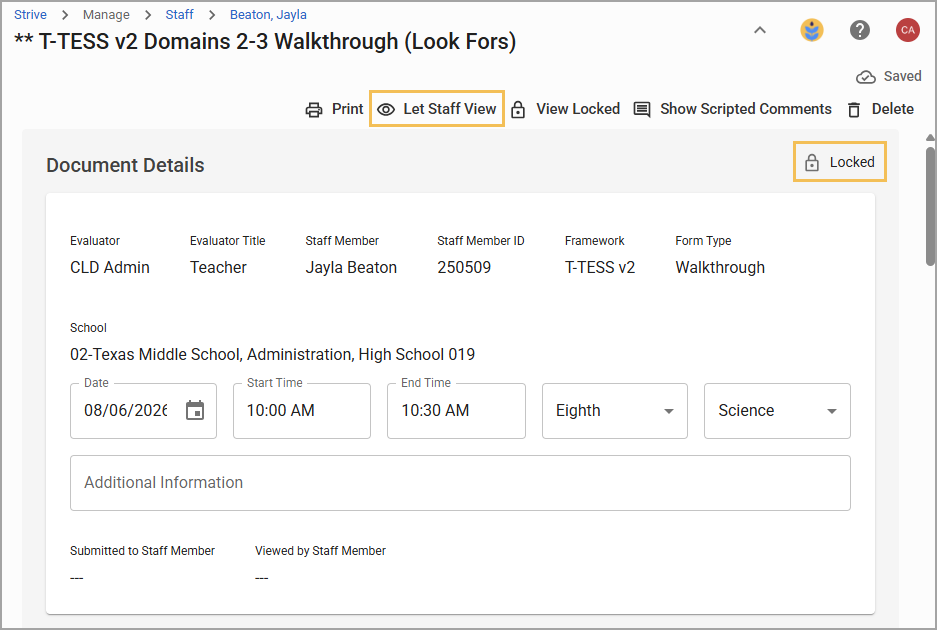
Only the evaluator can select View Locked () to switch the document view from Locked to Unlocked. A message appears, stating that the document is now visible to anyone with view rights for this school.

.png)
Step 6: If needed, you can lock the document again by selecting View Unlocked (). A message appears, stating that the document is now only visible to you (the evaluator), the staff member you are evaluating, and district-level individuals.

.png)