Request Types are the items the end-user selects when submitting a ticket. Each Request Type can be configured separately by clicking on it and accessing the different settings tabs.
Adding a New Request Type
Select the Configure Request Types section on the Manage tab.
Select Add New Request Type.
Enter a name for the request type and select the department where this request type will reside.
Click Next and then select Finish.
Click on the newly added item to access the options to modify for this request type.
Configuring Request Type Settings
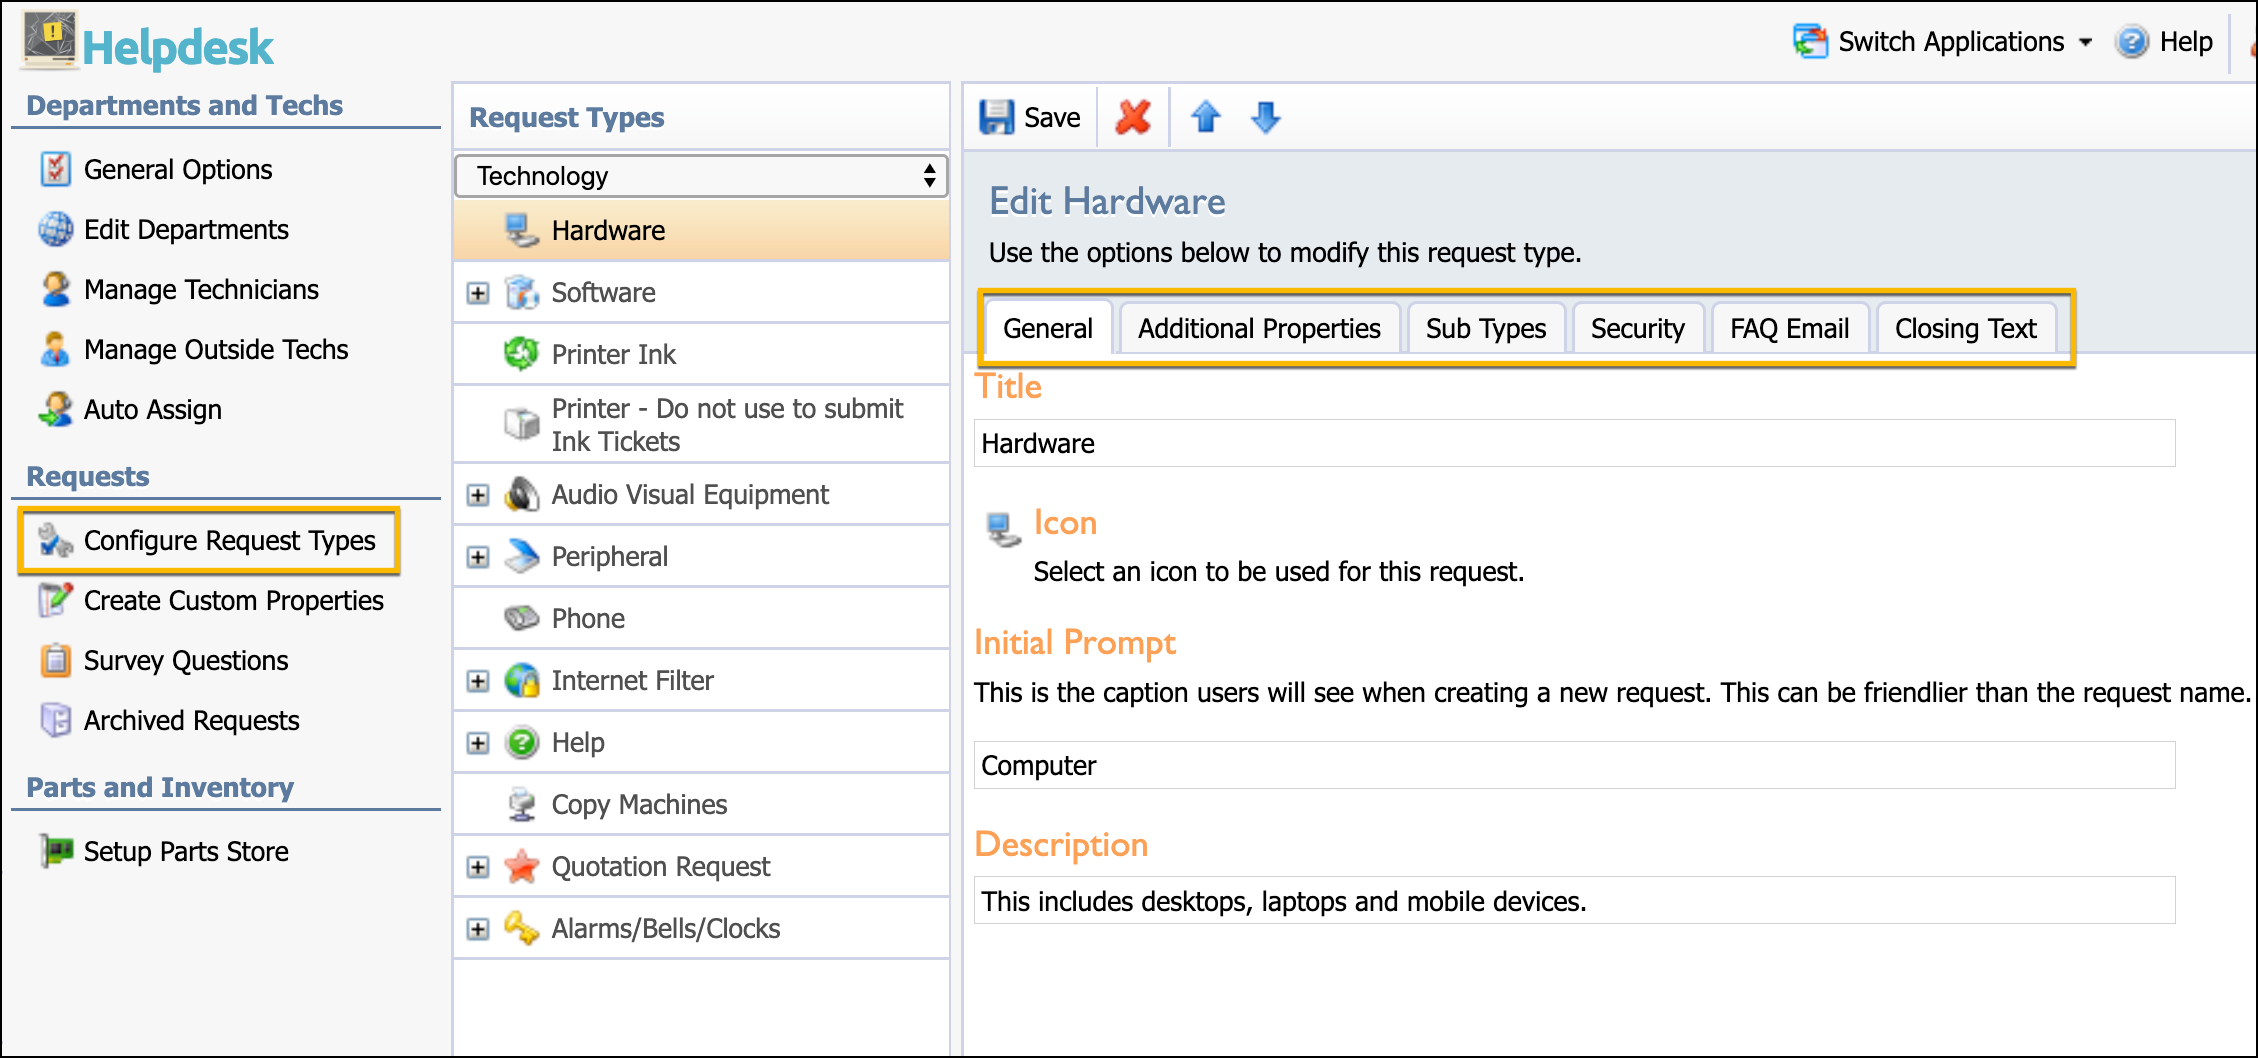
General Tab
Options on the General tab include:
Title – Official name for the request type.
Icon – An image chosen from the library to represent the request type.
Initial Prompt – This is what the user sees when viewing a request type name.
Description – This information is available on the request type screen for users to read to help determine categories.
Best Practice: Keep titles and initial prompts the same, and keep descriptions brief and short.

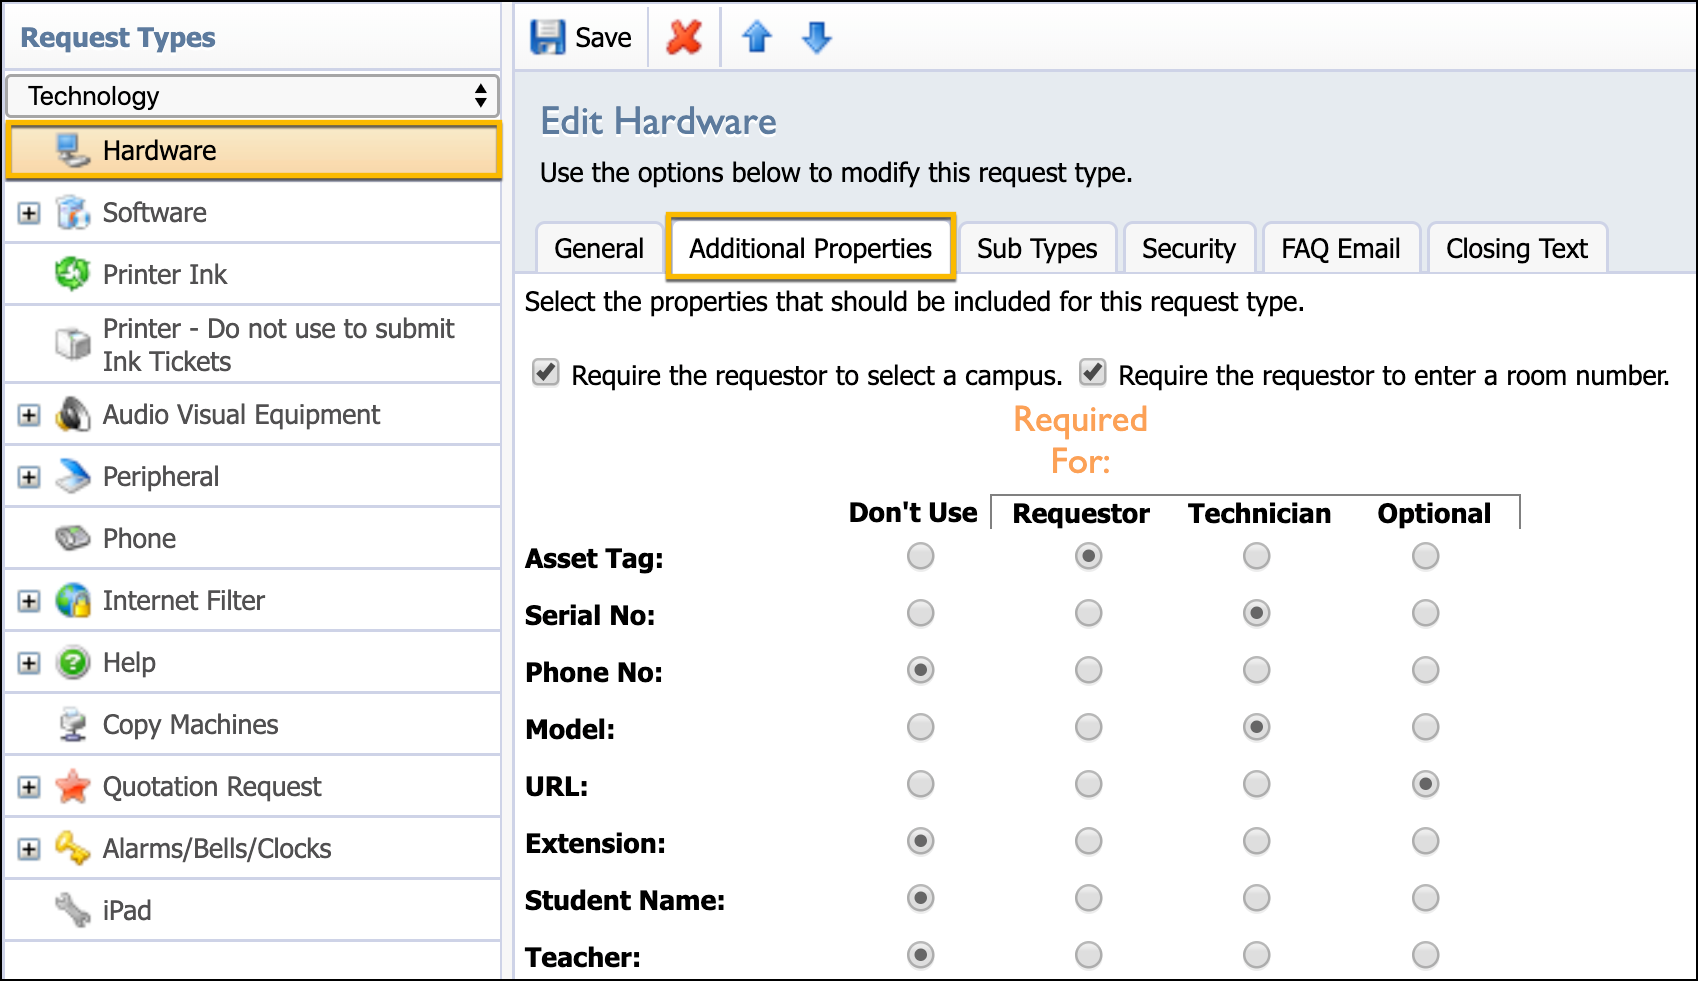
Additional Properties
On the Additional Properties tab, you can:
Require that requestors select a campus for this request type.
Require that requestors select a room number for this request type.
Select additional fields of information for requestor and/or technician to enter the information for the request type. These fields are created in the Create Custom Properties section in the Manage tab.
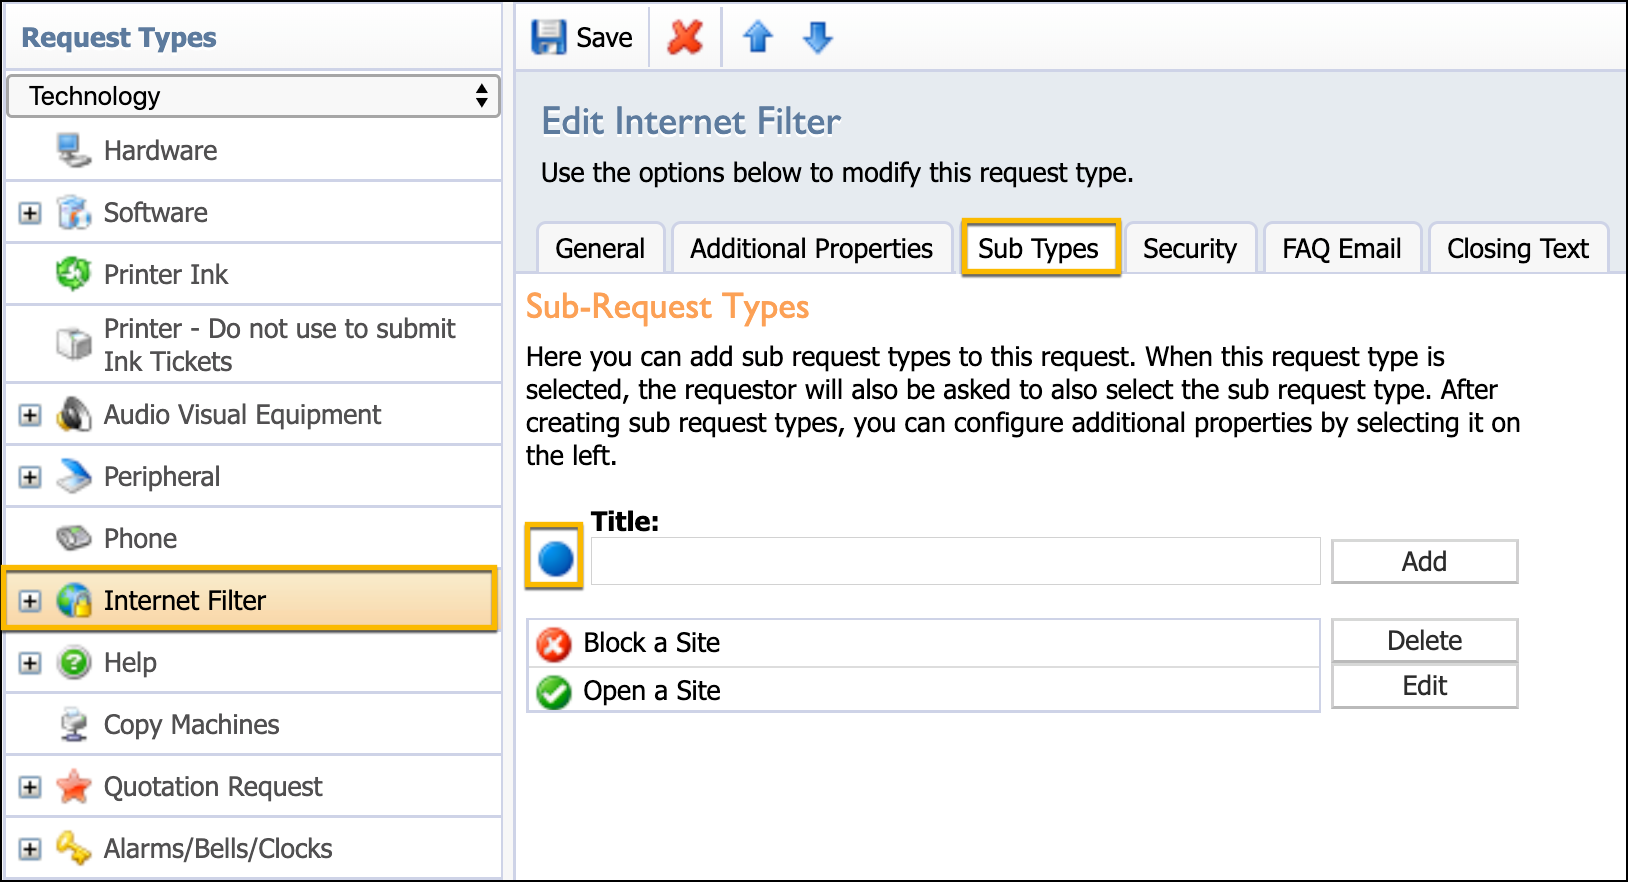
Sub Types
The Sub Types tab allows you to:
Create sub-categories for request types with their own different custom properties.
Add a sub-type then click on it to configure properties.
Select an icon from the library to represent the sub-type.
Example: “Internet Filter” could be a Request Type and the sub-types could be "Block a Site" and "Open a Site".
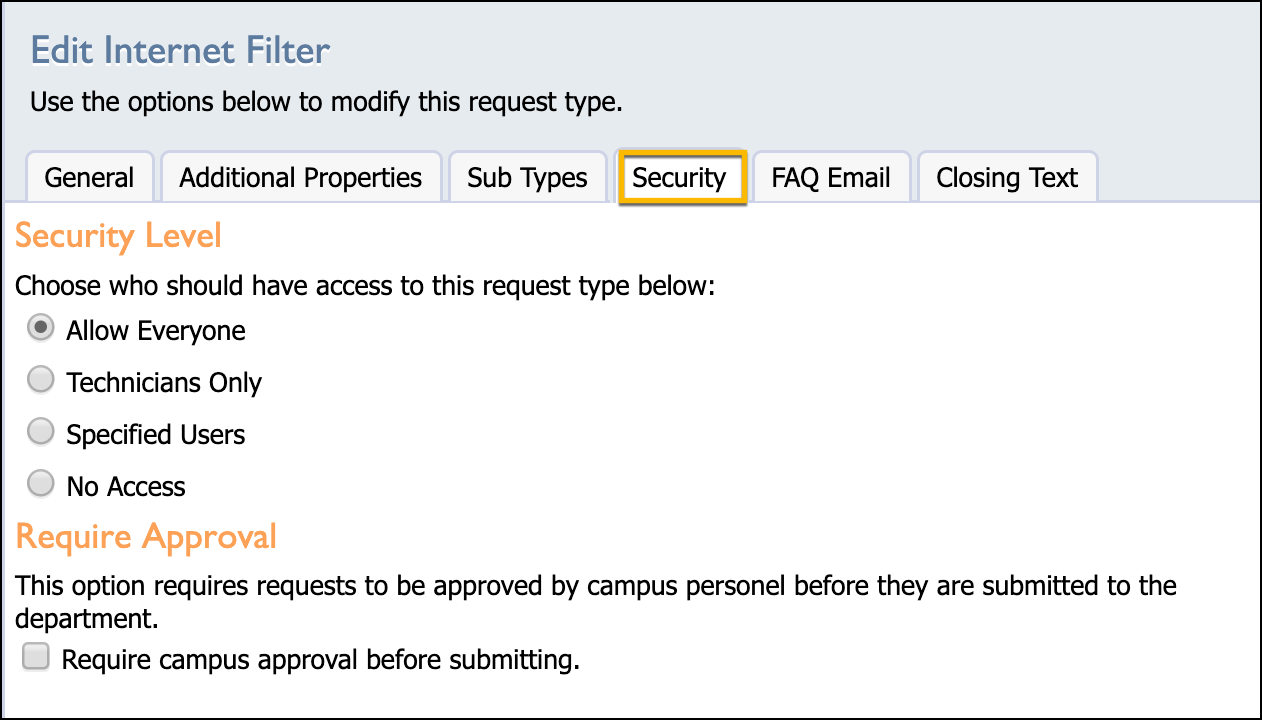
Security Tab
On the Security tab, you can:
Define who has access to this request type.
Turn off a request type.
Determine whether the request type requires prior campus-level approval.
Approval must be granted by a user who has principal access level in System Management.
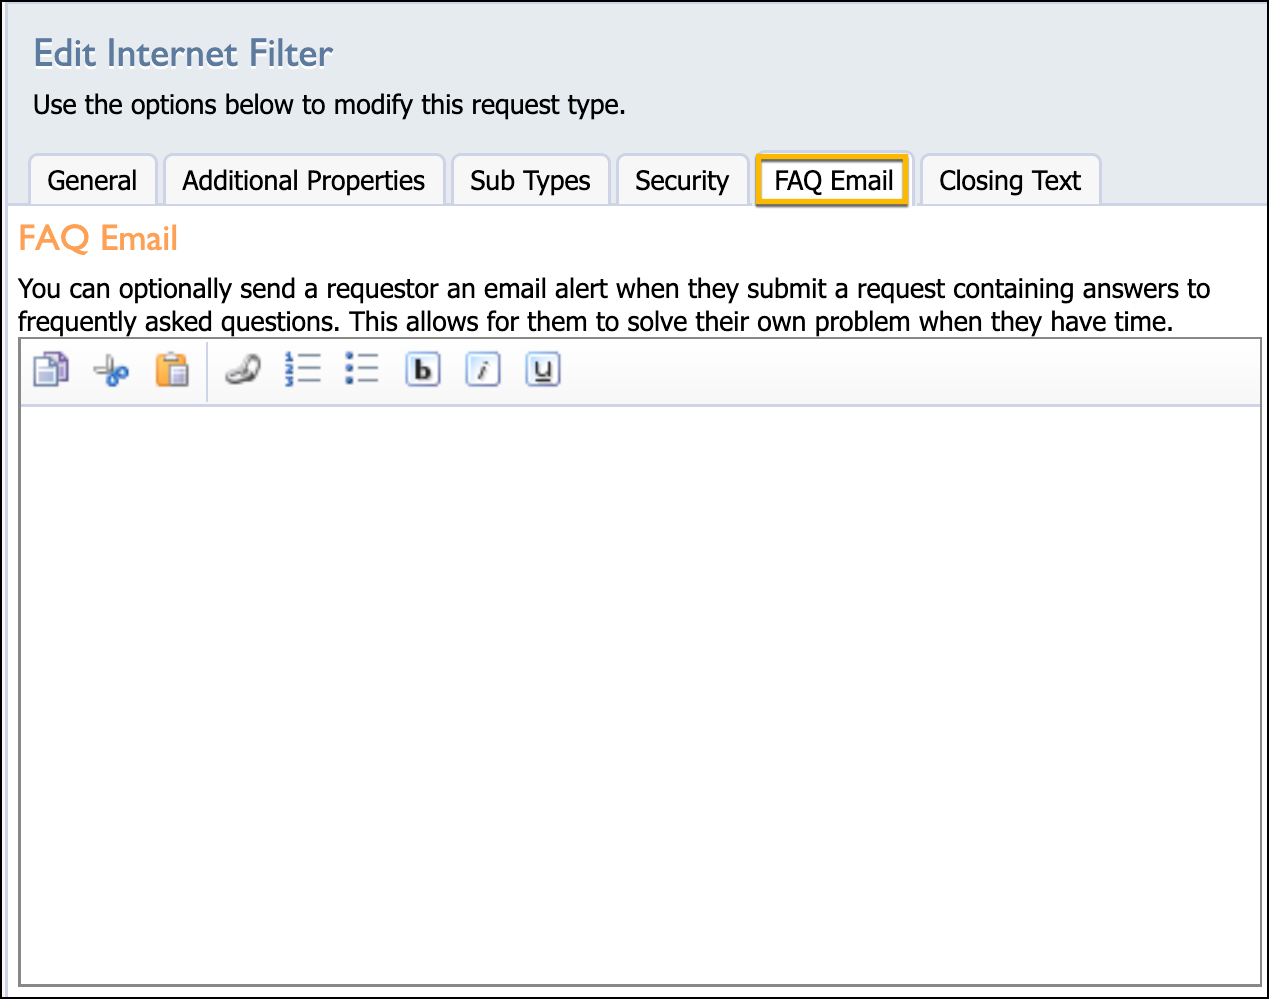
FAQ Email
In the FAQ Email field, you can create an auto-reply email to be sent to the requestor when a request is submitted.
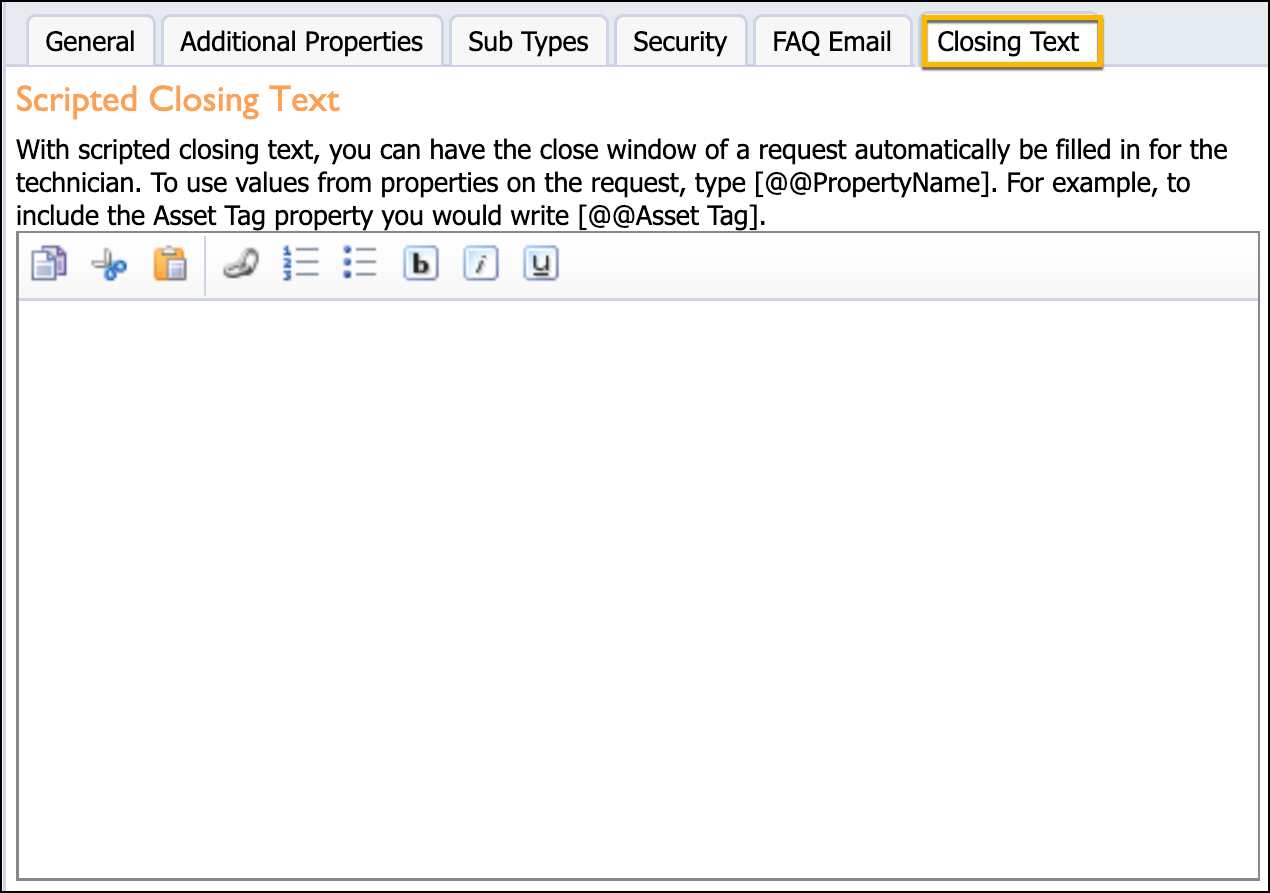
Closing Text
In the Scripted Closing Text field, you can create a custom message to be sent to requestor after their request is closed. You can enter values from properties on the request, such as [@@Asset Tag], in order to auto-populate information in the message.
The order of request types can be altered using the blue arrows on the toolbar to move request types up and down the list. Use the Save button after changing any settings for a request type.
![]()