The option to import assets appears on the Manage tab. To import assets, you need to have the System Administrator role assigned in Facilities&Events.
Import Guidelines
In order to import assets correctly, make sure the import file meets the following requirements:
The file must be in CSV format.
Rooms, Simple Assets, and Regular Assets are imported separately.
Column order in the asset importer must match column order in the spreadsheet.
The column titles/headers must be removed from the CSV file. (Delete Row 1 that contains the column titles before importing.)
Date fields must be in this format: 1/5/2009 or 1/15/2009
No quotation marks can appear within the cells.
Be sure to populate the first and last columns with data so there are no gaps.
Note: Remember to press Save at the top after setting your importer schema.
Prior to importing assets, perform the following tasks:
Create or import Rooms.
Create Asset Categories and Asset Classes.
Create Custom Properties and associate them with Asset Classes if the custom properties exist in the import file.
Ensure each row in the file contains data for the four required asset fields:
Asset Class
Title
Campus
Room Number
Note: Importing inventory always adds; it never replaces or updates.
Importing Data Schema
You can import data schema from within the Manage tab.
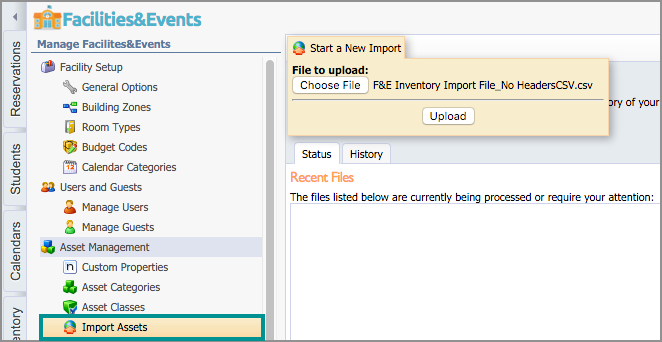
Step 1: Under Asset Management, select Import Assets.
Step 2: Click Start a New Import and browse to Upload the CSV file.
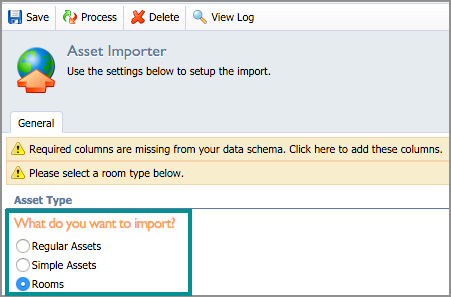
Step 3: Set up the import schema after uploading the file. Under Asset Type, select whether or not to import Regular Assets, Simple Assets, or Rooms.
Step 4: At the top of the General tab, click Required columns are missing from your data schema. Click here to add these columns. Selecting this text will add the required columns to the Data Schema section required for the import.
Note: If columns already appear in the data schema, choose Clear Selected Fields before adding the required columns.
The CSV file must contain the required fields for the rooms or assets to import successfully. The person conducting the import can include additional information from the General Information, Financial Information, and Custom Properties folders as long as the Data Schema column order matches the CSV column order.
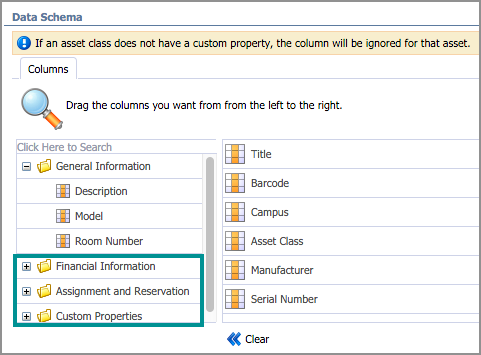
If the Data Schema columns are not in the same order as the CSV file, the person importing can rearrange the columns by selecting the column (moving down) and dragging it onto the destination column (where the tip of the hand is on the column) and then dropping.
To add additional columns, click on the folder to expand the options and drag the property from the left to the right. After adding and ordering the columns correctly, be sure to click Save at the top of the page to finalize the data schema.
Process Import
After matching the data schema to the CSV file and removing the column titles from the CSV file, the room/assets import can begin.
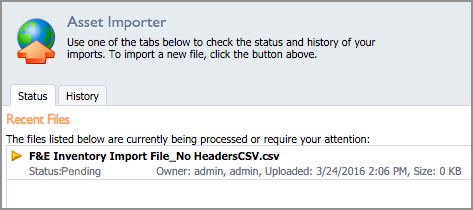
To process the import, click the Save and Process icons on the top toolbar.

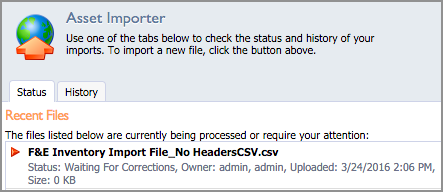
The file appears as Pending under the Status tab.
Note: The screen will not automatically refresh once the file is imported. Either click on Import Assets at the left to refresh, or log out and log back in after a few minutes to check the status.
After a successful import, locate the file on the History tab and check that it has a green triangle next to it.
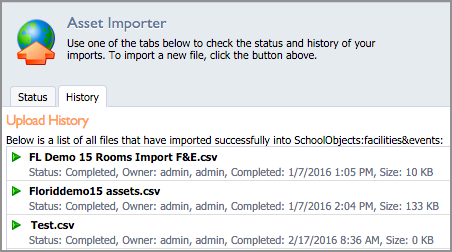
If any problems exist with the file, the yellow triangle will turn red. The person managing the file import will need to troubleshoot, make corrections to the file, and process it again.
Troubleshooting
If a file does not import for any reason, you can correct and upload the file again.
Step 1: Double click the file on the Status tab to view the Asset Importer screen.
Step 2: Click the View Log icon to view any possible errors when importing.
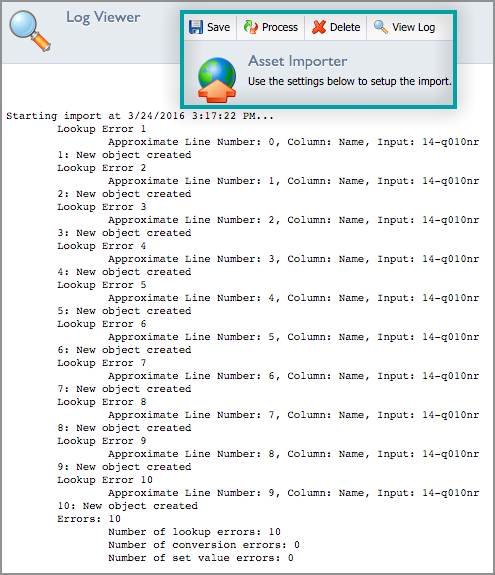
Step 3: Make any necessary changes to the Data Schema section or make corrections to the CSV file.
Step 4: To correct the file, click the Download File icon in the upper-right corner. The CSV file will open.
Step 5: Make any changes to the file and click Save As, change the file path, and replace the file to its original location when initially uploaded.
Step 6: Select Reupload File to upload the new file and click Process. Repeat the steps until the file imports successfully.
