This article outlines specific steps for setting up the T-PESS process for principals. You should follow the same steps to set up a separate process for assistant principals. The principal and assistant principal evaluation processes both use the same framework, steps, and tasks, but some of the forms associated with those tasks differ.
Note: Eduphoria provides locked frameworks that help ensure data fidelity, which include T-TESS Alt D1, T-TESS v2, T-PESS v2, T-SCESS, and TEMPSC.
T-PESS v2 is a renamed version of the T-PESS rubric, which took effect in August 2021. If your district previously used Eduphoria’s locked T-PESS NEW framework, it has been renamed to T-PESS v2 and is ready to use. All the settings in your evaluation process and forms are automatically updated to T-PESS v2; you don’t need to make any changes.
If you have previously used a T-PESS framework other than Eduphoria’s locked T-PESS NEW framework, a framework created by your district, or if you have not used Strive for your T-PESS process, you must create a new process tied to the T-PESS v2 locked framework.
Note: This article walks you through setting up a T-PESS evaluation process. When you are ready to conduct an evaluation, see Creating an Evaluation Document for staff.
Building the Evaluation Process With the T-PESS v2 Framework
If your district uses the locked T-PESS v2 framework, you must build a new evaluation process.
Retiring Your Existing T-PESS Process
The first series of steps requires you to retire your existing T-PESS process.
Quick Guide
Select Settings (), and then select Process Management.
Locate the existing T-PESS Principal process you no longer want to use.
Select the Delete icon () to permanently remove the process.
Note: Completing the end-of-year archive preserves all evaluation data for the year, making it safe to delete old processes. If a process is assigned at least one staff member, it cannot be deleted. We will soon offer users a way to make processes inactive to help organize the Process Management table.
Illustrated Guide
Step 1: Select Settings (), and then select Process Management.
.png)
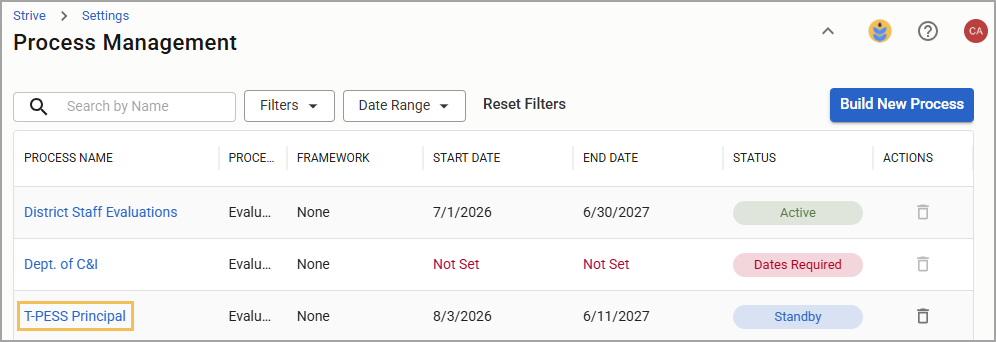
Step 2: Locate the existing T-PESS Principal process you no longer want to use.
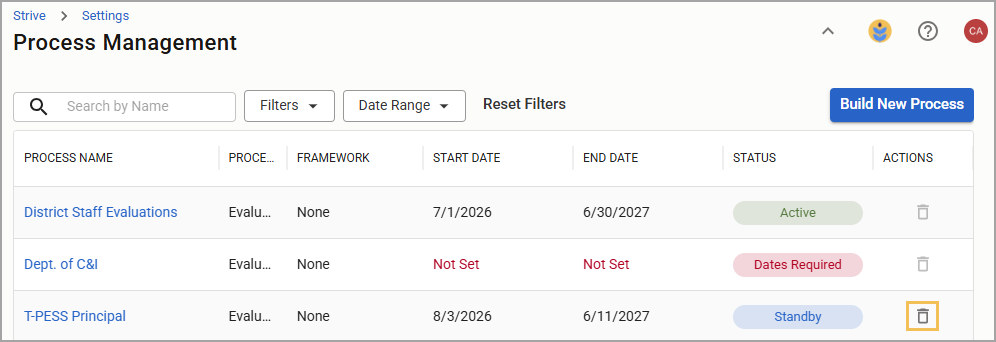
Step 3: Select the Delete icon () to permanently remove the process.
Note: Completing the end-of-year archive preserves all evaluation data for the year, making it safe to delete old processes. If a process is assigned at least one staff member, it cannot be deleted. We will soon offer users a way to make processes inactive to help organize the Process Management table.
Verifying Prebuilt Forms
Next, you must locate and verify that you have prebuilt forms from Eduphoria.
Quick Guide
Select Settings (), and then select Form Management.
Select the Prebuilt Forms tab.
Select each form type and verify that you have each of the following forms in the table:
Reflections
T-PESS - Assistant Principal - BOY Self-Assessment
T-PESS - Principal - BOY Self-Assessment
Observations
T-PESS - Assistant Principal - MOY Evaluation
T-PESS - Principal - MOY Evaluation
Summatives
T-PESS - Assistant Principal - EOY Evaluation
T-PESS - Principal - EOY Evaluation
Evaluations
T-PESS - EOY Goals Attainment (for Principals & APs)
T-PESS - MOY Goal Progress (for Principals & APs)
If any are missing or don’t appear properly tagged, contact Support.
Illustrated Guide
Step 1: Select Settings (), and then select Form Management.
.png)
Step 2: Select the Prebuilt Forms tab.
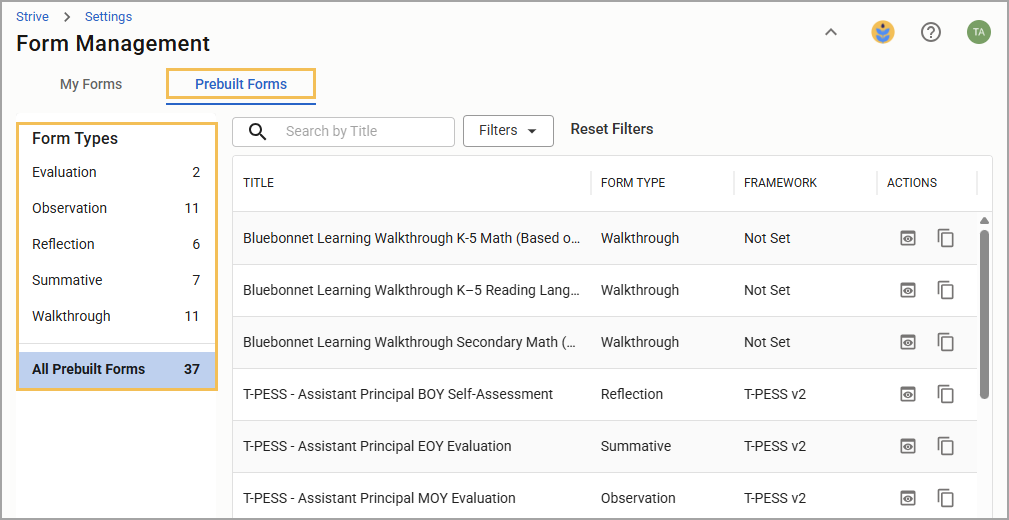
Step 3: Select each form type and verify that you have each of the following forms in the table:
Form Type | Form Title |
|---|---|
Reflections | T-PESS - Assistant Principal - BOY Self-Assessment T-PESS - Principal - BOY Self-Assessment |
Observations | T-PESS - Assistant Principal - MOY Evaluation T-PESS - Principal - MOY Evaluation |
Summative | T-PESS - Assistant Principal - EOY Evaluation T-PESS - Principal - EOY Evaluation |
Evaluations | T-PESS - EOY Goals Attainment (for Principals & APs) T-PESS - MOY Goal Progress (for Principals & APs) |
Note: Framework settings and tags are already set for prebuilt forms.
Step 3: If any are missing or don’t appear properly tagged, contact Support.
.png)
Building a New T-PESS v2 Process
Next, you’ll build a new T-PESS v2 process.
Quick Guide
Select Settings (), and then select Process Management.
Select Build New Process.
Type “T-PESS Principal” in the Process Name box.
Set your Process Type as Evaluation and your Framework as T-PESS v2.
Set the Start and End Dates of the process, then select Start Building.
Set up the evaluation process by creating and modifying steps and tasks.
Assign Forms or Goals to each task as you create them (see a sample process in Step 7 of this section’s Illustrated Guide). Only use Professional Growth Goals, not Student Growth Goals, for T-PESS.
For Forms tasks, attach the appropriate form (see a list of recommended forms in Step 8 of this section’s Illustrated Guide). Set the number required to complete and a due date for completion to help evaluators monitor their staff’s progress in the Overview and Activity Tracker.
For Professional Goal and Student/Campus Goal tasks, select Professional Growth Goal from the drop-down menu.
Repeat these steps to create the “T-PESS Assistant Principal” process.
Illustrated Guide
Step 1: Select Settings (), and then select Process Management.
Step 2: Select Build New Process.
.png)
Step 3: Type “T-PESS Principal” in the Process Name box.
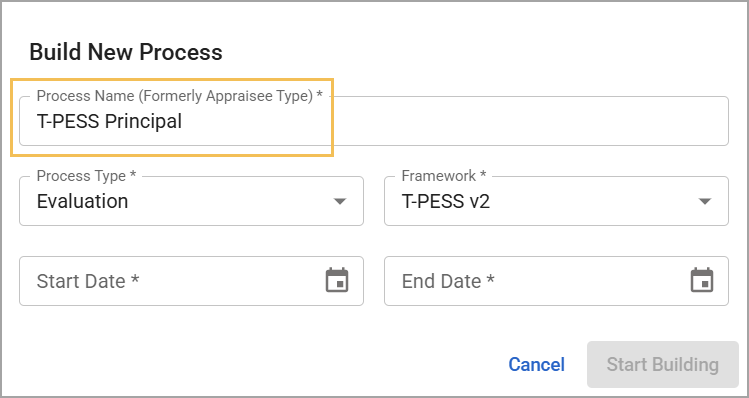
Step 4: Set your Process Type as Evaluation and your Framework as T-PESS v2.
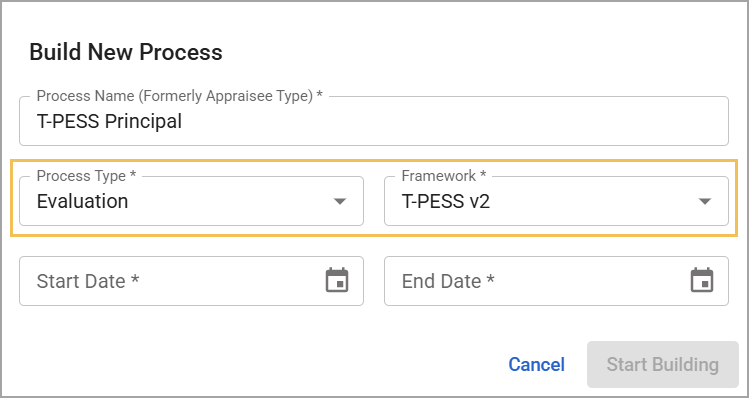
Step 5: Set the Start and End Dates of the process, then select Start Building.
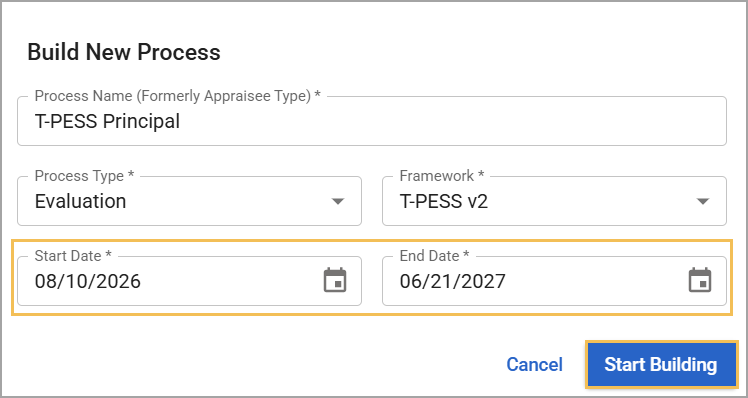
Step 6: Set up the evaluation process by creating and modifying steps and tasks.
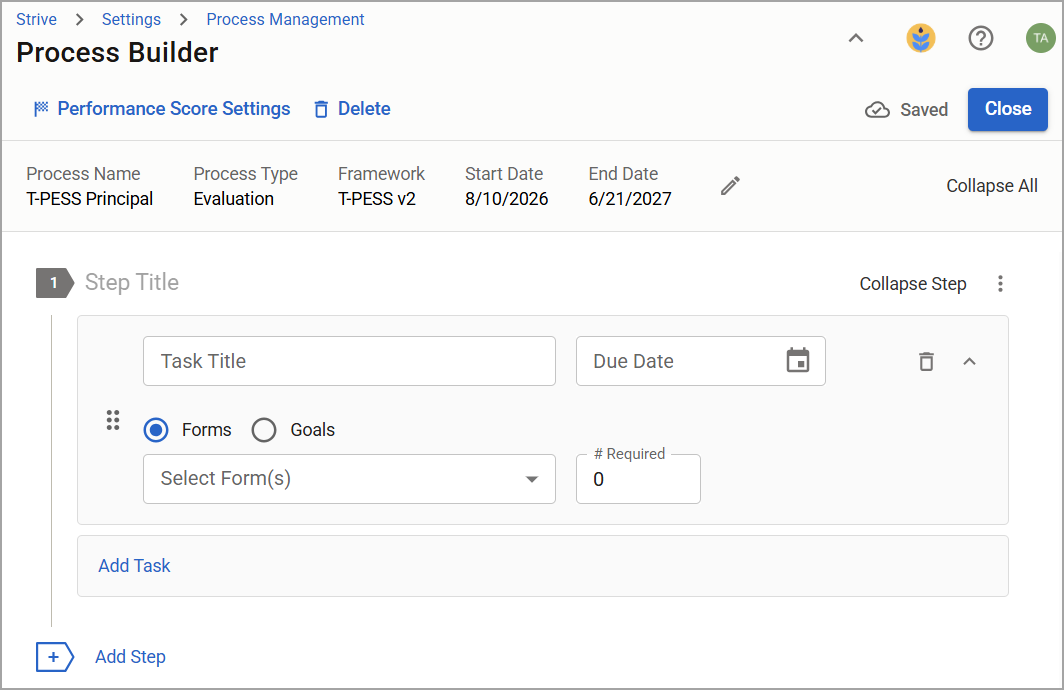
Step 7: Assign Forms or Goals to each task as you create them. Only use Professional Growth Goals, not Student Growth Goals, for T-PESS.
Sample Process
Step Title | Task Title | Task |
|---|---|---|
BOY Self Assessment and Goal Setting | Principal Self-Assessment | Form |
Professional Goal | Professional Growth Goal | |
Student/Campus Goal | Professional Growth Goal | |
MOY Conference | Mid-Year Goals Progress | Form |
MOY Principal Evaluation | Form | |
EOY Conference | EOY Goal Attainment | Form |
EOY Principal Evaluation | Form |
Step 8: For Forms tasks, attach the appropriate form. Set the number required to complete and a due date for completion to help evaluators monitor their staff’s progress in the Overview and Activity Tracker.
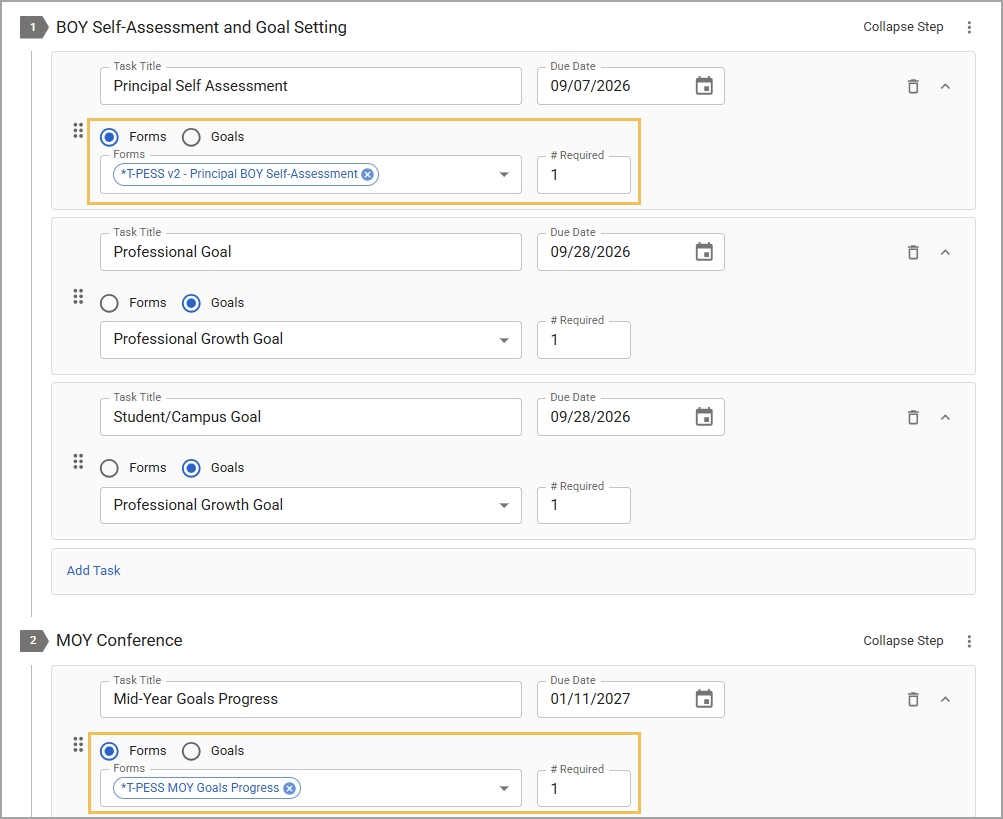
Recommended Forms
Step Title | Task Title | Form Type | Form Title |
|---|---|---|---|
BOY Self Assessment and Goal Setting | Principal Self Assessment | Reflection | T-PESS - Principal - BOY Self-Assessment |
MOY Conference | Mid-Year Goals Progress | Evaluation | T-PESS - MOY Goals Progress |
MOY Principal Evaluation | Observation | T-PESS - Principal - MOY Evaluation | |
EOY Conference | EOY Goal Attainment | Evaluation | T-PESS - EOY Goals Attainment |
EOY Principal Evaluation | Summative | T-PESS - Principal - EOY Evaluation |
Step 9: For Professional Goal and Student/Campus Goal tasks, select Professional Growth Goal from the drop-down menu.
Step 10: Repeat these steps to create the “T-PESS Assistant Principal” process.
Note: The MOY Goals Progress and EOY Goals Attainment forms are the same for both principals and assistant principals.
Your evaluators must select the new process for all T-PESS staff members.
Making Old Forms Inactive
Form Management contains all active forms and allows appraisal administrators to make them inactive. Making a form inactive moves it to the Inactive Forms section, removes it from processes and report selections, and maintains historical data for analysis. In addition, you can reactivate inactive forms.
Locate the old form under the appropriate form type, then select the Make Inactive icon.
.png)
If the Make Inactive icon is grayed out, that means the form is currently associated with a process and cannot be made inactive.