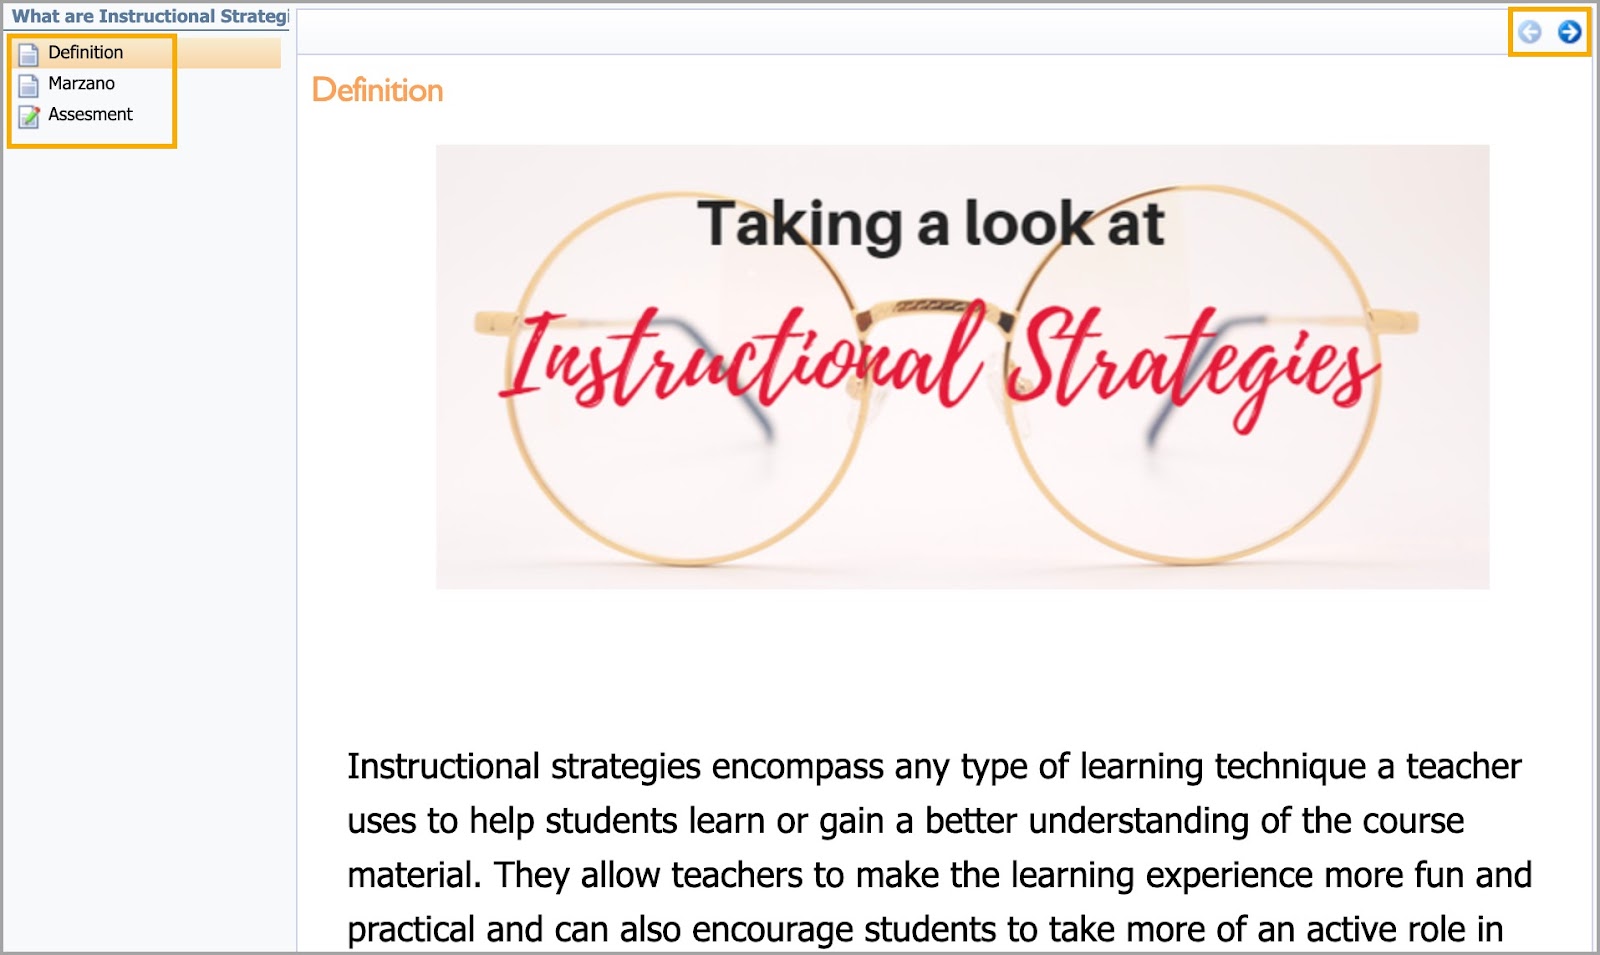
An eCourse is an asynchronous learning tool to facilitate information sharing without the constraints of time, place, or instructor. In Strive, you can take eCourses at your own pace and refer to course information anytime.
Some districts use eCourses to provide required annual compliance training.
Quick Guides
Registering for an eCourse
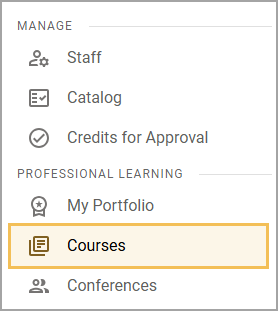
Select Courses from the navigation panel.
To filter the list, expand the Course Type section and then select eCourses. You can also locate eCourses by looking for courses with the computer icon.
Select Enroll.
Accessing eCourse Content
Select My Portfolio on the navigation panel to view courses in the Enrolled Courses tab.
Select the Course Title to access the eCourse content and details.
Select the Course Content tab.
Select View beside the desired chapter to open a pop-up for the course content.
Use the blue arrows to navigate through the online content.
Caution: If you click the Table of Contents and skip over items in the list, you will not receive credit for the course. You must view all course content to receive credit. Navigate with the blue arrows to access all content and receive credit.
When you have advanced using the blue arrows to the end of a chapter, you will see a Move to the Next Chapter? button. Select the button to continue to the next chapter or close the course pop-up window at any time to leave the content page. Your progress will be saved and you can return later to complete further steps.
When you have completed all chapters, you will see the message You have reached the end of the chapter. Close the content window to return to the course details.
Taking an Assessment
Answer the questions.
Select the Score Assessment button to submit and receive credit.
Click the blue arrows to continue.
Uploading a File
Select Attach File.
Select Choose File to select a file on your computer.
Search for the file, select the file name, and Attach File.
Once files are attached and all other questions are answered, select Score Assessment.
Select the blue arrows to continue through the eCourse.
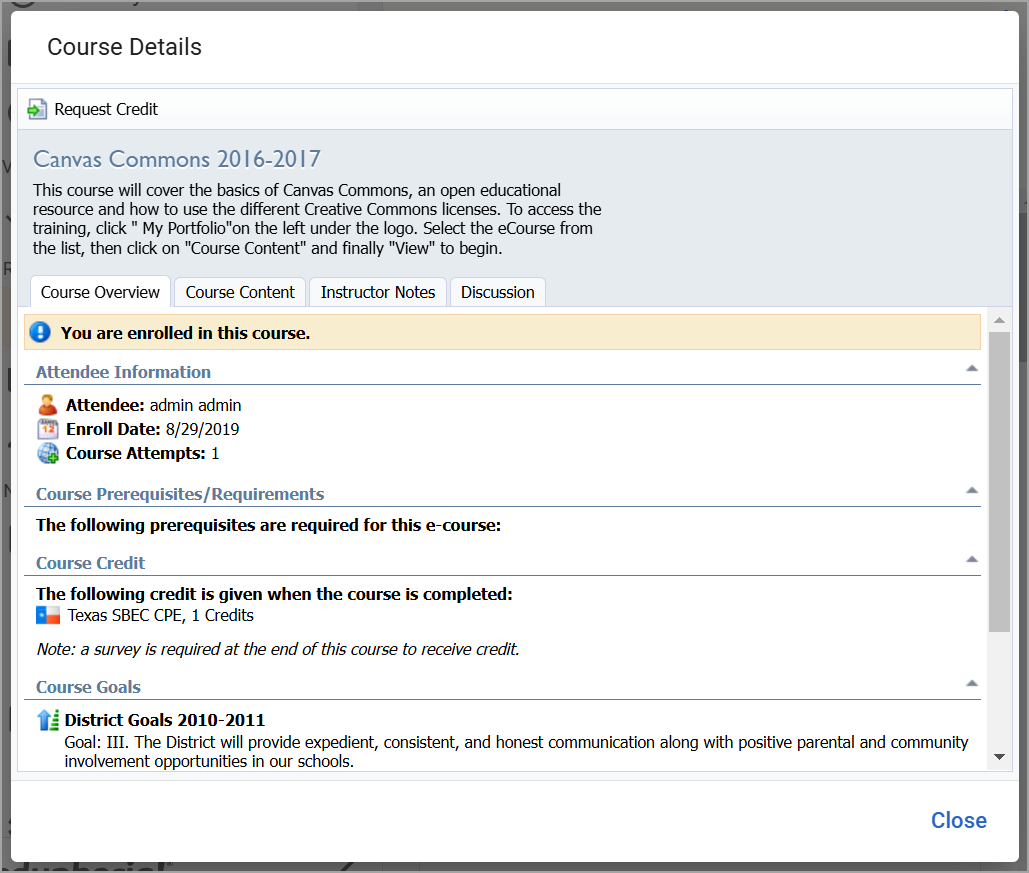
Requesting Credit
Select the View button for any chapters with a pencil icon to complete the chapter requirements.
Select the Request Credit button to submit tasks and assessments for scoring after all course chapters are complete.
Completing a Survey
Select the eCourse on the Enrolled Courses tab of My Portfolio to open the Course Details.
Select the Survey tab.
Complete all survey fields.
Select Submit Survey.
Caution: If you select Dismiss, it will not submit your survey. You must scroll to the bottom of the survey and click Submit Survey to receive credit.
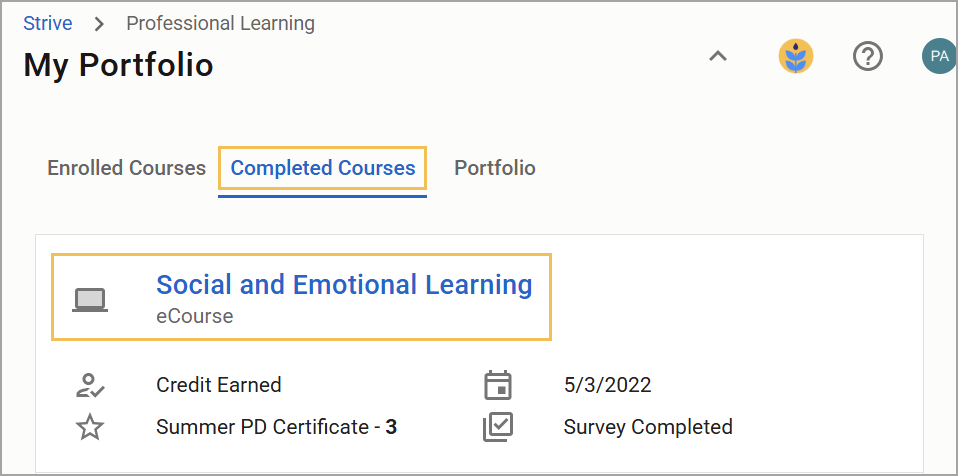
Viewing Credit Status
Select the Completed Courses tab of My Portfolio.
Click on the course title to open the Course Details. If you have been granted credits for the course, a banner appears at the top of the Course Details screen.
Creating a Certificate
Select the Completed Courses tab of My Portfolio.
Click on the course title to open the Course Details.
Select the Certificate button to download a PDF certificate for the course.
Illustrated Guides
Registering for an eCourse
The first step towards completing an eCourse is to register for one. Follow these instructions to locate and enroll in eCourses.
Step 1: Select Courses from the navigation panel.
Step 2: To filter the list, expand the Course Type section in the panel on the right side of the screen and then select eCourses. You can also locate eCourses by scrolling through the list and looking for courses with the computer icon, indicating that the course can be completed digitally.
.png)
.png)
Step 3: When you find a course you want to sign up for, select Enroll.
Tip: To view Course Instructors and Course Categories, select the Expand arrow ().
.png)
Accessing eCourse Content
Once you’ve registered for an eCourse, you can access the course content within Strive.
Step 1: Select My Portfolio from the main menu. The Enrolled Courses tab is selected by default. This tab lists all of the courses that you signed up for.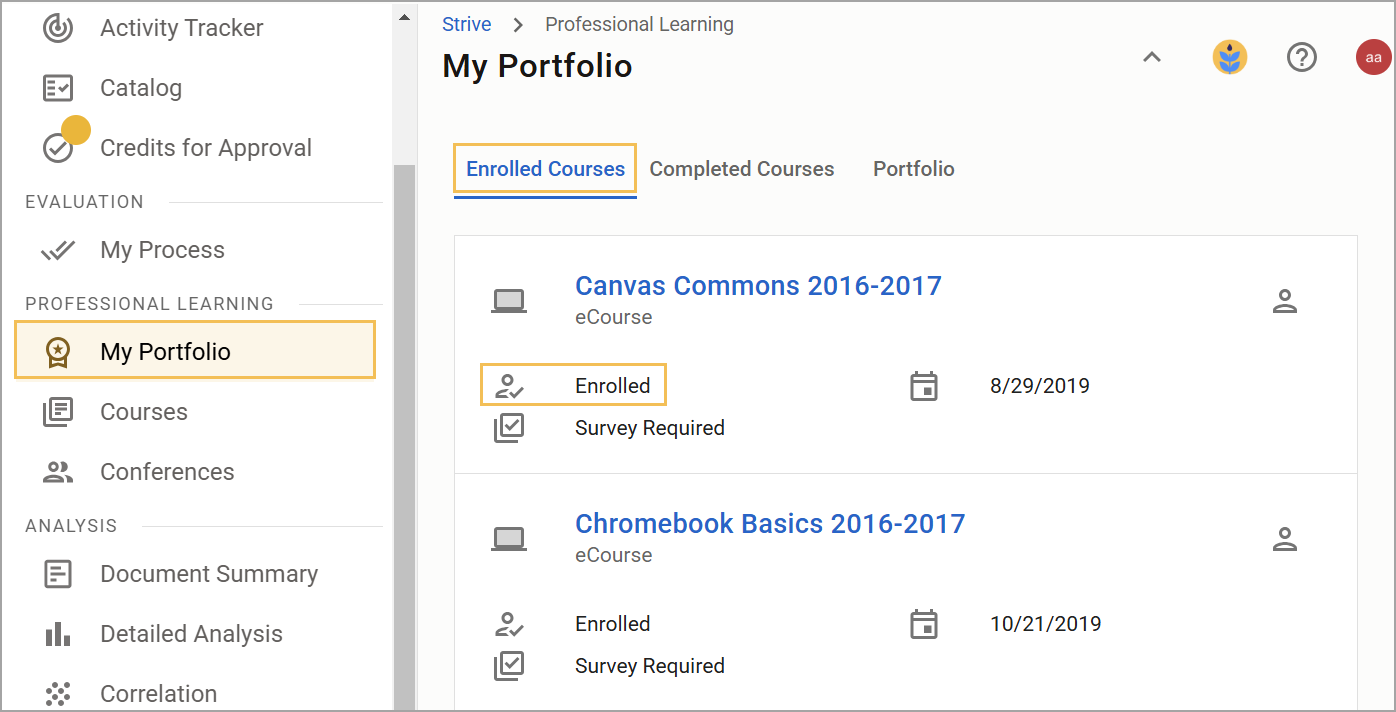
Step 2: Select the Course Title to access the eCourse content and details.
Step 3: Select the Course Content tab.
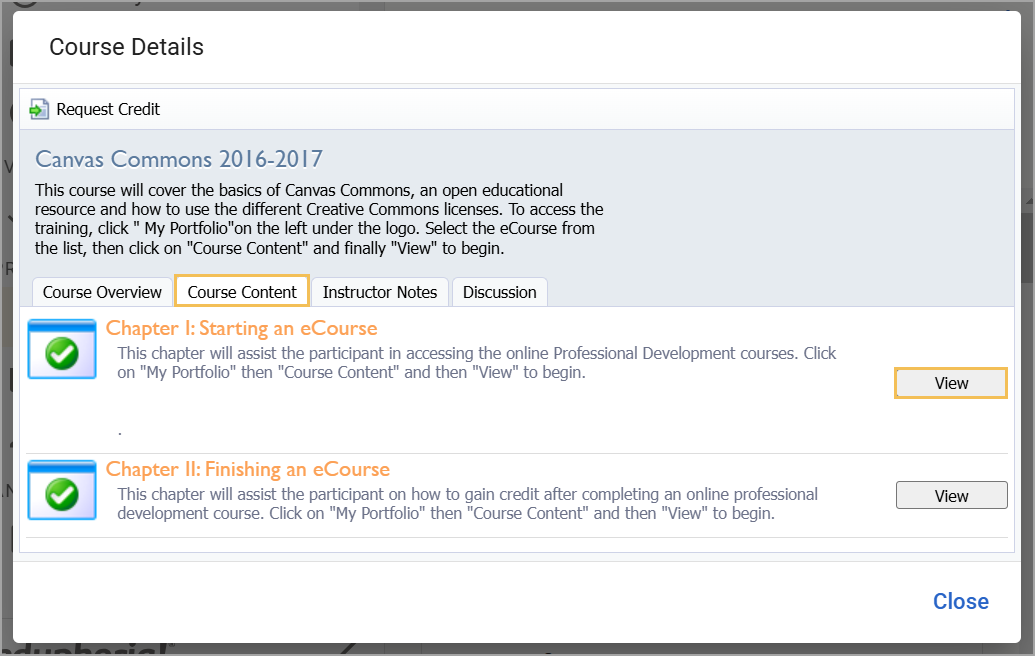
Step 4: Select View beside the desired chapter to open a pop-up for the course content.
Step 5: Use the blue arrows to navigate through the online content.
Caution: If you click the Table of Contents and skip over items in the list, you will not receive credit for the course. You must view all course content to receive credit. Navigate with the blue arrows to access all content and receive credit.
Step 6: When you reach the end of a chapter, the Move to the Next Chapter? button appears. Select the button to continue to the next chapter or close the course pop-up window at any time to leave the content page. Your progress saves and you can return later to complete further steps.

Step 7: When you have completed all chapters, the You have reached the end of the chapter message appears to confirm that you have completed this portion of the course. Close the content window to return to the course details.

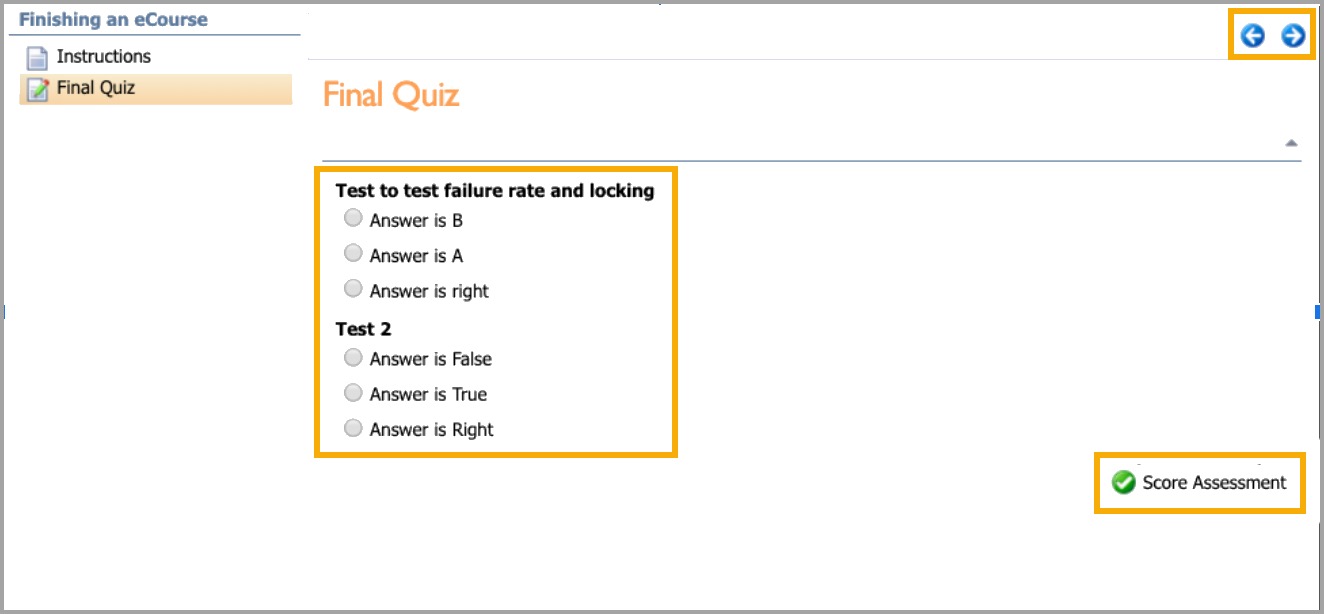
Taking an Assessment
After reviewing the eCourse's content, it's time to complete an assessment to test your knowledge and receive credit.
Step 1: If a course includes a quiz, short answer, or assessment of any kind, read the questions carefully and respond to each question or prompt.
Step 2: Once you have responded to all of the questions or prompts, select the Score Assessment button to submit your answers and receive credit.
Step 3: Click the blue arrows to continue.
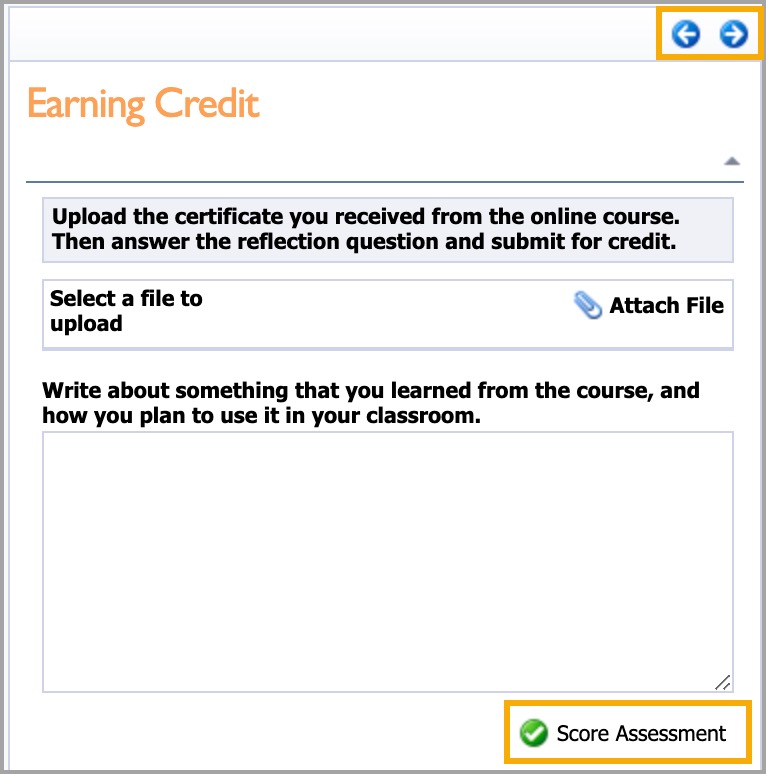
Uploading a File
An eCourse may require you to upload a certificate file and answer additional questions, like a reflection about the course, as part of taking the assessment. Follow these instructions to complete the upload task, submit your assessment, and receive credit.
Step 1: Select Attach File.
Step 2: Select Choose File to select your file on your computer.
Step 3: Search for the file, select the file name, and Attach File.
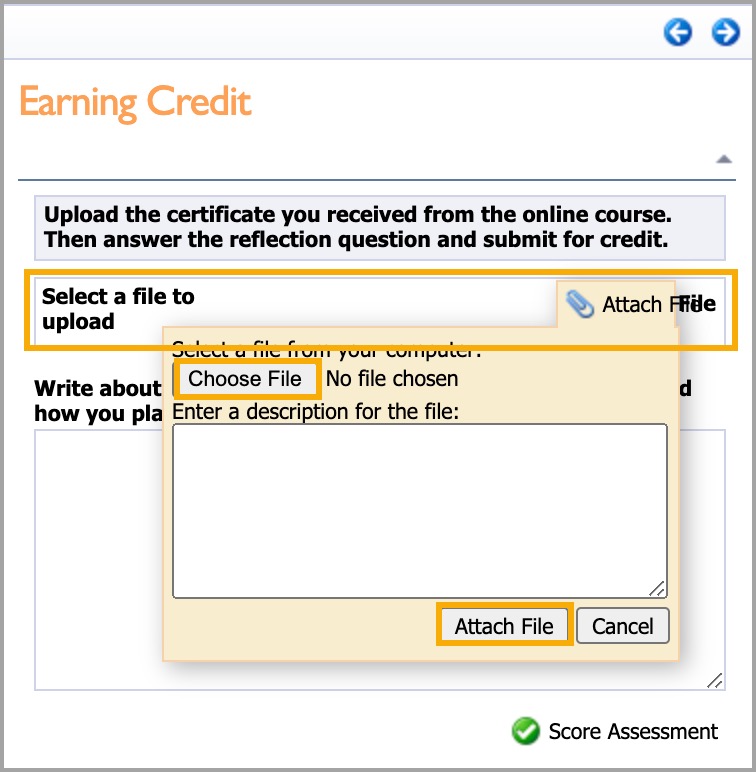
Step 4: Once files are attached and all other questions are answered, select Score Assessment.
Step 5: Select the blue arrows to continue through the eCourse.
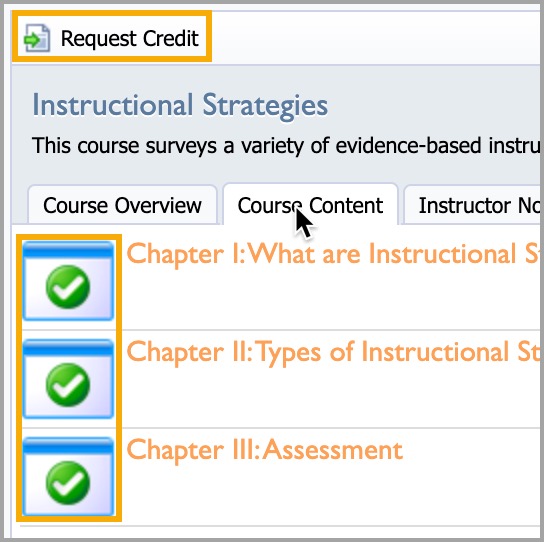
Requesting Credit
A course is complete when each chapter has a green check icon and a Request Credit button in the Course Details. If you do not see the Request Credit button, perform the following steps:
Step 1: Select the View button for any chapters with a Globe icon or Globe and Pencil icon to complete the chapter requirements.
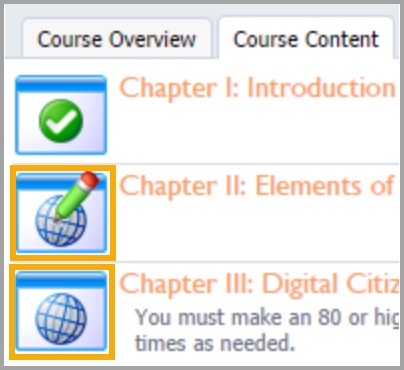
Step 2: After completing all course chapters, select the Request Credit button to submit tasks and assessments for scoring.
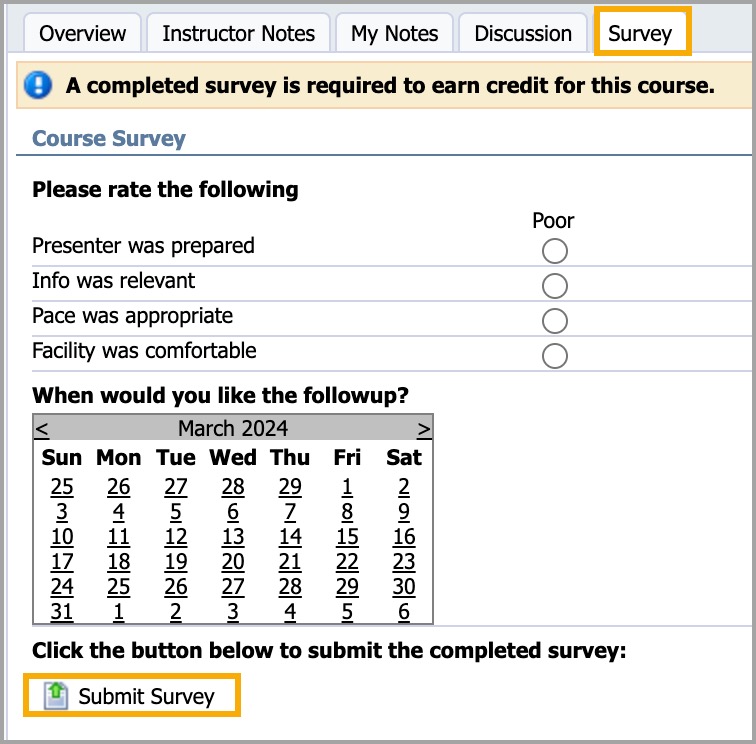
Completing a Survey
If your course requires a survey, it will appear when you click the Request Credit button.
Step 1: Select the eCourse on the Enrolled Courses tab of My Portfolio to open the Course Details.
Step 2: Select the Survey tab.
Step 3: Complete all survey fields.
Step 4: Select Submit Survey at the bottom of the survey screen.
Caution: If you select Dismiss, it will not submit your survey. You must scroll to the bottom of the survey and click Submit Survey to receive credit.
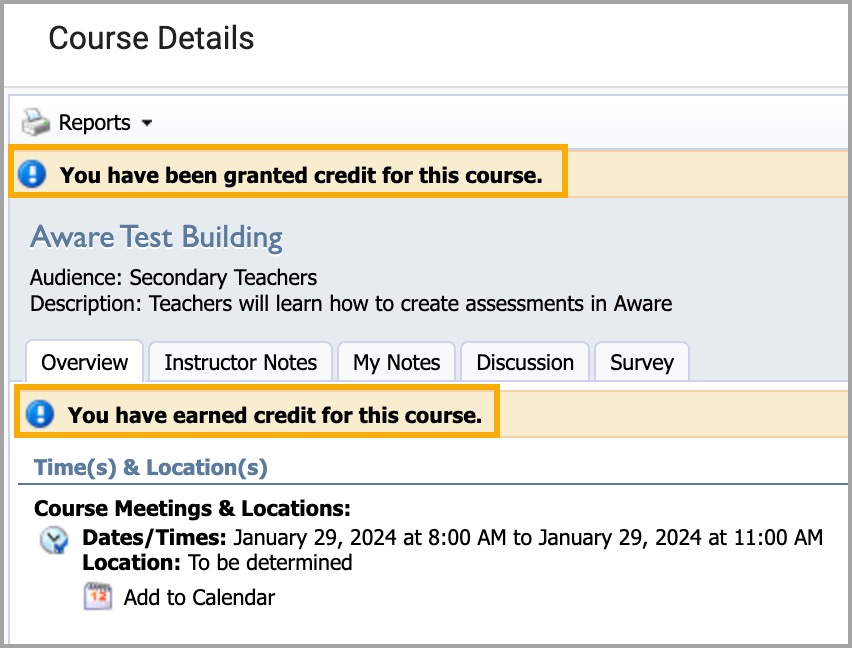
Viewing Credit Status
You can view the credit status of your completed courses in My Portfolio.
Step 1: Select the Completed Courses tab on the My Portfolio screen.
Step 2: Select the course title to view Course Details. If you have been granted credits for the course, a banner appears at the top of the Course Details screen.
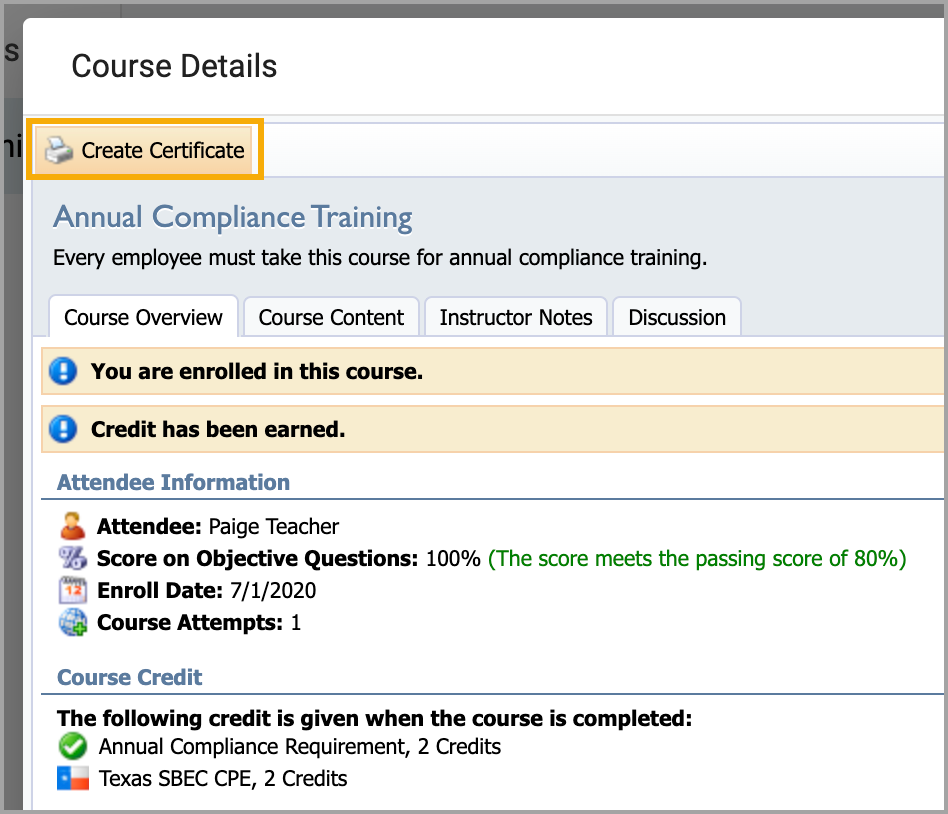
Creating a Certificate
Strive saves credits and tracks professional learning electronically. Credits are automatically added to your Professional Learning Portfolio. You can create and print a certificate for your records.
Step 1: Select the Completed Courses tab of My Portfolio.
Step 2: Click on the course title to open the Course Details.
Step 3: Select the Certificate button to download a PDF certificate for the course.