To create an interactive response question, begin by creating a new test in Aware or opening an existing test to add new questions.
Note: Assessments with interactive response questions can be printed as test booklets only. Answer documents are not available for these question types. This test is not scannable, nor will it have student IDs, class numbers, or any other information. Teachers must use the Enter Answers feature to manually input student responses for students taking a paper version of the assessment.
Creating a Drag-and-Drop Question
In drag-and-drop questions, students select an option from the answer bank and drag it to the correct area. TEA suggests drag-and-drop for use in mathematics, social studies, and science assessments, but drag-and-drop questions are available for any assessment. Drag-and-drop follows TEA’s examples and can be used in conjunction with text, images, and tables. Images and tables cannot be used as drag-and-drop options but are available to use as question text.
Quick Guide
When working on an assessment, go to the Questions tab and do the following:
If this is the first time adding a question, select the Interactive Item Types button.
If adding more questions, select the Plus sign and choose Interactive Item Types from the drop-down menu.
Select Drag-and-Drop.
Select a template to use for the Drag-and-Drop assessment question.
Use the template to create the prompt.
Select Continue.
Use the interaction builder to edit answers and add possible answer choices if desired.
When complete, select Create / Update.
Illustrated Guide
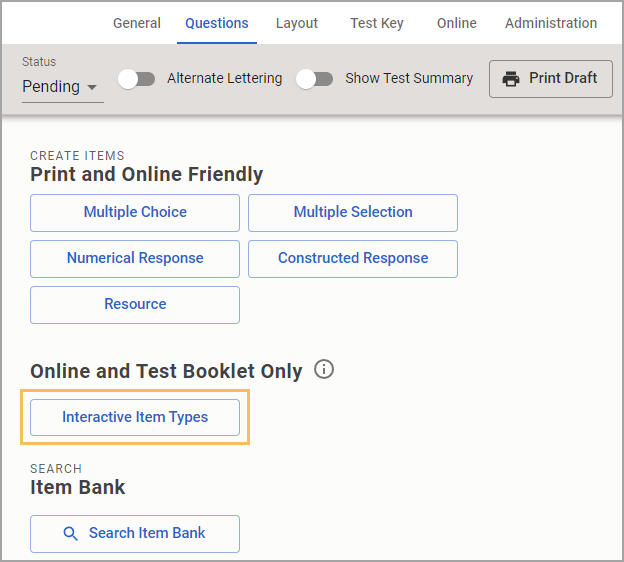
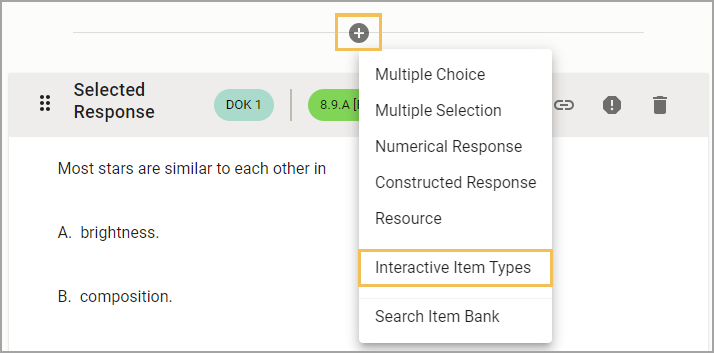
Step 1: When creating or editing an assessment in Aware, navigate to the Questions tab and do the following:
If this is the first time adding a question to the assessment, select the Interactive Item Types button.
If you want to add more questions to an existing assessment, select the Plus sign above or below an existing question and choose Interactive Item Types from the drop-down menu.
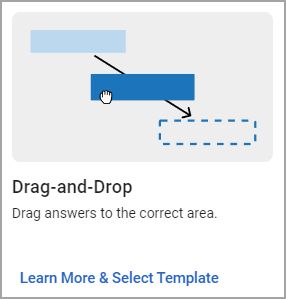
Step 2: On the Choose your interaction type step, select Drag-and-Drop from the available question types.
Step 3: On the Construct your question step, a blank template appears as the default template to allow test authors to construct a question. Select Use a Different Template to choose between three additional, preformatted drag-and-drop templates. These templates are formatted to match Texas state examples for math, science, and social studies.
Test authors can also access all templates by selecting Learn More under the Drag-and-Drop question type.
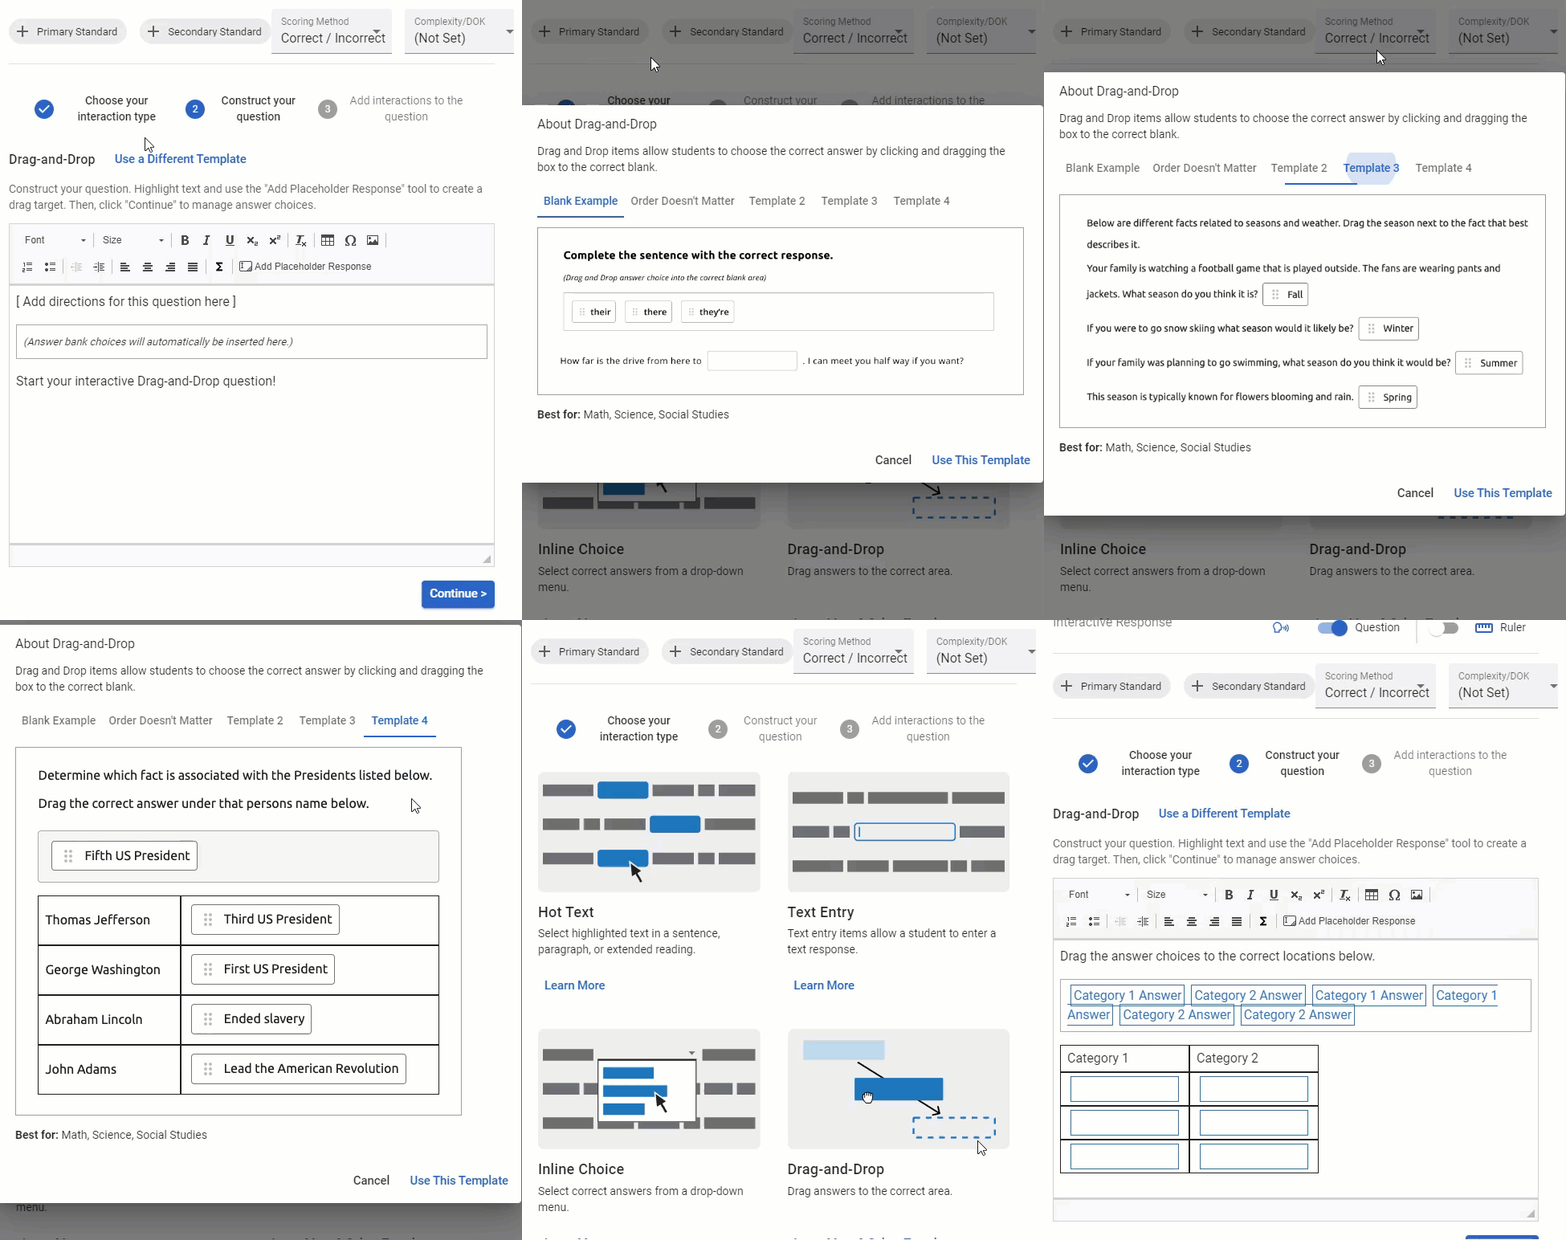
Step 4: Use the selected template to create the assessment question.
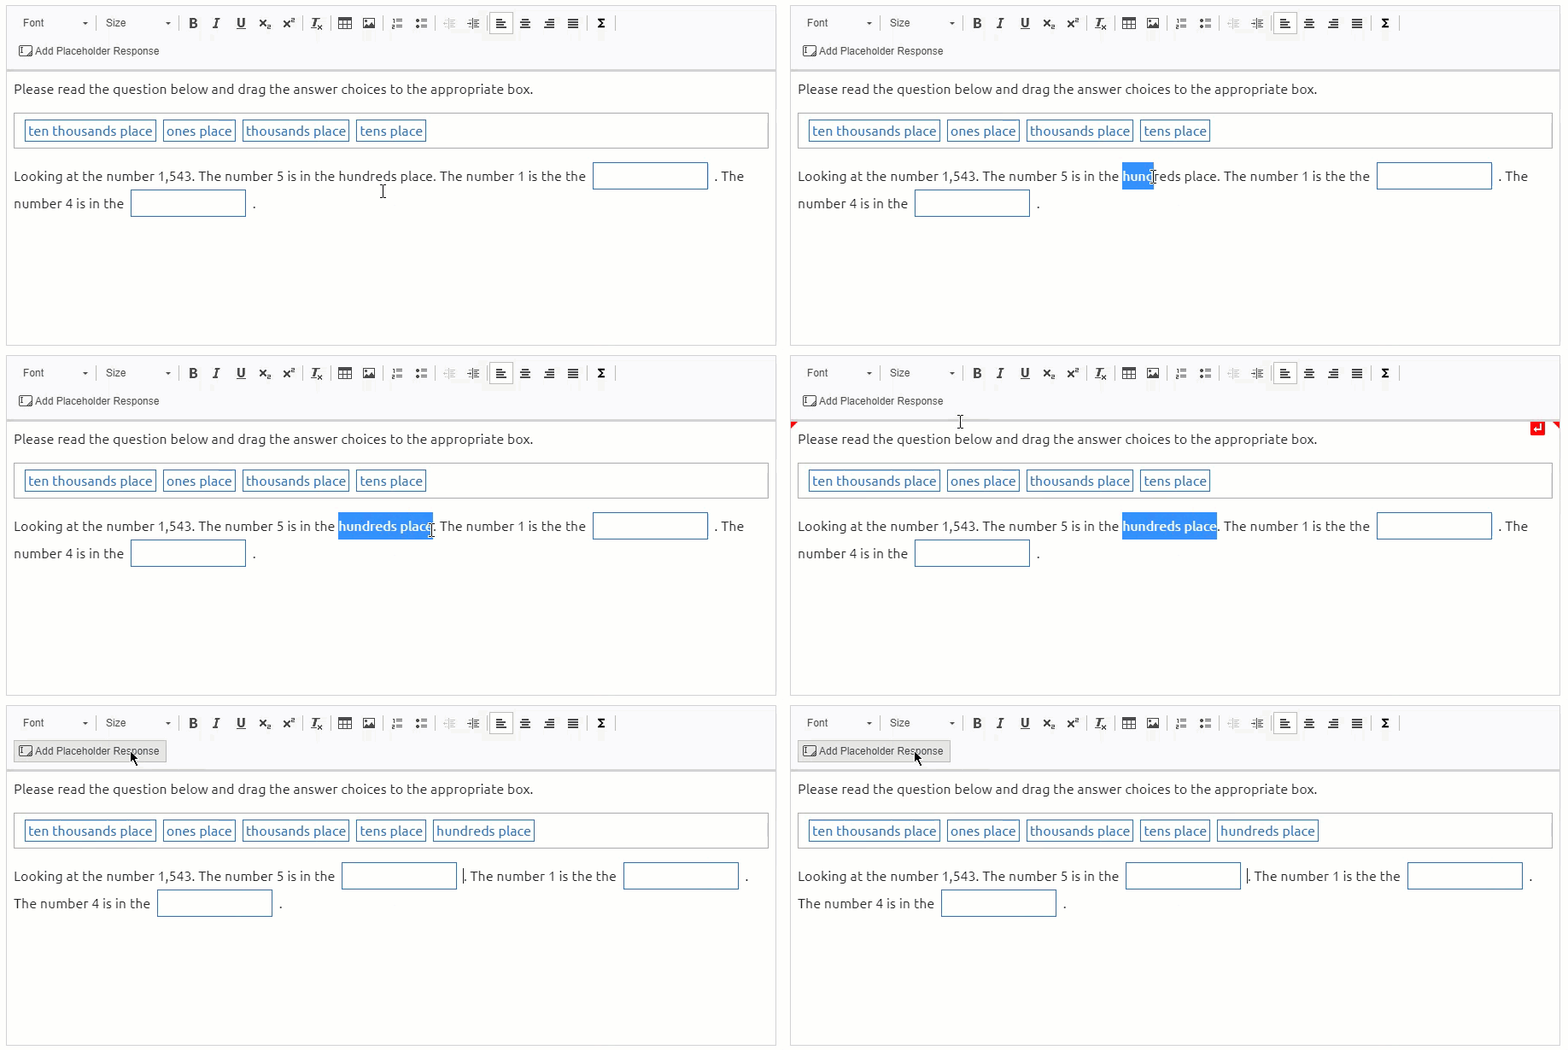
To construct a drag-and-drop question with the blank template, use the Add Placeholder Response button to choose words that should be drag-and-drop selections. For drag-and-drop options using math equations, use the Creating and Editing Equations section below.
To construct a drag-and-drop question with one of the preformatted templates, edit only the directions and content of the question during this step. The Add Placeholder Response feature will disrupt the formatting, so wait until the next step to add and edit answer choices.
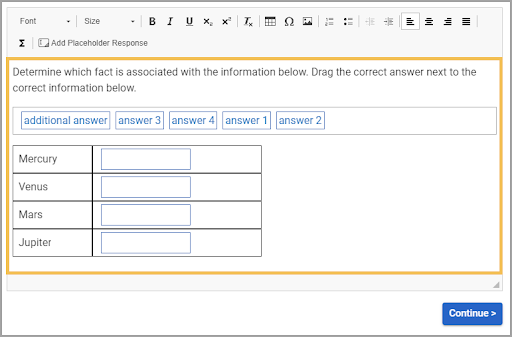
Step 5: Select Continue to move on to the next step.
Step 6: Use the interaction builder to edit answers and add possible answer choices if desired. Use the Shuffle Answer Choices button to choose the order in which the potential answers appear. The order created in this window is the order every student sees on the assessment.
Drag-and-drop questions from item banks are automatically shuffled if enabled by the item bank. If the answer choices appear in the correct order, a warning message appears prompting the author to shuffle the answer choices. Test authors can delete any answer or target question that is not needed.
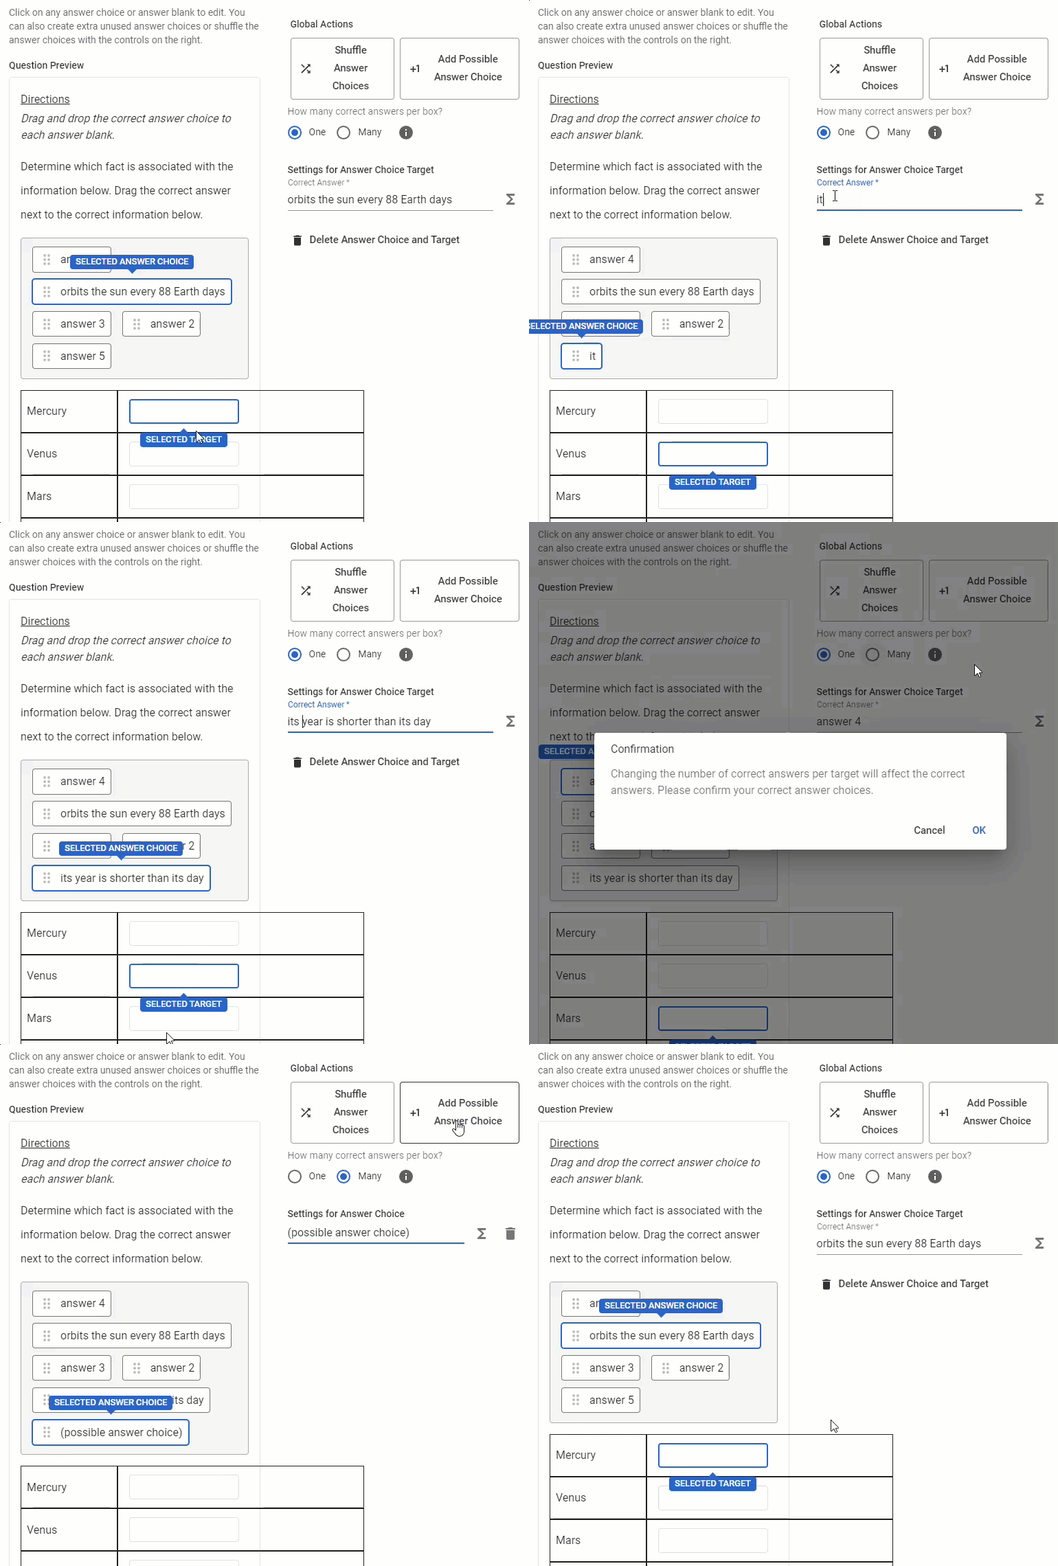
Step 7: Review the preview, and then select Create or Update to save the assessment question.
Selecting Correct Answers per Box
Choose one or many answers per box. The option to select many is useful when there is more than one correct answer that may be selected for each target. Selecting Many enables you to designate which answer choices are correct by selecting the target.
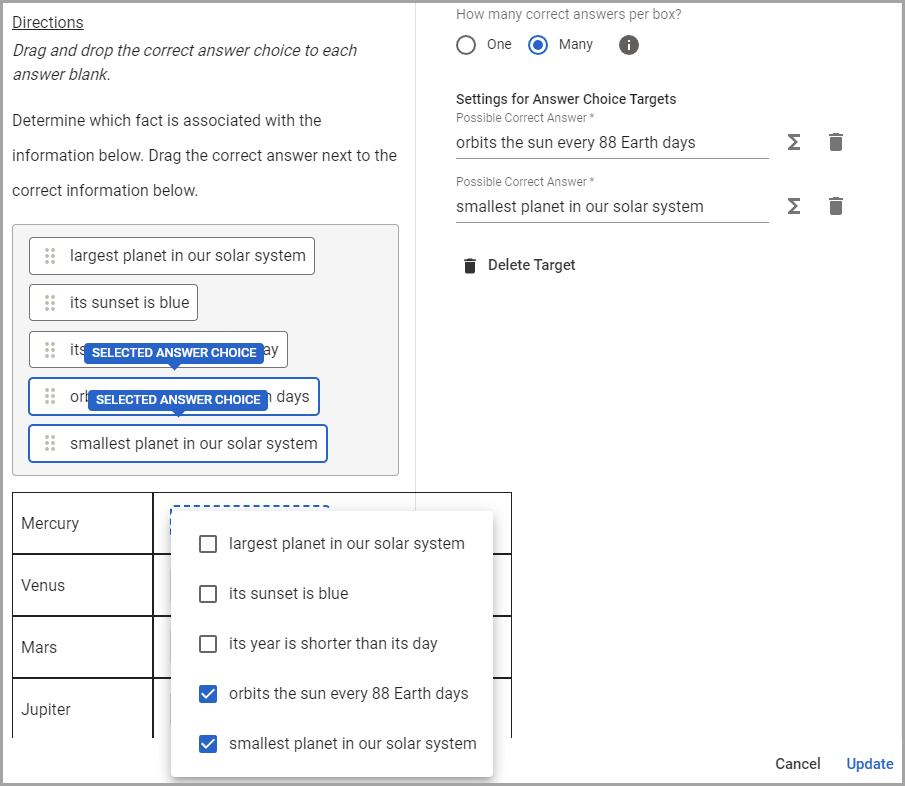
When selecting Many, a confirmation message appears to remind you to check that all answers have been correctly assigned to their targets before creating the assessment question. Select OK to continue.

If one target has two possible correct answers, each answer must also appear as an option for another target. Use the Order Doesn’t Matter template to get started.
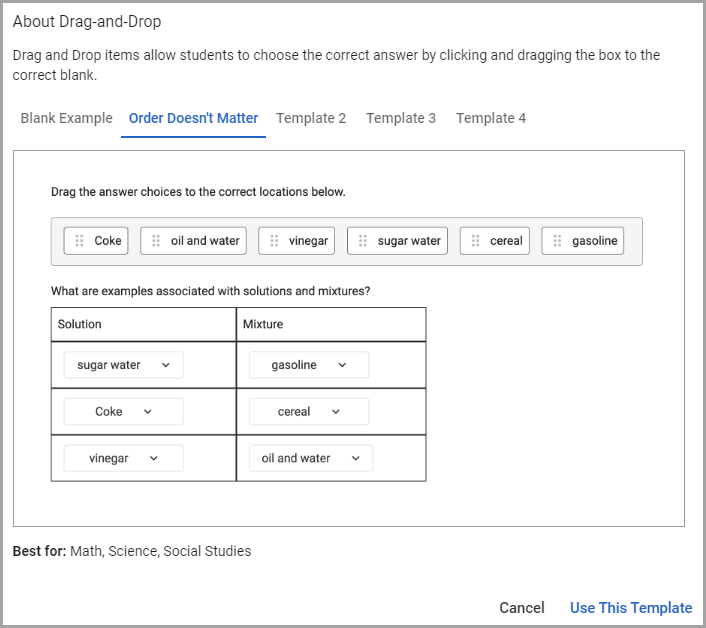
If more than one answer is correct per target, students still only earn one point for each target that is correctly answered.
Creating and Editing Equations
To create math equation answer choices, follow the steps below.
Step 1: After entering your interactive test question in the text box, select the Add Placeholder Response button for each desired response, leaving each box empty.
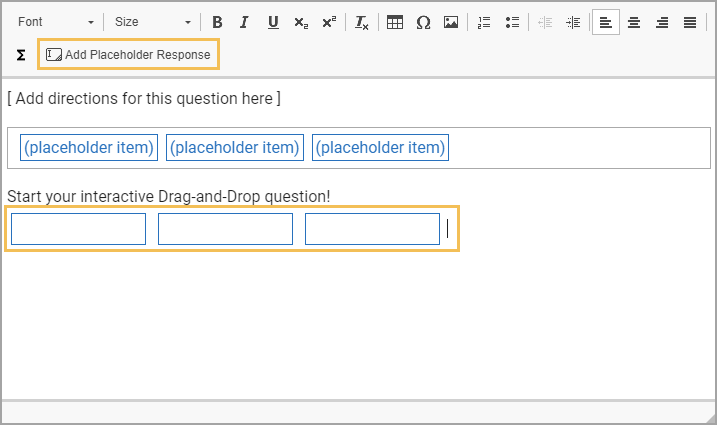
Step 2: Select Continue.
Step 3: Select each of the blank placeholder items and use the Add Math (Σ) button to enter the desired equations.
Under Text-to-Speech Override, add optional alternate text that students with Text-to-Speech support will hear when the math is read aloud. For example, the answer choice -4÷10-2 could be read aloud as “negative four divided by ten minus two” instead of “minus four divided by ten minus two.”
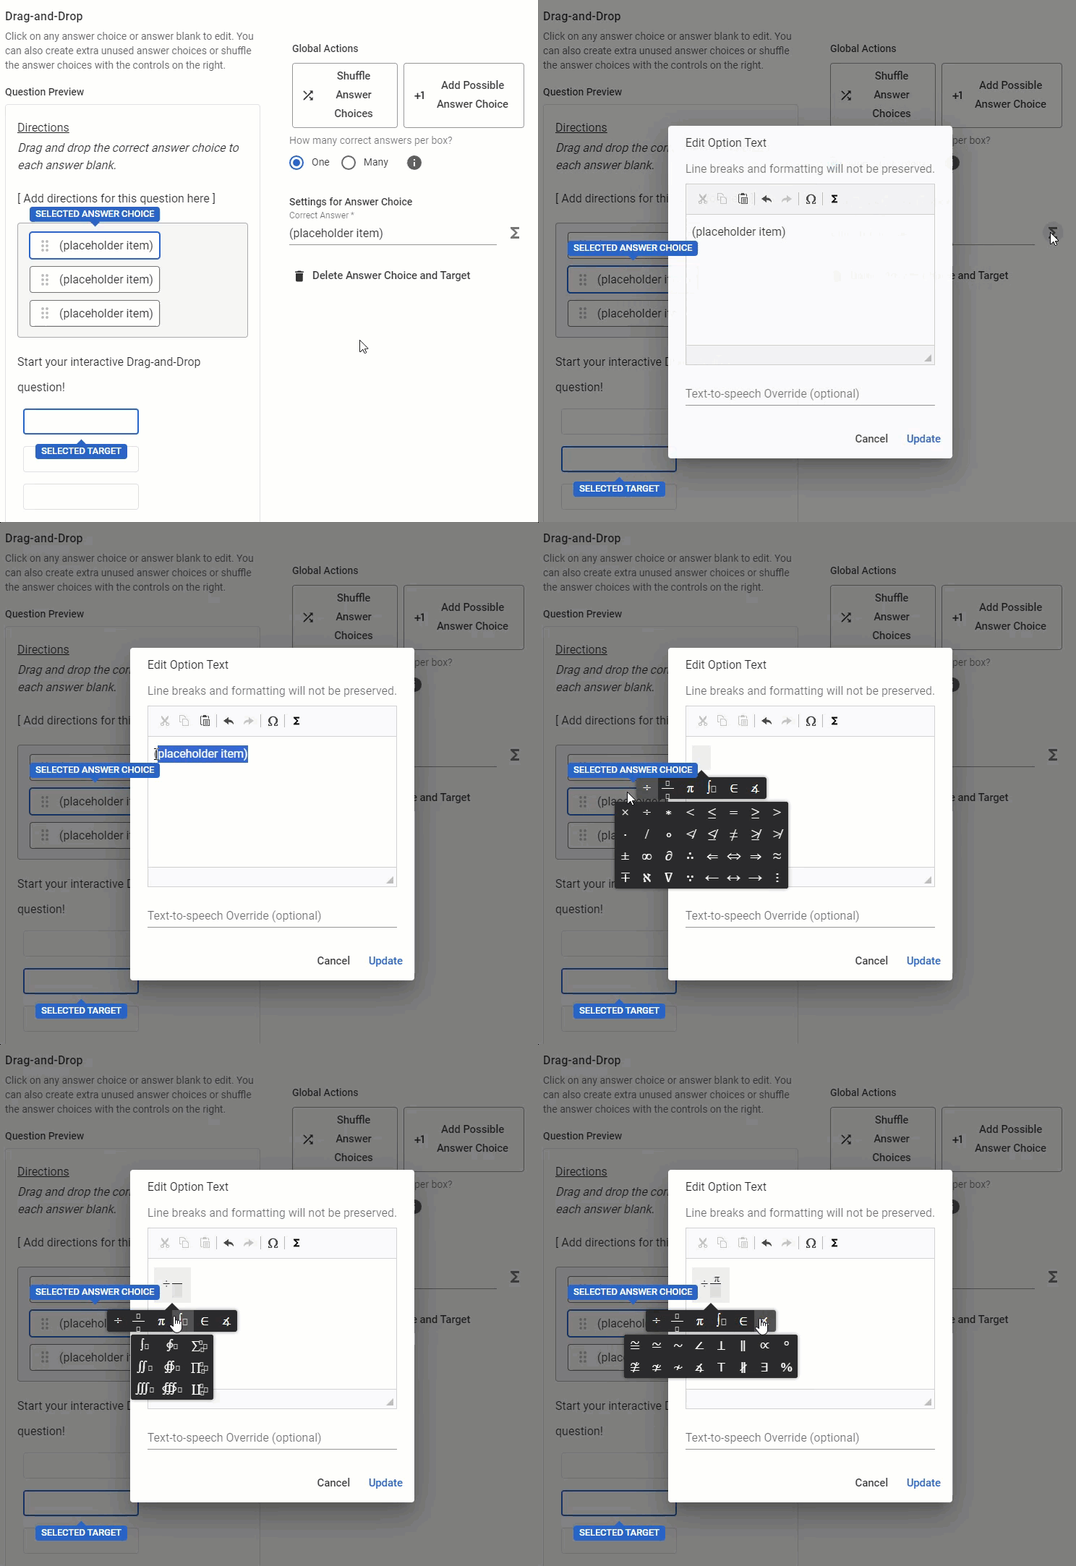
Do not edit the text that appears after selecting Update. Use the question preview area on the left side of the screen to determine if the question is formatted correctly, not the encoded text on the right.
Note: As long as the equation looks correct on this third/final question preview screen, the equation will appear correctly to students. Equations occasionally appear incorrectly formatted on step 2 (construct your question).
Step 4: Review the preview and then select Create or Update to save the assessment question.
Student Experience
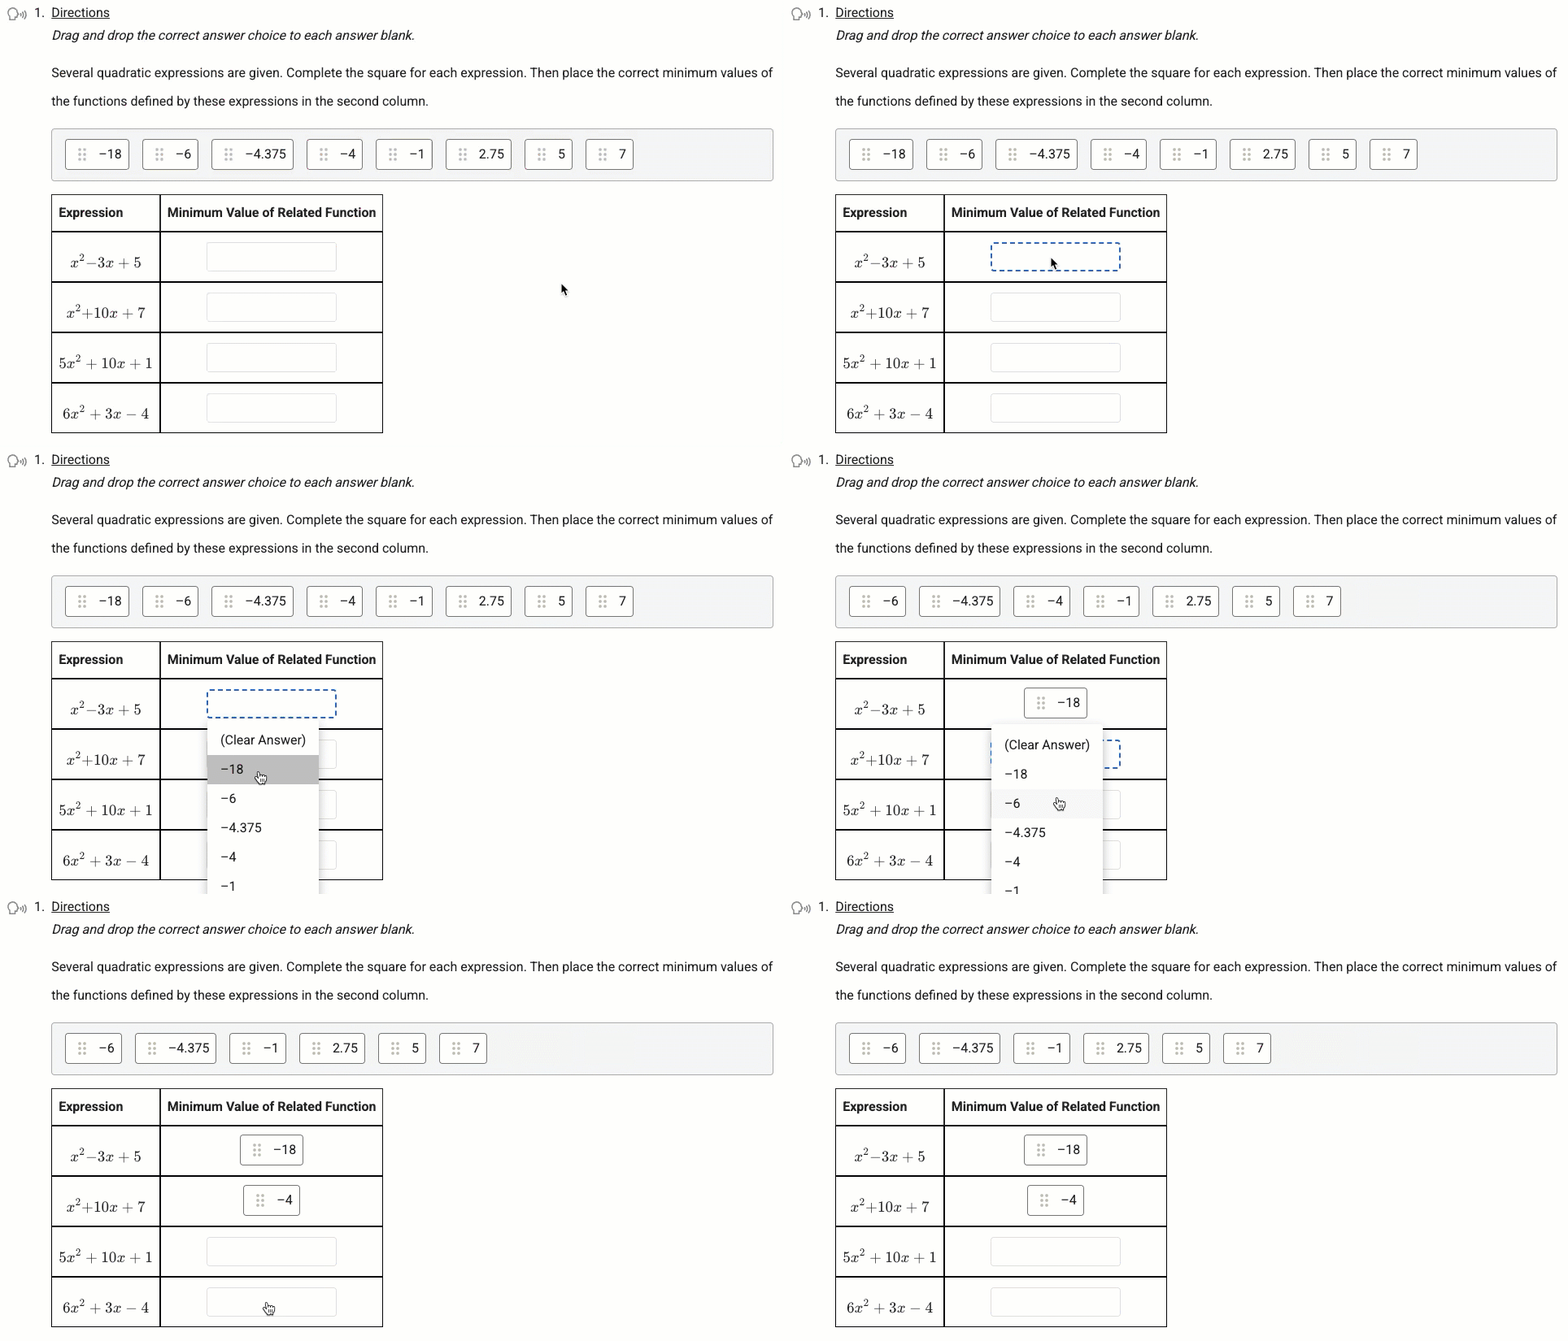
Students see the Drag-and-Drop question during online testing.
Students can drag and drop with a mouse, touchpad, touchscreen, or arrow keys. Students can also click on an answer choice to select from available choices.
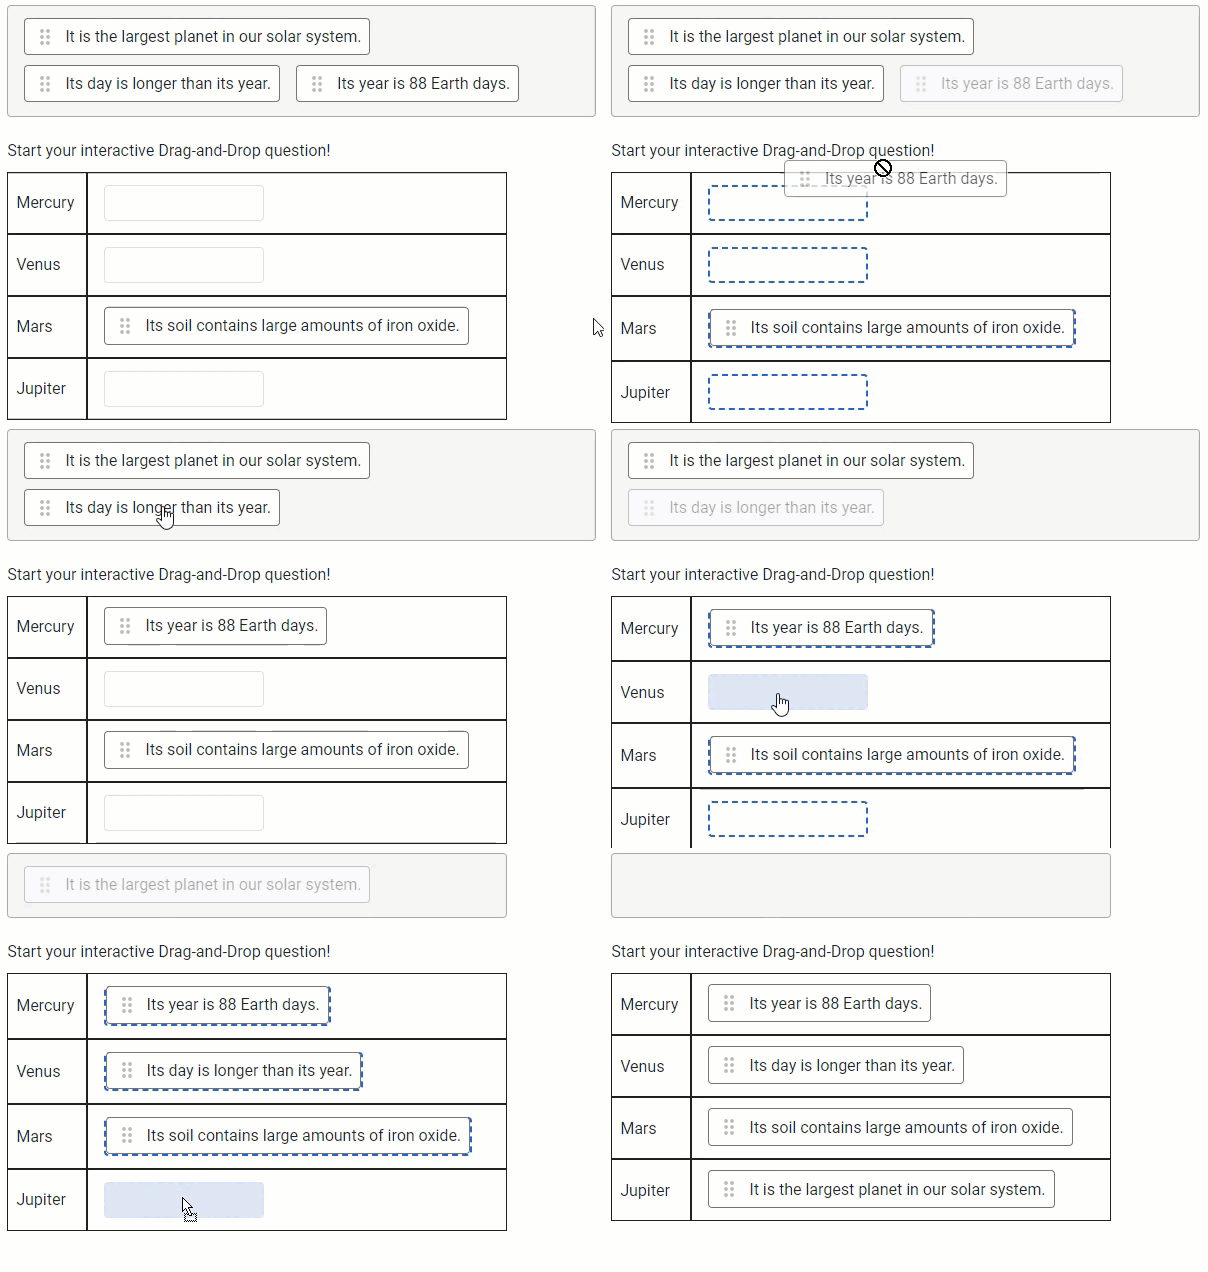
Additionally, students can tap the answer placeholder to choose from a list of answer choices. When a student selects the placeholder, a drop-down menu appears, allowing them to select the answer from a list rather than dragging it from the answer bank.
Data Analysis
Viewing Responses in Quick Views
Question Type is available in Quick Views. Access Quick Views through the navigation bar or through the Quick Views card.
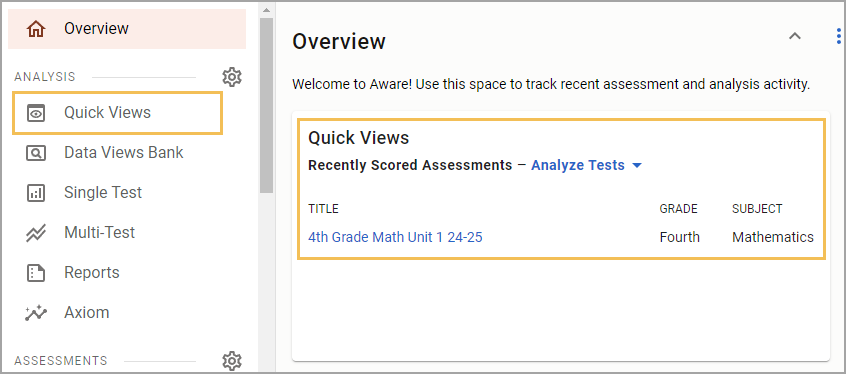
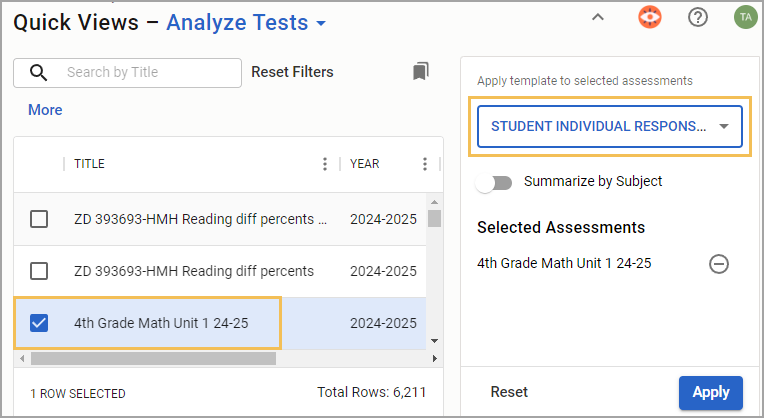
Once in Quick Views, use the search field to find and select the assessment(s) you want to analyze. Choose the Student Individual Responses template from the drop-down menu. Select Apply to continue.
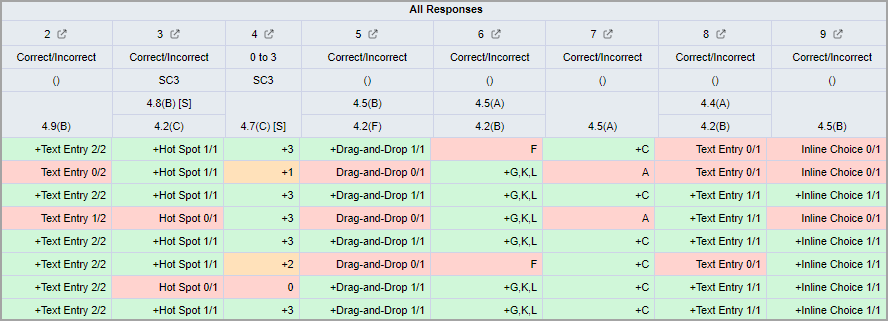
In data analysis, interactive items will be indicated next to the scores for each question. Teachers can view the exact question asked on the Enter Answers screen and modify student answers if needed.
Show or Hide the Question Type Column
If the table does not display the type of question, you can customize which columns appear or do not appear from the Edit menu. Select the Columns tab, and then expand the Responses folder. Drag the Question Type option to the empty space on the right side of the screen. Then, select Update to apply your changes. For more information, see Editing Data Views as a Teacher.
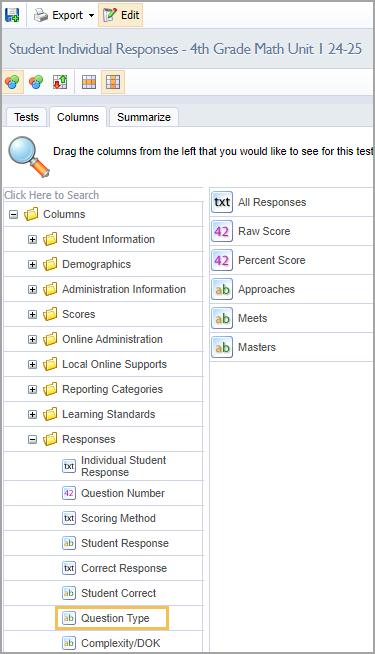
The Question Type column shows the type of question asked and the corresponding question number.

Allowing Teachers to Answer and Score Assessment Questions
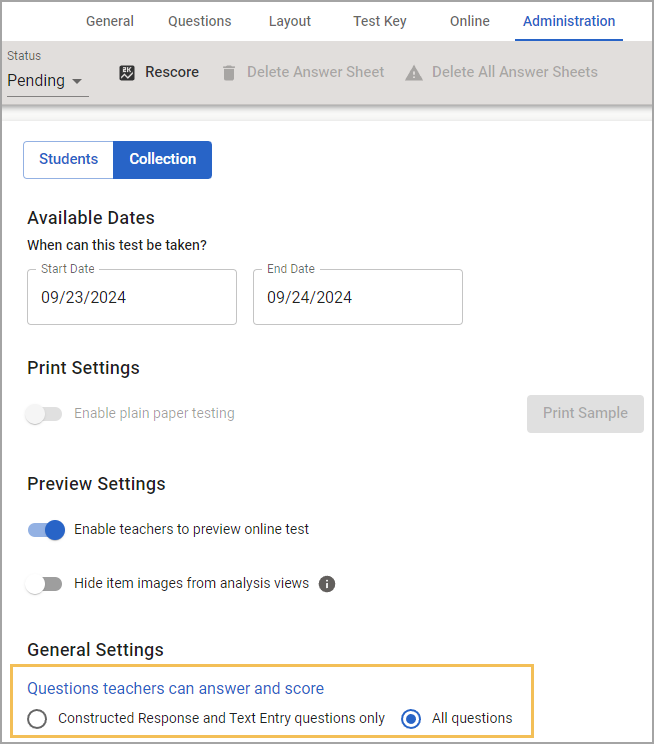
For district- and school-level tests, the Questions teachers can answer and score option must be set to All Questions to enable editing privileges. Locate this setting in Administration > Collection > General Settings when authoring or editing an assessment in Aware.
Additional Information
Visit the Interactive Item Types FAQ for more information.